1. Product Overview
The EROMMY 12' x 20' Gazebo is a permanent outdoor pavilion designed to enhance your garden, patio, or lawn space. It features a durable aluminum frame and a polycarbonate double roof, providing reliable shelter and a comfortable environment for various outdoor activities. This manual provides essential information for assembly, operation, and maintenance to ensure long-lasting enjoyment of your gazebo.

Figure 1.1: The EROMMY 12' x 20' Gazebo, showcasing its large size and elegant design in an outdoor setting.
2. Key Features
- Polycarbonate Double Roof Top: Designed for better ventilation and optimum airflow. The polycarbonate material allows light to pass through while reducing heat and blocking 99% of UV rays, creating a comfortable shaded area.
- Sturdy and Durable Aluminum Frame: Constructed with a powder-coated, rust-resistant aluminum frame for long-term durability and stability. The feet include pre-drilled holes for secure anchoring.
- Netting and Curtains: Equipped with both netting to keep insects out and durable curtains for privacy and protection from UV rays. These can be adjusted to suit your needs.
- Integrated Hooks: Features three hooks on the roof top, allowing for the installation of fans or lights to enhance your outdoor experience.
- Easy Assembly: Comes with pictographic instructions and magnified portions to assist with part identification, facilitating a straightforward assembly process.
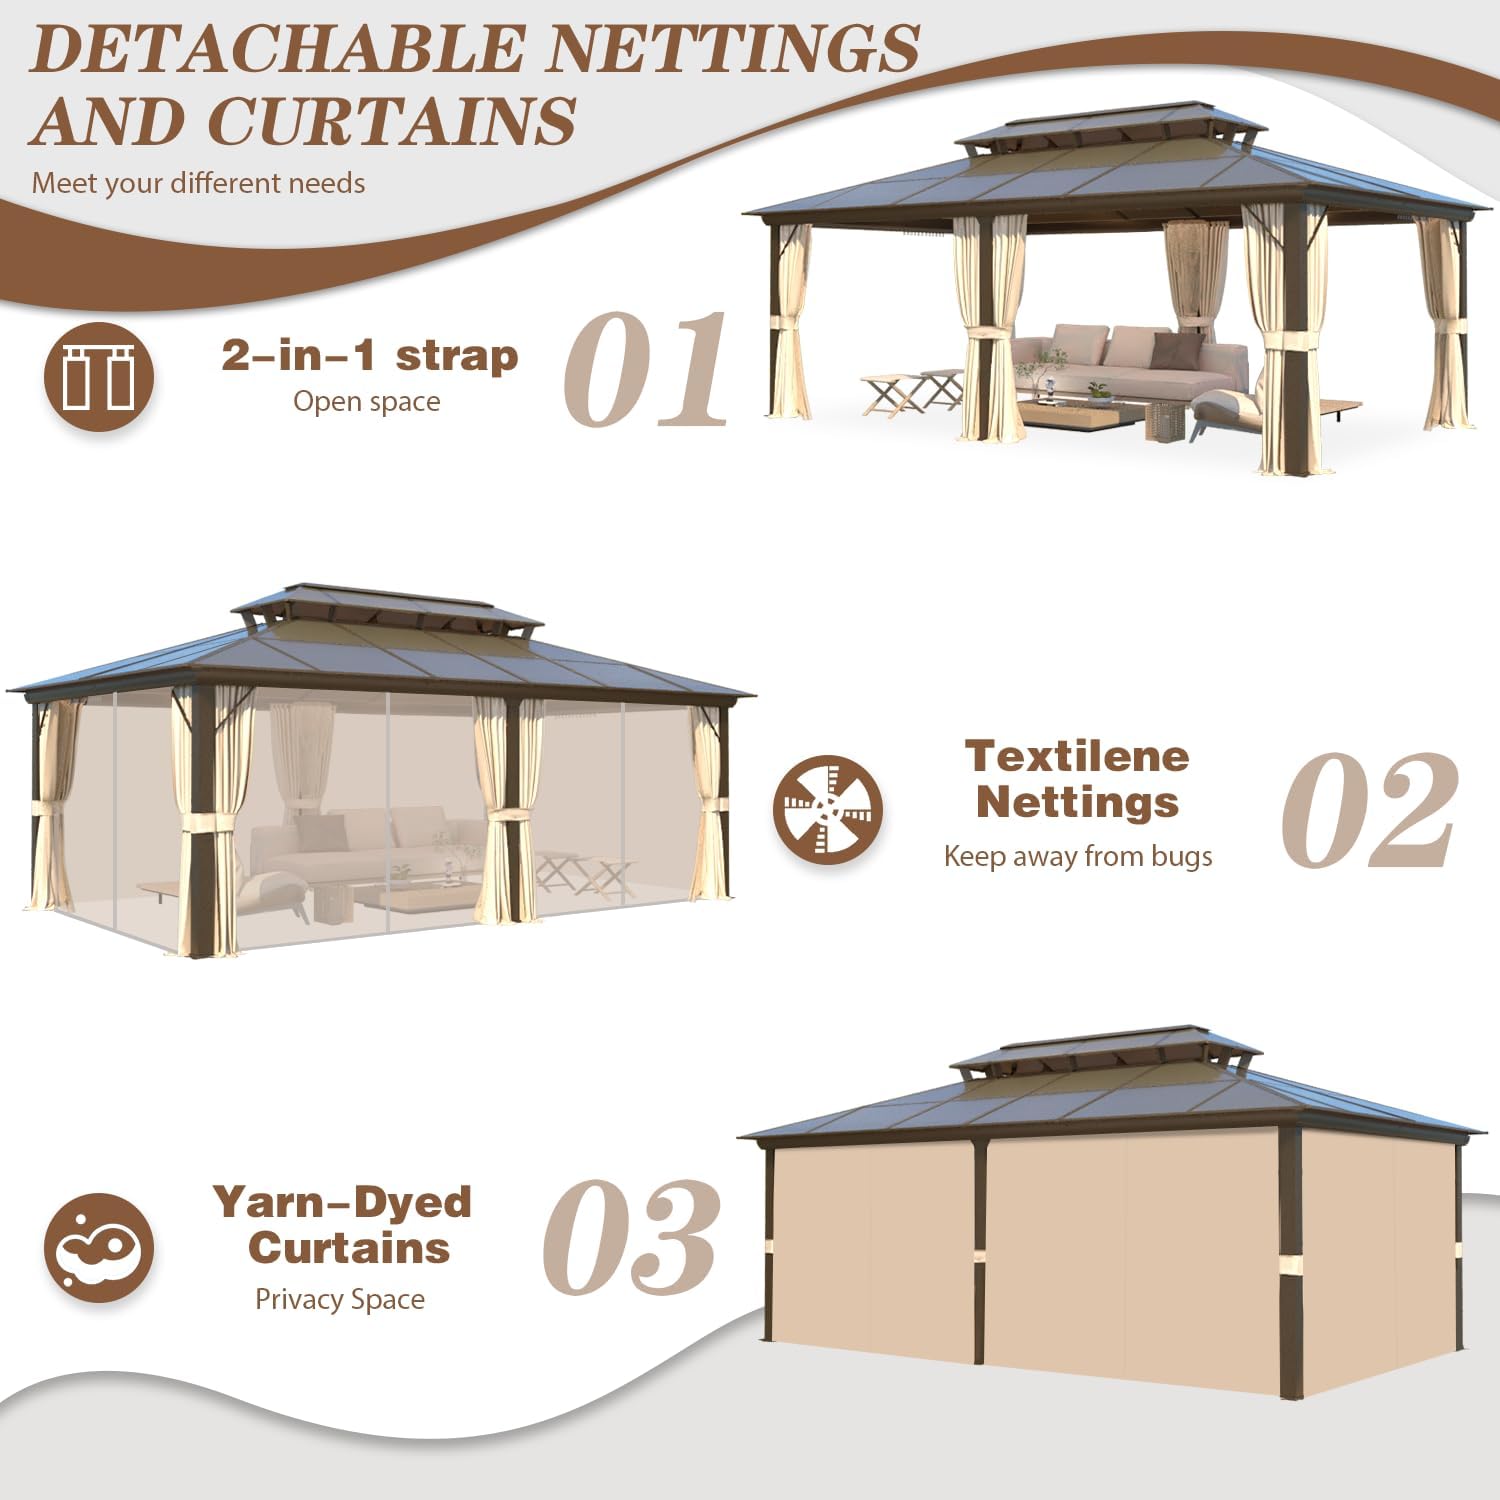
Figure 2.1: Illustration of the detachable netting and curtains, highlighting their dual functionality for open space, insect protection, and privacy.
3. Setup and Assembly
Assembly of the EROMMY Gazebo requires careful attention to the provided instructions. While designed for ease of assembly, it is recommended to have at least two people for the installation process, especially when handling larger components like the roof sections.
3.1 Pre-Assembly Checklist
- Verify all parts are present and undamaged upon delivery. Refer to the parts list in your separate assembly guide.
- Gather necessary tools: two 8-foot A-frame ladders, hex head drill bits (consider having spares), and a hammer drill for anchoring to concrete (if applicable).
- Choose a level and stable location for installation.
3.2 Assembly Tips
- Follow Instructions Carefully: The included pictographic instructions are designed to guide you step-by-step. Pay close attention to magnified portions for intricate details.
- Roof Panel Installation: Some users have found it easier to install roof panels by loosening lower side rails and sliding them in from the bottom, or by using clear packing tape to temporarily secure clips before sliding panels into channels.
- Anchoring: It is crucial to anchor the gazebo securely to your deck or patio. Use lag bolts with self-locking nuts for wooden decks or the provided concrete sleeve anchors for concrete surfaces. Consider filling posts with gravel for added weight.
- Patience is Key: The assembly process may take several days. Do not rush, and ensure each step is completed correctly before proceeding.

Figure 3.1: Detailed dimensions of the 12'x20' gazebo, including height and base measurements, crucial for planning your installation space.
4. Operating Your Gazebo
Your EROMMY Gazebo is designed for versatile use, offering comfort and protection in various outdoor conditions.
4.1 Curtains and Netting
- The gazebo includes two sets of curtains: a mesh netting layer and an opaque fabric layer.
- Use the mesh netting to keep insects out while allowing airflow.
- The opaque curtains provide additional privacy and shade from direct sunlight. They are waterproof and offer UV protection.
- Both layers can be zipped together for full enclosure or tied back to the posts for an open-air feel.
4.2 Integrated Hooks
- Utilize the three hooks located on the roof structure to hang outdoor fans for cooling or decorative lights to create ambiance.

Figure 4.1: Example of a fan and light fixture installed using the integrated hooks on the gazebo roof, enhancing comfort and utility.
5. Maintenance
Proper maintenance will extend the lifespan and preserve the appearance of your EROMMY Gazebo.
- Snow Load: Clear the pavilion when snow thickness exceeds 2 inches (approximately 2500 lbs snow load capacity). Excessive snow can damage the roof structure.
- Wind Conditions: Take measures to avoid wind when wind speed reaches 25 mi/h. Ensure curtains and netting are securely tied or zipped to prevent damage.
- Cleaning: Regularly clean the frame and roof panels with mild soap and water. Avoid abrasive cleaners or harsh chemicals that could damage the finish.
- Fabric Care: The curtains and netting are durable and water-repellent. Clean them as needed with a gentle fabric cleaner. Ensure they are dry before storing or zipping up for extended periods to prevent mildew.
- Frame Inspection: Periodically check all bolts and connections to ensure they remain tight. Re-tighten as necessary.

Figure 5.1: Overview of the gazebo's weather-resistant features, emphasizing its ability to withstand snow, UV, and wind when properly maintained.
6. Troubleshooting
This section addresses common issues you might encounter during assembly or use.
| Problem | Possible Cause | Solution |
|---|---|---|
| Dented parts upon arrival | Shipping damage or manufacturing defect. | Inspect all boxes and parts immediately upon receipt. Contact EROMMY customer support with photos of the damage for replacement parts. |
| Difficulty installing roof panels | Misalignment or clips falling out. | Ensure all frame components are perfectly aligned. Try loosening lower rails to slide panels from the bottom. Use clear packing tape to temporarily secure clips before sliding panels into channels. |
| Gazebo instability in wind | Insufficient anchoring. | Ensure the gazebo is securely anchored to the ground using appropriate bolts for your surface (wood deck or concrete). Consider filling posts with gravel for added weight if not already done. |
7. Specifications
| Attribute | Detail |
|---|---|
| Brand | EROMMY |
| Model | 12' x 20' Gazebo Polycarbonate Double Roof Canopy |
| Material | Polycarbonate Roof, Aluminum Frame (Metal, Alloy Steel) |
| Item Weight | 333 Pounds |
| Product Dimensions | 157.2 x 120 x 109.2 inches |
| Floor Area | 240 Square Feet |
| Water Resistance Level | Water Resistant |
| Ultraviolet Light Protection | 99% |
| Assembly Required | Yes |
| Color | Beige |
8. Warranty and Support
For any questions regarding your EROMMY Gazebo, including warranty information, missing parts, or assembly assistance, please contact EROMMY customer support directly. Refer to the contact information provided in your product packaging or on the official EROMMY website.
Manufacturer: EROMMY
Seller: Erommy (via Amazon)