Bewinner Bewinner7d6zqvyg15
ATS 20+ Radio Receiver User Manual
Model: Bewinner7d6zqvyg15
Brand: Bewinner
1. Product Overview
The ATS 20+ Radio Receiver is a high-sensitivity, portable full-band digital radio designed for versatile use, from outdoor camping to home entertainment. It features multiple channels and advanced digital demodulation technology for enhanced reception across various frequency bands.
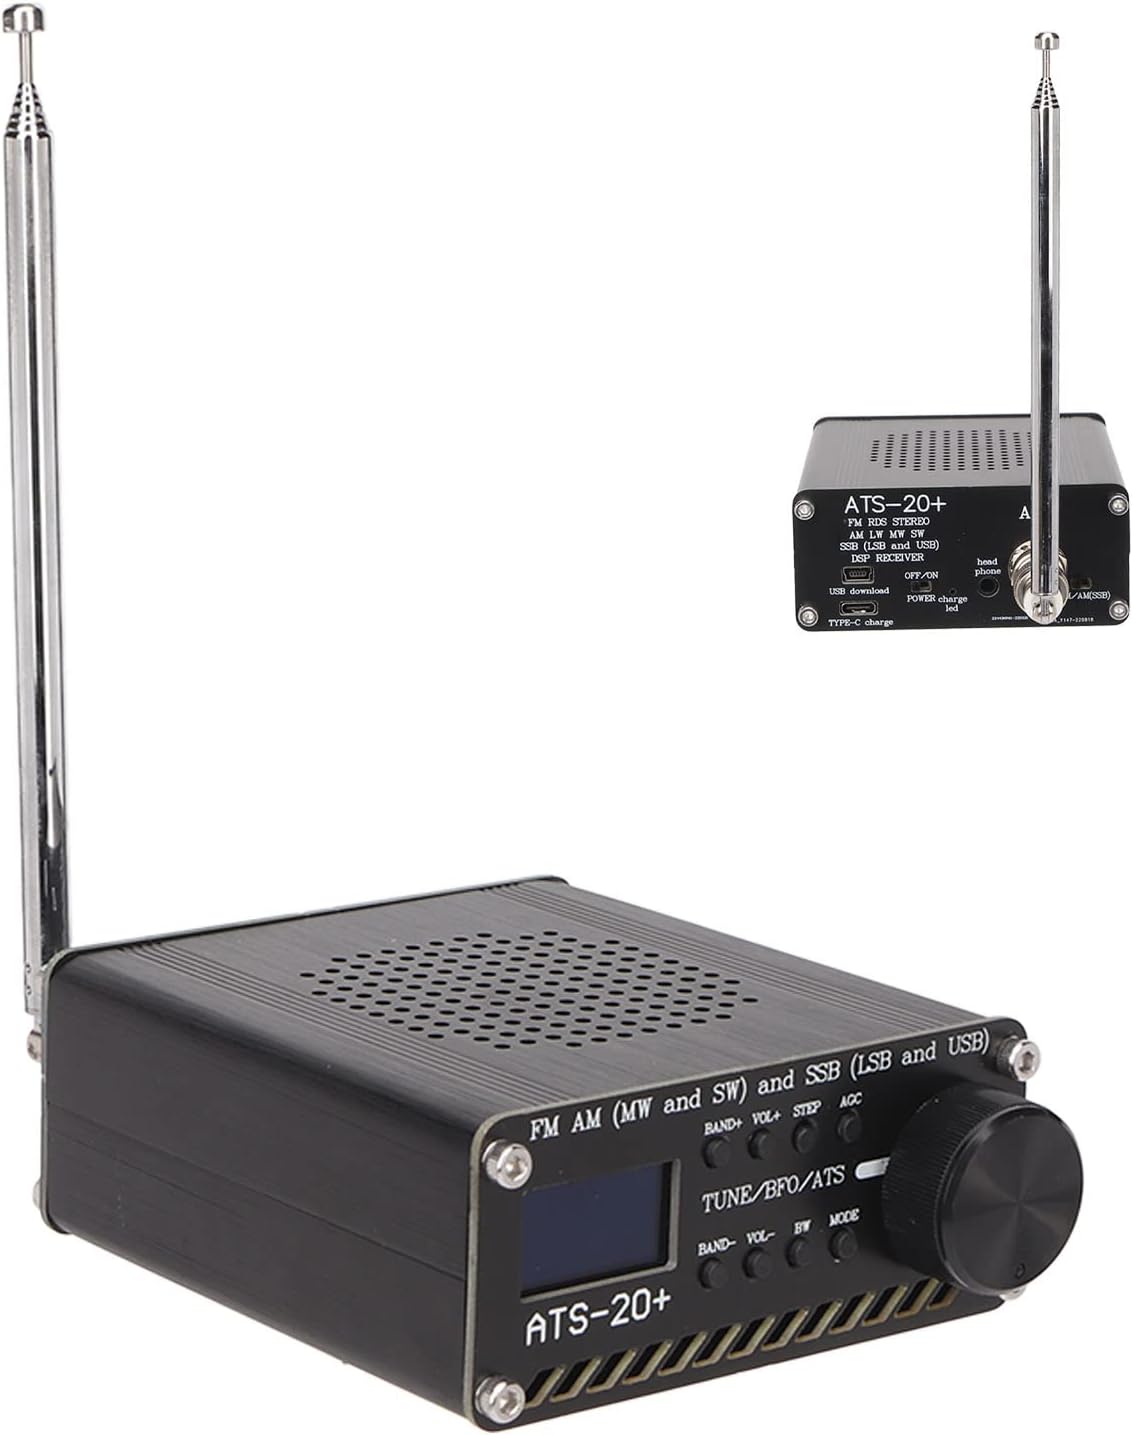
Figure 1: Front view of the ATS 20+ Radio Receiver with its telescopic antenna extended.
Key features include:
- Multiple Channels: Equipped with sound bandwidth filters (0.5, 1, 1.2, 2.2, 3, and 4Khz) and 22 pre-configured commercial and amateur radio frequency bands.
- High Sensitivity: Utilizes multiple conversion and DSP digital demodulation technology for significantly improved radio sensitivity.
- Portable and Lightweight: Designed with sturdy aluminum alloy components and a compact form factor for maximum portability. Features large, easy-to-use tuning and volume knobs.
- Stable Performance: Durable aluminum alloy construction. The PCB is designed to retain the si4735 package, allowing users to replace the chip and ensuring software compatibility.
- Wide Application: Suitable for various environments, including outdoor camping, kitchen use, and general global FM broadcast reception.
2. Package Contents
Before proceeding with setup, please ensure all items are present in the package:
- ATS 20+ Radio Receiver Unit
- Telescopic Antenna
- USB Type-C Charging Cable
- Self-adhesive Rubber Feet (4 pieces)

Figure 2: All included components: radio unit, antenna, USB cable, and rubber feet.
3. Setup Guide
Follow these steps to set up your ATS 20+ Radio Receiver:
- Attach Rubber Feet: Peel off the adhesive backing from the four rubber feet and attach them to the bottom corners of the radio receiver. This provides stability and protects surfaces.
- Connect Antenna: Screw the telescopic antenna into the "ANT" port located on the side of the radio. Ensure it is securely fastened.
- Charge Device: Connect the supplied USB Type-C cable to the "TYPE-C charge" port on the side of the radio and the other end to a compatible USB power source (e.g., computer USB port, wall adapter). The "POWER charge led" will indicate charging status.
Video 1: A demonstration of unboxing and initial setup, including attaching the rubber feet, connecting the antenna, and identifying the charging port.

Figure 3: Side view of the radio, highlighting the antenna port, headphone jack, USB download port, and Type-C charging port.
4. Operating Instructions
Operating your ATS 20+ Radio Receiver is straightforward:
- Power On/Off: Locate the "OFF/ON" switch on the side panel and slide it to the "ON" position to power on the device. Slide to "OFF" to power off.
- Band Selection: Use the "BAND+" and "BAND-" buttons to cycle through the available frequency bands (FM, AM, MW, SW, SSB, LSB, USB).
- Tuning: Rotate the large "TUNE/BFO/ATS" knob to adjust the frequency. For fine-tuning, use the "STEP" button to change the tuning step size.
- Volume Control: Use the "VOL+" and "VOL-" buttons to adjust the audio volume.
- Mode Selection: The "MODE" button allows switching between different reception modes, such as LSB and USB for SSB reception.
- Automatic Gain Control (AGC): The "AGC" button controls the automatic gain control feature, which helps maintain a consistent audio level.
- Bandwidth (BW) Adjustment: Use the "BW" button to select different sound bandwidth filters (0.5, 1, 1.2, 2.2, 3, and 4Khz) to optimize reception for different signal types.

Figure 4: Detailed view of the radio's front panel, showing the display, tuning knob, and control buttons.

Figure 5: Closer look at the display and function buttons for band, volume, step, AGC, bandwidth, and mode.

Figure 6: The large tuning knob for precise frequency adjustment.
5. Maintenance
To ensure the longevity and optimal performance of your ATS 20+ Radio Receiver, follow these maintenance guidelines:
- Cleaning: Use a soft, dry cloth to clean the exterior of the radio. Avoid using abrasive cleaners or solvents, as they may damage the finish.
- Storage: When not in use for extended periods, store the radio in a cool, dry place away from direct sunlight and extreme temperatures.
- Antenna Care: Handle the telescopic antenna gently to prevent bending or breaking. Retract the antenna when not in use or during transport.
- Battery Care: Charge the device regularly, even if not in frequent use, to maintain battery health. Avoid fully discharging the battery for prolonged periods.
- Component Replacement: The PCB is designed to allow users to replace the si4735 chip if necessary, ensuring software compatibility. Refer to specialized guides for such advanced maintenance.

Figure 7: The durable aluminum alloy casing ensures long service life and stable performance.
6. Troubleshooting
If you encounter issues with your ATS 20+ Radio Receiver, refer to the following common problems and solutions:
| Problem | Possible Cause | Solution |
|---|---|---|
| No power | Battery is depleted or power switch is off. | Ensure the power switch is in the "ON" position. Charge the device using the USB Type-C cable. |
| Poor reception or static | Antenna not extended, weak signal, or interference. | Fully extend the telescopic antenna. Try repositioning the radio or moving to an area with better signal. Adjust the "BW" (bandwidth) filter. |
| No audio | Volume too low or headphones connected. | Increase the volume using "VOL+" button. If headphones are plugged in, unplug them to use the internal speaker, or ensure headphones are functioning correctly. |
| Cannot tune to desired frequency | Incorrect band selected or tuning step too large. | Verify you are on the correct frequency band using "BAND+"/"BAND-". Adjust the tuning step size using the "STEP" button for finer control. |
7. Specifications
| Feature | Detail |
|---|---|
| Model Number | Bewinner7d6zqvyg15 |
| Brand | Bewinner |
| Package Dimensions | 6.14 x 4.21 x 2.64 inches |
| Item Weight | 11.3 ounces |
| Connectivity Technology | USB (Type-C for charging) |
| Special Feature | Portable, Lightweight, DSP Digital Demodulation |
| Audio Output Mode | Stereo |
| Output Power | 1.5 Watts |
| Frequency Bands | FM, AM, MW, SW, SSB (LSB and USB) |
| Bandwidth Filters | 0.5, 1, 1.2, 2.2, 3, 4Khz |
8. Warranty and Support
Bewinner is committed to providing quality products. For information regarding warranty coverage and customer support, please refer to the official Bewinner website or contact their customer service directly. You can visit the Bewinner Store on Amazon for more details.
The brand emphasizes product quality, stating that "From product production to delivery, we strictly control each link, and each product is shipped after careful inspection."
Related Documents - Bewinner7d6zqvyg15
 |
Bewinner Portable Tri-Screen for Laptop User Guide (15 inch) User guide for the Bewinner Portable Tri-Screen for Laptop (15 inch), covering setup, connection methods, display configuration, OSD settings, and technical specifications. Compatible with 15-17 inch laptops. |
Ask a question about this manual
Ask about setup, troubleshooting, compatibility, parts, safety, or missing instructions. Manuals+ will review the question and use this page’s manual context to help answer it.