
1. Product Overview
The FSSQBFLC Astronaut Galaxy Projector (Model HR-F2) is designed to project stunning nebula effects and green stars onto walls or ceilings, creating a relaxing and immersive atmosphere. It features multiple nebula colors, adjustable brightness, a timer function, and a remote control for convenient operation.
Included Components:
- Astronaut Galaxy Projector (HR-F2)
- Remote Control
- Power Cord (USB)
- Instruction Manual

Figure 1: FSSQBFLC Astronaut Galaxy Projector (Model HR-F2)
2. Safety Information
- Indoor Use Only: This product is designed for indoor use.
- Power Source: Use only the provided power cord and a compatible power adapter (not included) with the specified voltage (230V).
- Avoid Direct Eye Exposure: Do not look directly into the projector's light source, especially the laser, as it may cause eye damage.
- Keep Away from Water: Despite some specifications indicating water resistance, this is an electronic device. To prevent electric shock or damage, keep the projector away from water, moisture, and high humidity environments.
- Ventilation: Ensure proper ventilation around the projector. Do not cover ventilation openings.
- Children: This product is not a toy. Adult supervision is recommended when used by children.
- Cleaning: Disconnect power before cleaning. Use a soft, dry cloth. Do not use liquid cleaners.
3. Setup
- Unpack: Carefully remove all components from the packaging.
- Placement: Place the projector on a stable, flat surface. Ensure the projection area (wall or ceiling) is clear. The astronaut's head can be rotated 360° to adjust the projection angle.
- Connect Power: Insert the USB end of the power cord into the projector's power port and the other end into a compatible USB power adapter (e.g., 5V/1A or 5V/2A, not included) or a USB port on a computer/power bank.
4. Operating Instructions
4.1 Powering On/Off
Press the ON/OFF button on the back of the projector or on the remote control to turn the device on or off.
4.2 Remote Control Functions
The remote control provides full functionality for adjusting the projector's settings. Ensure the remote control has working batteries (not included) and is pointed towards the projector.

Figure 2: Remote Control Layout and Functions
- ON/OFF: Power on/off the projector.
- Timer: Set auto-off timer for 60 or 120 minutes.
- B+/B-: Adjust Nebula brightness (increase/decrease).
- S+/S-: Adjust Nebula change speed (increase/decrease).
- NEBULA: Cycle through different Nebula colors or modes.
- LA-/LA+: Adjust Star breathing rate (speed of fading in/out) and Star brightness.
- LA-MODE: Switch between different Star modes (e.g., static, breathing).
- LA ON/OFF: Turn the laser stars on or off.
- RESET: Reset all settings to default.
4.3 Nebula and Star Effects
The projector offers up to 8 stunning nebula effects and green stars. These can be used simultaneously or independently.
- Use the NEBULA button to cycle through various nebula colors and patterns.
- Use the LA ON/OFF button to activate or deactivate the green stars.
- Adjust the brightness of the nebula using B+/B-.
- Adjust the speed of the nebula changes using S+/S-.
- Adjust the brightness and breathing rate of the stars using LA+/LA-.
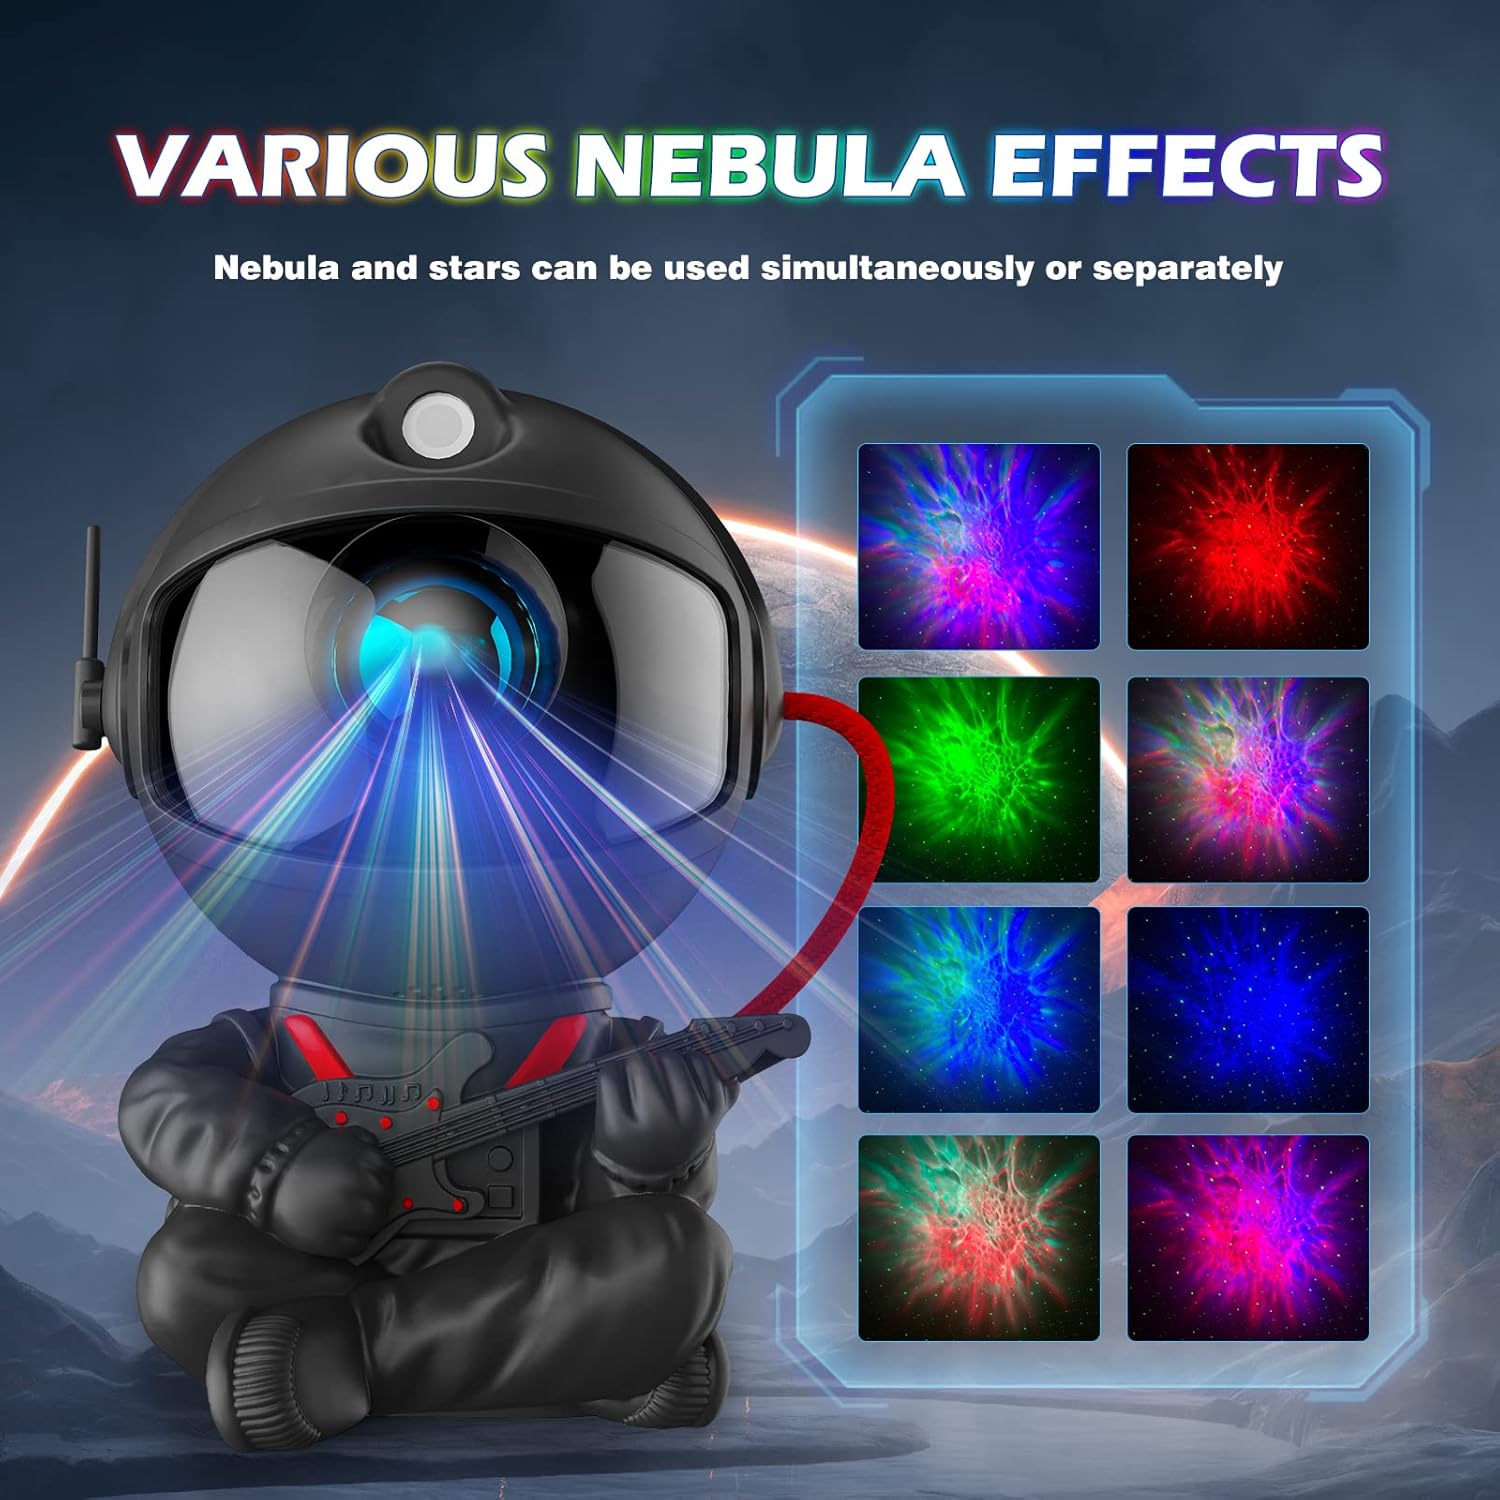
Figure 3: Various Nebula Effects
4.4 Timer Function
The projector includes a timer function to automatically turn off after a set period.
- Press the Timer button on the remote control to select either 60 minutes or 120 minutes.
- The projector will automatically power off once the selected time has elapsed.

Figure 4: Auto-Off Timer Function
5. Maintenance
- Cleaning: Ensure the projector is powered off and unplugged before cleaning. Use a soft, dry, lint-free cloth to wipe the exterior. Do not use abrasive cleaners, solvents, or spray directly onto the device.
- Lens Care: Gently clean the projection lens with a soft lens cloth if dust or smudges affect projection quality.
- Storage: When not in use for extended periods, store the projector in a cool, dry place, away from direct sunlight and extreme temperatures.
6. Troubleshooting
| Problem | Possible Cause | Solution |
|---|---|---|
| Projector does not turn on. | No power connection or faulty power source. | Ensure the power cord is securely connected. Try a different USB power adapter or USB port. |
| Remote control not working. | Dead batteries or obstruction. | Replace remote control batteries. Ensure there is no obstruction between the remote and the projector. Point the remote directly at the projector. |
| No nebula or stars projected. | Nebula/stars turned off or brightness too low. | Press the NEBULA or LA ON/OFF buttons on the remote. Increase brightness using B+ or LA+. |
| Projection is blurry. | Lens is dirty. | Gently clean the projection lens with a soft, dry lens cloth. |
7. Specifications
| Model Number | HR-F2 |
| Brand | FSSQBFLC |
| Product Dimensions | 3.38"D x 2.99"W x 4.92"H (8.59 cm D x 7.59 cm W x 12.5 cm H) |
| Item Weight | 8.4 ounces (238 grams) |
| Light Source Type | LED |
| Number of Light Sources | 8 |
| Light Color | Seven-color (Nebula) |
| Power Source | Wired power supply (USB) |
| Voltage | 230 Volts |
| Control Method | Remote |
| Material | Plastic |
| Indoor/Outdoor Usage | Indoor |
| Water Resistance Level | Waterproof (Note: Designed for indoor use, avoid direct contact with liquids.) |
| Special Feature | Color Changing, Timer, Remote Control |
8. Warranty and Support
For warranty information or technical support, please refer to the contact details provided with your purchase or contact the retailer directly. Keep your purchase receipt for warranty claims.