Introduction
This manual provides essential information for the installation, operation, and maintenance of the SIRUBA 747 Industrial Sewing Machine E809 Needle Plate. This needle plate is a crucial component for achieving precise stitching on compatible industrial overlock sewing machines.
The E809 Needle Plate is designed for use with SIRUBA 747 overlock machines and is also universally compatible with JUKI 3314 overlock machine models. It is specifically engineered for four-wire, four-line, four-thread overedge sewing applications, ensuring consistent stitch formation and fabric feeding.
Installation Guide
Proper installation of the E809 Needle Plate is critical for optimal sewing performance and to prevent damage to your machine or the needle plate itself. Always ensure the machine is powered off and unplugged before beginning any installation or maintenance procedures.
1. Preparation
- Turn off and unplug the sewing machine from the power source.
- Raise the presser foot and needle bar to their highest positions.
- Carefully remove any existing needle plate by unscrewing the retaining screws. Keep these screws in a safe place.
- Clean the area where the needle plate sits, removing any lint, dust, or thread debris.
2. Installing the E809 Needle Plate
Align the new E809 Needle Plate with the screw holes on the machine bed. Ensure that the feed dogs are properly positioned within the slots of the needle plate.
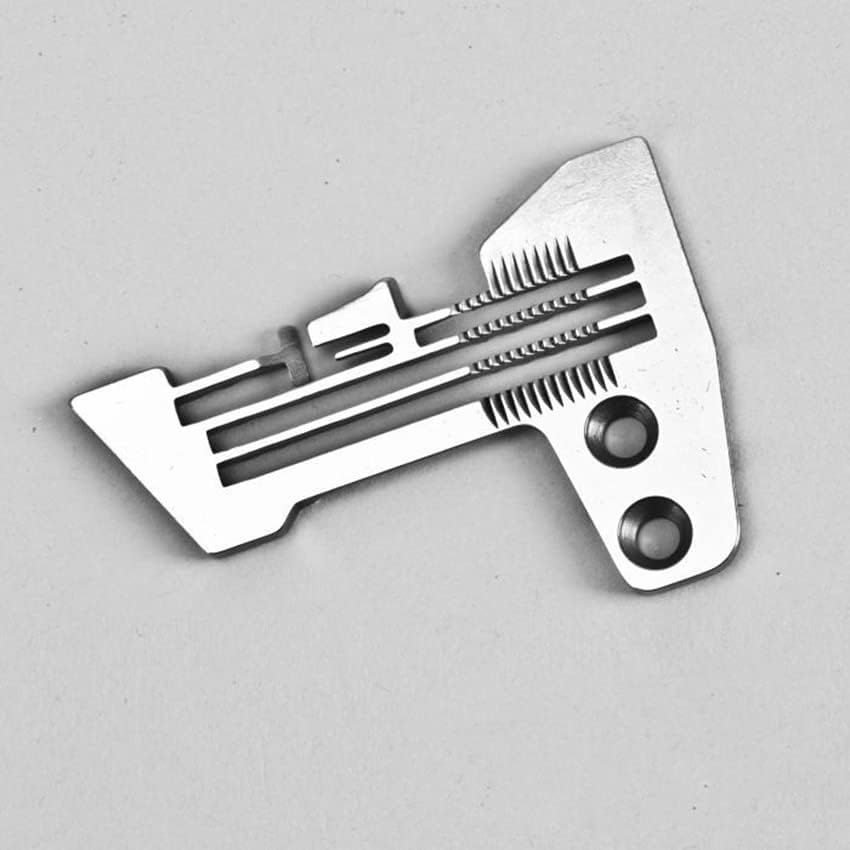
Image: Top view of the E809 Needle Plate, showing its overall shape and the slots for the feed dogs and needle. This view helps in understanding the correct orientation for installation.
- Gently place the E809 Needle Plate onto the machine bed, ensuring it sits flat and flush.
- Insert the retaining screws into their respective holes.
- Using a screwdriver, tighten the screws securely. Do not overtighten, as this can strip the threads or damage the plate.
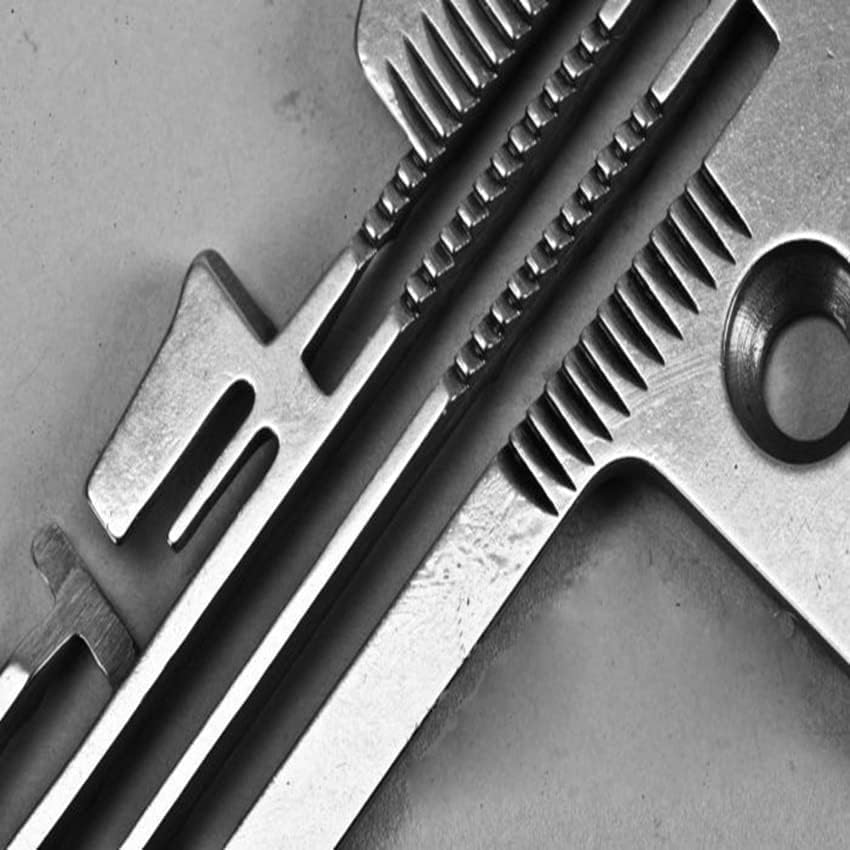
Image: Close-up view of the E809 Needle Plate, highlighting the precision-machined slots and teeth designed to work with the machine's feed dogs. This detail is crucial for proper fabric feeding.
3. Post-Installation Check
- Manually turn the handwheel to ensure the needle passes cleanly through the needle hole without striking the plate.
- Verify that the feed dogs move freely within their slots and are not obstructed by the needle plate.
- Plug in the machine and perform a test stitch on a scrap piece of fabric to confirm proper function.
Operating Considerations
While the E809 Needle Plate itself does not have operational controls, its proper function is integral to the overall operation of your industrial sewing machine. Adhering to the following guidelines will ensure optimal performance and longevity of the needle plate.
Needle Compatibility and Usage
Always use the correct type and size of needles recommended for your SIRUBA 747 or JUKI 3314 overlock machine. Using bent, dull, or incorrect needles can cause damage to the needle plate, leading to skipped stitches or fabric damage.

Image: Detailed close-up of the E809 Needle Plate, focusing on the needle hole and the surrounding area. This highlights the precise engineering required for the needle to pass through without friction, ensuring smooth stitching.
Fabric Feeding
The design of the E809 Needle Plate, with its specific feed dog slots, is optimized for consistent fabric feeding during four-wire, four-line, four-thread overedge operations. Ensure that the feed dogs are clean and free of debris to maintain smooth fabric movement.
Thread Path
While the needle plate itself is not part of the threading path, its surface provides the foundation for the stitch formation. Ensure that threads are correctly tensioned and pass smoothly over the plate's surface without snagging.
Maintenance
Regular maintenance of your E809 Needle Plate will extend its lifespan and ensure consistent sewing quality. Always power off and unplug the machine before performing any maintenance.
Cleaning
- Daily Cleaning: After each use, use a small brush to remove lint and thread snippets from the feed dog area and around the needle hole.
- Weekly Cleaning: For more thorough cleaning, remove the needle plate (refer to Installation Guide) and clean both sides. Use compressed air or a soft cloth to remove stubborn debris.
- Avoid Harsh Chemicals: Do not use abrasive cleaners or solvents on the needle plate, as these can damage the finish or material.

Image: Side view of the E809 Needle Plate, clearly showing the "E 809" model marking. This view also illustrates the thickness and structural integrity of the plate, important for durability.
Inspection for Wear and Damage
Periodically inspect the needle plate for signs of wear, such as nicks, burrs, or enlarged needle holes. Even minor damage can affect stitch quality and potentially damage needles or fabric. If significant wear or damage is observed, replace the needle plate promptly.
Troubleshooting
This section addresses common issues related to the needle plate. For broader machine issues, consult your sewing machine's primary user manual.
| Problem | Possible Cause | Solution |
|---|---|---|
| Skipped Stitches | Bent or dull needle; incorrect needle size; burr on needle plate; loose needle plate. | Replace needle; ensure correct needle for fabric; inspect needle plate for damage and replace if necessary; tighten needle plate screws. |
| Fabric Not Feeding Smoothly | Lint or debris in feed dog area; damaged feed dogs; incorrect presser foot pressure. | Clean feed dog area thoroughly; check feed dogs for damage; adjust presser foot pressure according to machine manual. |
| Needle Breaking Frequently | Needle striking needle plate; bent needle; incorrect needle installation. | Ensure needle plate is correctly installed and tightened; replace bent needle; re-install needle correctly. |
| Excessive Noise from Needle Plate Area | Loose needle plate screws; debris under needle plate. | Tighten needle plate screws; remove needle plate and clean underneath. |
Specifications
- Model: E809
- Material: Stainless Steel
- Compatibility: SIRUBA 747 Overlock Machine, JUKI 3314 Overlock Machine (Universal)
- Application: Four-wire, four-line, four-thread overedge sewing
- Part Type: Needle Plate
Warranty Information
Specific warranty details for this Generic brand E809 Needle Plate are not provided in the product information. Please refer to the seller's return policy or contact the seller directly for any warranty-related inquiries. Standard consumer rights may apply based on your region.
Customer Support
For technical assistance or further inquiries regarding the E809 Needle Plate, please contact the seller or the manufacturer of your sewing machine. Ensure you have your machine's model number and the needle plate's model number (E809) ready when seeking support.
For general information about your SIRUBA 747 or JUKI 3314 sewing machine, please consult the original machine's user manual or the manufacturer's official website.


