1. Introduction
This user manual provides comprehensive instructions for the safe and effective use of the Maqi Q3, Q4, Q5, S3, S4, S5 series industrial sewing machine control box circuit board. This component serves as the original motherboard for compatible Maqi lockstitch industrial sewing machines, managing critical functions for machine operation. Please read this manual thoroughly before installation or operation to ensure proper functionality and to prevent damage to the component or the sewing machine.
2. Safety Information
Adherence to safety guidelines is crucial when handling electronic components and industrial machinery. Failure to follow these instructions may result in personal injury, electric shock, or damage to the equipment.
- Power Disconnection: Always ensure the sewing machine is completely disconnected from the main power supply before attempting any installation, removal, or maintenance of the control board.
- Static Electricity: Electronic components are sensitive to static electricity. Handle the circuit board by its edges and avoid touching the components or connectors directly. Use anti-static precautions if available.
- Professional Installation: Installation of this control board should ideally be performed by a qualified technician with experience in industrial sewing machine electronics.
- Environmental Conditions: Do not expose the control board to moisture, excessive dust, or extreme temperatures. Operate the sewing machine in a clean, dry environment.
- Component Integrity: Do not attempt to modify or repair the circuit board yourself. Unauthorized modifications can void warranties and create safety hazards.
3. Product Overview
The Maqi control box circuit board is a critical component designed for specific Maqi industrial lockstitch sewing machine models, including Q3, Q4, Q5, S3, S4, and S5. It integrates the necessary electronic circuitry to manage motor control, stitch patterns, and other operational parameters of the sewing machine.
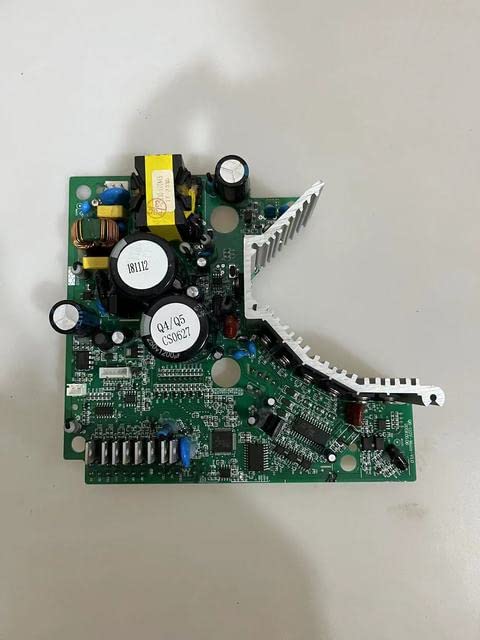
Figure 3.1: Top view of the Maqi industrial sewing machine control box circuit board. This image displays the main layout of the board, including various integrated circuits, capacitors, and connectors.
The board features robust construction suitable for industrial environments. Key components include power regulation circuits, microcontrollers, and various input/output interfaces for connecting to the sewing machine's motor, sensors, and user interface.

Figure 3.2: Angled view of the control board, highlighting the heat sink for thermal management and prominent capacitors for power filtering. This perspective shows the robust design for sustained operation.

Figure 3.3: Underside view of the control board, revealing the intricate network of circuit traces and solder points. This side connects to the mounting points and internal wiring of the control box.
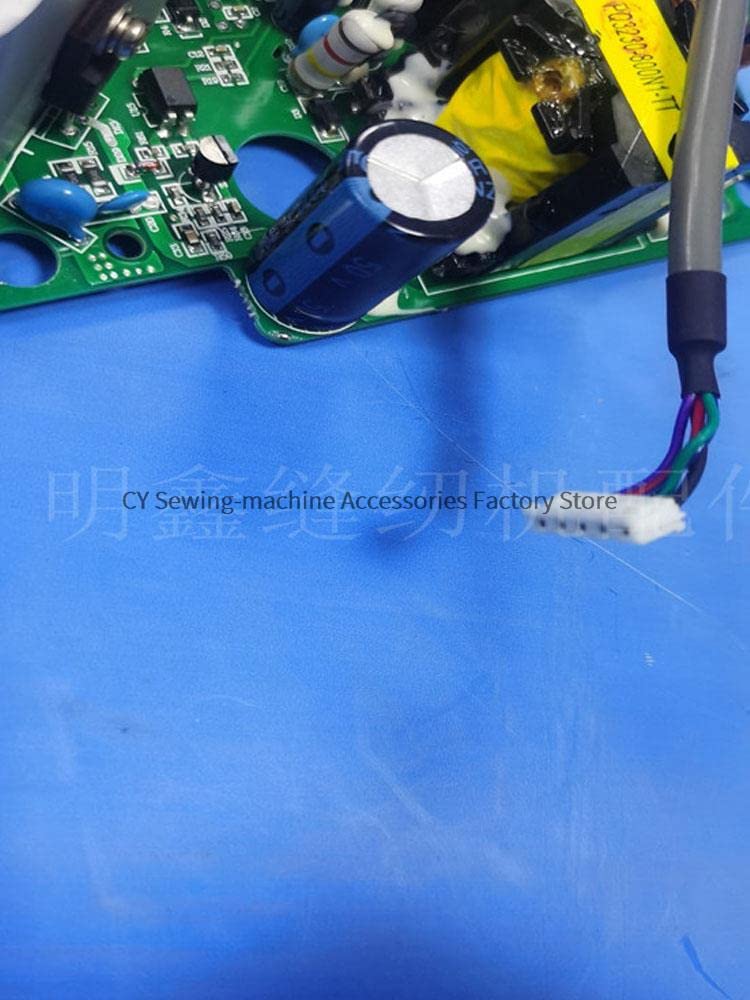
Figure 3.4: Close-up view of a multi-pin connector on the control board, illustrating the connection points for various peripherals or internal wiring within the sewing machine system.
4. Installation Guide
This section outlines the general steps for installing the control box circuit board. Due to the complexity and specific wiring of industrial sewing machines, it is highly recommended that installation be performed by a certified technician.
- Preparation:
- Ensure the sewing machine is powered off and unplugged from the electrical outlet.
- Gather necessary tools, which may include screwdrivers, anti-static wrist strap, and a multimeter.
- Clear the work area and ensure adequate lighting.
- Accessing the Control Box:
- Locate and open the control box housing on your Maqi industrial sewing machine. This may involve removing screws or latches.
- Carefully observe and document the existing wiring connections to the old circuit board, if replacing. Taking photos is highly recommended.
- Removing the Old Board (if applicable):
- Gently disconnect all cables and connectors from the old board. Note their positions.
- Unscrew any mounting hardware securing the old board in place and carefully remove it.
- Installing the New Board:
- Align the new control board with the mounting points inside the control box.
- Secure the board using the appropriate screws or fasteners, ensuring it is firmly seated and not loose.
- Reconnect all cables and connectors to their corresponding ports on the new board, referring to your documentation or the machine's service manual. Ensure all connections are secure and correctly oriented.
- Reassembly:
- Carefully close and secure the control box housing.
- Double-check all external connections and ensure no tools or loose items are left inside the machine.
5. Operating Instructions
Once the control board is correctly installed, the sewing machine can be powered on. The control board functions as the central processing unit for the machine's operations. Specific operating procedures will depend on the model of your Maqi industrial sewing machine and its user interface.
- Initial Power-Up: After installation, plug the sewing machine into a grounded electrical outlet. Turn on the main power switch. Observe the machine's display (if any) for any error codes or unusual behavior.
- Functionality Check: Perform basic operations such as starting the motor, testing stitch patterns, and verifying sensor responses (e.g., thread break detection, foot lift).
- Calibration/Settings: If the machine requires specific calibration or parameter settings after a board replacement, refer to your sewing machine's specific user manual or service guide for detailed instructions.
If any issues arise during initial power-up or operation, refer to the Troubleshooting section of this manual or your machine's specific documentation.
6. Maintenance and Care
Proper maintenance ensures the longevity and reliable performance of your control board and sewing machine.
- Cleaning: Keep the control box area clean and free from dust, lint, and debris. Use a soft, dry brush or compressed air to gently remove dust from the circuit board and connectors. Ensure the machine is powered off and unplugged before cleaning.
- Environmental Control: Maintain a stable operating environment, avoiding extreme humidity or temperature fluctuations.
- Regular Inspections: Periodically inspect the board for any signs of damage, loose connections, or discoloration (which could indicate overheating).
- Avoid Liquids: Never allow liquids to come into contact with the control board or any internal electronic components.
7. Troubleshooting
This section provides general guidance for common issues. For specific error codes or complex problems, consult a qualified technician or the sewing machine's service manual.
| Problem | Possible Cause | Solution |
|---|---|---|
| Machine does not power on. | No power supply; loose power cable; faulty power switch; control board issue. | Check power outlet and cable. Ensure main power switch is ON. Verify all internal power connections to the board. |
| Machine powers on but does not operate. | Motor connection issue; sensor malfunction; incorrect settings; control board issue. | Check motor and sensor connections. Review machine settings. Consult service manual for specific error codes. |
| Erratic or inconsistent operation. | Loose connections; electrical interference; component failure on board. | Inspect all cable connections for tightness. Ensure proper grounding. If problem persists, professional diagnosis is recommended. |
| Error codes displayed. | Specific machine fault. | Refer to your Maqi sewing machine's specific user or service manual for the meaning of the error code and recommended actions. |
If troubleshooting steps do not resolve the issue, contact a qualified service technician.
8. Specifications
- Product Type: Sewing Machine Parts (Control Box Circuit Board / Motherboard)
- Material: Plastic (housing/base), Electronic Components
- Compatibility: Maqi Q3, Q4, Q5, S3, S4, S5 Lockstitch Industrial Sewing Machines
- Part Number (Example): 13010080 PCB (Note: Specific part numbers may vary)
- Origin: Mainland China
9. Warranty and Support
For warranty information, please refer to the terms and conditions provided by your original point of purchase or the manufacturer. Keep your purchase receipt as proof of purchase.
For technical support, service, or replacement parts, please contact the seller or an authorized Maqi service center. When contacting support, be prepared to provide your product model number, the specific issue encountered, and any relevant purchase details.


