
1. Introduction and Overview
The GOYOJO HBRVD-187.5 is a universal hardness tester designed for accurate measurement of material hardness across various scales, including Rockwell, Brinell, and Vickers. This instrument is engineered for precision and reliability, making it suitable for a wide range of industrial and scientific applications, such as quality control, material research, and educational purposes. It provides a comprehensive solution for evaluating the hardness properties of different materials.
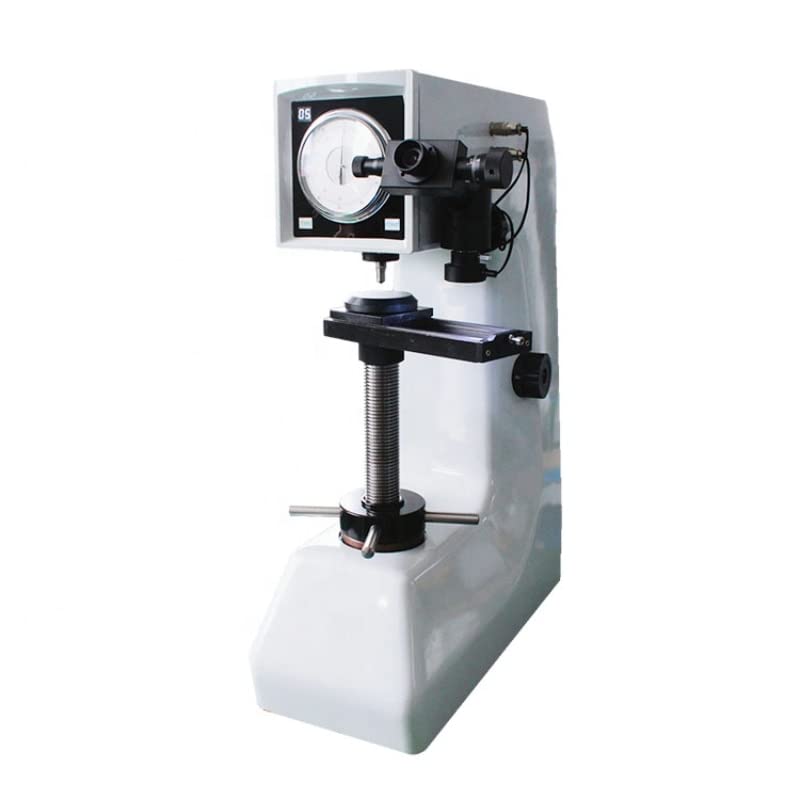
Figure 1: Front view of the GOYOJO HBRVD-187.5 Universal Hardness Tester. This image displays the main unit with its control panel, indenter, and sample stage.
2. Product Features and Components
The HBRVD-187.5 hardness tester integrates multiple testing methods into a single robust unit. Key components and their functions are detailed below:
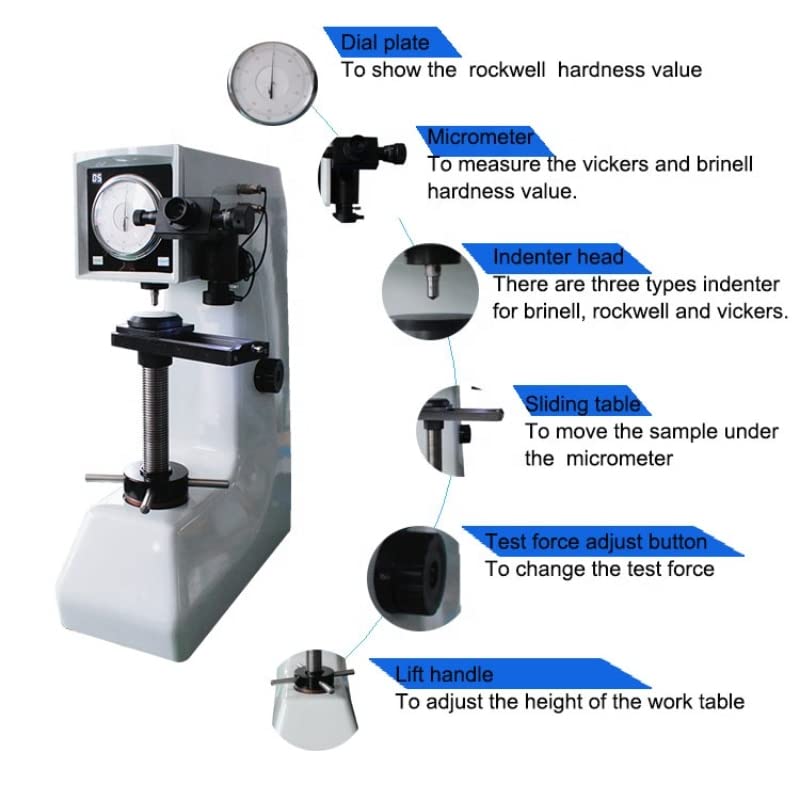
Figure 2: Diagram illustrating the main components of the hardness tester. Labels point to the dial plate, micrometer, indenter head, sliding table, test force adjust button, and lift handle.
- Dial Plate: Displays the Rockwell hardness value directly after a test.
- Micrometer: Used for precise measurement of Vickers and Brinell indentation sizes to determine hardness values.
- Indenter Head: Houses the interchangeable indenters (diamond for Vickers/Rockwell, carbide ball for Brinell) which apply the test force to the sample.
- Sliding Table: Allows for precise positioning and movement of the sample under the indenter or micrometer.
- Test Force Adjust Button: Controls and selects the appropriate test force for the chosen hardness scale.
- Lift Handle: Adjusts the height of the work table to accommodate samples of varying sizes.
3. Specifications
The following specifications apply to the GOYOJO HBRVD-187.5 Universal Hardness Tester:
- Hardness Scales:
- Rockwell: HRA, HRB, HRC
- Brinell: HBW2.5/31.25, HBW2.5/62.5, HBW2.5/187.5
- Vickers: HV30, HV100
- Indentor to Wall Distance: 160 mm
- Maximum Sample Height: 200 mm
- Dimensions (L x W x H): 550 x 230 x 780 mm
- Voltage Input: AC220V/50Hz
- Weight: 80 kg
- Certifications: CE, ISO9001
4. Setup
Proper setup is crucial for accurate and safe operation. Follow these steps to prepare your hardness tester:
- Unpacking: Carefully remove the instrument and all accessories from the packaging. Retain packaging for future transport or storage.
- Placement: Position the hardness tester on a stable, level, and vibration-free workbench capable of supporting its weight (80 kg). Ensure adequate space around the unit for operation and maintenance.
- Power Connection: Connect the power cord to the instrument and then to a grounded AC220V/50Hz power outlet. Verify the voltage matches the instrument's requirements.
- Indenter Installation: Select the appropriate indenter (Rockwell, Brinell, or Vickers) for your intended test and securely install it into the indenter head according to the specific instructions provided in the detailed product manual.
- Initial Checks: Before first use, perform a visual inspection for any signs of damage. Ensure all moving parts operate smoothly.
5. Operating Instructions
Follow these general steps to perform a hardness test. Refer to the full product manual for detailed procedures specific to each hardness scale.
- Sample Preparation: Ensure the sample surface is clean, flat, and free from oxides, scale, or other contaminants that could affect the indentation. The sample thickness must be sufficient to prevent the indentation from affecting the opposite surface.
- Select Hardness Scale and Load: Turn on the instrument. Use the test force adjust button to select the desired hardness scale (Rockwell, Brinell, or Vickers) and the corresponding test load.
- Position Sample: Place the prepared sample on the work table. Use the lift handle to adjust the table height so the sample is close to the indenter, ensuring sufficient clearance for the indenter to make contact.
- Apply Minor Load (Rockwell): For Rockwell tests, apply the minor load as per the specific procedure.
- Apply Major Load: Initiate the test cycle to apply the major load. The instrument will maintain the load for the specified dwell time.
- Read Results:
- Rockwell: Read the hardness value directly from the dial plate.
- Brinell/Vickers: Remove the sample and use the micrometer to measure the indentation diameter (Brinell) or diagonal lengths (Vickers). Calculate the hardness value using the appropriate formula or conversion table.
- Repeat Tests: Perform multiple indentations on different areas of the sample to ensure representative results.
6. Maintenance
Regular maintenance ensures the longevity and accuracy of your GOYOJO HBRVD-187.5 hardness tester:
- Cleaning: Keep the instrument clean and free from dust, dirt, and corrosive substances. Use a soft, dry cloth for cleaning. Avoid using harsh chemicals or abrasive materials.
- Indenter Care: Inspect indenters regularly for wear or damage. Replace worn or chipped indenters immediately, as they can lead to inaccurate readings. Store indenters in a protective case when not in use.
- Calibration: Perform periodic calibration using certified reference blocks to verify the accuracy of the instrument. The frequency of calibration depends on usage and quality requirements.
- Lubrication: Lightly lubricate moving parts, such as the lead screw for the work table, as recommended in the detailed product manual, to ensure smooth operation.
- Storage: When not in use for extended periods, cover the instrument to protect it from dust and environmental factors. Store in a dry, temperature-controlled environment.
7. Troubleshooting
This section addresses common issues you might encounter. For more complex problems, contact technical support.
| Problem | Possible Cause | Solution |
|---|---|---|
| Inaccurate Hardness Readings | Worn or damaged indenter; improper sample preparation; incorrect test load/scale selected; instrument out of calibration. | Inspect and replace indenter; ensure proper sample surface finish; verify correct test parameters; perform calibration. |
| Instrument Not Powering On | Power cord not connected; power outlet issue; internal fuse blown. | Check power cord connection; test power outlet; consult qualified technician for fuse replacement. |
| Work Table Movement is Stiff | Lack of lubrication; dirt or debris on lead screw. | Clean lead screw and apply light lubrication as per manual. |
8. Warranty and Support
For detailed information regarding the warranty period, terms, and conditions for your GOYOJO HBRVD-187.5 Universal Hardness Tester, please refer to the warranty card included with your product or contact your authorized GOYOJO dealer or the manufacturer directly. Technical support and service inquiries should also be directed to your point of purchase or the official GOYOJO customer service channels.