Introduction
This manual provides essential information for the installation, operation, and maintenance of the Disenparts 12V Fuel Pump, part numbers 42-1762 and 42-989. This fuel pump is designed for compatibility with Thermo King Tripac APU and TriPac Evolution systems. It is a replacement part manufactured to precise OE requirements for reliable performance.
Please read this manual thoroughly before installation and operation to ensure proper function and safety.
Safety Information
Always prioritize safety when working with fuel systems. Failure to follow these instructions may result in property damage, injury, or death.
- Ensure the vehicle's power is disconnected before beginning any installation or maintenance.
- Work in a well-ventilated area to avoid inhaling fuel vapors.
- Keep open flames, sparks, and other ignition sources away from the work area.
- Wear appropriate personal protective equipment (PPE), including safety glasses and fuel-resistant gloves.
- Handle fuel carefully to prevent spills. Clean up any spills immediately.
- If you are unsure about any step, consult a qualified mechanic.
Product Overview
The Disenparts 12V Fuel Pump is a compact electric fuel pump designed for specific auxiliary power unit (APU) applications. It ensures consistent fuel delivery to maintain optimal engine performance.
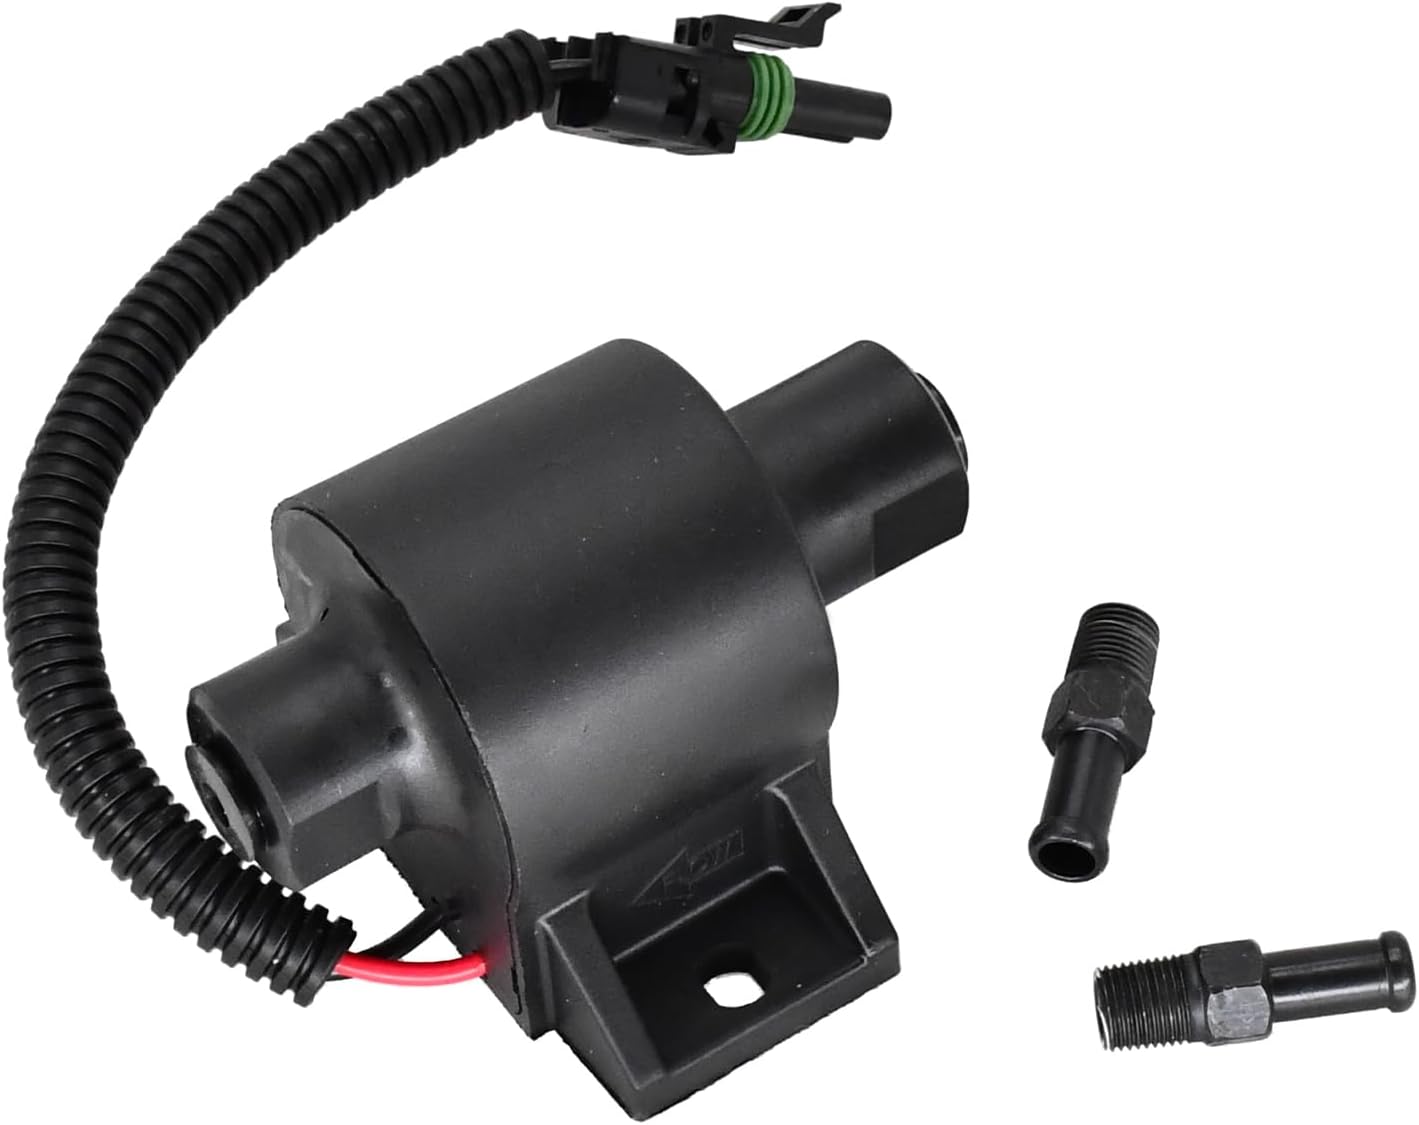
Figure 1: Main view of the 12V Fuel Pump, showing the pump body, electrical connector, and included hose fittings.
Key Components:
- Pump Body: The main housing containing the pumping mechanism.
- Electrical Connector: For connecting to the vehicle's 12V power supply.
- Inlet/Outlet Ports: Connections for fuel lines.
- Mounting Brackets: Integrated into the pump body for secure installation.
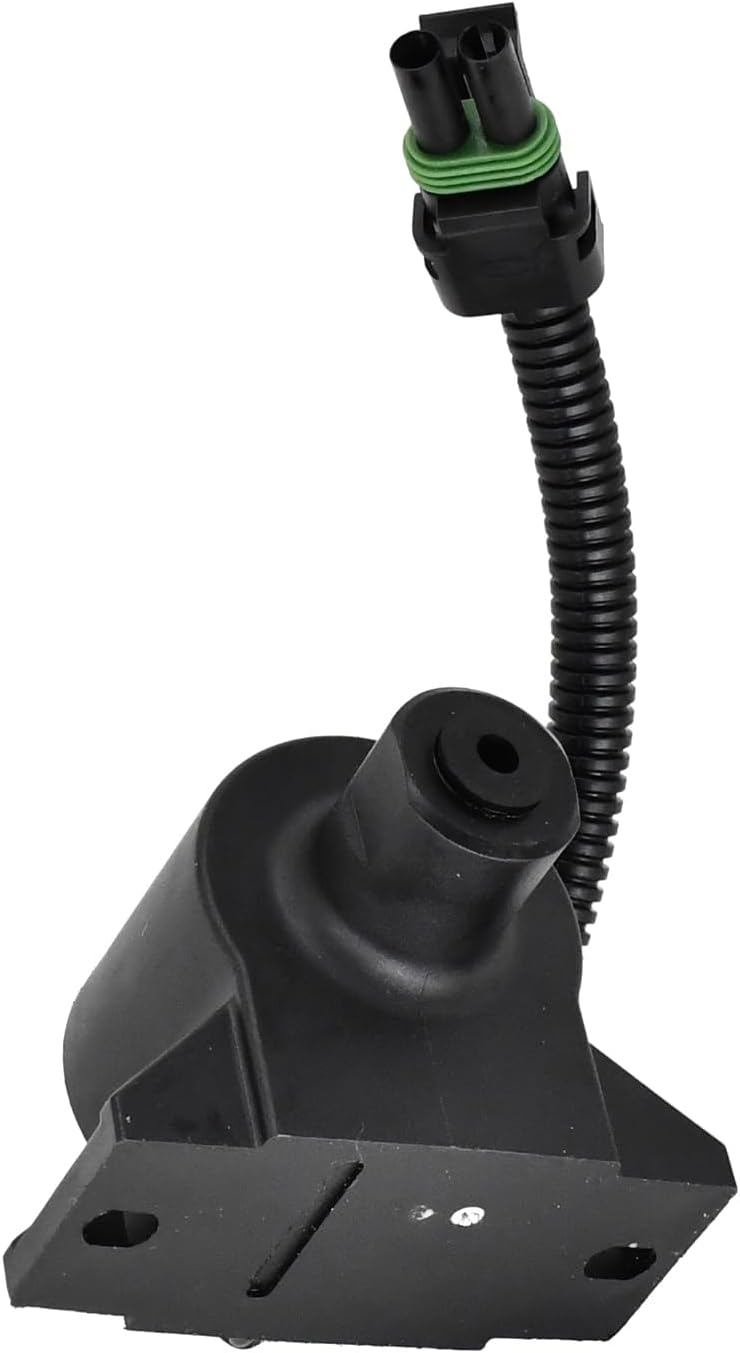
Figure 2: Side view highlighting the electrical connection and the sturdy mounting base of the fuel pump.
Setup and Installation
This fuel pump is designed for easy installation. However, proper procedure is crucial for safe and reliable operation.
Required Tools:
- Wrenches (appropriate sizes for fuel line fittings)
- Screwdriver or socket set (for mounting bolts)
- Hose clamps (if replacing existing lines)
- Fuel-resistant sealant (optional, for fittings)
- Drain pan for fuel
Installation Steps:
- Prepare the Work Area: Ensure the vehicle is off, cool, and parked on a level surface. Disconnect the negative terminal of the battery. Place a drain pan beneath the fuel pump area to catch any spilled fuel.
- Locate and Remove Old Pump: Identify the existing fuel pump. Carefully disconnect the electrical connector and fuel lines. Be prepared for residual fuel to leak. Remove any mounting bolts securing the old pump.
- Inspect Connections: Examine the fuel lines and electrical harness for any signs of wear or damage. Replace components as necessary.
- Mount New Pump: Position the new Disenparts fuel pump in the same location as the old one. Secure it using the existing mounting points and hardware. Ensure it is firmly attached to prevent vibration.
- Connect Fuel Lines: Attach the fuel lines to the inlet and outlet ports of the new pump. Ensure connections are tight and free of leaks. The pump may have an arrow indicating flow direction.
- Connect Electrical Harness: Connect the electrical plug to the pump's connector. Ensure a secure connection. Note: Some users have reported that wires may be inverted from the pump to the plug on some replacement units. Verify correct polarity if the pump does not operate after installation.
- Final Checks: Reconnect the battery. Turn the ignition to the "ON" position (without starting the engine) for a few seconds to allow the pump to prime the fuel system. Check for any fuel leaks around the connections.
- Start Engine: Start the engine and allow it to run for a few minutes, checking again for any leaks or unusual noises.
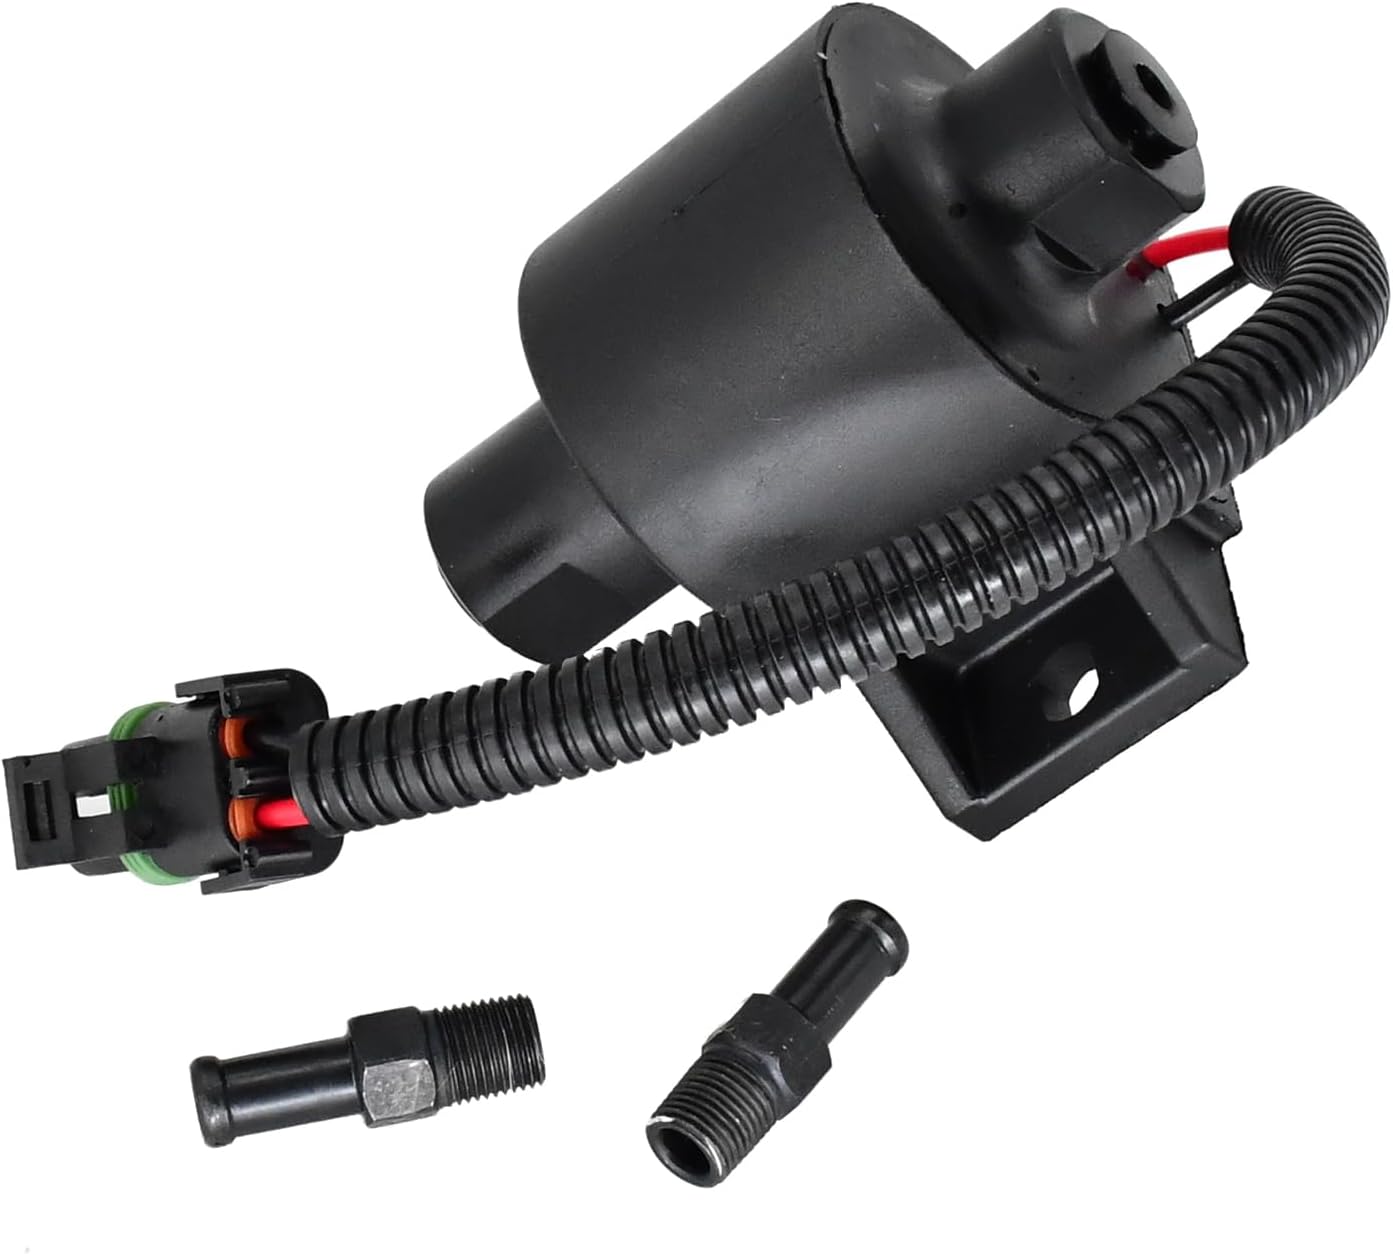
Figure 3: Angled view of the fuel pump, often showing the flow direction indicator (arrow) on the pump body.
Operating Instructions
Once properly installed, the 12V Fuel Pump operates automatically as part of your vehicle's fuel system. It is designed to deliver fuel consistently to the engine or APU.
- The pump activates when the ignition is turned on, priming the fuel system.
- It maintains the necessary fuel pressure and flow during engine operation.
- No manual intervention is required for its operation under normal conditions.
Maintenance
The Disenparts 12V Fuel Pump is designed for long-term, maintenance-free operation. However, regular inspection of the surrounding fuel system components is recommended.
- Regular Inspection: Periodically check fuel lines, connections, and the pump body for any signs of leaks, cracks, or corrosion.
- Fuel Filter: Ensure your vehicle's fuel filter is replaced according to the manufacturer's recommendations. A clogged fuel filter can put undue strain on the fuel pump.
- Cleanliness: Keep the area around the fuel pump clean and free of debris.
Troubleshooting
If you experience issues with your fuel pump, consider the following common problems and solutions:
| Problem | Possible Cause | Solution |
|---|---|---|
| Pump does not operate / No fuel flow |
|
|
| Fuel leaks at connections |
|
|
| Engine sputtering or loss of power |
|
|
For issues not covered here, or if troubleshooting steps do not resolve the problem, it is recommended to consult a professional mechanic.
Specifications
| Attribute | Detail |
|---|---|
| Part Numbers | 42-1762, 42-989 |
| Model Number | 132115DK0AR |
| Brand | Disenparts |
| Voltage | 12V |
| Application Compatibility | Thermo King Tripac APU, TriPac Evolution |
| Fit Type | Vehicle Specific Fit |
| Item Weight | 15 Ounces (approx. 0.43 kg) |
| Operation Mode | Mechanical (Electric) |
| Country of Origin | China |
Warranty and Support
This product is a replacement part. For specific warranty information, please refer to the seller's policy at the time of purchase. Typically, replacement parts come with a limited warranty against manufacturing defects.
For technical support or inquiries regarding this product, please contact the seller directly:
- Seller: Disenparts
- Return Policy: 30-day refund/replacement policy (as per Amazon listing at time of data retrieval).
- For further assistance, you may visit the seller's page on Amazon: Disenparts Seller Page