1. Introduction
Thank you for choosing the Netzu Digital Alarm Clock Model 5266B. This device combines a clear LED time display with an 8-color night light, dual alarm functionality, adjustable brightness, and convenient USB charging ports. This manual provides detailed instructions to help you set up and operate your alarm clock effectively.
2. Safety Information
- Ensure the power adapter is connected to a suitable power outlet.
- Do not expose the device to water or excessive moisture.
- Avoid placing the clock near heat sources or in direct sunlight.
- Clean the device with a soft, dry cloth. Do not use abrasive cleaners or solvents.
- Keep out of reach of small children to prevent accidental damage or ingestion of small parts.
3. Package Contents
Please check the package for the following items:
- Netzu Digital Alarm Clock (Model 5266B)
- Power Adapter
- CR2032 Button Cell Battery (pre-installed for backup)
- User Manual
4. Product Overview
Familiarize yourself with the main components of your alarm clock:

Image: Front view of the Netzu Digital Alarm Clock, showing the large LED time display and control buttons located on the top surface.
The clock features a large LED display for clear time visibility, and intuitive buttons on the top for easy access to settings and functions.
5. Setup
5.1 Power Connection
- Connect the provided power adapter to the DC IN port on the back of the alarm clock.
- Plug the adapter into a standard electrical outlet. The clock display will light up.
5.2 Battery Backup
The clock includes a pre-installed CR2032 button cell battery. This battery serves as a backup to maintain time and alarm settings during a power outage. The clock will not operate solely on battery power; it requires the AC adapter for normal function.
6. Operating Instructions
6.1 Setting the Time
- Press and hold the TIME SET button (usually located on the back or top) until the hour digits begin to flash.
- Use the + or - buttons to adjust the hour. Pay attention to the AM/PM indicator if using 12-hour format.
- Press TIME SET again to confirm the hour and move to minute adjustment.
- Use the + or - buttons to adjust the minutes.
- Press TIME SET one more time to save the time setting.
- To switch between 12-hour and 24-hour format, press the 12/24H button (if available) or cycle through the time setting options.
6.2 Setting Alarms (Dual Alarm)
This clock supports two independent alarms (Alarm 1 and Alarm 2).
- Press and hold the ALARM 1 SET button until the alarm hour digits flash.
- Use the + or - buttons to set the desired alarm hour.
- Press ALARM 1 SET again to confirm the hour and move to minute adjustment.
- Use the + or - buttons to set the desired alarm minutes.
- Press ALARM 1 SET one more time to save the alarm setting.
- Repeat the process for ALARM 2 SET if you wish to set a second alarm.
- To activate/deactivate an alarm, press the corresponding ALARM 1 ON/OFF or ALARM 2 ON/OFF button. An indicator icon will appear on the display when an alarm is active.
- To adjust the alarm volume, look for a dedicated VOLUME button or a combination of buttons during alarm setting. The alarm sound frequency will gradually increase.
6.3 Snooze Function

Image: A hand pressing the large snooze button located on the top of the alarm clock, indicating its use for temporary silence.
When an alarm sounds, press the large SNOOZE button on the top of the clock to temporarily silence the alarm for 9 minutes. The alarm will sound again after the snooze period. To turn off the alarm completely, press any other button (e.g., ALARM ON/OFF).
6.4 Night Light Function
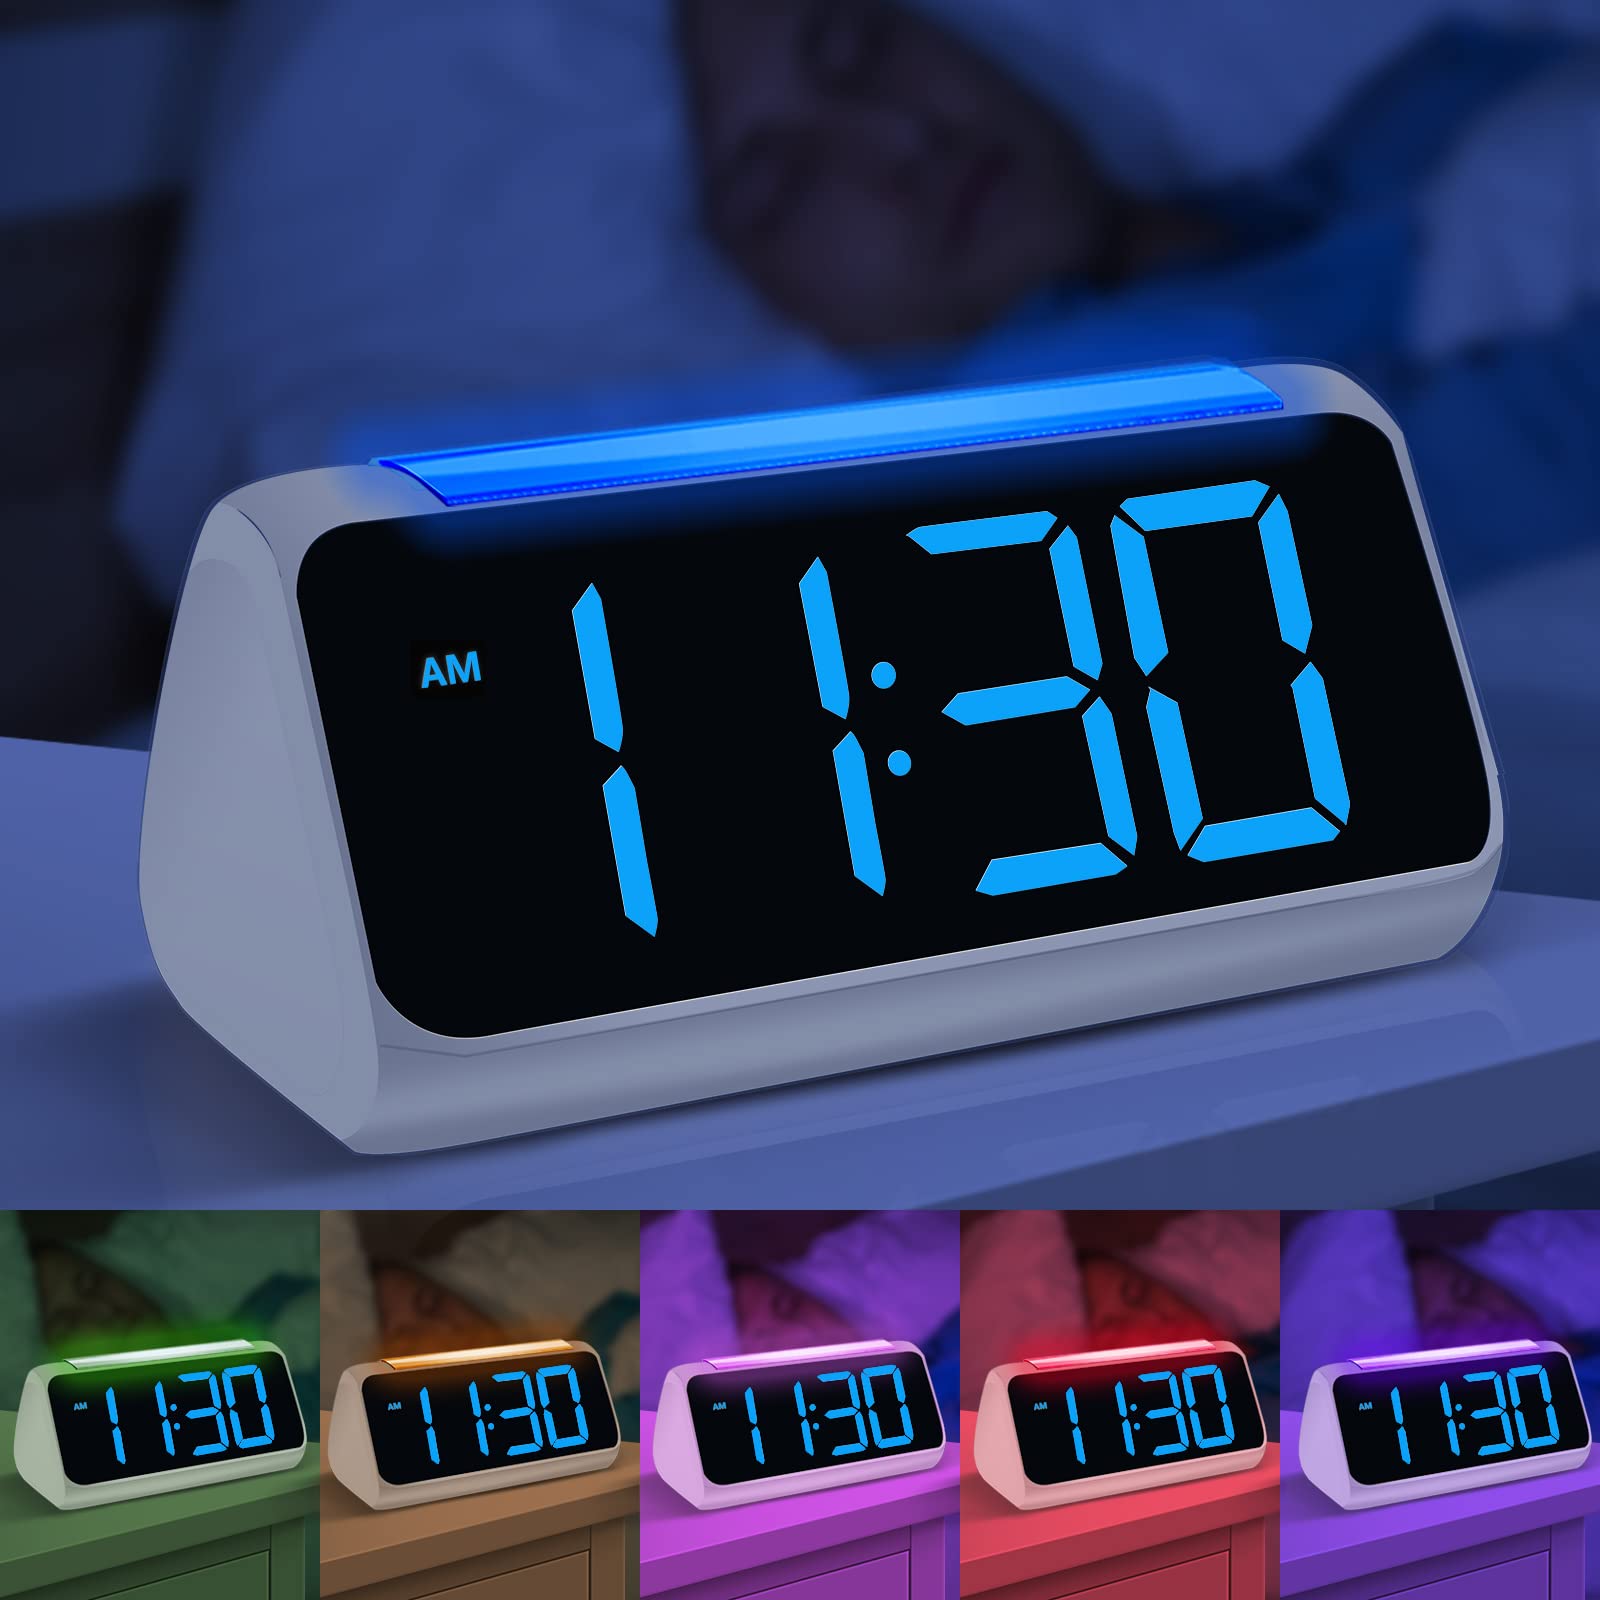
Image: Multiple views of the Netzu Digital Alarm Clock showcasing its 8 different night light color options, providing ambient illumination.
The clock features an 8-color night light with 3 adjustable brightness levels. To activate or change the night light:
- Press the LIGHT button (or the top surface, as indicated by some models) to turn on the night light.
- Press the LIGHT button repeatedly to cycle through the 8 available colors.
- To set a specific color, stop pressing the button when your desired color is displayed.
- To activate automatic color cycling, press and hold the LIGHT button until the colors begin to change automatically.
- To adjust the brightness of the night light, press the LIGHT button quickly after selecting a color or during automatic cycling. There are 3 brightness levels.
- Press and hold the LIGHT button again to turn off the night light.
6.5 Display Brightness Adjustment
The LED display brightness can be adjusted from 0% to 100% to suit your preference, ensuring readability during the day and minimal disturbance at night.
- Locate the DIMMER or BRIGHTNESS button (often a dedicated button or part of the +/- controls when not in time/alarm setting mode).
- Press the button to cycle through preset brightness levels or hold it to continuously adjust the brightness.
6.6 USB Charging Port
The alarm clock is equipped with dual 5V 1A USB charging ports on the back. These ports allow you to charge your smartphone or other small electronic devices conveniently.
- Connect your device's USB charging cable to one of the USB ports on the back of the alarm clock.
- Ensure the alarm clock is powered on via its AC adapter for the USB charging ports to function.
7. Maintenance
- Cleaning: Wipe the clock's surface with a soft, dry, lint-free cloth. Do not use liquid cleaners or sprays directly on the device.
- Storage: If storing the clock for an extended period, disconnect it from power and remove the backup battery. Store in a cool, dry place.
- Battery Replacement: If the backup battery needs replacement, carefully open the battery compartment on the bottom and replace the CR2032 battery with a new one, observing polarity.
8. Troubleshooting
| Problem | Possible Cause | Solution |
|---|---|---|
| Clock display is off or dim. | No power, power adapter loose, brightness set too low. | Check power connection. Adjust display brightness. |
| Alarm does not sound. | Alarm not activated, alarm volume too low, incorrect alarm time set. | Ensure alarm is ON (indicator visible). Adjust alarm volume. Verify alarm time. |
| Time is incorrect after power outage. | Backup battery depleted or missing. | Replace the CR2032 backup battery. Reset the time. |
| USB charging not working. | Clock not powered by AC adapter, faulty USB cable, device not compatible. | Ensure clock is plugged into AC power. Try a different USB cable. Check device compatibility. |
9. Specifications

Image: Technical diagram illustrating the product dimensions: 175mm length, 91.5mm width, 84mm height, and 50.8mm digit height.
| Feature | Detail |
|---|---|
| Brand | Netzu |
| Model Number | 5266B |
| Color | White and Blue |
| Display Type | Digital LED |
| Special Features | Adjustable Night Light (8 colors, 3 brightness levels), Dual Alarm, Snooze Function, Full-range Dimmer (0-100%) |
| Power Source | Electric (AC Adapter) with Battery Backup |
| Backup Battery | 1 x CR2032 (Included) |
| USB Charging Ports | Dual 5V 1A USB ports |
| Time Format | 12/24 Hour Switchable |
| Mounting Type | Tabletop |
| Product Dimensions | 175mm x 91.5mm x 84mm (approx. 6.9 x 3.6 x 3.3 inches) |
| Digit Height | 50.8mm (approx. 2 inches) |
10. Warranty and Support
Netzu products are designed for reliability and performance. For warranty information or technical support, please refer to the contact details provided with your purchase or visit the official Netzu website. Keep your purchase receipt as proof of purchase for warranty claims.