1. Important Safety Instructions
Read and understand all safety instructions before operating the bench drill. Failure to follow these instructions may result in serious injury or property damage. Keep this manual for future reference.
- Eye Protection: Always wear ANSI-approved safety goggles or a face shield when operating the drill press.
- Work Area: Keep the work area clean, well-lit, and free from clutter. Ensure adequate space around the machine.
- Secure Workpiece: Always clamp the workpiece securely to the drill press table. Never hold it by hand.
- Proper Attire: Do not wear loose clothing, gloves, neckties, or jewelry that can get caught in moving parts. Tie back long hair.
- Disconnect Power: Always disconnect the power supply before making adjustments, changing drill bits, or performing maintenance.
- Avoid Overreaching: Maintain proper footing and balance at all times.
- Use Correct Speed: Select the appropriate drilling speed for the material and drill bit size.
- Ventilation: Ensure proper ventilation when drilling materials that produce dust or fumes.
- Children and Bystanders: Keep children and bystanders at a safe distance from the operating machine.
2. Product Overview and Components
The AAGAZA 5-Speed Bench Drill is designed for precision drilling in various materials. Familiarize yourself with its components for safe and effective operation.

Figure 2.1: Labeled components of the AAGAZA 5-Speed Bench Drill. Key parts include the High Hard Shield, Smooth Operation Handle, Detailed Drill Press Nameplate, Sturdy Drill Bits Chuck, High Power Motor, Solid Column, Multifunctional Workbench, and Thickened Base.
Key Components:
- High Hard Shield: Provides protection during operation.
- Smooth Operation Handle: Used to lower and raise the drill chuck.
- Detailed Drill Press Nameplate: Contains important specifications and speed settings.
- Sturdy Drill Bits Chuck: Holds drill bits securely, compatible with 1.5mm to 13mm bits.
- High Power Motor: Provides the necessary power for drilling operations.
- Solid Column: Supports the drill head and table, ensuring stability.
- Multifunctional Workbench: Adjustable table for supporting workpieces, can tilt 0-45 degrees.
- Thickened Base: Provides a stable foundation, reducing vibration and movement.

Figure 2.2: Internal view highlighting the high-efficiency pure copper motor, designed for reliable performance and high loading capacity.
3. Specifications
This section details the technical specifications of your AAGAZA Bench Drill.

Figure 3.1: Dimensions of the AAGAZA Bench Drill and a close-up of the speed chart and chuck.
| Feature | Specification |
|---|---|
| Input Voltage | 220V / 50Hz |
| Power | 350W |
| Number of Speeds | 5 |
| Speed Settings (RPM) | 620, 920, 1280, 1750, 2620 |
| Maximum Drilling Depth | 50mm |
| Maximum Drilling Diameter | 13mm |
| Chuck Diameter Range | 1.5 - 13mm |
| Table Tilt Angle | 0-45 degrees |
| Item Weight | Approximately 1 Grams (Note: This value may be a placeholder or incorrect, refer to packaging for actual weight) |
| Special Feature | Anti-corrosion properties |
Key Features:
- 5-Speed Operation: Offers versatile speed settings (620, 920, 1280, 1750, 2620 RPM) to accommodate various materials and drilling tasks.
- Stable Cast Iron Base: Reduces noise, vibration, and movement during operation, enhancing stability and control.
- Ergonomic Joystick: Designed for comfortable and labor-saving operation.
- Adjustable Workbench: The work table can be tilted from 0 to 45 degrees, allowing for angled drilling.
- Durable Construction: Precision workmanship with anti-corrosion features ensures longevity.
4. Setup and Assembly
Follow these steps to properly assemble and set up your bench drill.

Figure 4.1: The AAGAZA Bench Drill and its included accessories, such as chuck key, hex wrenches, and safety shield.
Assembly Steps:
- Unpacking: Carefully remove all components from the packaging. Verify that all parts and accessories listed in the packing list are present.
- Base and Column: Secure the column to the heavy cast iron base using the provided fasteners. Ensure it is firmly tightened.
- Drill Head: Mount the drill head assembly onto the top of the column. Align it correctly and secure it with the designated locking mechanisms.
- Work Table: Attach the work table to the column, ensuring it can be adjusted vertically and locked into position.
- Handles: Install the operating handles onto the drill head.
- Chuck: Insert the chuck onto the spindle. Use a soft mallet or block of wood to gently tap it into place, ensuring a secure fit.
- Safety Shield: Attach the safety shield to the drill head for added protection.
Mounting the Drill Press:
For optimal stability and safety, it is recommended to bolt the bench drill to a sturdy workbench. Use appropriate bolts and washers through the pre-drilled holes in the base.
5. Operating Instructions
Follow these instructions for safe and effective operation of your AAGAZA Bench Drill.

Figure 5.1: The bench drill set up with a wooden workpiece secured by a vise, ready for drilling.
5.1 Power Connection
Connect the power cord to a grounded 220V / 50Hz electrical outlet. Ensure the power switch is in the OFF position before plugging in the machine.
5.2 Speed Adjustment
The drill press features 5 adjustable speeds. To change the speed:
- Disconnect the power supply.
- Open the belt cover located on top of the drill head.
- Consult the speed chart (usually located inside the belt cover or on the nameplate, refer to Figure 3.1) to determine the correct belt configuration for your desired RPM.
- Adjust the drive belt position on the motor and spindle pulleys to achieve the desired speed.
- Ensure the belt tension is correct (not too tight or too loose).
- Close the belt cover securely before reconnecting power.
5.3 Installing/Removing Drill Bits
- Disconnect the power supply.
- Insert the drill bit into the chuck, ensuring it is centered and fully seated.
- Tighten the chuck jaws firmly using the chuck key. Ensure all three chuck key holes are used for even tightening.
- To remove, loosen the chuck jaws with the chuck key and carefully pull out the drill bit.
5.4 Securing the Workpiece
Always secure the workpiece to the drill press table using a vise or clamps. Never attempt to hold the workpiece by hand during drilling.
5.5 Adjusting Drilling Depth
The maximum drilling depth is 50mm. To set the desired depth:
- Lower the drill bit until its tip touches the workpiece.
- Lock the spindle in this position.
- Adjust the depth stop mechanism (usually a threaded rod with nuts) to the desired drilling depth.
- Unlock the spindle. The drill will now stop at the preset depth.
5.6 Adjusting Table Angle
The work table can be tilted from 0 to 45 degrees for angled drilling.
- Loosen the table locking bolt.
- Adjust the table to the desired angle using the angle scale.
- Tighten the table locking bolt securely.
5.7 Drilling Procedure
- Ensure the workpiece is securely clamped and the drill bit is correctly installed and tightened.
- Select the appropriate speed for the material and drill bit.
- Adjust the table height and angle as needed.
- Turn on the drill press.
- Slowly lower the drill bit into the workpiece using the operating handles. Apply steady, even pressure.
- Allow the drill to cut cleanly. Do not force the drill.
- Periodically raise the drill bit to clear chips, especially when drilling deep holes.
- Once the hole is complete, raise the drill bit clear of the workpiece and turn off the machine.
- Wait for the spindle to come to a complete stop before removing the workpiece.
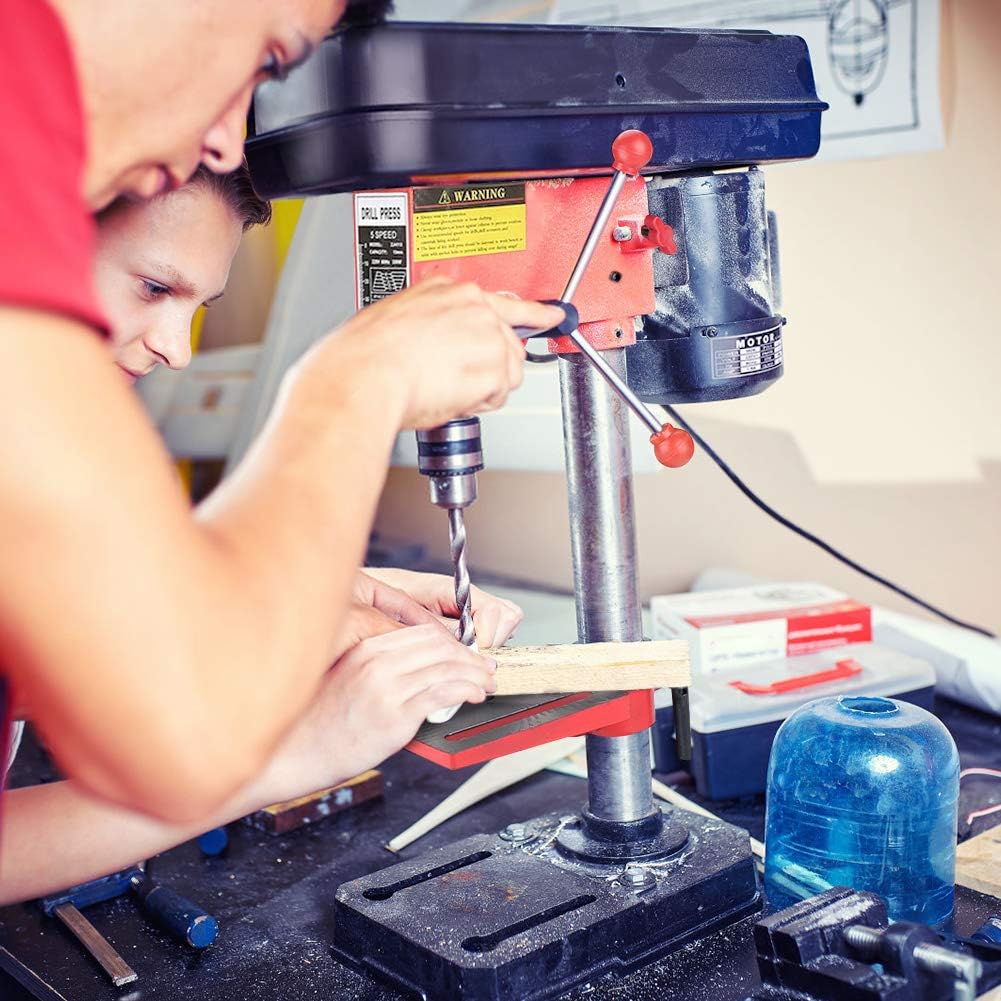
Figure 5.2: Demonstrating the use of the bench drill for woodworking tasks.
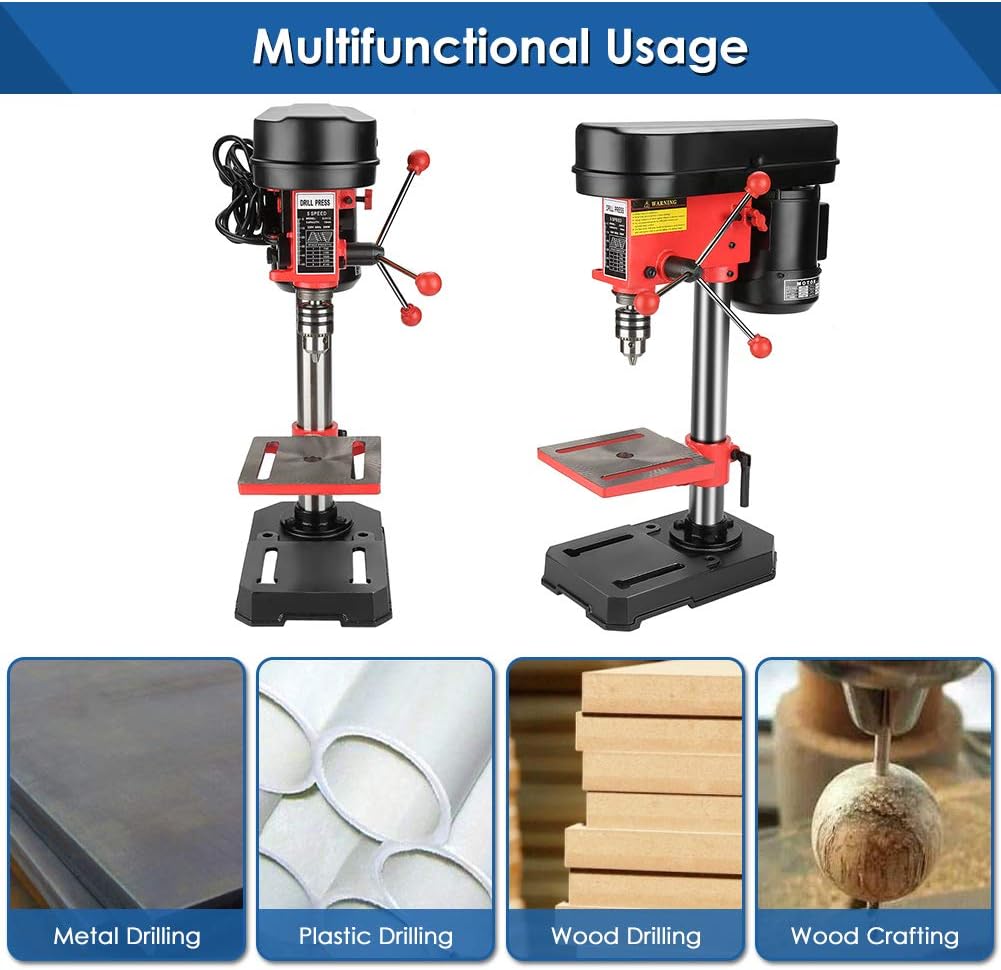
Figure 5.3: The bench drill is suitable for various materials including metal, plastic, and wood.
6. Maintenance
Regular maintenance ensures the longevity and safe operation of your bench drill.
6.1 Cleaning
- Disconnect power before cleaning.
- Remove chips and dust from the table, column, and drill head after each use. Use a brush or vacuum cleaner; never use compressed air directly towards yourself or others.
- Wipe down all painted and machined surfaces with a clean, dry cloth.
6.2 Lubrication
- Apply a light coat of machine oil to the column and other unpainted metal surfaces periodically to prevent rust.
- Lubricate the quill (spindle housing) and depth stop mechanism as needed.
6.3 Belt Inspection
- Regularly inspect the drive belt for wear, cracks, or fraying. Replace if necessary.
- Ensure proper belt tension. A belt that is too loose can slip, and one that is too tight can cause premature wear on bearings.
6.4 Chuck Care
- Keep the chuck jaws clean and free of debris.
- If the chuck becomes stiff, apply a small amount of light oil to the jaws and rotate them to distribute the lubricant.
7. Troubleshooting
This section provides solutions to common operational issues.
| Problem | Possible Cause | Solution |
|---|---|---|
| Drill does not start | No power supply Faulty switch Motor overload | Check power connection and outlet Inspect power switch Allow motor to cool, check for obstructions |
| Excessive vibration | Loose mounting bolts Unbalanced drill bit Worn belt | Tighten all mounting bolts Ensure drill bit is straight and properly installed Inspect and replace belt if worn |
| Drill bit wanders or breaks | Workpiece not secured Incorrect speed Dull or damaged drill bit Excessive feed pressure | Secure workpiece firmly Select appropriate speed Replace or sharpen drill bit Reduce feed pressure |
| Motor overheats | Continuous heavy use Poor ventilation Incorrect belt tension | Allow motor to cool down Ensure adequate airflow around motor Adjust belt tension |
| Inaccurate drilling | Loose chuck Worn spindle bearings Table not square to spindle | Tighten chuck securely Contact qualified service personnel Adjust table squareness |
8. Warranty and Support
Information regarding the specific warranty terms for the AAGAZA 5-Speed Bench Drill is not available in the provided product data. Please refer to your purchase documentation or contact the retailer or manufacturer directly for warranty details and customer support.
For technical assistance or spare parts, please reach out to AAGAZA customer service through their official channels.