Important Safety Information
Please read all instructions carefully before beginning installation. Failure to follow these instructions may result in electrical shock, fire, or other hazards that could cause personal injury or property damage. Keep this manual for future reference.
- Electrical Safety: All electrical connections must be in accordance with local codes, ordinances, or the National Electric Code (NEC). If you are unfamiliar with proper electrical wiring connections, obtain the services of a qualified electrician.
- Power Disconnection: Before starting installation, ensure the power to the circuit is turned off at the circuit breaker or fuse box. Do not rely on the wall switch alone to turn off power.
- Grounding: This fixture must be properly grounded. Connect the fixture's ground wire to the house supply ground wire.
- Bulb Requirements: Use only bulbs of the specified type and wattage. This fixture requires six E12 candle bulbs, each with a maximum wattage of 40W. Bulbs are not included.
- Handling: Handle the fixture with care. Avoid dropping or striking the fixture or its components.
- Cleaning: Clean only with a soft, dry cloth. Do not use abrasive cleaners or solvents.
Product Overview
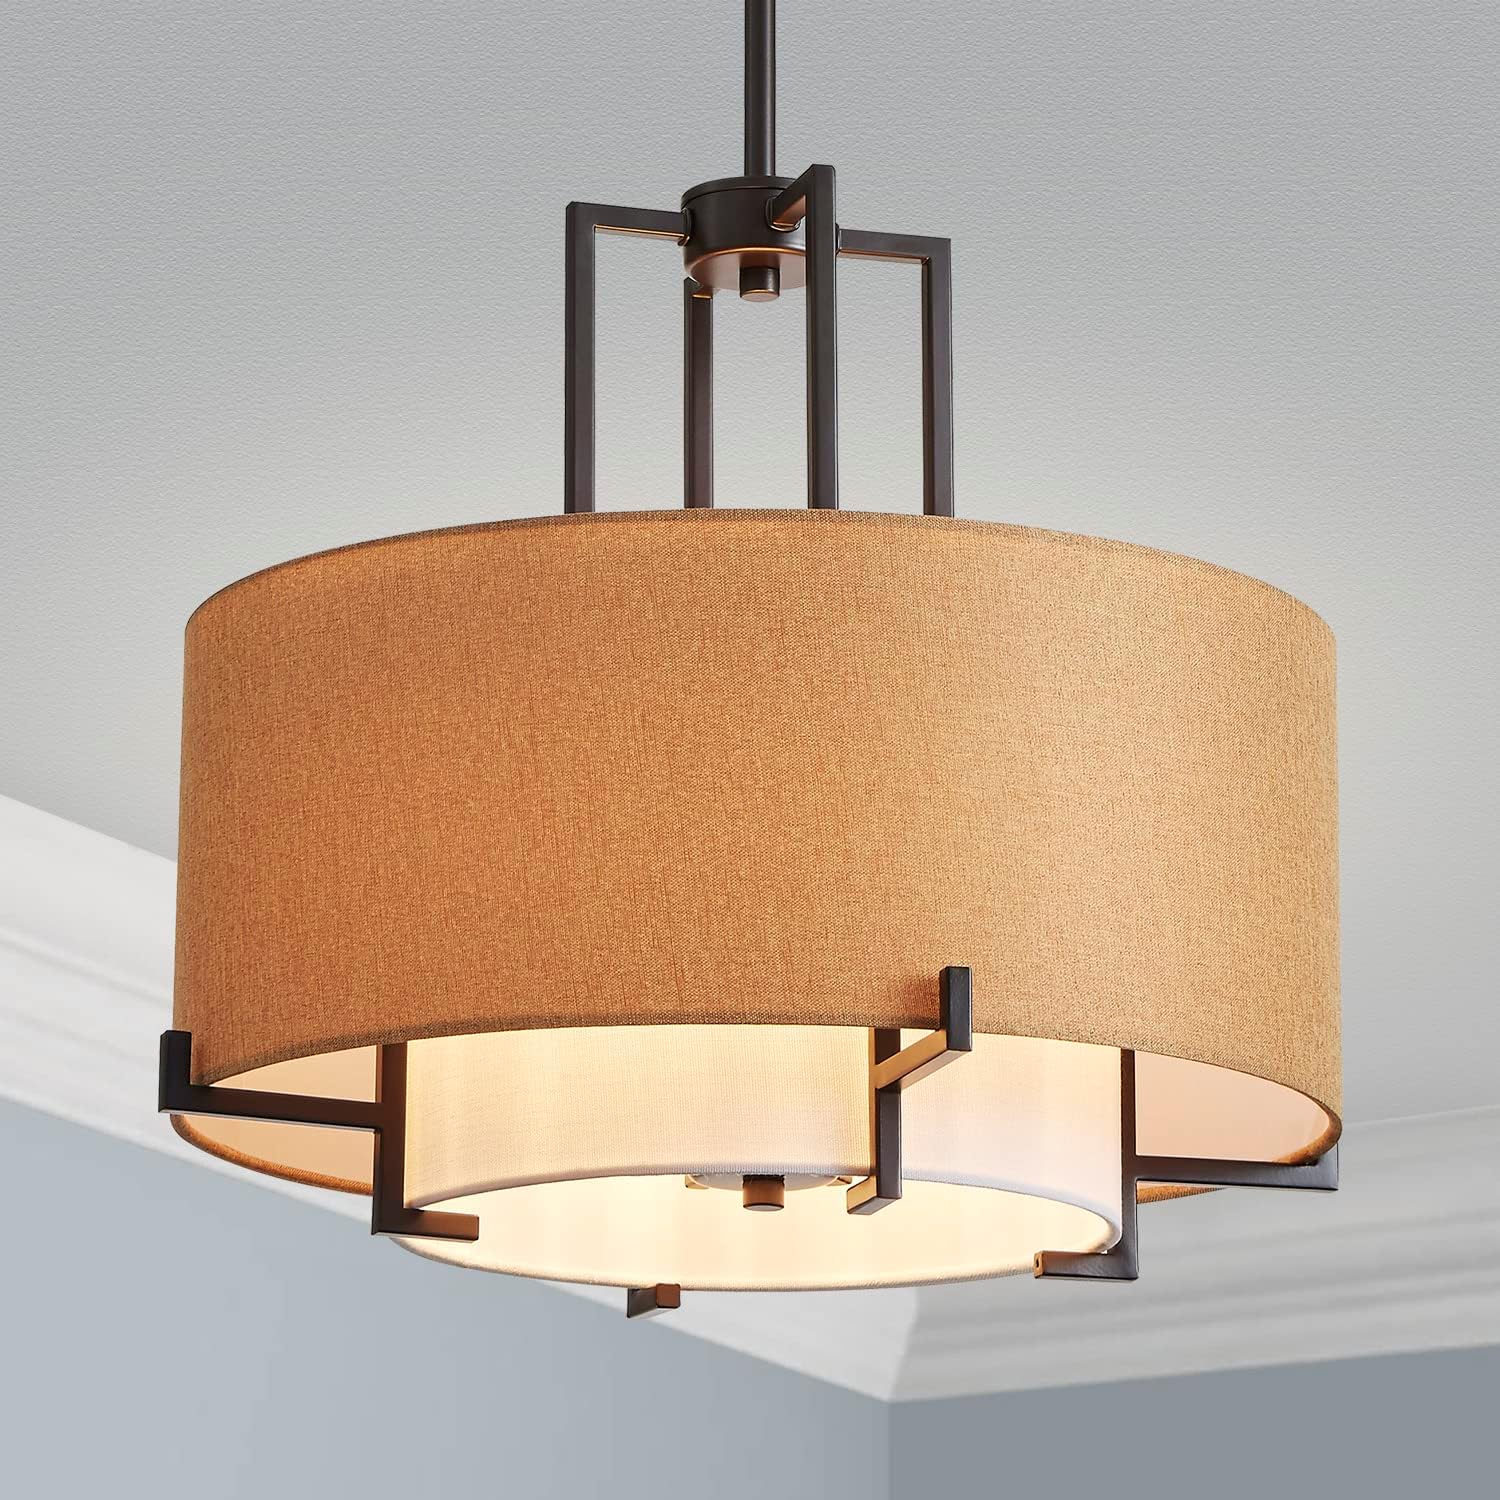
The Saint Mossi Modern Chandelier is a drum-style light fixture designed for indoor use, suitable for dining rooms, bedrooms, and living rooms. It features a two-layer textile lampshade with a light brown, wood-like outer shade and a warm beige inner shade, supported by a matte black metal frame.
Package Contents
Verify that all components are present and undamaged before beginning installation. If any parts are missing or damaged, contact customer support.
- Chandelier Fixture Assembly (includes textile shades and metal frame)
- Mounting Hardware Kit (includes mounting bracket, screws, wire nuts)
- Canopy
- Downrods (various lengths for adjustable height)
- Instruction Manual
Specifications
Detailed technical specifications for the Saint Mossi Modern Chandelier.
| Feature | Specification |
|---|---|
| Model Name | Chandelier |
| Product Dimensions | 30"L x 30"W x 30"H (Adjustable height up to 61" with downrods) |
| Item Weight | 9.03 pounds (4.11 Kilograms) |
| Material | Alloy Steel, Fabric |
| Color | Brown (Shade), Matte Black (Frame) |
| Light Source Type | LED or Incandescent |
| Bulb Base | E12 |
| Number of Light Sources | 6 |
| Max Wattage per Bulb | 40 watts |
| Voltage | 120 Volts |
| Special Feature | Dimmable |
| Installation Type | Ceiling-mount (Pendant Light) |
| Indoor/Outdoor Usage | Indoor |

Setup and Installation
Professional installation is recommended for electrical fixtures. Ensure power is OFF at the circuit breaker before proceeding.
- Prepare for Installation: Turn off the electricity at the main fuse box or circuit breaker. Clear the work area and gather all necessary tools (screwdriver, wire strippers, electrical tape, ladder).
- Attach Mounting Bracket: Secure the mounting bracket to the junction box in the ceiling using the provided screws. Ensure it is firmly attached and can support the weight of the fixture.
- Adjust Height (if applicable): Determine the desired hanging height for your chandelier. Assemble the appropriate length of downrods by screwing them together. Feed the fixture wires through the downrods and canopy.
- Make Electrical Connections: Carefully connect the fixture's wires to the house electrical wires. Match the wires:
- Connect the black (Live/Hot) wire from the fixture to the black (Live/Hot) wire from the junction box.
- Connect the white (Neutral) wire from the fixture to the white (Neutral) wire from the junction box.
- Connect the green or bare copper (Ground) wire from the fixture to the green or bare copper (Ground) wire from the junction box.
- Mount the Fixture: Carefully lift the fixture and align the canopy with the mounting bracket. Secure the canopy to the mounting bracket using the provided screws or nuts. Ensure the fixture is stable and flush against the ceiling.
- Install Bulbs: Screw six E12 base bulbs (not included, max 40W each) into the sockets. Do not overtighten.
- Restore Power: Once installation is complete and all connections are secure, turn the electricity back on at the main fuse box or circuit breaker.

Operating Instructions
The Saint Mossi Modern Chandelier is designed for simple operation.
- Turning On/Off: Operate the chandelier using a standard wall switch connected to the fixture's circuit.
- Dimming Functionality: This fixture is dimmable. To utilize the dimming feature, ensure you are using dimmable E12 bulbs and have a compatible dimmer switch installed on your wall. Follow the dimmer switch manufacturer's instructions for operation.
Maintenance
Regular maintenance will help preserve the appearance and functionality of your chandelier.
- Cleaning: Always turn off the power to the fixture and allow it to cool before cleaning. Use a soft, dry, lint-free cloth to wipe down the metal frame and textile shades. Do not use liquid cleaners, abrasive cleaners, or polishes, as they may damage the finish or fabric.
- Bulb Replacement: Ensure the power is off and bulbs are cool before attempting to replace them. Unscrew the old bulb and screw in a new E12 base bulb of the correct wattage (max 40W).
- Inspection: Periodically inspect the wiring and connections for any signs of wear or damage. If any issues are found, consult a qualified electrician.

Troubleshooting
If you experience issues with your chandelier, refer to the following common problems and solutions:
| Problem | Possible Cause | Solution |
|---|---|---|
| Light does not turn on | No power to the fixture; Loose wiring connection; Faulty bulb; Tripped circuit breaker/blown fuse. | Check power supply at the circuit breaker. Ensure all wire connections are secure. Replace bulbs. Reset circuit breaker or replace fuse. |
| Light flickers | Loose bulb; Loose wiring connection; Incompatible dimmer switch/bulbs. | Tighten bulbs. Check wiring connections. Ensure dimmable bulbs are used with a compatible dimmer switch. |
| Dimming not working | Non-dimmable bulbs; Incompatible dimmer switch; Faulty dimmer switch. | Ensure all bulbs are dimmable. Verify dimmer switch compatibility with LED/incandescent bulbs. Replace dimmer switch if necessary. |
| Fixture is unstable/wobbles | Mounting bracket not securely fastened; Loose canopy screws. | Ensure mounting bracket is tightly secured to the junction box. Tighten canopy screws. |
If the problem persists after attempting these solutions, please contact customer support or a qualified electrician.
Warranty and Support
For warranty information and customer support, please refer to the documentation included with your purchase or visit the official SM Saint Mossi website. Keep your purchase receipt as proof of purchase for any warranty claims.
Contact Information: For assistance, please visit the SM Saint Mossi Brand Store on Amazon or contact their customer service directly through the provided channels on their official website.