
Introduction
Thank you for choosing the Russell Hobbs Express Mini Oven Air Fryer. This appliance combines five cooking functions: air frying, traditional baking, grilling, toasting, and keeping food warm. This manual provides essential information for safe operation, maintenance, and troubleshooting to ensure optimal performance and longevity of your appliance.
Important Safety Instructions
Always follow basic safety precautions when using electrical appliances to reduce the risk of fire, electric shock, and injury.
- Read all instructions before use.
- Do not touch hot surfaces. Use handles or knobs.
- To protect against electrical shock, do not immerse cord, plugs, or appliance in water or other liquid.
- Close supervision is necessary when any appliance is used by or near children.
- Unplug from outlet when not in use and before cleaning. Allow to cool before putting on or taking off parts.
- Do not operate any appliance with a damaged cord or plug, or after the appliance malfunctions or has been damaged in any manner.
- The use of accessory attachments not recommended by the appliance manufacturer may cause injuries.
- Do not use outdoors.
- Do not let cord hang over edge of table or counter, or touch hot surfaces.
- Do not place on or near a hot gas or electric burner, or in a heated oven.
- Extreme caution must be used when moving an appliance containing hot oil or other hot liquids.
- Always attach plug to appliance first, then plug cord into the wall outlet. To disconnect, turn any control to 'off', then remove plug from wall outlet.
- Do not use appliance for other than intended use.
- Oversize foods or metal utensils must not be inserted in a toaster oven as they may create a fire or risk of electric shock.
- A fire may occur if the toaster oven is covered or touching flammable material, including curtains, drapes, walls, and the like, when in operation.
- Do not place any materials other than manufacturer's recommended accessories in this oven.
- Do not place cardboard, plastic, paper, or similar materials in the oven.
- Do not store any materials, other than manufacturer's recommended accessories, in this oven when not in use.
- Do not clean with metal scouring pads. Pieces can break off the pad and touch electrical parts, creating a risk of electric shock.
- Do not attempt to dislodge food when the appliance is plugged in.
- The exterior surfaces of the appliance will become hot during use.
Product Overview
The Russell Hobbs Express Mini Oven Air Fryer is a versatile kitchen appliance designed for various cooking tasks. It features a compact design with a stainless steel finish.

Image: The Russell Hobbs Express Mini Oven Air Fryer, showcasing its compact stainless steel design with a pizza cooking inside, illustrating its baking capability.
Components and Controls
The appliance includes several key components and intuitive controls for ease of use.

Image: A close-up view of the control panel, featuring three rotary dials for temperature, cooking function (Toast, Grill, Air Fry, Bake, Keep Warm), and timer settings.
- Temperature Control Dial: Adjusts cooking temperature (up to 220°C).
- Function Control Dial: Selects cooking mode (Toast, Grill, Air Fry, Bake, Keep Warm).
- Timer Control Dial: Sets cooking duration (up to 60 minutes) with a 'Stay On' option.
- Power Indicator Light: Illuminates when the oven is operating.
- Glass Door: Allows visibility of food during cooking.
- Crumb Tray: Collects crumbs and drips for easy cleaning.
Included Accessories
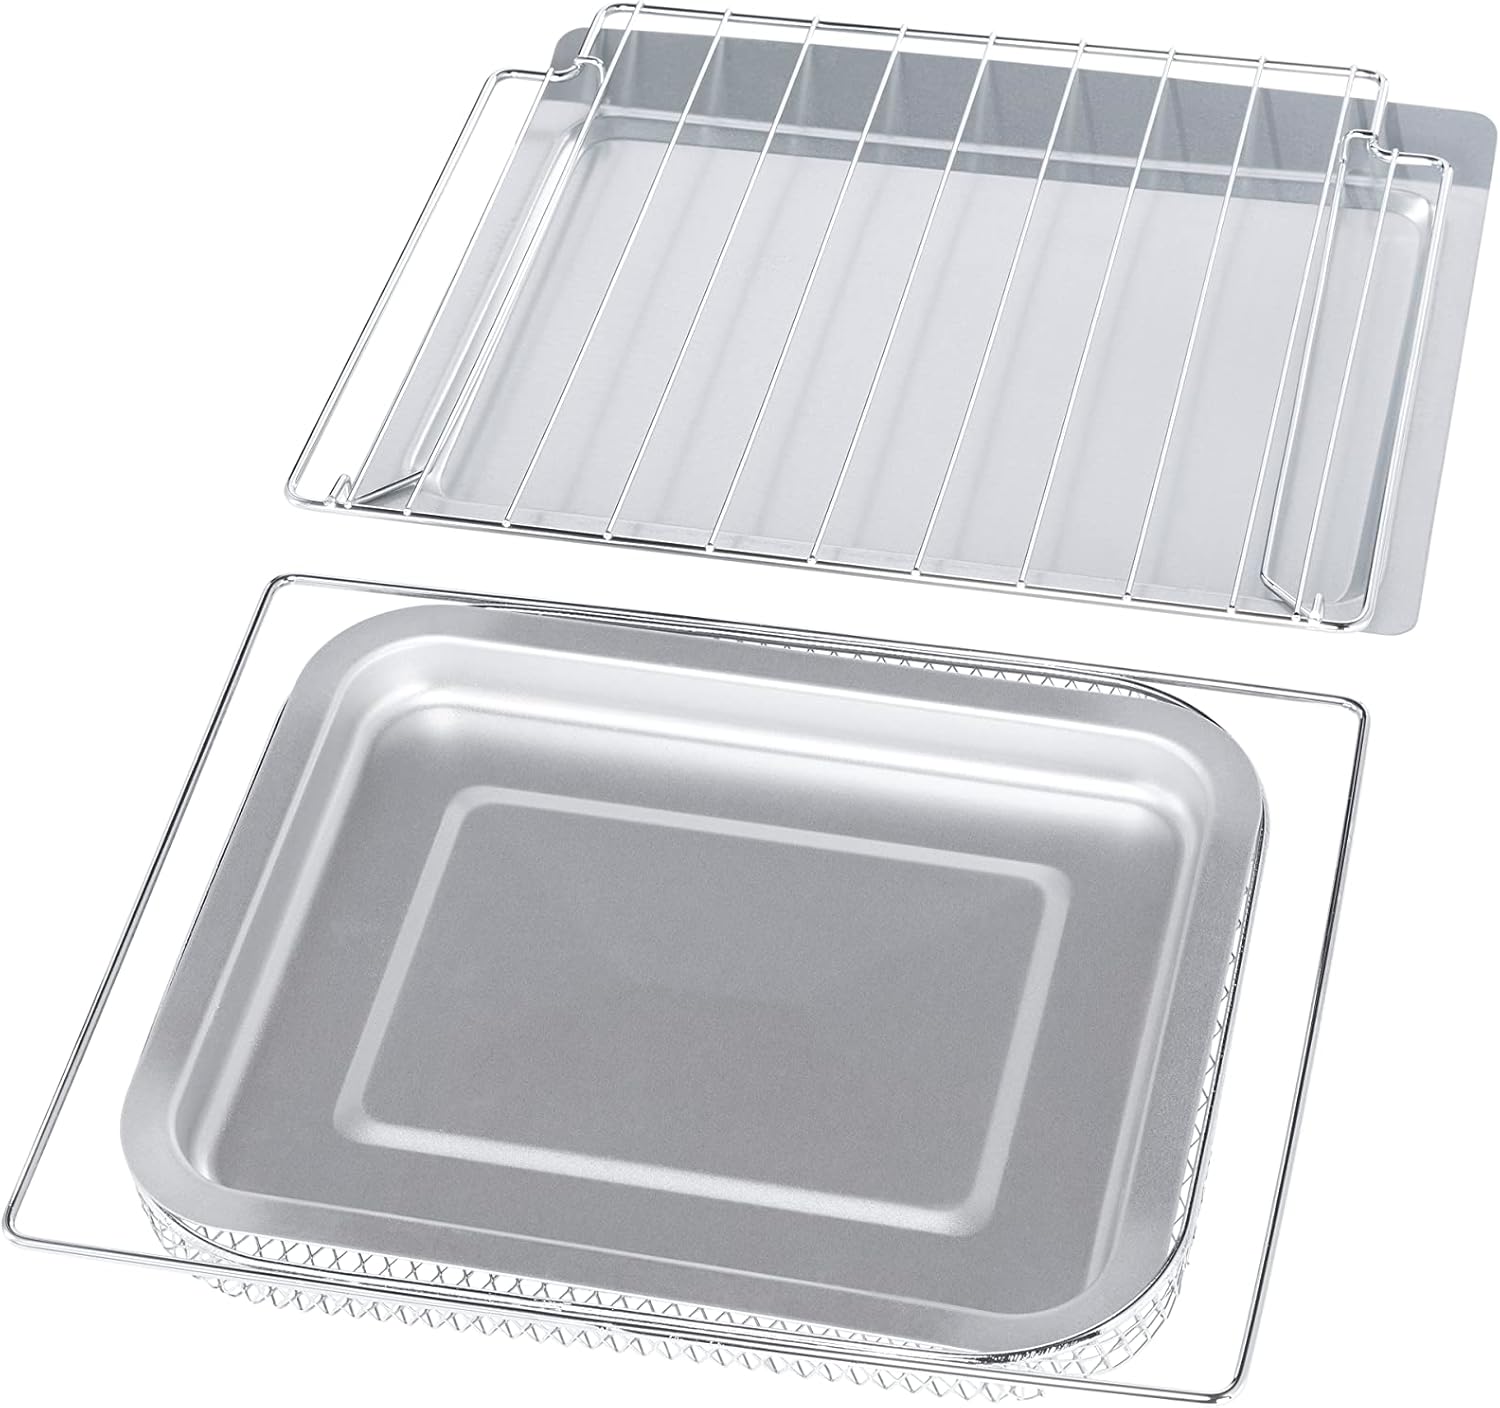
Image: The included accessories: a baking tray, a wire rack, and an air fry basket, designed to fit within the oven for various cooking methods.
- Baking Tray: For general baking and roasting.
- Wire Rack: For grilling, toasting, and supporting other cookware.
- Air Fry Basket: Specifically designed for air frying, allowing hot air to circulate around food.
- Crumb Tray: Removable for easy cleaning.
Before First Use
- Unpack: Remove all packaging materials, stickers, and labels from the appliance and its accessories.
- Clean: Wash the baking tray, wire rack, and air fry basket in warm, soapy water. Wipe the interior and exterior of the oven with a damp cloth. Dry all parts thoroughly.
- Placement: Place the oven on a stable, heat-resistant surface, ensuring adequate ventilation (at least 10-15 cm clearance on all sides). Do not place it directly against a wall or under cabinets.
- Initial Burn-off: Before cooking food, operate the oven empty for approximately 15 minutes at 220°C on the 'Bake' function. This will burn off any manufacturing residues and odors. A slight smoke or odor is normal during this process. Ensure the area is well-ventilated.
Operating Instructions
This appliance offers five distinct cooking functions. Always preheat the oven for 5-10 minutes before placing food inside, unless otherwise specified.
1. Air Fry Function
The Air Fry function uses high-intensity hot air to cook food, achieving crispy results with little to no oil.

Image: The 'Air Fry' logo, indicating the appliance's capability for oil-free frying.

Image: A plate of golden, crispy curly fries, demonstrating the results achievable with the air fry function.
- Place food in the air fry basket. For best results, do not overcrowd the basket.
- Insert the air fry basket onto the wire rack, and slide it into the middle rack position.
- Turn the Function dial to 'Air Fry'.
- Set the Temperature dial to the desired temperature (e.g., 200°C for most air-fried items).
- Set the Timer dial to the desired cooking time. The power indicator light will illuminate.
- Shake or flip food halfway through cooking for even crisping.
- When the timer rings, carefully remove the food using oven mitts.
2. Bake Function
Ideal for baking pizzas, cakes, casseroles, and other oven-cooked dishes.

Image: A freshly baked pizza topped with pepperoni, cheese, and basil, showcasing the oven's baking capabilities for a 30cm pizza.
- Place food on the baking tray or in an oven-safe dish on the wire rack.
- Slide the tray/rack into the desired rack position (middle for most items).
- Turn the Function dial to 'Bake'.
- Set the Temperature dial to the required baking temperature.
- Set the Timer dial to the desired baking time. The power indicator light will illuminate.
- Monitor food through the glass door.
- When the timer rings, carefully remove the food.
3. Grill Function
Use the Grill function for browning, toasting, or cooking thinner cuts of meat and vegetables.

Image: Appetizing grilled meat and vegetable skewers, illustrating the effective grilling function of the oven.
- Place food directly on the wire rack or on the baking tray for items that may drip. Position the rack in the upper slot for intense grilling.
- Turn the Function dial to 'Grill'.
- Set the Temperature dial to 'Grill' (usually maximum temperature).
- Set the Timer dial to the desired grilling time. The power indicator light will illuminate.
- Turn food halfway through cooking for even grilling.
- When the timer rings, carefully remove the food.
4. Toast Function
Perfect for toasting bread, bagels, or pastries.
Image: Slices of toasted bread topped with jam and butter, demonstrating the oven's toasting capability.
- Place bread slices directly on the wire rack. For best results, use the middle or upper rack position.
- Turn the Function dial to 'Toast'.
- Set the Temperature dial to 'Toast' (usually a fixed setting or maximum).
- Set the Timer dial to the desired toasting level (light, medium, dark). The power indicator light will illuminate.
- The oven will automatically turn off when the timer completes.
- Carefully remove the toasted items.
5. Keep Warm Function
This function maintains food at a serving temperature without further cooking.
- Place cooked food in an oven-safe dish on the baking tray or wire rack.
- Slide the tray/rack into the middle rack position.
- Turn the Function dial to 'Keep Warm'.
- Set the Temperature dial to 'Warm' (usually a low, fixed temperature).
- Set the Timer dial to the desired duration for keeping warm, or to 'Stay On' for continuous warming. The power indicator light will illuminate.
- When finished, turn the timer to 'Off' and carefully remove the food.
Cleaning and Maintenance
Regular cleaning ensures optimal performance and extends the life of your appliance. Always unplug the oven and allow it to cool completely before cleaning.
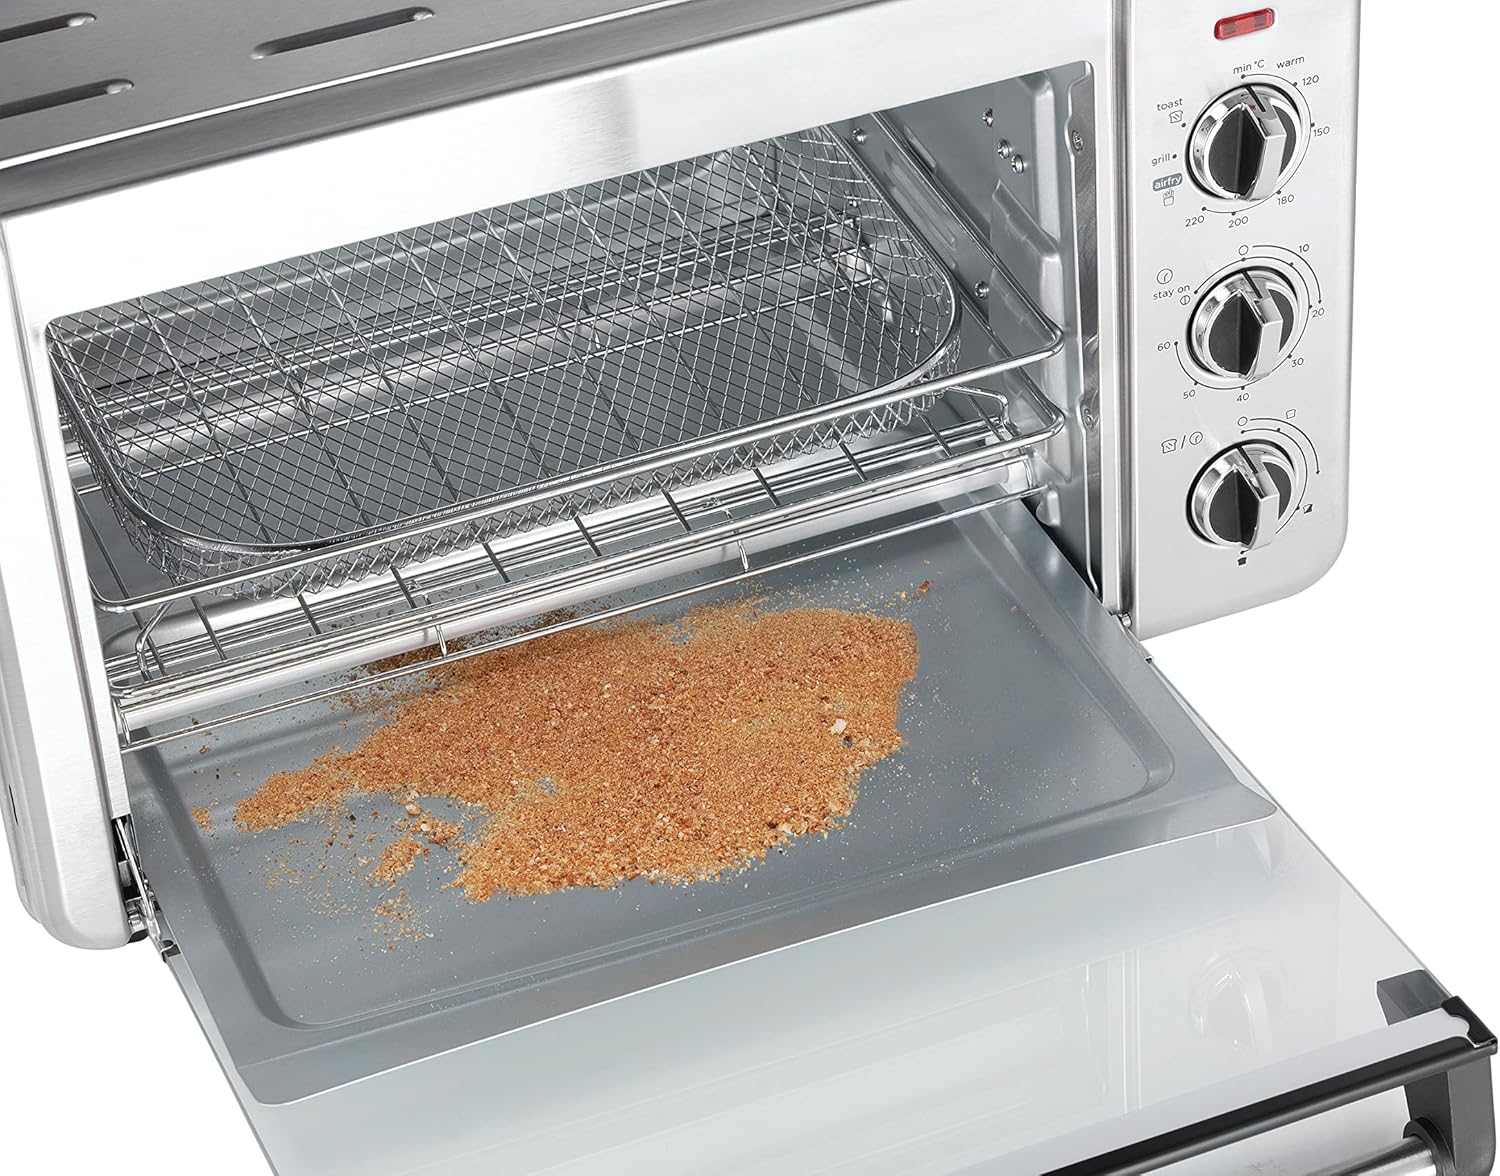
Image: The removable crumb tray being pulled out from the bottom of the oven, showing collected crumbs for easy disposal and cleaning.
- Crumb Tray: Pull out the crumb tray from the bottom of the oven. Discard crumbs and wash the tray in warm, soapy water. Rinse and dry thoroughly before replacing.
- Accessories: The baking tray, wire rack, and air fry basket can be washed in warm, soapy water. For stubborn food residue, soak them before cleaning. They are generally dishwasher safe, but hand washing is recommended for longevity.
- Interior: Wipe the interior walls with a damp cloth and mild detergent. For baked-on food, a non-abrasive cleaner designed for oven interiors can be used. Avoid harsh chemicals or abrasive pads.
- Exterior: Wipe the exterior surfaces with a soft, damp cloth. Do not use abrasive cleaners or polishes that could scratch the stainless steel finish.
- Glass Door: Clean the glass door with a glass cleaner or a damp cloth.
- Storage: Ensure the oven is clean and dry before storing. Store in a cool, dry place.
Troubleshooting
Refer to the table below for common issues and their solutions.
| Problem | Possible Cause | Solution |
|---|---|---|
| Oven does not turn on. | Not plugged in; power outlet issue; timer not set. | Ensure the appliance is securely plugged into a working outlet. Set the timer to the desired cooking duration or 'Stay On'. |
| Food not cooking evenly. | Overcrowding; incorrect rack position; insufficient preheating. | Do not overcrowd the oven. Use the recommended rack position. Preheat the oven for 5-10 minutes before adding food. Rotate food halfway through cooking. |
| Excessive smoke during cooking. | Food residue; fatty foods; initial burn-off. | Ensure the oven and crumb tray are clean. For fatty foods, use the baking tray to catch drips. A small amount of smoke during first use is normal. |
| Food is not crispy when air frying. | Too much food; not enough oil (for some items); temperature too low. | Cook in smaller batches. Ensure food is lightly coated with oil if necessary. Increase temperature slightly or extend cooking time. Shake the basket frequently. |
| Timer not working. | Dial not turned past 20 minutes initially. | For times less than 20 minutes, turn the timer dial past the 20-minute mark, then back to the desired time. |
Technical Specifications
- Model Number: 26680-56
- Brand: Russell Hobbs
- Power: 1500 Watts
- Voltage: 230 Volts (AC)
- Capacity: 20 Liters (12.6 Liters usable)
- Dimensions (L x W x H): Approximately 39.2 x 51.2 x 33 cm
- Weight: Approximately 6.09 Kilograms
- Material: Stainless Steel
- Special Features: Timer, Grill Option, Crumb Tray

Image: A graphic highlighting the appliance's energy efficiency, stating it is 63% more energy efficient compared to conventional ovens.
Warranty and Customer Support
This Russell Hobbs appliance comes with a standard manufacturer's warranty. Please refer to the warranty card included with your purchase for specific terms and conditions, including the warranty period and coverage details.
For technical assistance, spare parts, or warranty claims, please contact Russell Hobbs customer support through their official website or the contact information provided in your product documentation. When contacting support, please have your model number (26680-56) and proof of purchase readily available.


