1. Product Overview
This document provides instructions for the installation and use of the adjustable leg replacement part designed for Ozark Trail 10' x 10' Simple Push Straight Leg Canopies. This replacement part is intended to restore the functionality of your canopy's leg assembly.

Figure 1: Adjustable Leg Replacement Part. This image displays the complete adjustable leg assembly, highlighting its compact length of 45 inches and fully extended length of 83 1/2 inches. The top features a leg bracket cap connector, and the middle shows a leg slider pole bracket connector.
2. Important Safety Information
- Always ensure all parts are securely fastened before use.
- Inspect the replacement leg for any damage before installation. Do not use if damaged.
- Keep hands and fingers clear of moving parts during adjustment to prevent pinching.
- This part is for replacement purposes only. Do not modify the part or use it for unintended applications.
3. Package Contents
The package includes:
- One (1) Metal ADJUSTABLE LEG Assembly
- One (1) Leg Bracket Cap Connector (pre-attached to the top of the leg)
- One (1) Leg Slider Pole Bracket Connector (pre-attached to the middle of the leg)
No other parts are included.

Figure 2: Connectors on the Adjustable Leg. This image provides a detailed view of the leg bracket cap connector at the top and the leg slider pole bracket connector in the middle of the replacement leg.
4. Compatibility
This replacement leg is compatible with Ozark Trail 10' x 10' Simple Push Straight Leg Canopies. It may also fit other canopy brands with identical dimensions and specifications.
Important: Please measure the length of your existing canopy leg before ordering to ensure compatibility. The upper part square cross-section is 1 1/16" x 1 1/16".
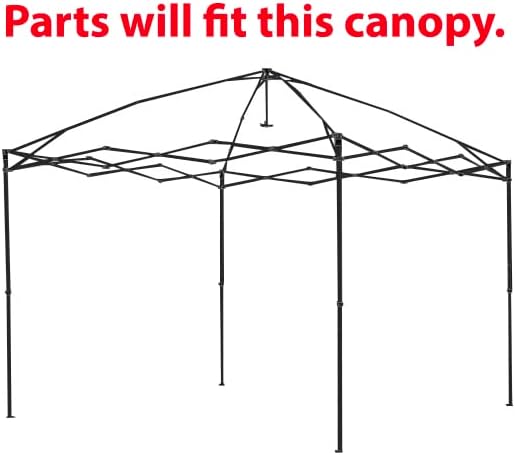
Figure 3: Compatible Canopy Frame. This image illustrates the type of canopy frame structure that this replacement leg is designed to fit.
5. Setup and Installation
- Remove Old Leg: Carefully remove the damaged or old leg from your canopy frame. This may involve releasing pins or bolts, depending on your canopy model.
- Attach Top Connector: Align the Leg Bracket Cap Connector (top part of the replacement leg, refer to Figure 2) with the corresponding attachment point on the canopy's upper frame. Secure it in place.
- Attach Slider Connector: Slide the Leg Slider Pole Bracket Connector (middle part of the replacement leg, refer to Figure 2) onto the lower part of the canopy frame. Ensure it slides freely.
- Secure Bottom: Once the top and slider connectors are in place, ensure the bottom of the leg is properly seated or secured as per your canopy's design.
- Verify Stability: After installation, gently test the leg's stability and ensure all connections are firm before fully deploying the canopy.
6. Operating Instructions (Leg Adjustment)
The replacement leg features an adjustable design to allow for varying canopy heights.
- To Extend: Locate the adjustment mechanism (typically a push-button or lever) on the lower section of the leg. Depress the button or release the lever and carefully pull the inner leg section downwards until it locks into the desired height setting.
- To Retract: Depress the adjustment button or release the lever and push the inner leg section upwards until it locks into the desired compact position.
- Ensure Locking: Always ensure the leg is securely locked into place at the chosen height before leaving the canopy unattended.
7. Maintenance
- Cleaning: Wipe the metal leg with a damp cloth to remove dirt and debris. Avoid abrasive cleaners.
- Lubrication: Periodically apply a silicone-based lubricant to the sliding mechanisms to ensure smooth operation.
- Inspection: Regularly check the leg for any signs of wear, corrosion, or damage. Ensure all connectors are intact and functional.
8. Troubleshooting
- Leg not adjusting smoothly: Ensure the adjustment button is fully depressed. Clean the sliding mechanism and apply lubricant if necessary.
- Leg feels wobbly after installation: Recheck all connection points to ensure they are securely fastened to the canopy frame. Verify that the leg is fully locked into its height setting.
- Part does not fit: Double-check the dimensions of your canopy's original leg against the specifications provided in this manual. Ensure your canopy is an Ozark Trail 10' x 10' Simple Push Straight Leg model or has identical dimensions.
9. Specifications
| Material | Metal |
| Compact Length | 45 inches |
| Extended Length (Fully) | 83 1/2 inches |
| Upper Part Square Cross Section | 1 1/16" x 1 1/16" |
| Item Weight | 2.5 pounds |
| Assembly Required | Yes |
10. Warranty and Support
Specific warranty information for this replacement part is not provided in the product details. For any warranty claims, technical support, or further assistance, please contact the seller directly through your purchase platform.