1. Introduction
This manual provides essential information for the safe and efficient operation of your Bosch Series 6 BGC41XHYG bagless vacuum cleaner. Please read these instructions carefully before using the appliance for the first time and keep them for future reference.

Image: The Bosch Series 6 BGC41XHYG bagless vacuum cleaner, a powerful and quiet appliance for thorough home cleaning.
The Bosch Series 6 BGC41XHYG is a powerful and quiet bagless vacuum cleaner designed for thorough cleaning. It features a ProHygienic system, SmartSensor Control for optimal performance, and an UltraAllergy filter, making it ideal for allergy sufferers. This model was recognized as a test winner by Stiftung Warentest (9/2024).

Image: The official test winner badge from Stiftung Warentest (Issue 9/2024) for the Bosch Series 6 BGC41XHYG.

Image: An illustration demonstrating the efficient cleaning process and sensor-controlled performance monitoring of the vacuum cleaner.
2. Safety Instructions
- Always ensure the voltage indicated on the rating plate matches your mains voltage.
- Do not vacuum up water, liquids, or damp dirt.
- Do not vacuum up hot ashes, burning cigarette butts, or sharp objects.
- Keep the appliance away from children.
- Never operate the vacuum cleaner without the dust container and filters correctly installed.
- If the power cord is damaged, it must be replaced by the manufacturer, its service agent, or similarly qualified persons to avoid a hazard.
- Unplug the appliance from the mains before cleaning or maintenance.
3. Package Contents
Your Bosch Series 6 BGC41XHYG vacuum cleaner package includes the following components:
- Bosch Series 6 BGC41XHYG Bagless Vacuum Cleaner unit
- Switchable roller brush (main floor nozzle)
- Hard floor brush
- XXL Upholstery nozzle
- XXL Crevice nozzle
- Furniture brush
- Accessory clip for suction tube
- Suction hose
- Telescopic tube

Image: Included XXL Upholstery Nozzle and XXL Crevice Nozzle for versatile cleaning.

Image: The furniture brush is included for gentle cleaning of delicate surfaces.
4. Setup
- Unpacking: Carefully remove all components from the packaging.
- Attach the Hose: Insert the hose into the suction opening on the main unit until it clicks into place.
- Assemble the Telescopic Tube: Connect the telescopic tube to the hose handle. Adjust the length of the telescopic tube to a comfortable working height.
- Attach the Floor Nozzle: Connect the desired floor nozzle (e.g., switchable roller brush or hard floor brush) to the end of the telescopic tube.
- Attach Accessories: If desired, attach the accessory clip to the telescopic tube to keep the crevice nozzle and upholstery nozzle readily available.
- Power Connection: Extend the power cord and plug it into a suitable mains socket.

Image: The ergonomic design allows for easy handling and transport, such as carrying the vacuum cleaner up stairs.
5. Operating Instructions
5.1 Powering On/Off
- To switch on the vacuum cleaner, press the On/Off foot pedal.
- To switch off, press the On/Off foot pedal again.
5.2 Suction Power Adjustment
The vacuum cleaner features SmartSensor Control, which monitors performance to ensure optimal cleaning. You can also manually adjust the suction power using the control dial on the main unit for different surfaces.
- Minimum Power: For delicate fabrics, curtains, or light dusting.
- Medium Power: For general cleaning of upholstery and carpets.
- Maximum Power: For hard floors and heavily soiled areas.
5.3 Using Attachments
- Switchable Roller Brush: Suitable for both carpets and hard floors. Use the foot switch on the nozzle to retract or extend the bristles.
- Hard Floor Brush: Specifically designed for thorough cleaning of hard floors with joints and crevices, such as tiles or wooden floors.

Image: The hard floor nozzle effectively cleans dirt from tiled surfaces.
- XXL Upholstery Nozzle: Ideal for quick cleaning of upholstered furniture, mattresses, and cushions.
- XXL Crevice Nozzle: Perfect for reaching narrow gaps, corners, and edges.
- Furniture Brush: Use for gentle cleaning of delicate surfaces like furniture, shelves, and blinds.
6. Maintenance
Regular maintenance ensures optimal performance and extends the lifespan of your vacuum cleaner.
6.1 Emptying the Dust Container
- Switch off the vacuum cleaner and unplug it from the mains.
- Press the release button for the dust container and remove it from the main unit.
- Hold the dust container over a waste bin and open the bottom flap to empty the contents.
- Close the flap securely and reinsert the dust container into the vacuum cleaner until it clicks.
Note: Empty the dust container regularly, preferably after each use or when the MAX indicator is reached, to maintain suction power.
6.2 Cleaning the UltraAllergy Filter
The UltraAllergy filter is washable and designed for particularly clean exhaust air, making it ideal for allergy sufferers.
- Switch off the vacuum cleaner and unplug it.
- Remove the dust container as described above.
- Locate and remove the UltraAllergy filter from its housing.
- Rinse the filter under cold running water until the water runs clear. Do not use detergents.
- Allow the filter to air dry completely for at least 24 hours before reinserting it. Do not dry in direct sunlight or on a radiator.
- Once completely dry, reinsert the filter into its housing and then reattach the dust container.
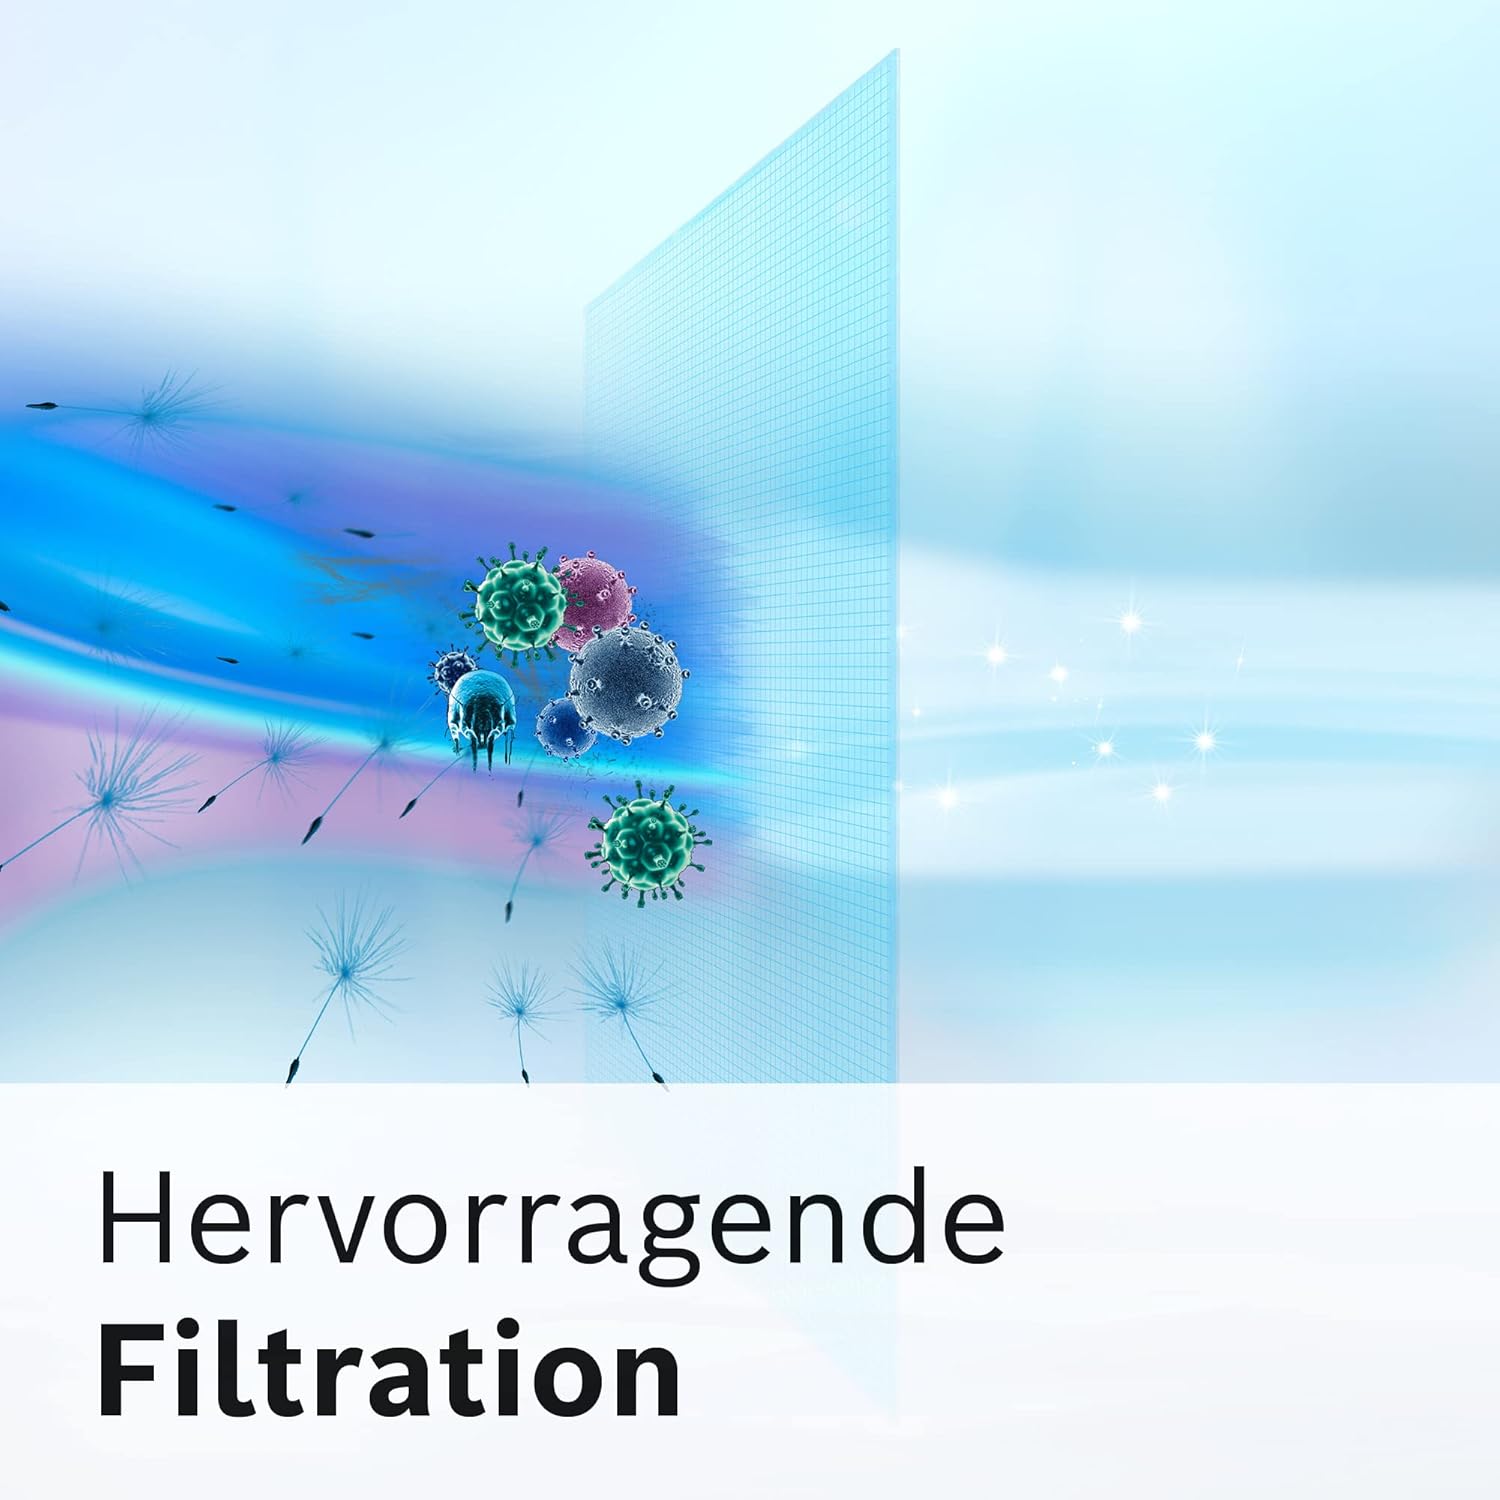
Image: The vacuum cleaner features an excellent filtration system, including the UltraAllergy filter, to capture fine particles and allergens.

Image: The UltraAllergy filter ensures clean exhaust air, making the vacuum cleaner suitable for allergy sufferers.
6.3 Cleaning Other Components
- Wipe the exterior of the vacuum cleaner with a soft, damp cloth. Do not use abrasive cleaners.
- Check nozzles and tubes for blockages regularly and remove any debris.
7. Troubleshooting
| Problem | Possible Cause | Solution |
|---|---|---|
| No suction power or reduced suction. |
|
|
| Vacuum cleaner does not switch on. |
|
|
| Unusual noise during operation. |
|
|
8. Specifications

Image: Key dimensions of the Bosch Series 6 BGC41XHYG vacuum cleaner: 47.4 cm (length), 32.4 cm (width), 26.7 cm (height).
| Feature | Detail |
|---|---|
| Model Number | BGC41XHYG |
| Brand | Bosch |
| Type | Bagless Canister Vacuum Cleaner |
| Power Source | Corded Electric |
| Voltage | 240 Volts |
| Wattage | 750 Watts |
| Motor Power | 1.02 horsepower |
| Noise Level | 68 Decibels |
| Dust Container Capacity | 2.4 Liters |
| Filter Type | Washable UltraAllergy Filter |
| Item Weight | 8.3 Kilograms |
| Dimensions (L x W x H) | 47.4 x 32.4 x 26.7 cm |
| Hose Length | 1.57 Meters |
| Control Method | Tactile |
| Connectivity Technology | WLAN (Note: This specification is listed in the product data; however, typical vacuum cleaners do not feature WLAN connectivity. Please refer to the official Bosch website for clarification on any smart features.) |
9. Warranty and Support
9.1 Motor Warranty
Bosch offers a 10-year motor warranty on this appliance, ensuring consistent high performance thanks to Bosch motor technology "Made in Germany".

Image: Official badge indicating the 10-year motor warranty provided by Bosch.
For detailed warranty conditions, please visit the official Bosch website: bosch-home.com.
9.2 Customer Support
Should you have any questions, require technical assistance, or need to arrange a service, please contact Bosch customer support. Refer to your product's documentation or the official Bosch website for local contact information.