
1. Introduction
This manual provides detailed instructions for the proper setup, operation, and maintenance of your BUTXET iScan Portable A4 Document Scanner. Please read this manual thoroughly before using the device to ensure optimal performance and longevity.
The iScan Portable Document Scanner is designed for convenient scanning of various documents, photos, receipts, and business cards. It features multiple resolution settings, color and monochrome scanning modes, and direct storage to a Micro SD card, making it suitable for use in diverse environments without requiring a computer connection during scanning.
2. Package Contents
Verify that all items listed below are present in your package:
- iScan Portable Document Scanner
- 16GB Micro SD Card
- USB Cable (for charging and data transfer)
- Cleaning Cloth
- Carrying Pouch
- User Manual
- OCR Software CD

Figure 2.1: Package Contents. The image displays the iScan Portable Document Scanner, a 16GB Micro SD card, a USB cable, a cleaning cloth, a carrying pouch, a user manual, and an OCR software CD.
3. Product Overview
Familiarize yourself with the components of your iScan Portable Document Scanner:
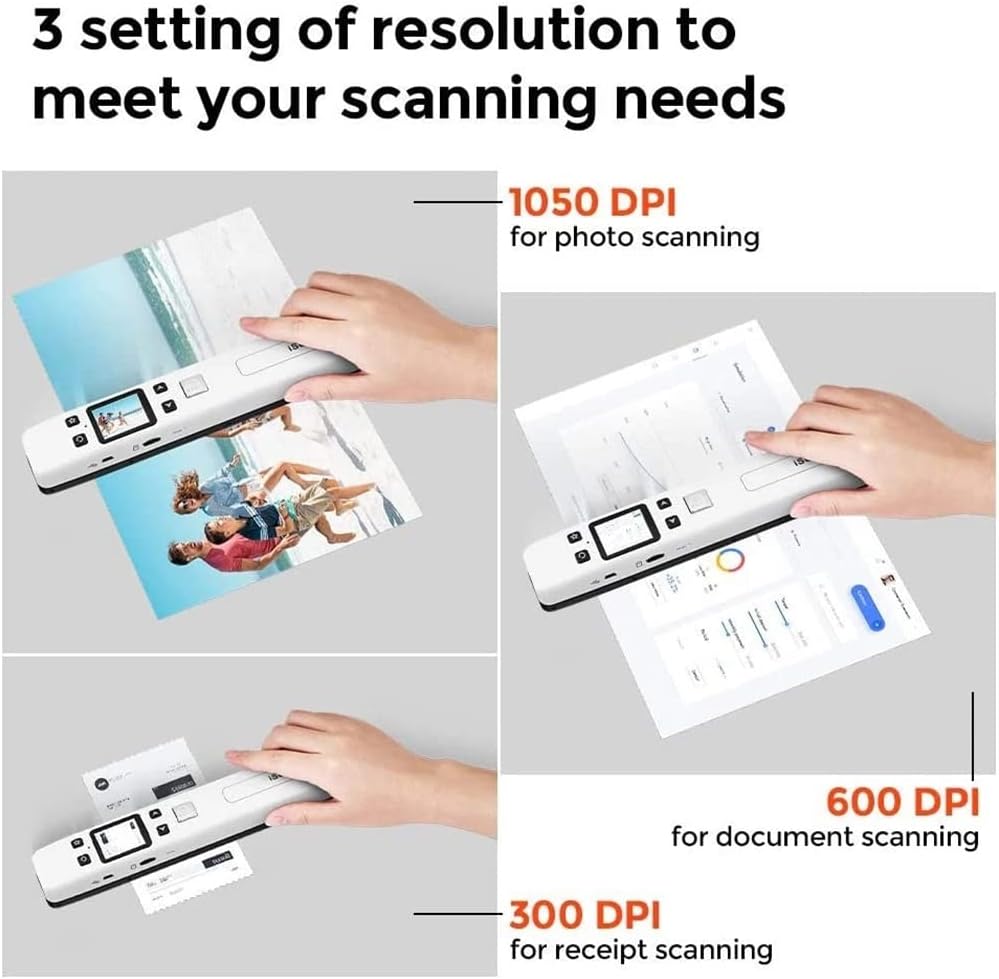
Figure 3.1: Scanner Components. This diagram illustrates the key components of the iScan Portable Document Scanner, including the Power/Scan button, LCD Display, Settings button, Option Page Up/Down buttons, Memory Card Slot, Back USB Port, and Reset Indicator.
- Power/Scan Button: Powers the device on/off and initiates scanning.
- LCD Display: Shows current settings, battery status, and scan count.
- Settings Button: Accesses the device's menu for configuration.
- Option Page Up/Down Buttons: Navigates through menu options and settings.
- Memory Card Slot: Insert Micro SD card for scan storage.
- Back USB Port: Connects to a computer for data transfer or for charging.
- Reset Indicator: Indicates device status or issues.
4. Setup
4.1 Charging the Scanner
The scanner is equipped with a built-in 820mAh rechargeable Li-ion battery. Before initial use, fully charge the device.
- Connect the provided USB cable to the scanner's Back USB Port.
- Connect the other end of the USB cable to a USB power adapter (not included) or a computer's USB port.
- The charging indicator on the scanner will illuminate. Charging is complete when the indicator changes color or turns off (refer to the LCD display for battery status).
4.2 Inserting the Micro SD Card
Scans are saved directly to a Micro SD card. A 16GB card is included, and the scanner supports cards up to 32GB.
- Locate the Memory Card Slot on the side of the scanner.
- Insert the Micro SD card into the slot with the gold contacts facing down, until it clicks into place.
- To remove the card, gently push it inward until it springs out.
5. Operating Instructions
5.1 Powering On/Off
- To power on, press and hold the Power/Scan Button for approximately 2 seconds.
- To power off, press and hold the Power/Scan Button for approximately 3 seconds. The scanner will also automatically power off after 3 minutes of inactivity.
5.2 Setting Scan Modes and Resolution
The scanner offers various settings to optimize your scans.

Figure 5.1: Scanning Modes and Resolution Settings. The iScan scanner supports both color and monochrome scanning modes. Users can select from three resolution settings: 1050 DPI for high-detail scans, 600 DPI for standard documents, and 300 DPI for quick scans like receipts.
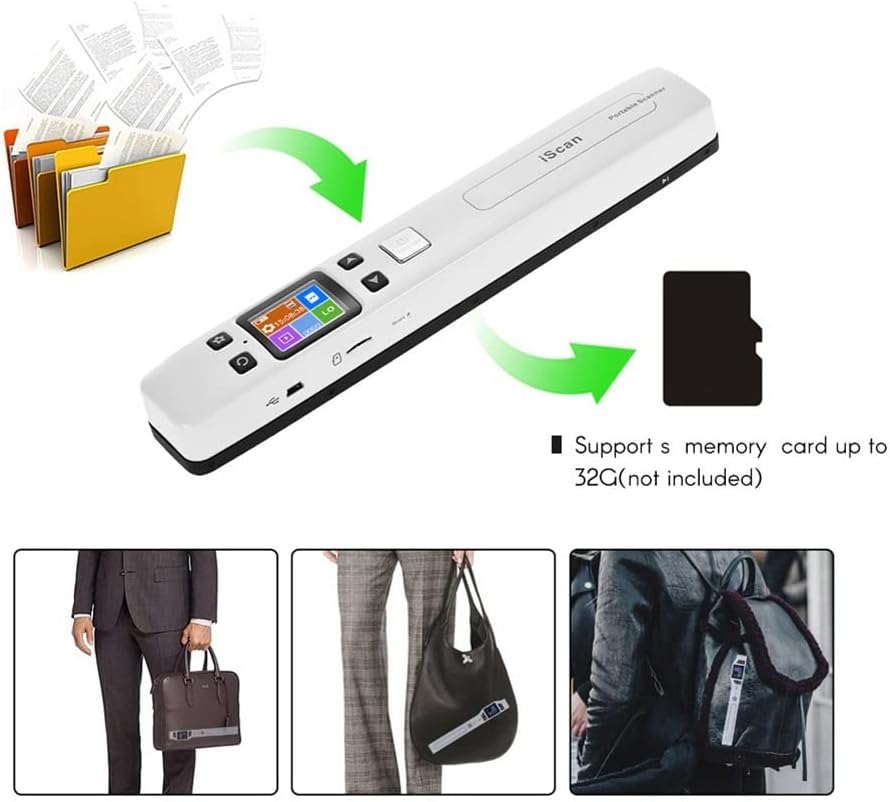
Figure 5.2: Recommended Resolution Settings for Various Document Types. The iScan scanner offers flexible resolution settings: 1050 DPI is ideal for detailed photo scanning, 600 DPI is recommended for general document scanning, and 300 DPI is suitable for quick scans of items like receipts.
Press the Settings Button to enter the menu. Use the Option Page Up/Down Buttons to navigate and the Power/Scan Button to confirm selections.
- Resolution: Select 300 DPI, 600 DPI, or 1050 DPI. Higher DPI results in more detail but larger file sizes.
- Scanning Mode: Choose between Color (for full-color documents and photos) or Mono (for black and white text documents).
- File Format: Select JPG (JPEG) for images or PDF for multi-page documents.
5.3 Performing a Scan
- Ensure the Micro SD card is inserted and the scanner is charged.
- Place the document or item to be scanned on a flat, clean surface.
- Hold the scanner firmly and align it with the top edge of the document.
- Press the Power/Scan Button once to start scanning. The LCD display will indicate that scanning is in progress.
- Slowly and steadily glide the scanner across the document, maintaining even pressure. Ensure the entire document passes through the scanner's rollers.
- Press the Power/Scan Button again to stop scanning. The scanned image will be saved to the Micro SD card.

Figure 5.3: Double Roller Drive Scanning. The scanner features a double roller drive system designed to ensure stable document feeding and prevent image distortion, resulting in clear and consistent scans.
5.4 Transferring Scans to a Computer
To access your scanned files, connect the scanner to a computer:
- Power on the scanner.
- Connect the scanner to your computer using the provided USB cable.
- The scanner will be recognized as a removable disk drive. No special drivers are required for Windows 8/7/Vista/XP and MacOS 10.4 or above.
- Open the removable disk drive to access the scanned files stored on the Micro SD card.
- Safely eject the removable disk from your computer before disconnecting the USB cable.
5.5 Using OCR Software
The included Optical Character Recognition (OCR) software allows you to convert scanned text images into editable text documents. Install the software from the provided CD onto a compatible Windows PC (Windows 7/Vista/XP). Note that this OCR software is not compatible with iOS devices.
6. Maintenance
6.1 Cleaning the Scanner
Regular cleaning ensures optimal scan quality.
- Exterior: Use the provided cleaning cloth or a soft, dry cloth to wipe the scanner's exterior.
- Rollers and Scan Window: Gently clean the rollers and the transparent scan window with the cleaning cloth. Avoid using abrasive materials or liquid cleaners directly on these parts.
6.2 Battery Care
- Avoid fully discharging the battery frequently.
- Store the scanner in a cool, dry place when not in use for extended periods.
7. Troubleshooting
- Scanner not powering on: Ensure the battery is charged. Connect to a USB power source and try again.
- Poor scan quality (streaks, blurry images): Clean the scanner's rollers and scan window. Ensure the document is flat and you are gliding the scanner smoothly and evenly. Check resolution settings.
- Scans not saving: Ensure a Micro SD card is properly inserted and has sufficient free space.
- Scanner not recognized by computer: Ensure the USB cable is securely connected to both the scanner and the computer. Try a different USB port or cable. Ensure the scanner is powered on.
- Automatic shutdown: The scanner is designed to power off after 3 minutes of inactivity to conserve battery. This is normal operation.
8. Specifications
| Feature | Specification |
|---|---|
| Scanner Type | Business Card, Photo, Receipt, Text |
| Brand | BUTXET |
| Connectivity Technology | USB |
| Resolution | 300/600/1050 DPI (selectable) |
| Item Weight | 650 Grams (1.43 pounds) |
| Minimum System Requirements | Windows 7/Vista/XP, MacOS 10.4 or above |
| Sheet Size | A4 |
| Package Dimensions | 11.02 x 3.94 x 1.97 inches |
| Battery | Built-in 820mAh Rechargeable Li-ion |
| Storage | Micro SD card up to 32GB (16GB included) |
| File Formats | JPG, PDF |
9. Support
If you encounter any issues or have questions not covered in this manual, please contact customer support for assistance.