Zenzee NG 22005
Zenzee Adjustable Dog Car Barrier User Manual
Model: NG 22005
Introduction
Thank you for choosing the Zenzee Adjustable Dog Car Barrier. This product is designed to safely separate your pet from the passenger compartment of your vehicle, preventing distractions and ensuring a safer journey for both you and your furry companion. It also serves as a versatile luggage rack to secure items in your trunk. This manual provides detailed instructions for assembly, installation, operation, and maintenance of your new car barrier.
Important Safety Information
- Always ensure the barrier is securely installed before driving.
- Do not use the barrier if any parts are damaged or missing.
- This barrier is intended to prevent pets from entering the passenger area; it is not a restraint system. Always use appropriate pet restraints (e.g., harness, carrier) in conjunction with the barrier for maximum safety.
- Regularly check all connections and adjustment points to ensure they remain tight and secure.
- Keep small parts away from children and pets to prevent choking hazards.
Package Contents

Image: All components of the Zenzee Dog Car Barrier, including grid panels, support tubes, and various fasteners.
Please check that all the following components are included in your package:
- 1x Main Grid Panel (A)
- 2x Side Grid Panels (B)
- 2x Vertical Support Tubes (C)
- 2x Adjustment Knobs (D)
- 2x Base Plates (E)
- 2x Headrest Hooks (F)
- 8x Square Nuts (G)
- 2x Long Screws (H)
- 2x Medium Screws (I)
- 2x Short Screws (J)
- Small Panel Clips (unlettered, for connecting panels)
Setup and Installation
Follow these steps to properly assemble and install your Zenzee Dog Car Barrier. Installation is designed to be straightforward and requires no tools.

Image: Step-by-step visual guide for assembling and installing the car barrier.
- Step 1: Assemble the Grid Panels
Use the small panel clips to attach the two side grid panels (B) to each side of the main grid panel (A). Ensure the panels are securely fastened. The assembled grid should be positioned between the center panel and the headrests of your car. - Step 2: Attach Support Tubes and Base Plates
Position the vertical support tubes (C) onto the assembled grid panels. Secure them using the medium screws (I) and base plates (E). Align the support tubes with the metal supports of your car's headrests. - Step 3: Secure to Headrests
For permanent installation, attach the headrest hooks (F) to the vertical support tubes (C) using the long screws (H) and adjustment knobs (D). Securely fasten the barrier to the metal posts of your car's rear headrests. There are a total of 3 possible positions for the headrest hooks, as shown in the diagram. Choose the position that best fits your vehicle.

Image: The Zenzee Dog Car Barrier installed in the trunk of an SUV, with a dog safely positioned behind it.
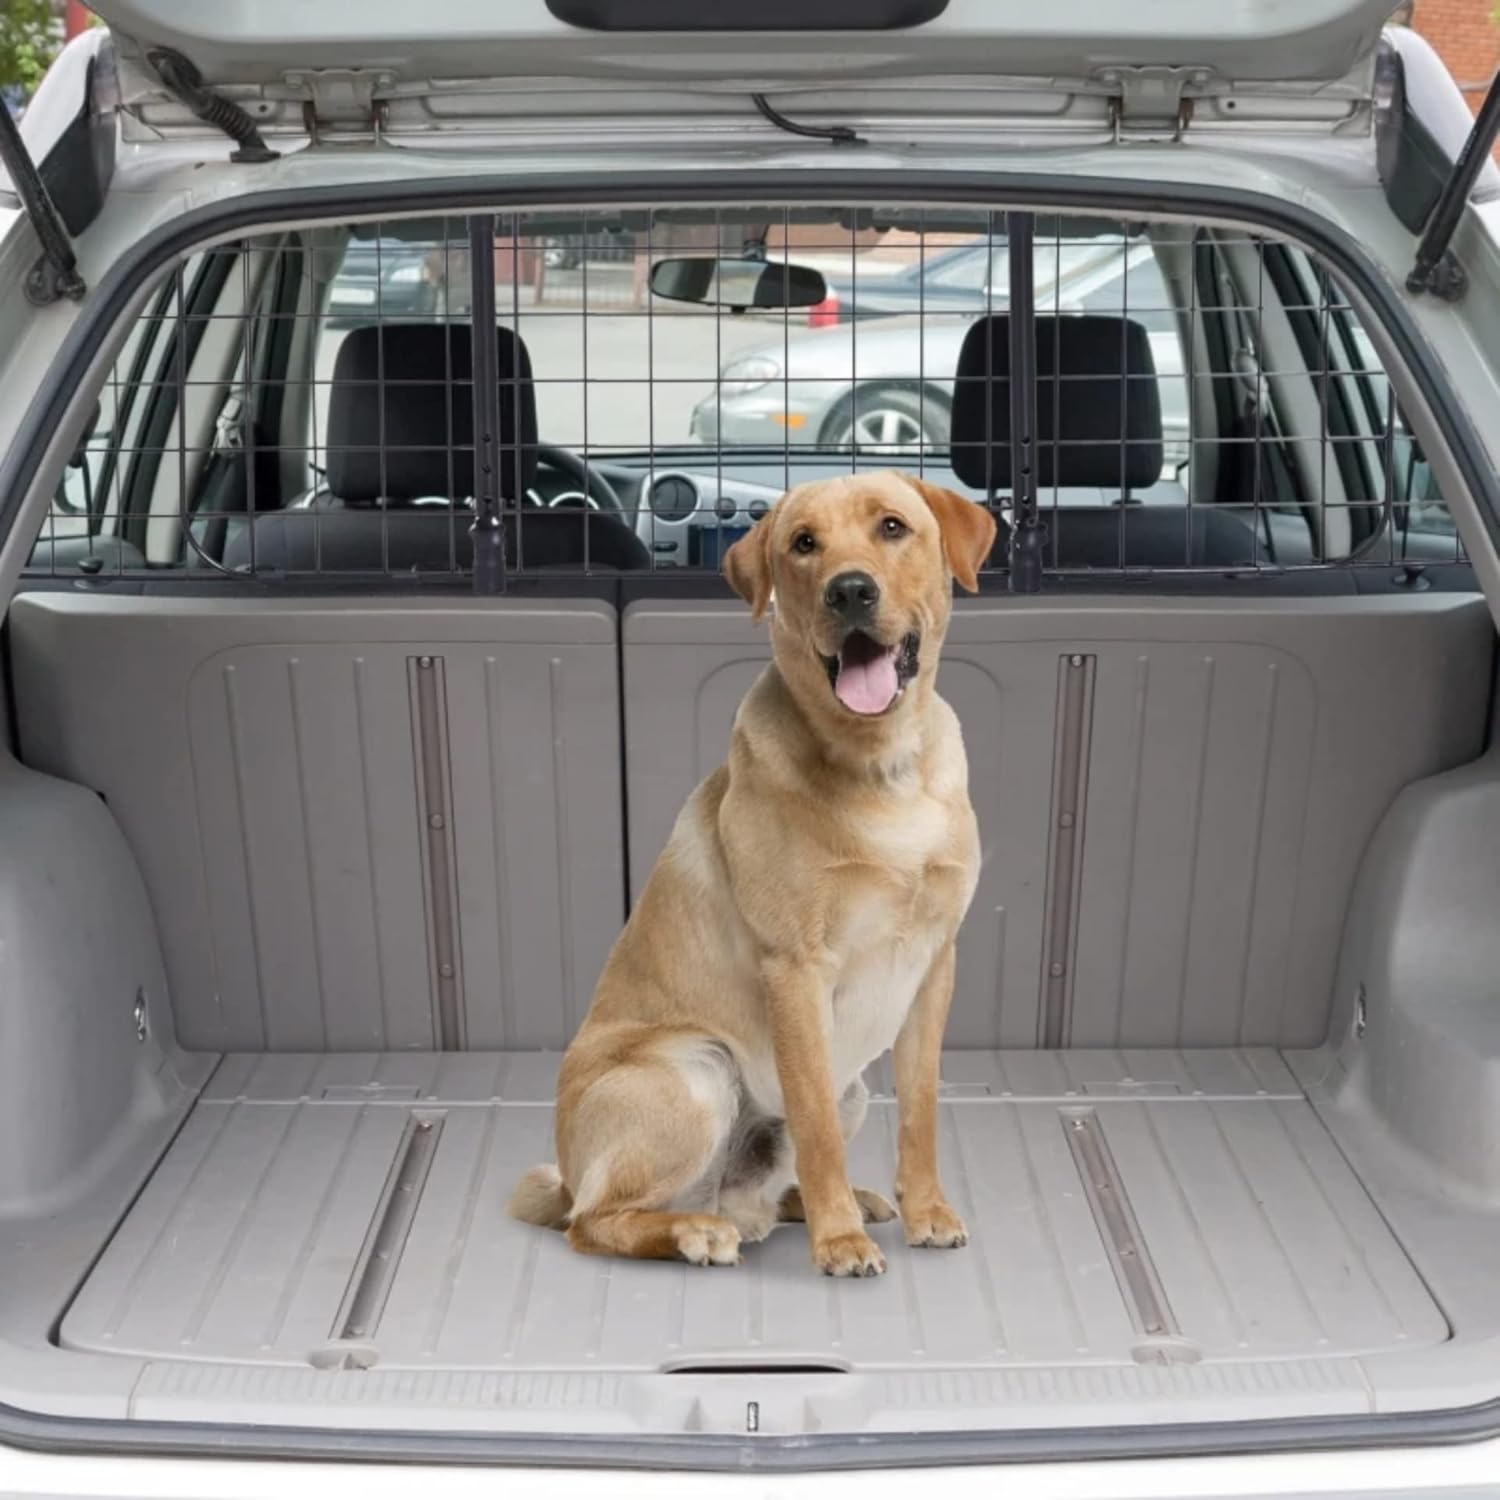
Image: Another view of the Zenzee Dog Car Barrier installed in a car, demonstrating its secure fit.
Operating Instructions
The Zenzee Dog Car Barrier is designed for adjustability to fit a wide range of vehicles.
- Adjusting Width: The side panels can be extended or retracted from the main panel to adjust the overall width of the barrier. Loosen the panel clips, slide the panels to the desired width (between 91 cm and 152 cm), and then tighten the clips to secure.
- Adjusting Height: The vertical support tubes can be adjusted in height. Loosen the adjustment knobs (D), slide the tubes up or down to the desired height (up to 30 cm), and then tighten the knobs to secure.

Image: Detailed view of the knobs and screws used for adjusting the barrier's dimensions.
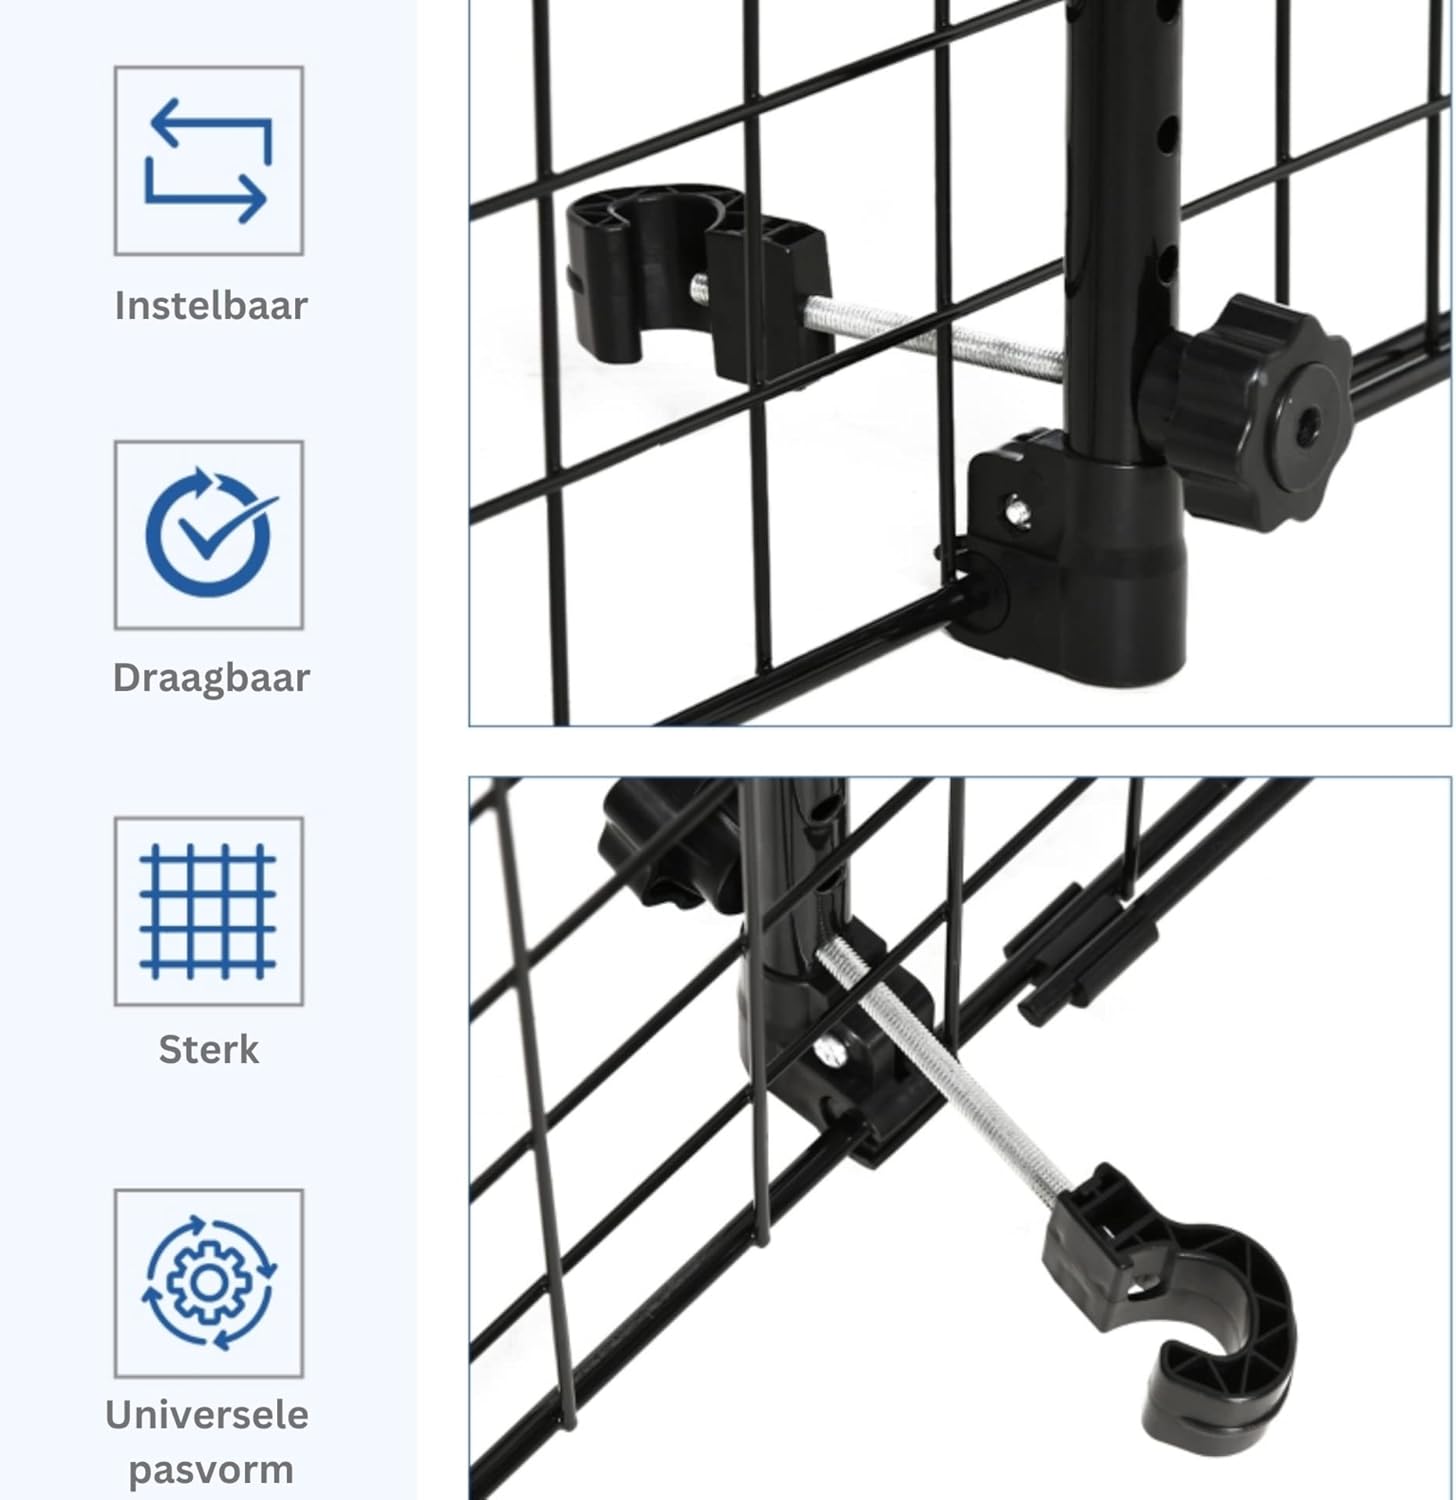
Image: Visual representation of the barrier's key features, including its adjustability and robust construction.
Maintenance and Care
To ensure the longevity and proper function of your Zenzee Dog Car Barrier, follow these simple maintenance guidelines:
- Cleaning: Wipe the barrier clean with a damp cloth and mild soap. Avoid using abrasive cleaners or solvents, as they may damage the finish.
- Inspection: Periodically inspect all parts for wear, damage, or loose connections. Tighten any loose screws or knobs.
- Storage: If removing the barrier for storage, ensure it is clean and dry. Store in a cool, dry place away from direct sunlight.
Troubleshooting
| Problem | Possible Cause | Solution |
|---|---|---|
| Barrier feels loose after installation. | Screws or knobs are not tightened sufficiently. | Ensure all adjustment knobs and screws are fully tightened. Re-check the connection to the headrest posts. |
| Barrier does not fit my car. | Incorrect adjustment of width or height. | Refer to the "Operating Instructions" section to properly adjust the width (91-152 cm) and height (up to 30 cm) of the barrier. Ensure your vehicle has headrest posts for secure attachment. |
| Parts are missing or damaged. | Manufacturing defect or shipping damage. | Contact customer support immediately for assistance. Do not attempt to use the barrier with missing or damaged parts. |
Product Specifications

Image: Diagram illustrating the adjustable width and fixed height of the barrier.
| Feature | Detail |
|---|---|
| Model Number | NG 22005 |
| Brand | Zenzee |
| Adjustable Width | 91 cm - 152 cm (approx. 35.8 inches - 59.8 inches) |
| Height | 30 cm (approx. 11.8 inches) |
| Color | Black |
| Material | Durable Metal Construction |
| First Available Date | July 14, 2023 |
Warranty and Support
The Zenzee Dog Car Barrier is manufactured to high-quality standards. For any questions, concerns, or warranty claims, please contact your retailer or the manufacturer directly.
For further assistance, you may visit the manufacturer's website: www.nicegoodz.nl
Ask a question about this manual
Ask about setup, troubleshooting, compatibility, parts, safety, or missing instructions. Manuals+ will review the question and use this page’s manual context to help answer it.