Introduction
This manual provides detailed instructions for the installation, operation, and maintenance of your XTRONS TX120L car stereo. The TX120L is a 10.1-inch rotatable QLED display unit featuring Android 12, an octa-core processor, 4GB RAM, 64GB ROM, built-in GPS, Wi-Fi, 4G connectivity, Apple CarPlay, Android Auto, and a Digital Sound Processor (DSP). Please read this manual thoroughly before using the device to ensure proper functionality and safety.
Safety Information
- Professional Installation Recommended: Due to the complexity of car electrical systems, professional installation is highly recommended to prevent damage to the unit or your vehicle.
- Operating Temperature: Do not expose the unit to extreme temperatures or humidity.
- Driving Safety: Do not operate the unit in a way that distracts you from driving. Always prioritize road safety.
- Power Supply: Ensure the unit is connected to a 12V DC power supply with negative grounding.
- Cleaning: Use a soft, dry cloth for cleaning. Avoid abrasive cleaners or solvents.
Package Contents
Please verify that all items are present in the package. Refer to the product packaging for a complete list of included accessories. Typically, the package includes:
- XTRONS TX120L Head Unit
- Power Harness
- GPS Antenna
- USB Cables
- 4G SIM Card Reader
- External Microphone (optional, may be included)
- User Manual
Setup and Installation
This section provides general guidelines for installing the XTRONS TX120L. For specific vehicle models, additional wiring harnesses or fascia kits may be required. It is highly recommended to consult a professional installer.
1. Physical Installation
The TX120L is a 2-DIN unit with a 10.1-inch rotatable display. Ensure your vehicle's dashboard opening is compatible with 2-DIN dimensions. The display can be adjusted for optimal viewing angle.

Image: Dimensions of the XTRONS TX120L car stereo unit, showing the main body and the rotatable screen. The main body measures approximately 178mm in width, 100mm in height, and 150mm in depth. The screen measures 25mm in thickness and 156mm in height.
Carefully mount the main unit into the dashboard. Connect all necessary cables before securing the unit completely.
2. Wiring Connections
Connect the power harness, speaker wires, and other input/output cables according to your vehicle's wiring diagram and the provided wiring instructions. Key connections include:
- Power: Connect the 12V constant, accessory (ACC), and ground wires.
- Speakers: Connect the speaker output wires to your vehicle's speakers.
- GPS Antenna: Connect the GPS antenna and position it in a location with a clear view of the sky.
- USB: Connect USB cables for external storage or smartphone connectivity.
- 4G SIM Card Reader: Insert your 4G SIM card into the provided reader and connect it to the unit for mobile data access.
- External Microphone: If using an external microphone, connect it to the designated input.
- Rear Camera/DVR (Optional): Connect optional rear view camera or DVR systems to their respective inputs.
- Steering Wheel Controls: Connect the steering wheel control wires and configure them in the unit's settings.
3. Initial Power On
After all connections are made, turn on your vehicle's ignition. The XTRONS logo should appear, followed by the Android 12 operating system loading. Allow the system to fully boot up.

Image: The XTRONS TX120L unit displaying the Android 12 logo and key specifications such as Octa-core processor, 4GB RAM, 64GB ROM, 4G connectivity, DSP, Wi-Fi, and a 1280x720 HD screen.
Operating Instructions
1. Home Screen and Navigation
The home screen provides access to various applications and functions. Swipe left or right to navigate between screens. Tap on app icons to launch them.

Image: The main user interface of the XTRONS TX120L, showing a split screen with navigation on the left and music playback on the right. The top bar displays time, signal strength, and quick settings icons. The bottom left corner shows the Android 12 logo.

Image: The app launcher screen of the XTRONS TX120L, displaying icons for Phone, Play Store, Radio, Settings, Torque, Voice Search, YouTube, Video, ZLINKS, and IGO Navigation.
2. GPS Navigation
The unit comes with built-in GPS. Launch the navigation application (e.g., IGO Navigation or Google Maps from Play Store) to plan routes and receive turn-by-turn directions. Ensure the GPS antenna is properly installed for optimal signal reception.

Image: The XTRONS TX120L display showing a navigation map on the left side and a video playing on the right side, demonstrating the split-screen functionality.

Image: The XTRONS TX120L display in vertical orientation, showing navigation on the upper part and music controls on the lower part of the screen.
3. Audio Playback (Radio, USB, SD, Bluetooth)
- Radio: Select the "Radio" app to access FM/AM tuner. Scan for stations and save presets.
- USB/SD: Insert a USB drive or SD card into the respective slots. The unit will automatically detect media files. Use the "Music" or "Video" app to browse and play content.
- Bluetooth Audio: Pair your smartphone via Bluetooth (see Bluetooth Pairing section). Once connected, you can stream audio from your phone to the car stereo.
4. Apple CarPlay / Android Auto
Connect your compatible iPhone or Android smartphone via USB to activate Apple CarPlay or Android Auto. This allows you to access selected phone apps, navigation, music, and messaging directly on the car stereo display.

Image: The XTRONS TX120L display showing the Apple CarPlay interface, with icons for Phone, Music, Maps, Messages, Now Playing, Car, Podcasts, and Audiobooks.
5. DSP Equalizer
Access the Digital Sound Processor (DSP) settings to customize the audio output. Adjust equalizer bands, balance, fader, and other sound effects to optimize your listening experience.
6. Screen Rotation
The 10.1-inch display is rotatable, allowing you to switch between horizontal and vertical orientations. Gently adjust the screen to your preferred viewing angle. The system interface will adapt automatically.
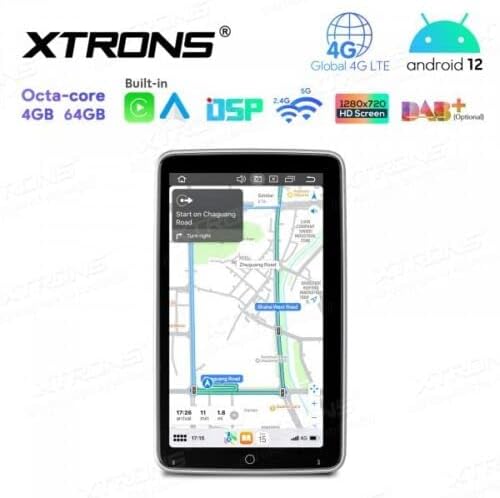
Image: The XTRONS TX120L display in vertical orientation, showing a full-screen navigation map.
Maintenance
- Screen Cleaning: Use a soft, lint-free cloth to wipe the screen. For stubborn marks, slightly dampen the cloth with water or a screen-safe cleaner. Do not spray liquids directly onto the screen.
- Software Updates: Periodically check for software updates through the unit's settings menu or the official XTRONS website. Keeping the software updated ensures optimal performance and access to new features.
- System Reset: If the unit experiences persistent issues, a factory reset option is available in the settings. Be aware that this will erase all user data and settings.
Troubleshooting
| Problem | Possible Cause | Solution |
|---|---|---|
| Unit does not power on. | Incorrect wiring (power/ground), blown fuse. | Check power and ground connections. Inspect vehicle fuses and the unit's fuse. |
| No sound from speakers. | Incorrect speaker wiring, volume too low, mute activated. | Verify speaker connections. Increase volume. Check if mute is active. |
| GPS signal is weak or unavailable. | GPS antenna improperly installed or obstructed. | Ensure GPS antenna is placed in a clear, unobstructed location (e.g., dashboard). |
| Bluetooth connection issues. | Device not in pairing mode, unit not discoverable, interference. | Ensure both devices are in pairing mode. Restart Bluetooth on both devices. Try pairing again. |
| Touchscreen unresponsive. | System freeze, temporary software glitch. | Perform a soft reset (refer to unit's specific reset procedure, usually a small reset button). If persistent, a factory reset may be needed. |
Specifications
| Brand | XTRONS |
| Model | TX120L |
| Operating System | Android 12 |
| Processor | Octa-core |
| RAM | 4 GB |
| Internal Storage (ROM) | 64 GB |
| Screen Size | 10.1 Inches |
| Display Type | QLED, IPS, 1280x720 HD |
| Connectivity | Wi-Fi, 4G LTE (SIM card reader included), Bluetooth 5.0, USB, SD |
| Navigation | Built-in GPS |
| Smartphone Integration | Apple CarPlay, Android Auto |
| Audio Features | Digital Sound Processor (DSP), Equalizer, RDS Radio |
| Input/Output | Microphone input, Rear Camera input (optional), DVR input (optional), OBD2 support (optional), TPMS support (optional) |
| Control Method | Touchscreen, Steering Wheel Controls, Remote Control |
Warranty and Support
For warranty information, please refer to the warranty card included with your product or visit the official XTRONS website. For technical support, troubleshooting assistance beyond this manual, or inquiries about replacement parts, please contact XTRONS customer service through their official channels.
Note: Information regarding spare parts availability and software updates is not available in the provided product data. Please check the manufacturer's website for the most current information.


