
1. Product Overview
This manual provides detailed instructions for the eMagTech 6 Pin Car Tail Light Rear Lamp Plug Connector, a vital component designed to ensure a secure and reliable electrical connection for your vehicle's rear lighting system. This connector is engineered to meet the specific requirements of compatible BMW models, ensuring optimal performance and fit.

Image: Front view of the eMagTech 6 Pin Car Tail Light Rear Lamp Plug Connector, showcasing its robust design.
2. Package Contents
Upon opening the package, please verify that all the following components are present and in good condition:
- 1 x 6 Pin Electrical Connector
- 6 x Connector Plug Terminals
- 6 x Seals

Image: All components included in the package: the 6-pin connector, six individual terminals, and six seals.
3. Compatibility
This eMagTech 6 Pin Car Tail Light Rear Lamp Plug Connector (OE: 61132359993) is specifically designed for compatibility with various BMW models. It is crucial to confirm the OE number of your existing part before purchasing to ensure proper fitment.
Compatible BMW Series:
- BMW 1 Series: F20, F21
- BMW 2 Series: F22, F23, F28, M2
- BMW 3 Series: F30, F31
- BMW 4 Series: F32, F33, F36
The connector is suitable for both the right and left rear lights. One connector is required per side.

Image: A BMW tail light assembly, highlighting the location where the connector (OE: 61132359993) is installed.
4. Setup and Installation
Installation of the eMagTech 6 Pin Car Tail Light Rear Lamp Plug Connector requires careful handling and basic automotive knowledge. If you are unsure about any step, it is recommended to seek professional assistance.
Installation Steps:
- Preparation: Ensure the vehicle's ignition is off and the battery is disconnected to prevent electrical shorts. Access the rear tail light assembly.
- Remove Old Connector: Carefully disconnect the existing tail light connector from the lamp holder. Observe how the wires are routed and connected.
- Prepare New Connector: The package includes the 6-pin connector, terminals, and seals. The terminal cross-section is 0.50mm²-1.00mm². Crimp the appropriate wires from your vehicle's harness onto the new terminals.
- Insert Terminals: Insert the crimped terminals into the new 6-pin connector, ensuring they click securely into place. Pay close attention to the correct pin assignment as per your vehicle's wiring diagram.
- Connect Seals: Place the seals around the wires at the entry points of the connector to ensure a waterproof connection.
- Connect to Lamp Holder: Firmly plug the new eMagTech connector into the tail light lamp holder until it is fully seated and locked.
- Test Functionality: Reconnect the vehicle's battery and test all tail light functions (running lights, brake lights, turn signals) to ensure proper operation.
- Secure Assembly: Reassemble the tail light unit and any removed trim panels.
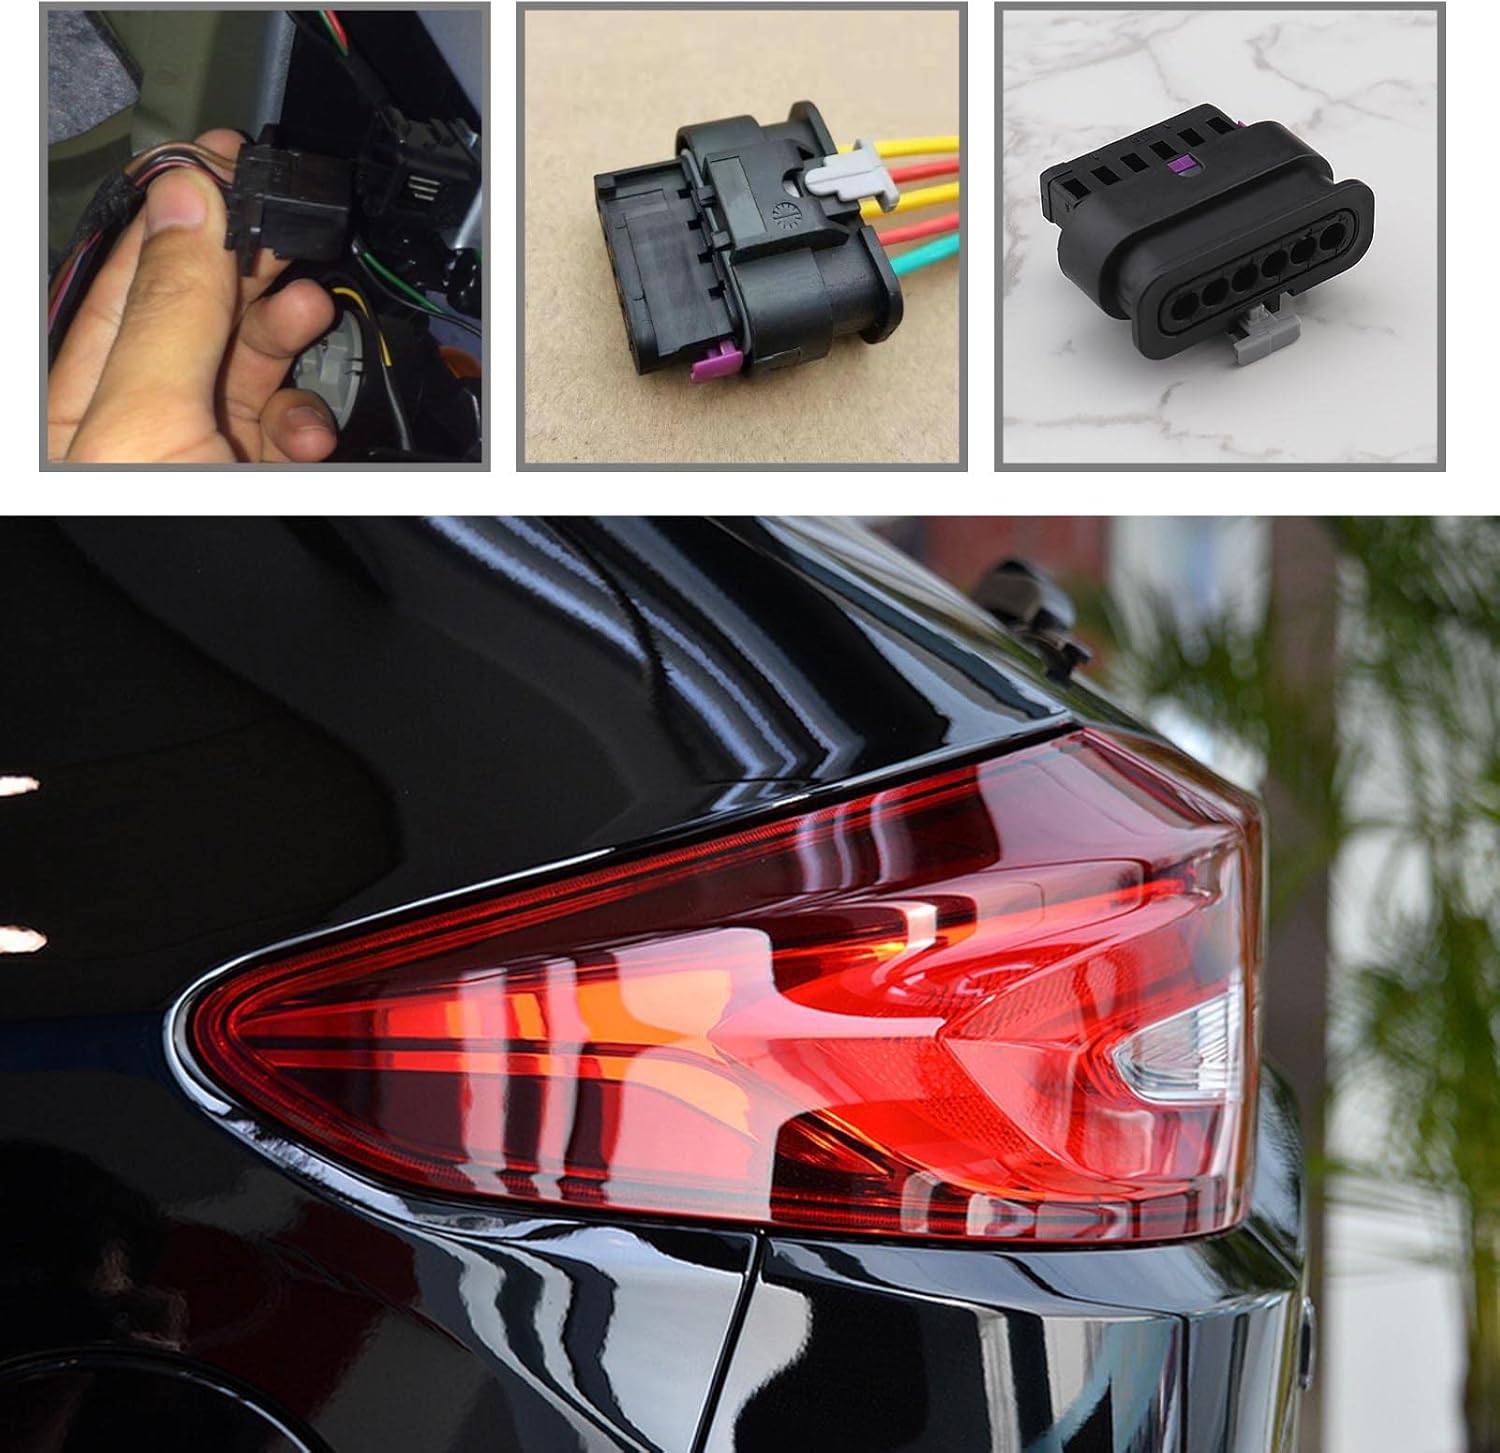
Image: A visual guide showing various stages of the connector installation, including wire preparation and connection to the tail light assembly.

Image: The rear tail lamp connecting harness, illustrating how the eMagTech connector integrates with the vehicle's existing wiring.
5. Operating Principles
The eMagTech 6 Pin Car Tail Light Rear Lamp Plug Connector is a passive electrical component. Its primary function is to provide a secure and stable conduit for electrical signals and power between the vehicle's wiring harness and the tail light assembly. Once properly installed, it ensures consistent illumination of the tail lights, brake lights, and turn signals as commanded by the vehicle's electrical system.
6. Maintenance
This connector is designed for durability and features a waterproof construction to protect against environmental elements. Regular maintenance is generally not required. However, it is advisable to:
- Periodically inspect the connection for any signs of corrosion or looseness, especially if you experience intermittent lighting issues.
- Ensure the seals remain intact to maintain the waterproof integrity of the connection.
7. Troubleshooting
If you encounter issues after installing the connector, consider the following troubleshooting steps:
- Lights Not Functioning:
- Verify that the OE number (61132359993) matches your vehicle's requirements.
- Check all electrical connections to ensure they are secure and properly seated.
- Inspect the wiring for any damage or incorrect crimping of terminals.
- Confirm that the vehicle's fuses related to the tail lights are intact.
- Intermittent Lighting:
- Ensure the connector is fully plugged into the lamp holder and there is no looseness.
- Check for any signs of corrosion on the terminals or within the connector.
If problems persist, consult a qualified automotive technician.
8. Specifications
| Attribute | Detail |
|---|---|
| Brand | eMagTech |
| Model Number | 61132359993 |
| Color | Red (Connector housing is black, but product listing mentions red) |
| Specific Uses For Product | Rear Lights |
| Vehicle Service Type | Car |
| Special Feature | Waterproof |
| Lens Material | Plastic (Refers to the connector's material, not a lens) |
| Assembly Required | Yes (Requires crimping terminals and inserting into housing) |
| Item Weight | 0.352 ounces |
| Package Dimensions | 4.57 x 4.53 x 0.71 inches |
9. Warranty and Support
For information regarding product warranty, returns, or technical support, please refer to the eMagTech official website or contact their customer service directly. Ensure you have your purchase details and the product model number (61132359993) available when contacting support.