1. Important Safety Information
Please read all instructions carefully before using the AISZG Foot Spa Bath Massager. Retain this manual for future reference.
- Electrical Safety: Ensure the unit is plugged into a grounded outlet. Do not use if the power cord is damaged. Keep the unit away from water sources when not in use.
- Water Usage: Always add water to the unit before plugging it in and powering it on. Never operate the machine without water. Do not exceed the maximum water fill line.
- Temperature Control: The unit features a heating function. Always test the water temperature with your hand before immersing your feet to avoid burns. Adjust the temperature to a comfortable level.
- Usage Precautions: Do not stand in the foot spa. It is designed for seated use only. Do not use if you have open wounds, infections, or any medical conditions affecting your feet or legs without consulting a doctor.
- Children and Individuals with Reduced Capabilities: This appliance is not intended for use by persons (including children) with reduced physical, sensory or mental capabilities, or lack of experience and knowledge, unless they have been given supervision or instruction concerning use of the appliance by a person responsible for their safety.
Legal Disclaimer: Statements regarding dietary supplements have not been evaluated by the FDA and are not intended to diagnose, treat, cure, or prevent any disease or health condition.
2. Product Overview
The AISZG Collapsible Foot Spa Bath Massager is designed to provide a relaxing and therapeutic foot soaking experience. It features integrated heating, massage rollers, bubble function, and red light therapy, all within a convenient collapsible design for easy storage.
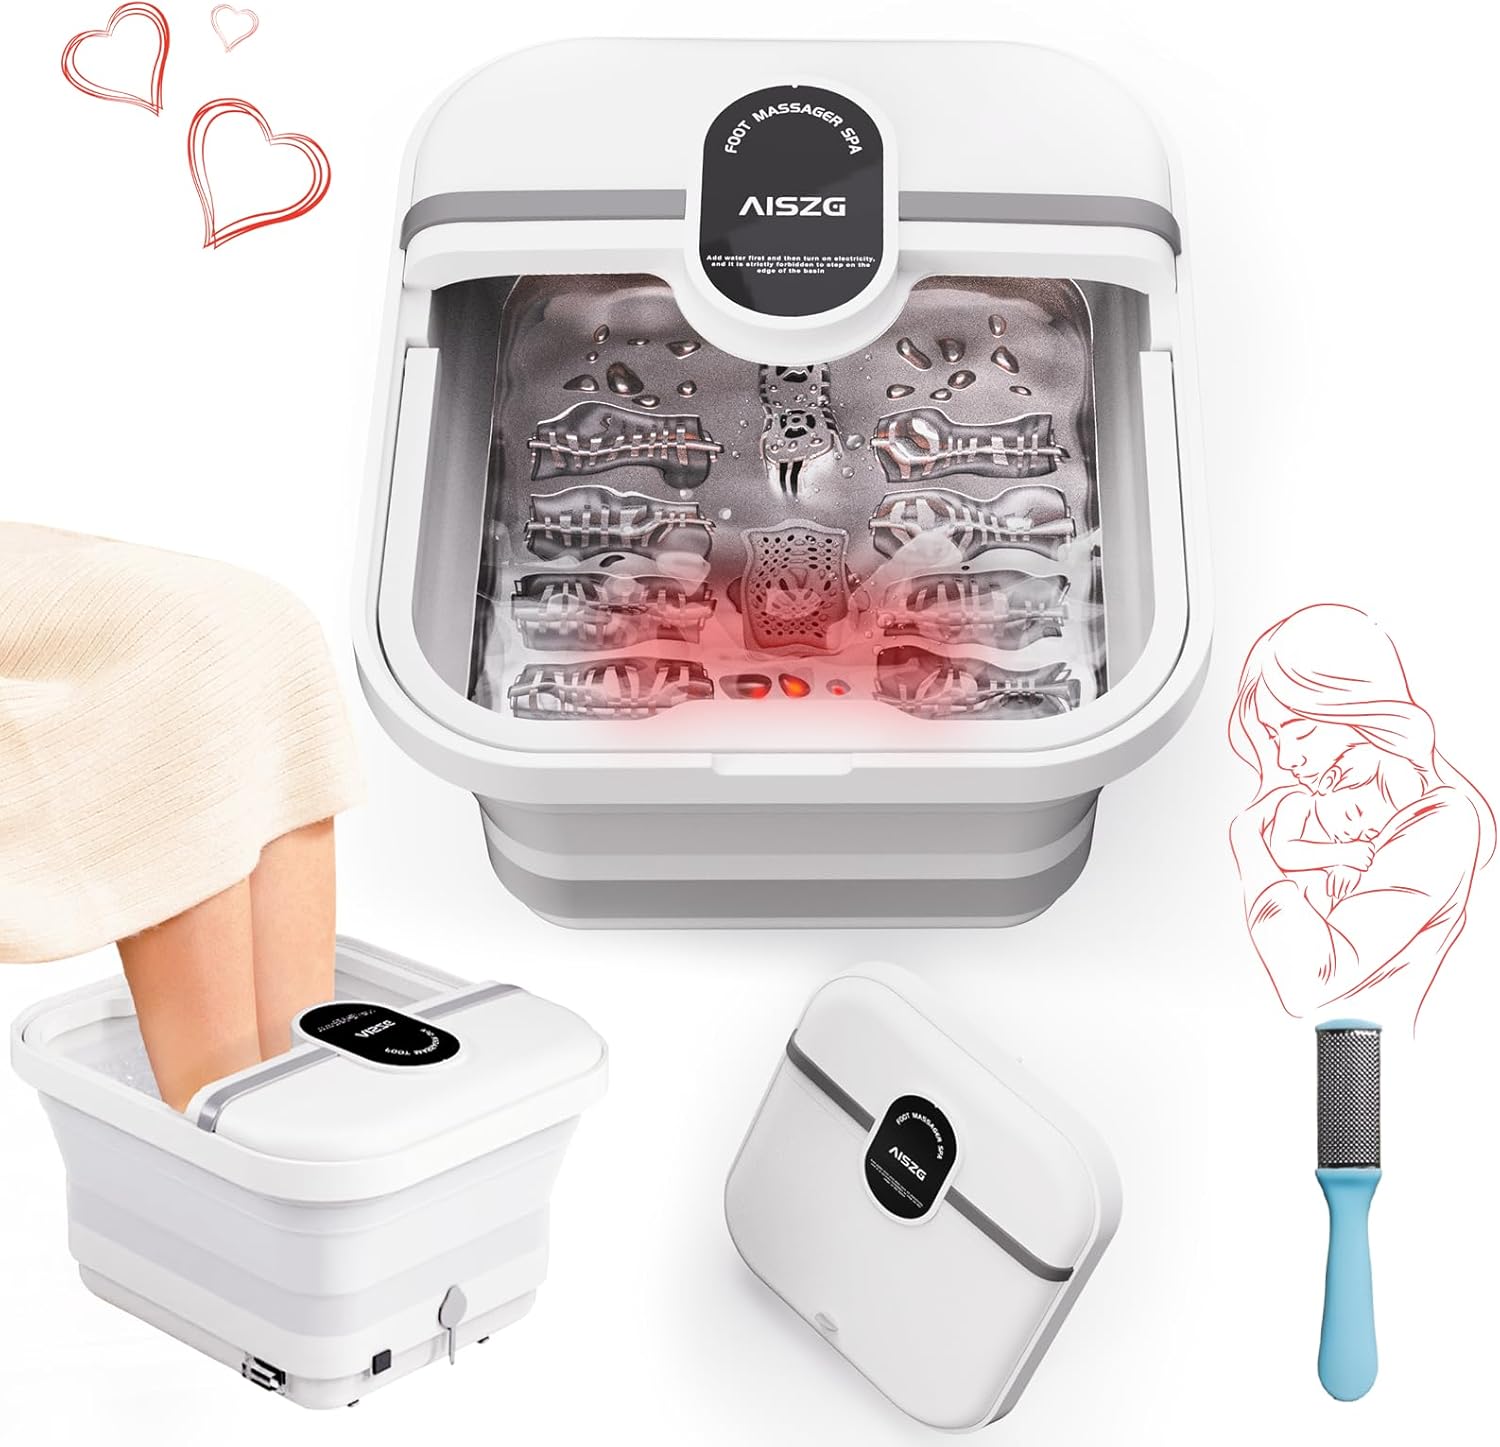
Figure 2.1: AISZG Collapsible Foot Spa Bath Massager in use.
Key Features:
- Collapsible Design: Folds flat for compact storage.
- Adjustable Heating: Maintains desired water temperature for consistent warmth.
- 8 Massage Rollers: Strategically placed rollers provide foot massage.
- Bubble Function: Soothing bubbles enhance relaxation.
- Red Light Therapy: Integrated red light for added therapeutic benefits.
- Drainage Outlet: Convenient outlet for easy water disposal.
- Hidden Carry Handle: For easy portability.

Figure 2.2: Overview of foot spa features and usage scenarios.
3. Setup
- Unfold the Unit: Place the collapsed foot spa on a flat, stable surface. Gently push down on the bottom of the unit to expand it to its full height. Ensure the support rod is securely in place to maintain the expanded shape.
- Positioning: Place the foot spa on a towel or waterproof mat in a comfortable location where you can sit comfortably and reach a power outlet.
- Fill with Water: Fill the foot spa with warm water. Do not use cold water as it will take longer to heat. Ensure the water level is between the minimum and maximum fill lines indicated inside the unit.
- Connect Power: Plug the power cord into a standard electrical outlet.
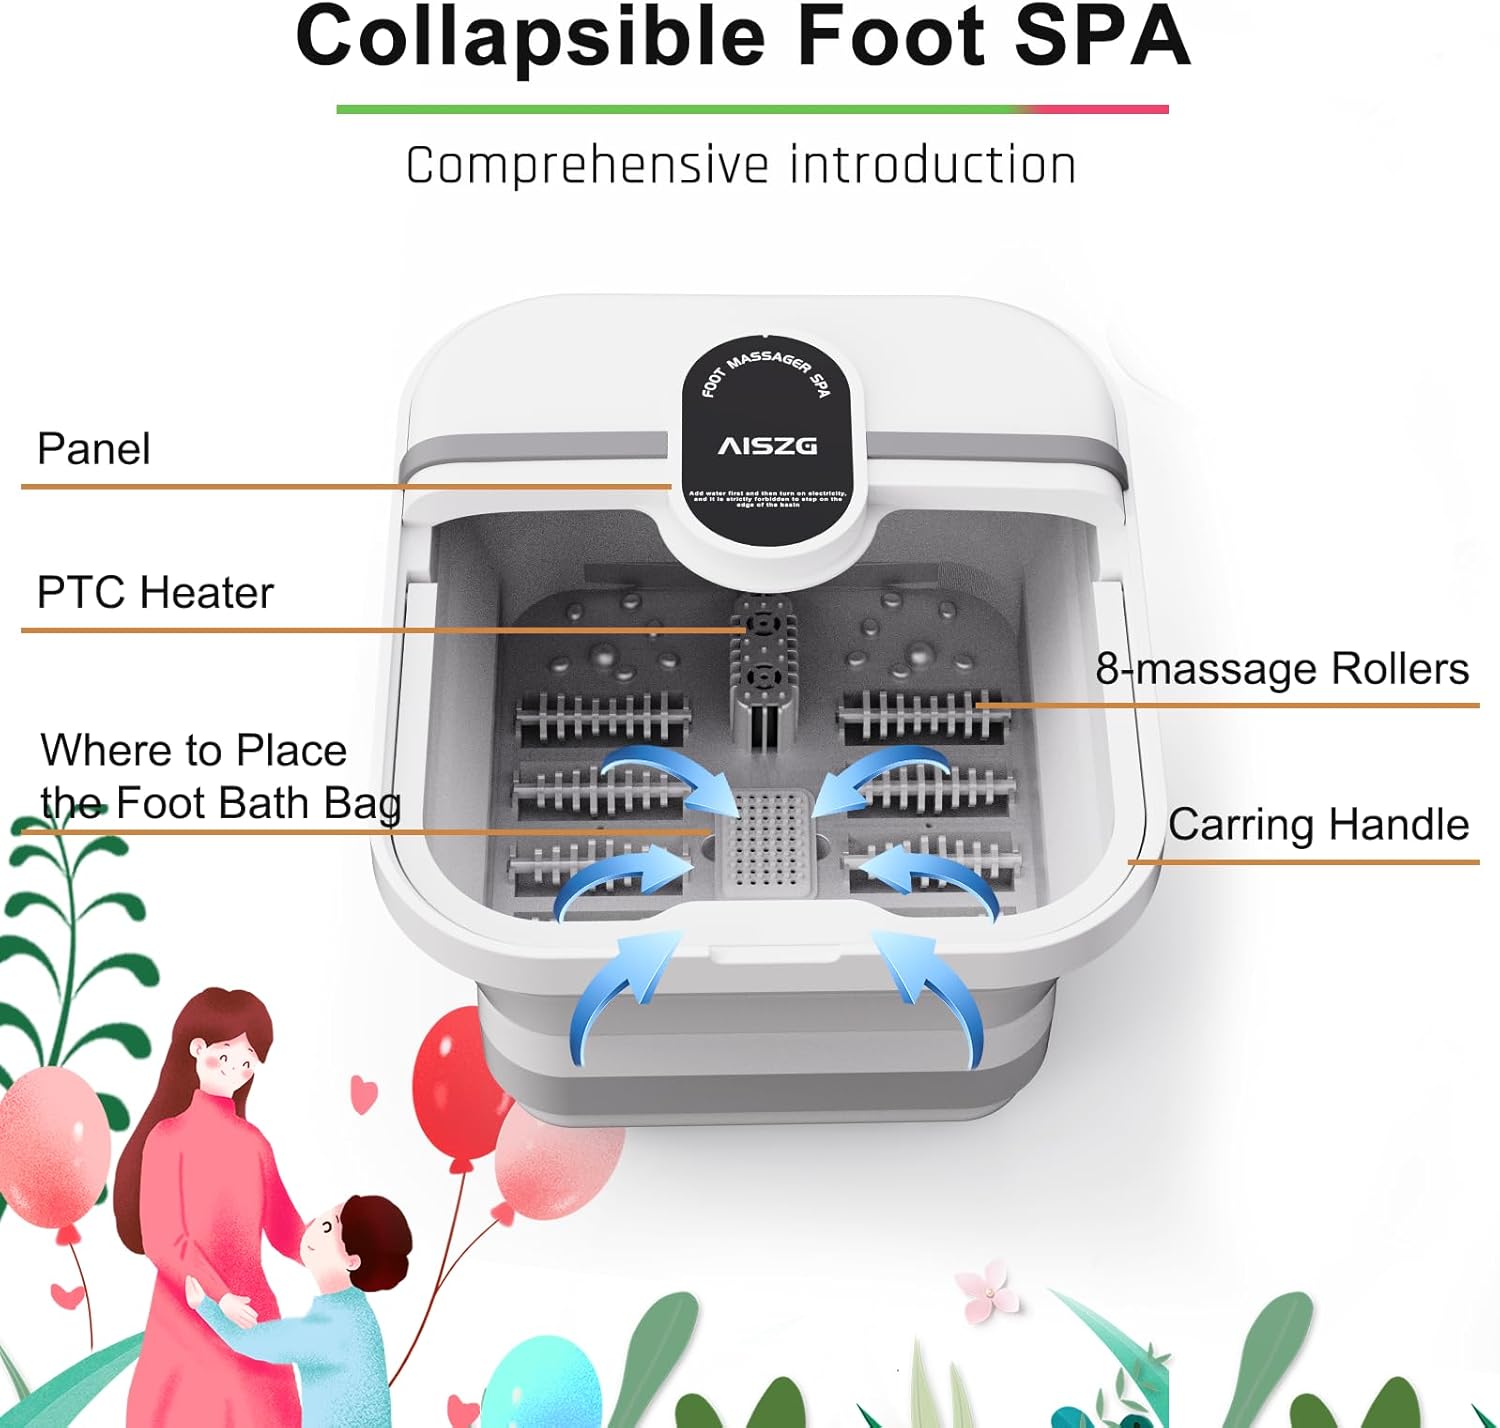
Figure 3.1: Labeled components of the foot spa.
Video 3.1: An unboxing video demonstrating the initial setup and components of a similar foot bath.
4. Operation
- Power On: Press the ON/OFF button on the control panel to turn on the unit. The display will show the current water temperature.
- Adjust Temperature: Use the 'TEMP ▲' and 'TEMP ▼' buttons to set your desired water temperature. The unit will automatically heat and maintain this temperature.
- Activate Bubbles: Press the 'BUBBLE' button to activate the soothing bubble massage.
- Red Light Therapy: Press the 'RED LIGHT' button to turn on the red light function.
- Use Massage Rollers: Gently move your feet back and forth over the 8 integrated massage rollers to stimulate pressure points.
- Use Pumice Stone: The central pumice stone can be used to gently exfoliate and smooth rough skin on your heels and soles.
- Set Timer: Use the 'TIMER' button to set a desired operating time. The unit will automatically shut off after the set time or after 30 minutes of continuous operation.
- Remote Control (if included): Some models may include a remote control for convenient adjustment of settings without bending over. Refer to the remote control's specific instructions if applicable.

Figure 4.1: Control panel for easy operation.
Video 4.1: Demonstration of the foot spa's heating, massage, and bubble functions.
5. Maintenance
- Power Off and Unplug: Always turn off the unit and unplug it from the power outlet before draining or cleaning.
- Drain Water: Locate the drainage outlet at the bottom side of the unit. Open the plug to release the water. You may need to tilt the unit slightly to ensure all water is drained.
- Clean the Unit: Wipe the interior and exterior of the foot spa with a soft, damp cloth. Do not use abrasive cleaners or harsh chemicals. Ensure all components are dry before storage.
- Storage: Once dry, collapse the foot spa by gently pushing the sides inward. Secure the support rod if applicable. Store in a cool, dry place away from direct sunlight.

Figure 5.1: Features for easy drainage and portability.

Figure 5.2: The foot spa's compact size when collapsed for easy storage.
6. Troubleshooting
- Unit Not Turning On: Ensure the power cord is securely plugged into a working outlet. Check the ON/OFF button.
- Water Not Heating: Verify that the temperature setting is correctly adjusted. Ensure the unit is filled with water above the minimum fill line. Heating may take a few minutes.
- No Bubbles: Check if the 'BUBBLE' button is activated. Ensure the unit is filled with sufficient water.
- Massage Rollers Not Working: The massage rollers are manual. Gently move your feet over them to activate the massage.
- Unusual Noise: If you hear unusual noises, immediately turn off and unplug the unit. Contact customer support.
7. Specifications
| Feature | Specification |
|---|---|
| Product Dimensions | 15.3 x 13.7 x 4.5 inches |
| Item Model Number | Foot-1 |
| Item Weight | 3.47 Pounds |
| Manufacturer | AISZG |
| Power Source | Corded Electric |
| Material | Stainless Steel |
| Use For | Foot |
8. Warranty and Support
For warranty information or customer support, please refer to the product packaging or contact the manufacturer directly. Keep your purchase receipt as proof of purchase.