1. Introduction
Thank you for purchasing the Bewinner Dilwe90y38cgo7q Mini Drone. This foldable FPV drone features a 1080P HD camera, altitude hold, and one-key start for an enjoyable flight experience. This manual provides essential information for safe operation, setup, and maintenance of your drone. Please read it thoroughly before use.
2. Safety Guidelines
- Always operate the drone in open areas, away from people, animals, and obstacles.
- Do not fly near airports, restricted airspace, or sensitive areas.
- Ensure the drone battery is fully charged and the remote control has fresh batteries before each flight.
- Keep fingers and hair away from rotating propellers.
- Do not operate in strong winds or adverse weather conditions.
- Supervise children during drone operation. Recommended age is 14 years and above.
- Turn off the drone and remote control when not in use.
3. Package Contents
Verify that all items are present in your package:
- 1 x Bewinner Mini Drone
- 1 x Remote Control
- 1 x Screwdriver
- 1 x USB Charging Cable
- 5 x Propellers (4 installed, 1 spare)
- 4 x Guard Frames
- 2 x User Manuals (this document)
- 1 x Storage Bag

Image: All components included in the Bewinner Mini Drone package, laid out for inspection.
4. Specifications
| Feature | Detail |
|---|---|
| Product Model | Dilwe90y38cgo7q (Internal reference: E58) |
| Material | ABS |
| Frequency | 2.4G |
| Color | Dark Blue |
| Unfolded Size | Approx. 28 x 22 cm (11 x 8.7 inches) |
| Folded Size | Approx. 12 x 7.5 cm (4.7 x 3 inches) |
| Drone Battery | 3.7V 600mAH Li-Ion Battery (integrated) |
| Charging Method | USB Port |
| Charging Time | Approx. 40 minutes |
| Flight Time | Approx. 8 minutes |
| Remote Control Batteries | 3 x AA Batteries (not included) |
| Remote Control Distance | Approx. 150 meters |
| Camera Mode | FPV (First Person View) |
| Video Resolution | 2048x1080 (1080P HD) |
| Image Resolution | 4096x2160 (4K) |
| Maximum Moving Speed | 10 Km/H |
| Maximum Ascent Speed | 3 Km/H |
| Age Recommendation | 14+ Years |

Image: The drone's camera, capable of 4K image and 1080P video recording.
5. Setup
5.1 Unfolding the Drone
Gently unfold the drone arms until they lock into position. Ensure all four arms are fully extended.
5.2 Installing Propeller Guards
Attach the four propeller guard frames to the drone's motor arms. These guards help protect the propellers from damage during flight.
5.3 Charging the Drone Battery
- Connect the drone's integrated battery to the USB charging cable.
- Plug the USB cable into a standard USB power adapter (e.g., computer USB port, phone charger).
- The charging indicator will show the charging status. Charging typically takes about 40 minutes.
- Disconnect the drone once charging is complete.
5.4 Installing Remote Control Batteries
Open the battery compartment on the back of the remote control. Insert 3 AA batteries (not included), ensuring correct polarity. Close the compartment securely.
5.5 Remote Control Overview

Image: Labeled diagram of the remote control, showing functions like Headless Mode, One Key Return, Photo/Video, Speed Switch, One Key Take-off, One Key Landing, Fine Tuning, 360 Rolling, and Emergency Stop.
- Left Joystick: Ascend/Descend, Turn Left/Right
- Right Joystick: Forward/Backward, Fly Left/Right
- One Key Take-off: Initiates automatic takeoff.
- One Key Landing: Initiates automatic landing.
- Headless Mode: Activates headless flight.
- One Key Return: Initiates automatic return to the takeoff point.
- Photo/Video Button: Press for photo, long press for video.
- Speed Switch: Toggles between high and low-speed modes.
- 360 Rolling/Emergency Stop: Performs a 360-degree roll or emergency stop.
- Fine Tuning: Adjusts drone drift (Rightward, Leftward, Forward, Backward).
- ON/OFF Switch: Powers the remote control on or off.
6. Operating Instructions
6.1 Power On and Frequency Matching
- Place the drone on a flat, level surface.
- Long press the power button on the drone to turn it on. The drone's indicator lights will flash.
- Turn on the remote control using its ON/OFF switch.
- Move the left throttle stick (joystick) fully up, then fully down. You will hear a sound, and the drone's indicator lights will stop flashing, indicating successful frequency matching.
6.2 Takeoff and Landing
- One Key Take-off: After successful frequency matching, press the One Key Take-off button on the remote control. The drone will automatically ascend and hover at a stable altitude.
- Manual Take-off: Alternatively, after frequency matching, push both joysticks down and outwards simultaneously to unlock the motors. Then, push the left joystick up to ascend.
- One Key Landing: During flight, press the One Key Landing button. The drone will automatically descend and land gently.
- Manual Landing: Slowly pull the left joystick down to descend and land the drone. Once landed, push both joysticks down and inwards to lock the motors.

Image: Visual representation of One Key Return and One Key Takeoff/Landing features, simplifying drone operation.
6.3 Flight Controls
- Ascend/Descend: Push the left joystick up to ascend, pull down to descend.
- Forward/Backward: Push the right joystick up to fly forward, pull down to fly backward.
- Turn Left/Right: Push the left joystick left to turn left, push right to turn right.
- Fly Left/Right (Sideways): Push the right joystick left to fly left, push right to fly right.
6.4 Altitude Hold
The drone features an atmospheric pressure altitude hold function. After takeoff, release the left joystick, and the drone will maintain its current altitude, allowing for stable hovering and easier control for photography.

Image: The drone demonstrating stable hovering due to its altitude hold function, making aerial photography convenient.
6.5 Headless Mode
In Headless Mode, the drone's orientation is relative to the pilot, regardless of the drone's actual front direction. This simplifies flight control, especially for beginners.
- Press the Headless Mode button on the remote control to activate.
- Press it again to exit Headless Mode.

Image: Depiction of Headless Mode, where the drone flies relative to the remote, and Trajectory Flight, where the drone follows a drawn path on a mobile device.
6.6 One Key Return
When in Headless Mode, pressing the One Key Return button will cause the drone to fly back towards the remote control's position. This is useful if you lose sight of the drone's orientation.
6.7 Speed Modes
The drone offers high and low-speed modes. Press the Speed Switch button on the remote control to toggle between them. Low speed is recommended for beginners, while high speed provides greater torque for experienced pilots or windy conditions.
6.8 360-Degree Rolling
To perform a 360-degree roll:
- Fly the drone to a height of at least 3 meters.
- Press the 360 Rolling button.
- Immediately push the right joystick in any direction (forward, backward, left, or right) to execute the roll.
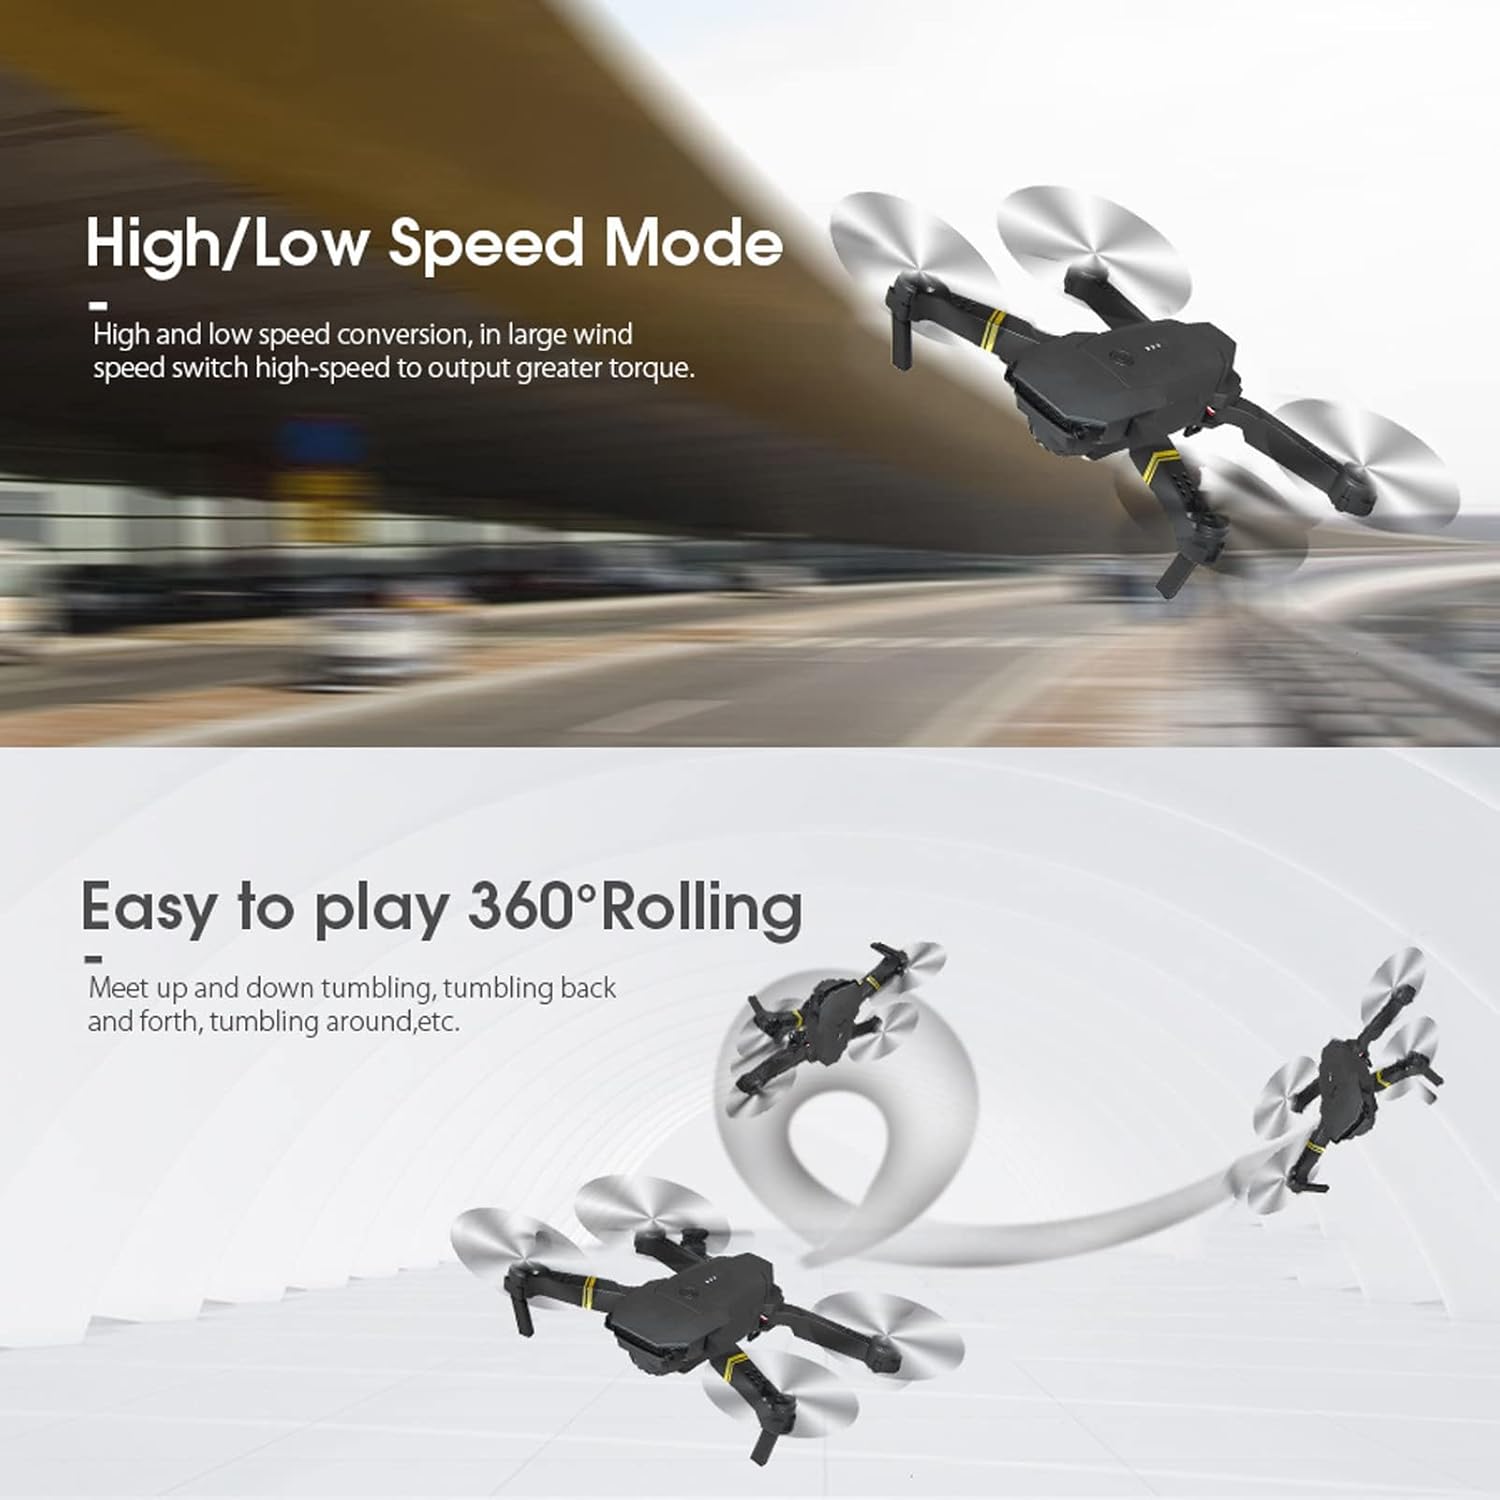
Image: Demonstrations of the drone's High/Low Speed Mode and its ability to perform 360-degree rolling stunts.
6.9 APP Control and FPV
The drone supports control via a mobile application, enabling real-time FPV (First Person View) and advanced features.
- Download the dedicated drone APP from your mobile device's app store (refer to the packaging or quick start guide for the specific APP name/QR code).
- Turn on the drone.
- On your mobile device, go to Wi-Fi settings and connect to the drone's Wi-Fi network (usually named something like 'WIFI-UFO' or similar, followed by a series of numbers/letters).
- Open the drone APP. You should see a live video feed from the drone's camera.
- Use the APP interface to control the drone, take photos, record videos, and access features like Trajectory Flight.

Image: The drone, remote control, and a smartphone showing the live FPV feed, highlighting the Wi-Fi APP compatibility for an immersive real-time experience.
7. Maintenance
- Cleaning: Use a soft, dry cloth to clean the drone and remote control. Do not use water or chemical cleaners.
- Propeller Replacement: If a propeller is damaged, use the included screwdriver to carefully remove the old propeller and install a new one. Ensure the correct propeller type (A or B) is installed on the corresponding motor.
- Battery Care: Store the drone battery in a cool, dry place. Do not overcharge or over-discharge the battery. If not used for a long time, charge it periodically to maintain battery health.
- Storage: When not in use, fold the drone and store it in the provided storage bag to protect it from dust and damage.
8. Troubleshooting
| Problem | Possible Cause | Solution |
|---|---|---|
| Drone does not respond to remote control. | Not paired, low remote battery, drone battery low. | Perform frequency matching again. Replace remote batteries. Charge drone battery. |
| Drone drifts during flight. | Not calibrated, environmental factors (wind). | Land the drone and recalibrate (refer to quick start guide for calibration steps). Use fine-tuning buttons on the remote. Fly in calm conditions. |
| Short flight time. | Battery not fully charged, old battery, aggressive flying. | Ensure full charge (40 minutes). Consider replacing battery if old. Fly more gently. |
| Poor camera image/video quality. | Low light, camera lens dirty, Wi-Fi interference. | Ensure good lighting. Clean camera lens. Fly in areas with minimal Wi-Fi interference. |
| APP not connecting to drone Wi-Fi. | Drone not powered on, incorrect Wi-Fi selected, APP issue. | Ensure drone is on. Select the correct Wi-Fi network. Restart APP and drone. |
9. Warranty and Support
For warranty information or technical support, please refer to the purchase platform or contact Bewinner customer service directly. Keep your purchase receipt as proof of purchase.
