1. Introduction
Thank you for choosing the GOPLUS 3x3m Pop-Up Gazebo with Extended Awning. This manual provides essential information for the safe and efficient assembly, operation, and maintenance of your product. Please read it thoroughly before use and retain it for future reference.
This gazebo is designed for temporary outdoor shelter, offering protection from sun and light rain. It features durable Oxford fabric, UV protection, adjustable height settings, and extended awnings for additional shade. The portable design includes a wheeled carrying bag for convenient transport and storage.
2. Safety Information
- Weather Conditions: This gazebo is intended for use in calm weather conditions. Do not use in strong winds, heavy rain, or snow, as this may cause damage to the product or personal injury.
- Anchoring: Always secure the gazebo firmly to the ground using the provided ground stakes, wind ropes, and sandbags. Failure to do so may result in the gazebo being lifted by wind.
- Assembly: Assembly should be performed by at least two adults. Ensure all parts are correctly installed and locked before use.
- Clearance: Ensure adequate clearance around the gazebo, away from power lines, trees, or other structures.
- Fire Safety: Keep all flame and heat sources away from the gazebo fabric. The fabric is not fireproof.
- Children: Keep children away from the gazebo during assembly and disassembly to prevent injury.
3. Package Contents
Please verify that all components listed below are present before beginning assembly. If any parts are missing or damaged, contact customer support.
- 1 x Canopy Frame
- 1 x Canopy Top (Fabric)
- 4 x Wind Ropes
- 8 x Ground Stakes
- 4 x Sandbags
- 1 x Carrying Bag
- 1 x Instruction Manual

Figure 3.1: Packing List and Components. This image displays all the items included in the package, such as the folded frame, canopy fabric, ropes, stakes, sandbags, and the wheeled carrying bag.
4. Setup Instructions
Follow these steps for proper assembly:
- Step 1: Open the Frame. With two people, gently pull the legs of the folded canopy frame outwards until it is partially open.
- Step 2: Attach Canopy Top. Drape the canopy fabric over the partially opened frame. Secure the corners of the fabric to the frame.
- Step 3: Extend the Frame. From underneath, push the central locking mechanism upwards until it clicks into place, fully extending the frame.
- Step 4: Adjust Height. Press the height-adjustable buttons on each leg and extend the legs to your desired height (270cm, 280cm, or 290cm). Ensure all four legs are set to the same height.
- Step 5: Secure the Gazebo. Fill the sandbags with sand or other heavy material and attach them to the gazebo legs. Use the ground stakes to anchor the legs to the ground. Attach the wind ropes to the canopy corners and stake them into the ground at an angle, pulling taut.

Figure 4.1: Pop-Up Gazebo Setup Steps. This image illustrates the three main steps for setting up the gazebo: expanding the frame, attaching the canopy and pushing the center up, and adjusting the leg height.
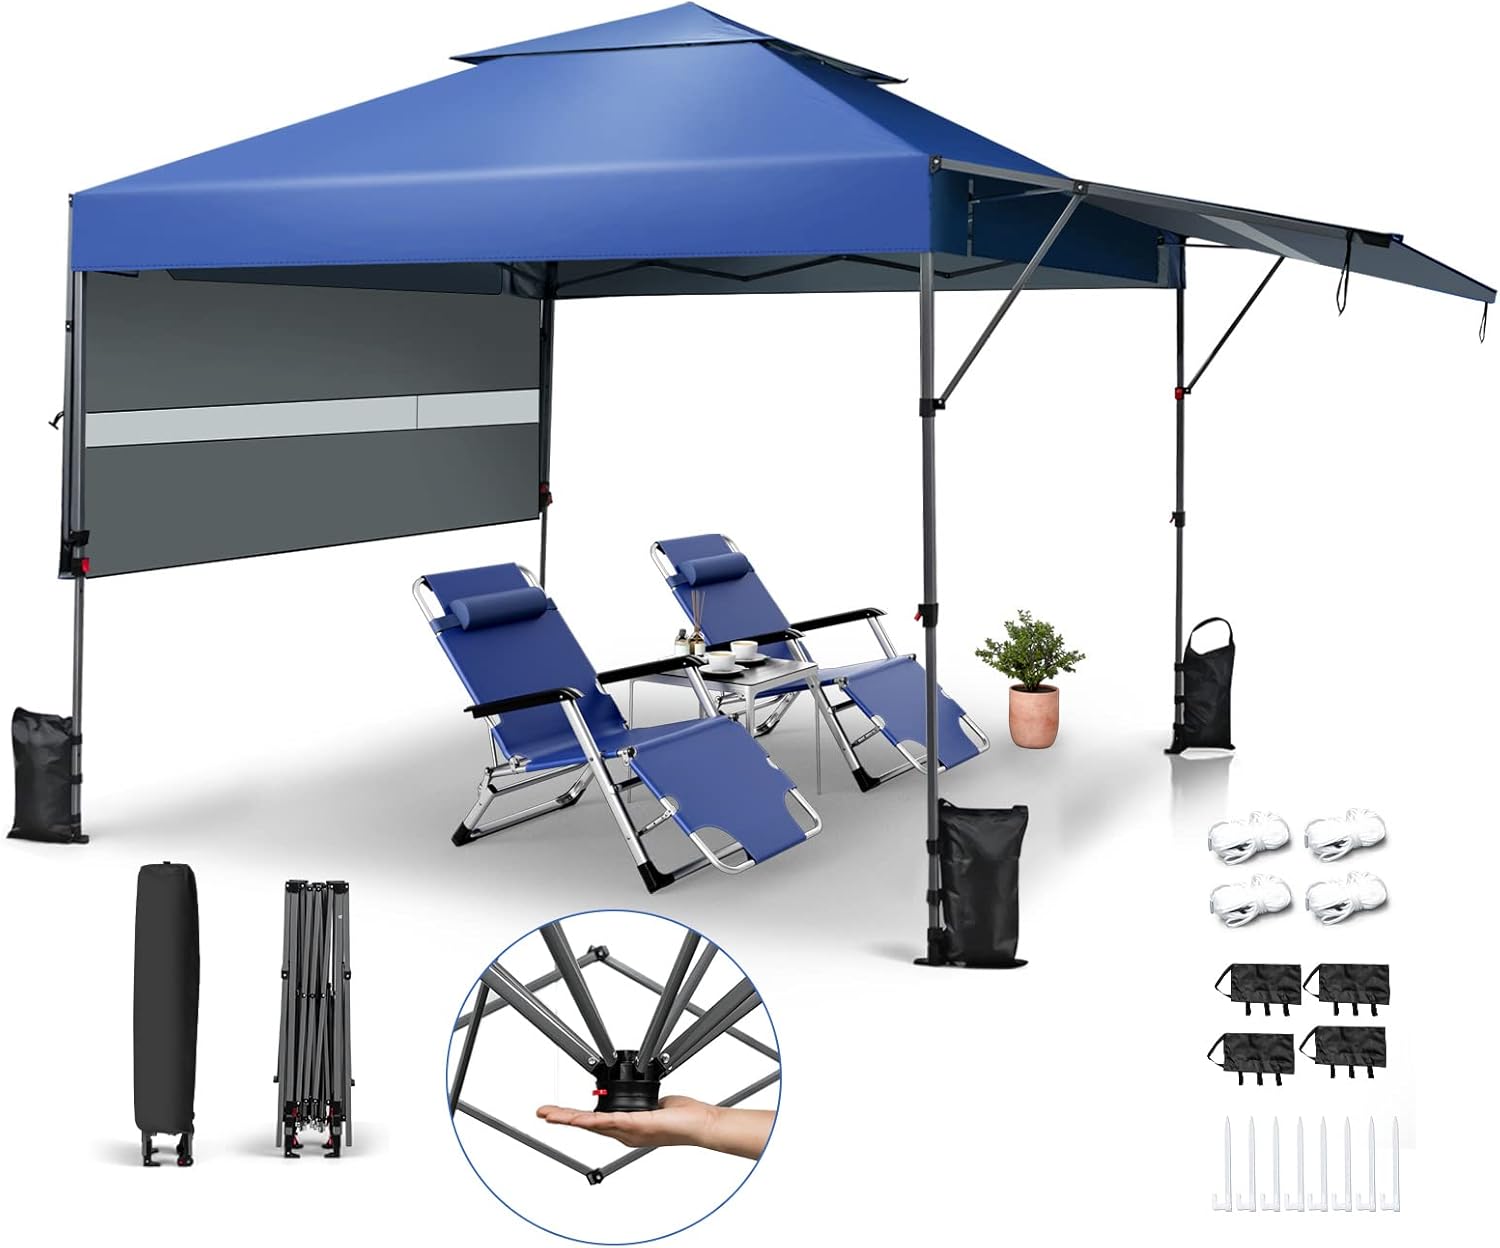
Figure 4.2: Assembled Gazebo with Accessories. This image shows the fully assembled gazebo with its extended awning, along with two lounge chairs, a small plant, and the included sandbags, ropes, and stakes.
5. Operating Instructions
5.1 Height Adjustment
The gazebo offers three adjustable height positions: 270cm, 280cm, and 290cm. To adjust the height, locate the red button on each leg. Press the button and slide the inner leg up or down to the desired position. Ensure the button locks securely into place at the chosen height for all four legs.
5.2 Extended Awnings
The gazebo features extended awnings on two sides for additional shade and protection. To deploy an awning, pull it outwards and lock the support arm into position. When not in use, the awnings can be folded back and secured with the integrated straps to prevent flapping in the wind or rain.

Figure 5.1: Awning Operation and Ventilation. This image highlights the ventilated top for airflow, the double half-blinds for extra shade, and shows how to pull out and lock the awning support arm, and how to fix the awning with straps when folded.
6. Maintenance
- Cleaning: Clean the canopy fabric with mild soap and water. Do not use harsh chemicals or abrasive cleaners. Rinse thoroughly and allow to air dry completely before folding and storing.
- Storage: Ensure the gazebo is completely dry before folding and placing it into the carrying bag. Store in a cool, dry place away from direct sunlight to prolong its lifespan.
- Frame Inspection: Periodically inspect the metal frame for any signs of damage, rust, or loose connections. Tighten any loose bolts or screws.
- Fabric Inspection: Check the canopy fabric for any tears, holes, or signs of wear. Small repairs can extend the life of the product.
7. Troubleshooting
- Gazebo is unstable: Ensure all legs are fully extended and locked at the same height. Verify that ground stakes are firmly in place, wind ropes are taut, and sandbags are filled and attached.
- Difficulty opening/closing the frame: Check for any obstructions in the frame's joints. Ensure the central locking mechanism is clean and free of debris. Apply a silicone-based lubricant to moving parts if necessary.
- Water pooling on canopy: Ensure the canopy is properly stretched and secured to the frame. Adjust leg heights if necessary to create proper tension and allow water runoff.
- Awning not staying extended: Check that the support arm is fully locked into its position.
8. Specifications
| Feature | Specification |
|---|---|
| Model Number | OQ21955FR |
| Dimensions (L x W x H) | 300 x 300 x 290 cm |
| Adjustable Height | 270 / 280 / 290 cm |
| Extended Awning Dimension | 125 x 300 cm (L x W) |
| Material | Oxford Fabric, Powder-coated Metal Frame |
| Water Resistance | Waterproof |
| UV Protection | Yes |
| Color | Blue |
| Gross Weight | 25 kg |

Figure 8.1: Product Dimensions and Adjustable Heights. This image provides a detailed diagram of the gazebo's dimensions, including the three adjustable height options and the size of the extended awning.
9. Warranty and Support
Specific warranty information for this product is not provided in the available documentation. For warranty claims, technical support, or replacement parts, please contact the retailer or manufacturer directly using the contact information provided at the point of purchase.