Product Overview
The TXL Atomic Clock with Backlight is a versatile 14.2-inch digital wall clock designed for accurate timekeeping and convenience. It features automatic time synchronization via radio frequencies, a large display for easy readability, and a built-in ambient light sensor for adjustable backlight. This battery-operated clock also displays day, date, and temperature, making it suitable for various indoor environments such as bedrooms, living rooms, and offices.

Figure 1: Front view of the TXL Atomic Clock, displaying time, day, date, and indicating atomic synchronization.
Setup Instructions
1. Battery Installation
The TXL Atomic Clock requires 4 AA batteries for main operation and 2 AAA batteries for backup (all included). Ensure correct polarity when inserting batteries.
- Locate the battery compartments on the back of the clock.
- Insert 4 AA batteries into the main compartment.
- Insert 2 AAA batteries into the backup compartment.
- Close the battery covers securely.

Figure 2: Rear view of the clock, illustrating the battery compartments and fold-out stand.
2. Initial Time Synchronization (Atomic Feature)
The clock is designed to automatically set itself by receiving radio frequencies from NIST's Colorado broadcast. For optimal reception, place the clock near a window or in an open area, away from electronic devices that may cause interference.
- After battery installation, the clock will begin searching for the atomic time signal. This process may take several minutes or up to 24 hours depending on signal strength.
- Once the signal is received, the clock will automatically display the correct time, day, and date.
- Ensure the DST (Daylight Saving Time) setting is enabled if your region observes it.

Figure 3: Steps for automatic time setting, highlighting the clock's auto-synchronization feature.
3. Placement Options
The clock offers flexible placement options:
- Wall Mount: Use the two keyholes on the back of the clock to hang it securely on a wall.
- Tabletop/Shelf Placement: Utilize the fold-out backstand for stable placement on any flat surface.
Operating Instructions
1. Time and Date Display
The clock displays time, day of the week, month, and date. It supports both 12-hour and 24-hour formats.
- To switch between 12-hour and 24-hour format, press the "+/12/24" button located on the back of the clock.
- The date display cycles automatically or can be manually adjusted.

Figure 4: Overview of the clock's display features, including time format and DST settings.
2. Temperature Display
The clock provides an indoor temperature display in either Celsius (°C) or Fahrenheit (°F).
- To switch between °C and °F, press the "-/°C/°F" button on the back of the clock.
3. Backlight Adjustment
The built-in ambient light sensor automatically illuminates the screen in dark conditions. There are two levels of adjustable brightness, and the backlight can also be turned off.
- Adjust the backlight intensity using the dedicated switch or button (refer to the specific button layout on your clock's rear panel).
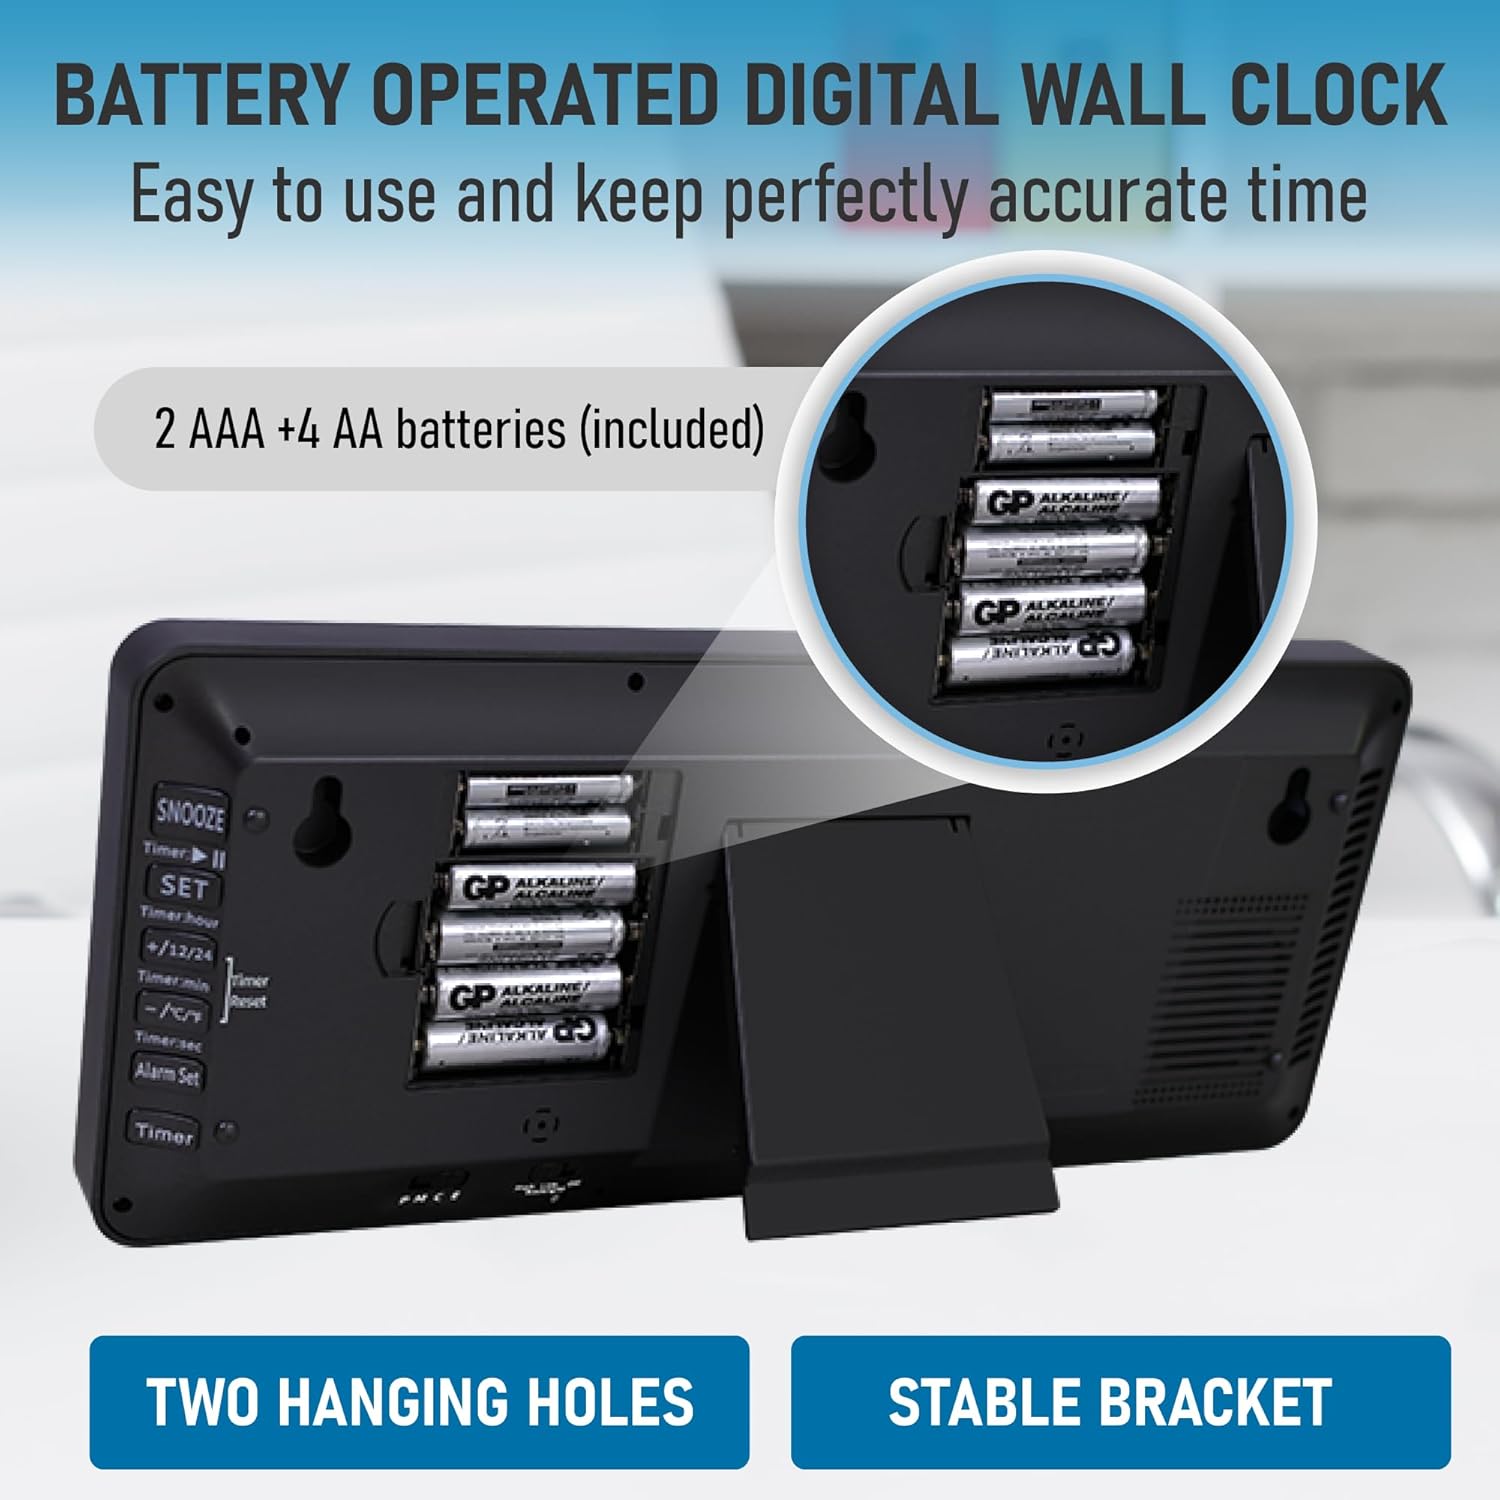
Figure 5: The clock's backlight feature, demonstrating visibility in low light conditions and brightness levels.
4. Alarm Function
The clock includes an alarm function. Refer to the buttons on the back for setting and activating the alarm.
- Press the "Alarm Set" button to enter alarm setting mode.
- Use the "+" and "-" buttons to adjust the alarm time.
- Press "Set" again to confirm and exit.
- To activate/deactivate the alarm, use the dedicated alarm ON/OFF switch or button.

Figure 6: The clock's multifunctionality, including Timer, Clock, and Alarm modes.
Key Features
The TXL Atomic Clock is equipped with several features to enhance its utility and user experience:
- Atomic Time Synchronization: Automatically sets and adjusts time based on the NIST WWVB radio broadcast, ensuring extreme accuracy and automatic Daylight Saving Time adjustments.
- Large Digital Display: The 14.2-inch screen with large, easy-to-read numbers provides clear visibility from a distance.
- Adjustable Backlight: Features an ambient light sensor that automatically activates the backlight in low light, with two adjustable brightness levels.
- Temperature and Date Display: Shows indoor temperature in °C or °F, along with the day of the week, month, and date.
- Battery Operated: Provides flexibility for placement without the need for power outlets.
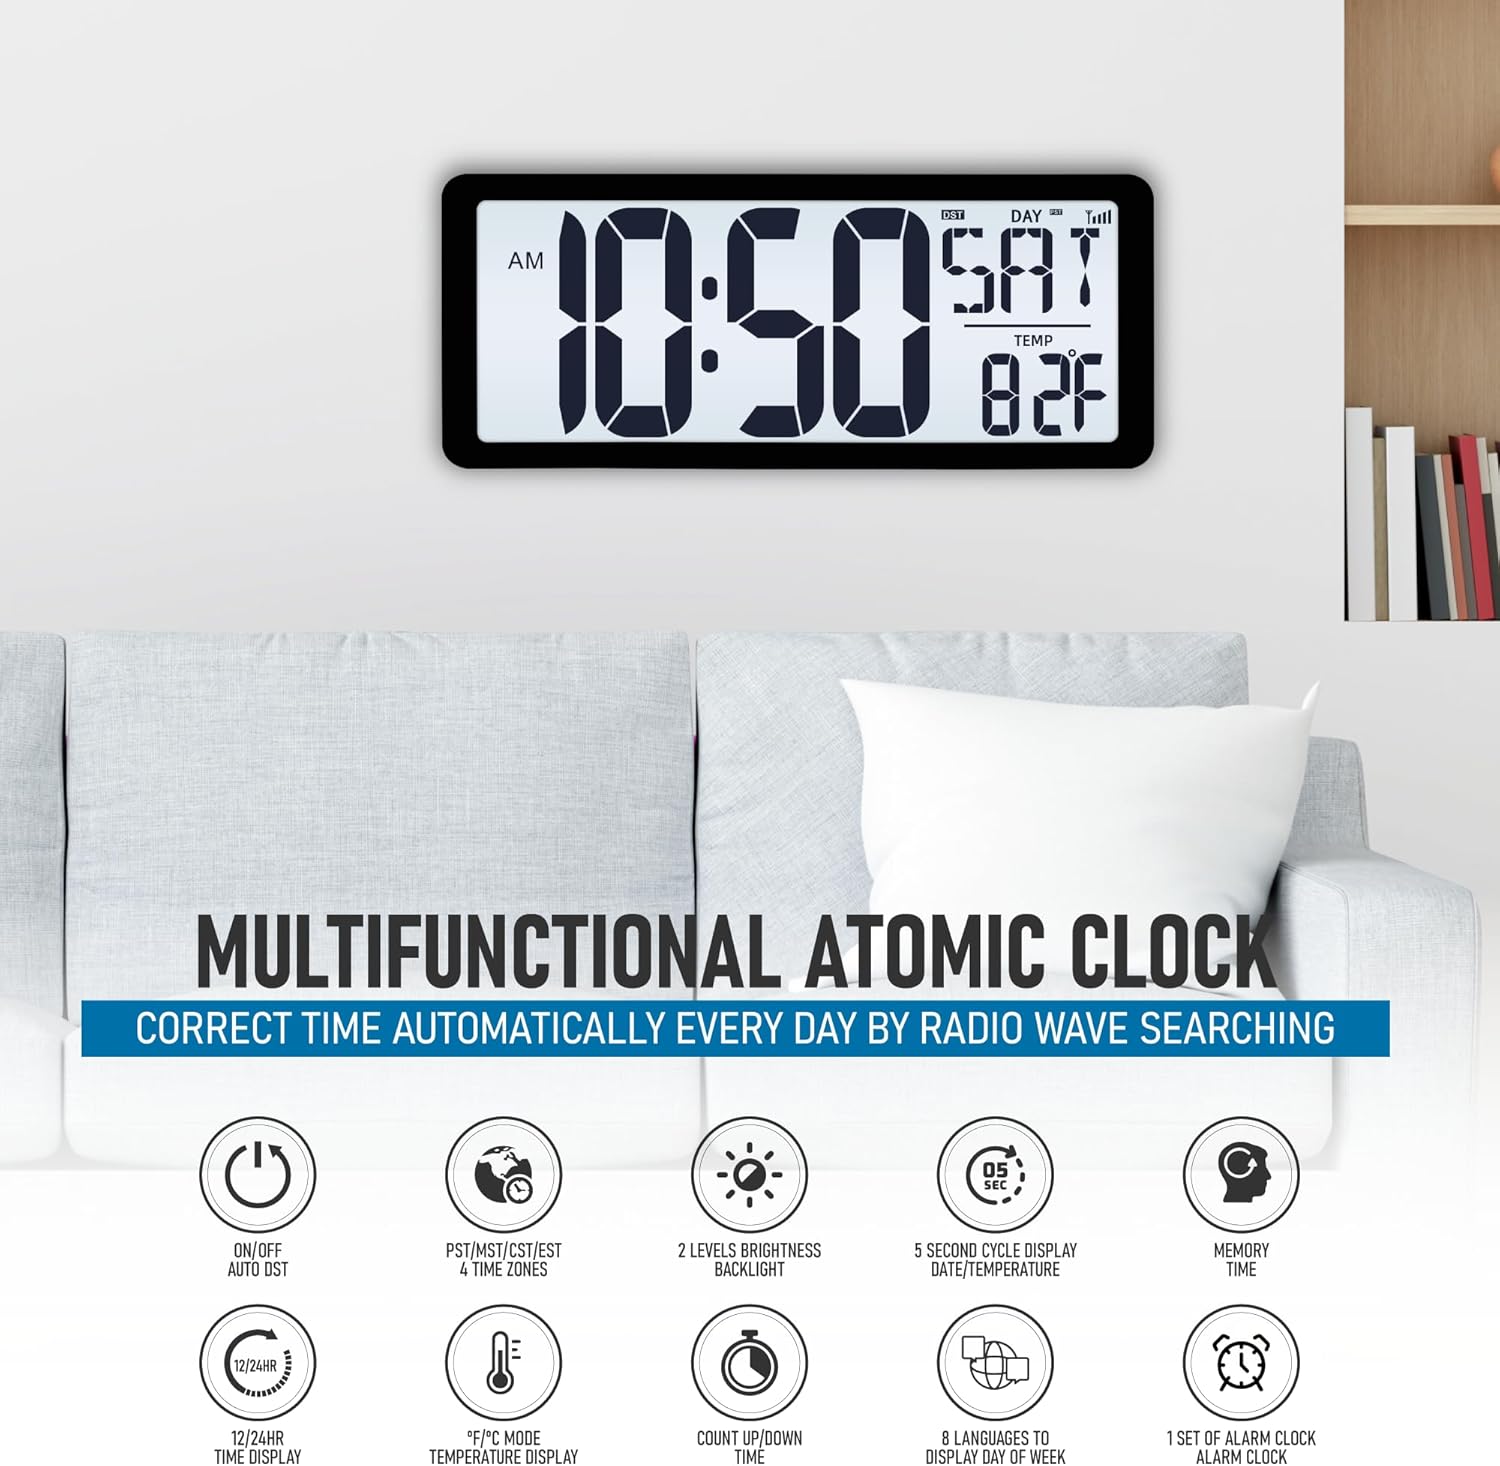
Figure 7: A visual summary of the clock's various functions and capabilities.
Maintenance
1. Battery Replacement
When the display dims or the clock stops functioning, it's time to replace the batteries. Always replace all batteries at once with new ones of the same type (AA and AAA).
- Open the battery compartments on the back of the clock.
- Remove the old batteries.
- Insert new batteries, ensuring correct polarity (+ and -).
- Close the battery covers. The clock will attempt to re-synchronize with the atomic signal.
2. Cleaning
To clean the clock, use a soft, dry cloth. Do not use abrasive cleaners, solvents, or spray directly onto the clock, as this may damage the display or casing.
Troubleshooting
| Problem | Possible Cause | Solution |
|---|---|---|
| Clock not setting time automatically. | Weak atomic signal reception. Interference from electronics. Incorrect time zone setting. |
|
| Display is dim or blank. | Low batteries. Backlight turned off or set to lowest brightness. |
|
| Temperature reading is inaccurate. | Clock placed near a heat source or vent. |
|
| Cannot manually set time/date. | Buttons not responding. Atomic synchronization overriding manual input. |
|
Specifications
| Feature | Detail |
|---|---|
| Brand | TXL |
| Model Number | 3039-AC-B |
| Display Type | Digital |
| Power Source | Battery Powered (4 AA, 2 AAA included) |
| Product Dimensions | 14.2"W x 5.9"H |
| Special Features | Adjustable Brightness, Daylight Saving, Illuminated, Large Display, Temperature Display, Atomic Synchronization |
| Mounting Type | Wall Mount, Tabletop |
| Material | Acrylonitrile Butadiene Styrene (ABS) |
| Alarm Clock | Yes |
| Operation Mode | Atomic |
Warranty and Support
For warranty information or technical support, please refer to the contact details provided with your product packaging or visit the official TXL website. Keep your purchase receipt for any warranty claims.
You can also visit the TXL Store on Amazon for more product information and customer service options.
Important Notes
- Avoid exposing the clock to extreme temperatures, direct sunlight, or high humidity.
- Do not disassemble the clock; this will void the warranty.
- Dispose of used batteries responsibly according to local regulations.