1. Introduction
Thank you for choosing the Elprico Smart Security Camera. This device is designed to provide reliable home monitoring with its 1080p HD video, pan and tilt capabilities, two-way audio, and advanced motion detection. This manual will guide you through the installation, operation, and maintenance of your camera to ensure optimal performance. Please read this manual thoroughly before use and retain it for future reference.

Figure 1: Elprico Smart Security Camera. This image shows the compact, white dome-shaped camera with a black lens housing, designed for indoor surveillance.
2. Product Features
The Elprico Smart Security Camera offers a range of features for comprehensive home monitoring:
- 1080p HD Video & Clear Night Vision: Capture crisp, clear video with 1080p resolution. The camera provides a night vision distance of up to 9.8 meters, with options for infrared or full-color night vision.
- Wide-Angle Pan & Tilt: Monitor a broad area with 355° horizontal (pan) and 90° vertical (tilt) rotation, controllable via the mobile application.
- Real-Time Monitoring & Two-Way Audio: Access live video feeds and communicate through the built-in microphone and speaker, allowing for two-way conversations.
- Smart Tracking & Motion Detection: The camera automatically tracks detected movement and sends real-time alerts to your smartphone, ensuring you are informed of any significant activity.
- Flexible Storage Options: Supports both cloud storage and local storage via a Micro SD card (up to 128GB, not included).
- Multi-User & Multi-Device Support: Share camera access with family members and view the feed on multiple devices simultaneously.
- 2.4GHz WiFi Connectivity: Connects wirelessly to your home network for easy setup and remote access.

Figure 2: 1080p HD Lens Clarity. This image illustrates the difference between a blurry and a clear image, highlighting the camera's 1080p HD lens with a large aperture for full-color, delicate, and clear picture quality.
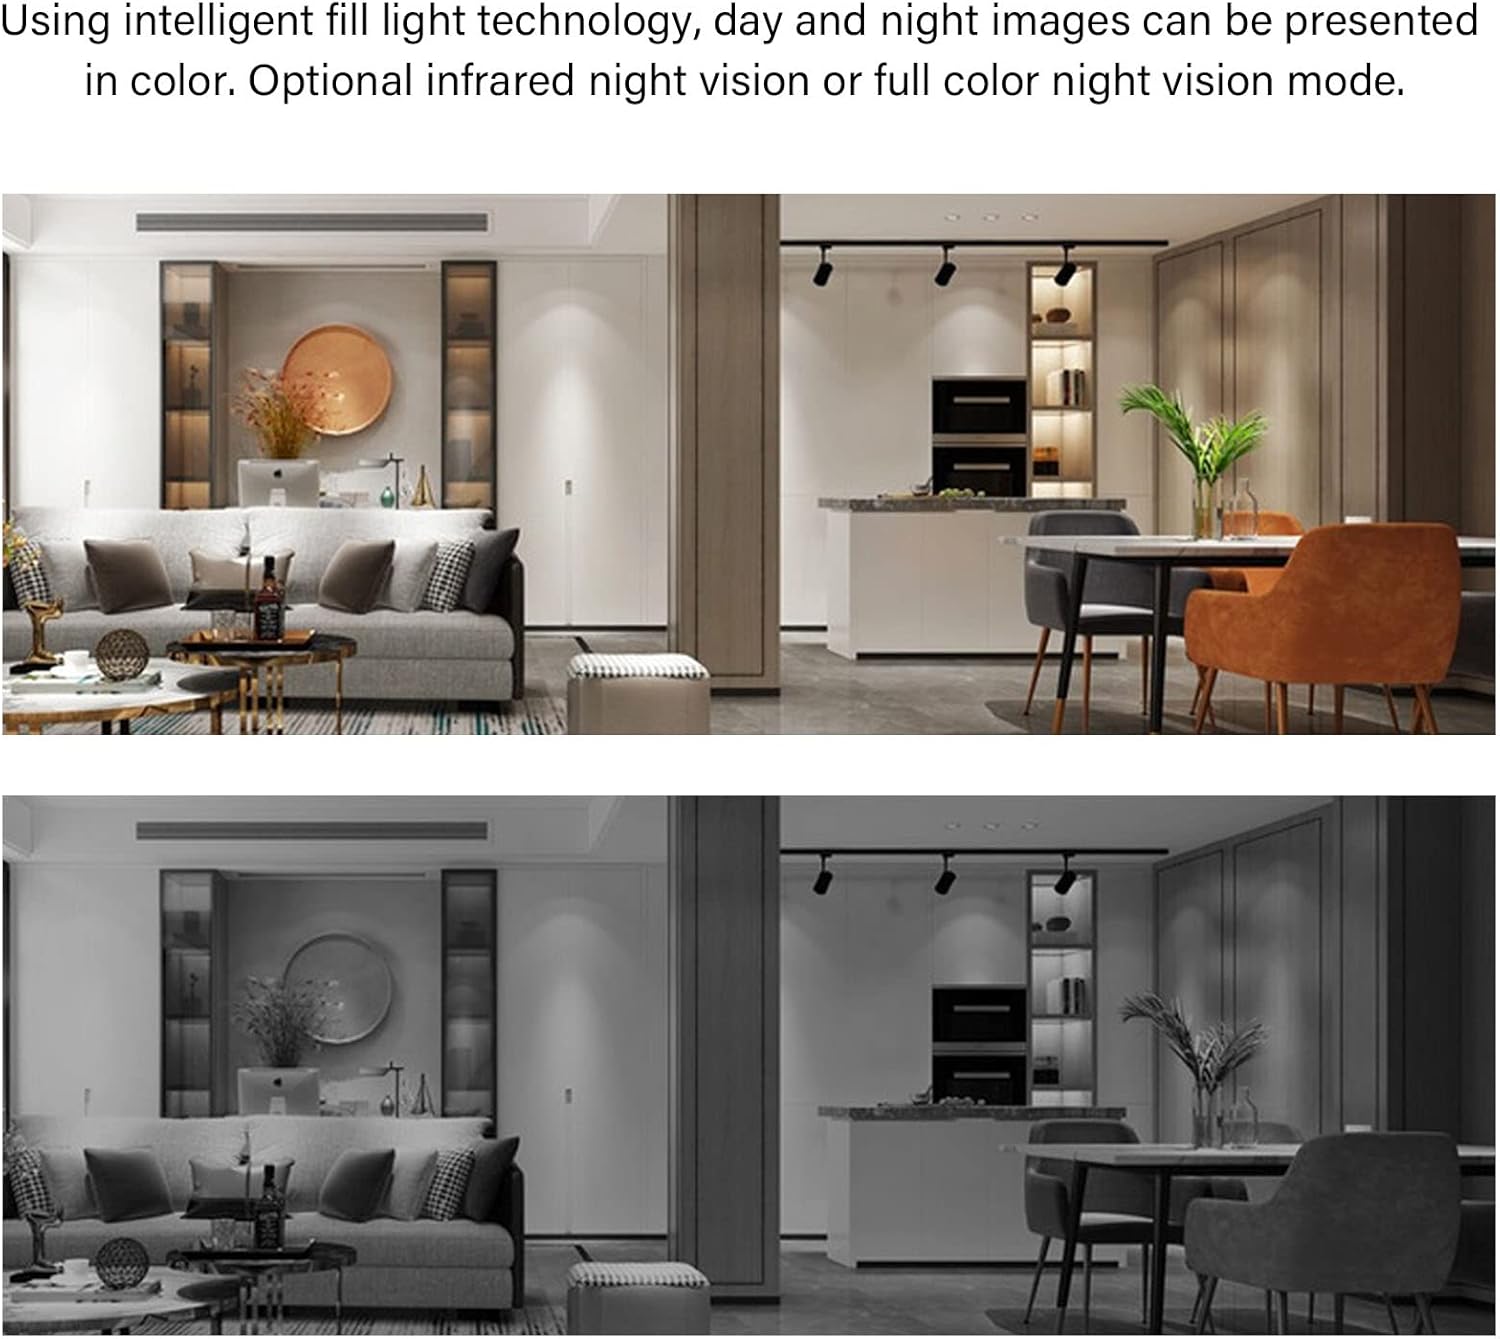
Figure 3: Day and Night Vision Modes. This image displays a comparison of a room viewed in daylight (top) and the same room viewed using the camera's intelligent fill light technology for night vision (bottom), showing clear images even in low light.

Figure 4: Flexible Pan and Tilt Rotation. This diagram shows the camera's dome head with arrows indicating its ability to rotate horizontally (355°) and vertically (90°), providing comprehensive home security coverage.
3. Setup Guide
Follow these steps to set up your Elprico Smart Security Camera:
- Unpack the Camera: Carefully remove all components from the packaging. Ensure you have the camera, power adapter, and mounting accessories (if included).
- Power On: Connect the camera to a power source using the provided power adapter. The camera will power on and typically indicate readiness with an LED light.
- Download the App: Search for the designated mobile application (usually mentioned in a quick start guide or on the packaging) on the App Store (for iOS) or Google Play Store (for Android) and install it on your smartphone.
- Create an Account: Open the app and follow the on-screen instructions to create a new user account or log in if you already have one.
- Add Camera: In the app, select the option to add a new device. Follow the in-app instructions to pair your camera. This usually involves scanning a QR code on the camera or connecting to the camera's temporary Wi-Fi hotspot. Ensure your smartphone is connected to a 2.4GHz Wi-Fi network during this process.
- Wi-Fi Connection: Configure the camera to connect to your home's 2.4GHz Wi-Fi network through the app. The camera does not support 5GHz Wi-Fi.
- Install Micro SD Card (Optional): If you plan to use local storage, insert a Micro SD card (up to 128GB, not included) into the camera's designated slot. Ensure the camera is powered off before inserting or removing the card.
- Mount the Camera (Optional): Choose a suitable location for your camera. Use the provided mounting accessories to secure it if desired. Ensure the camera has a clear view of the area you wish to monitor and is within range of your Wi-Fi signal.
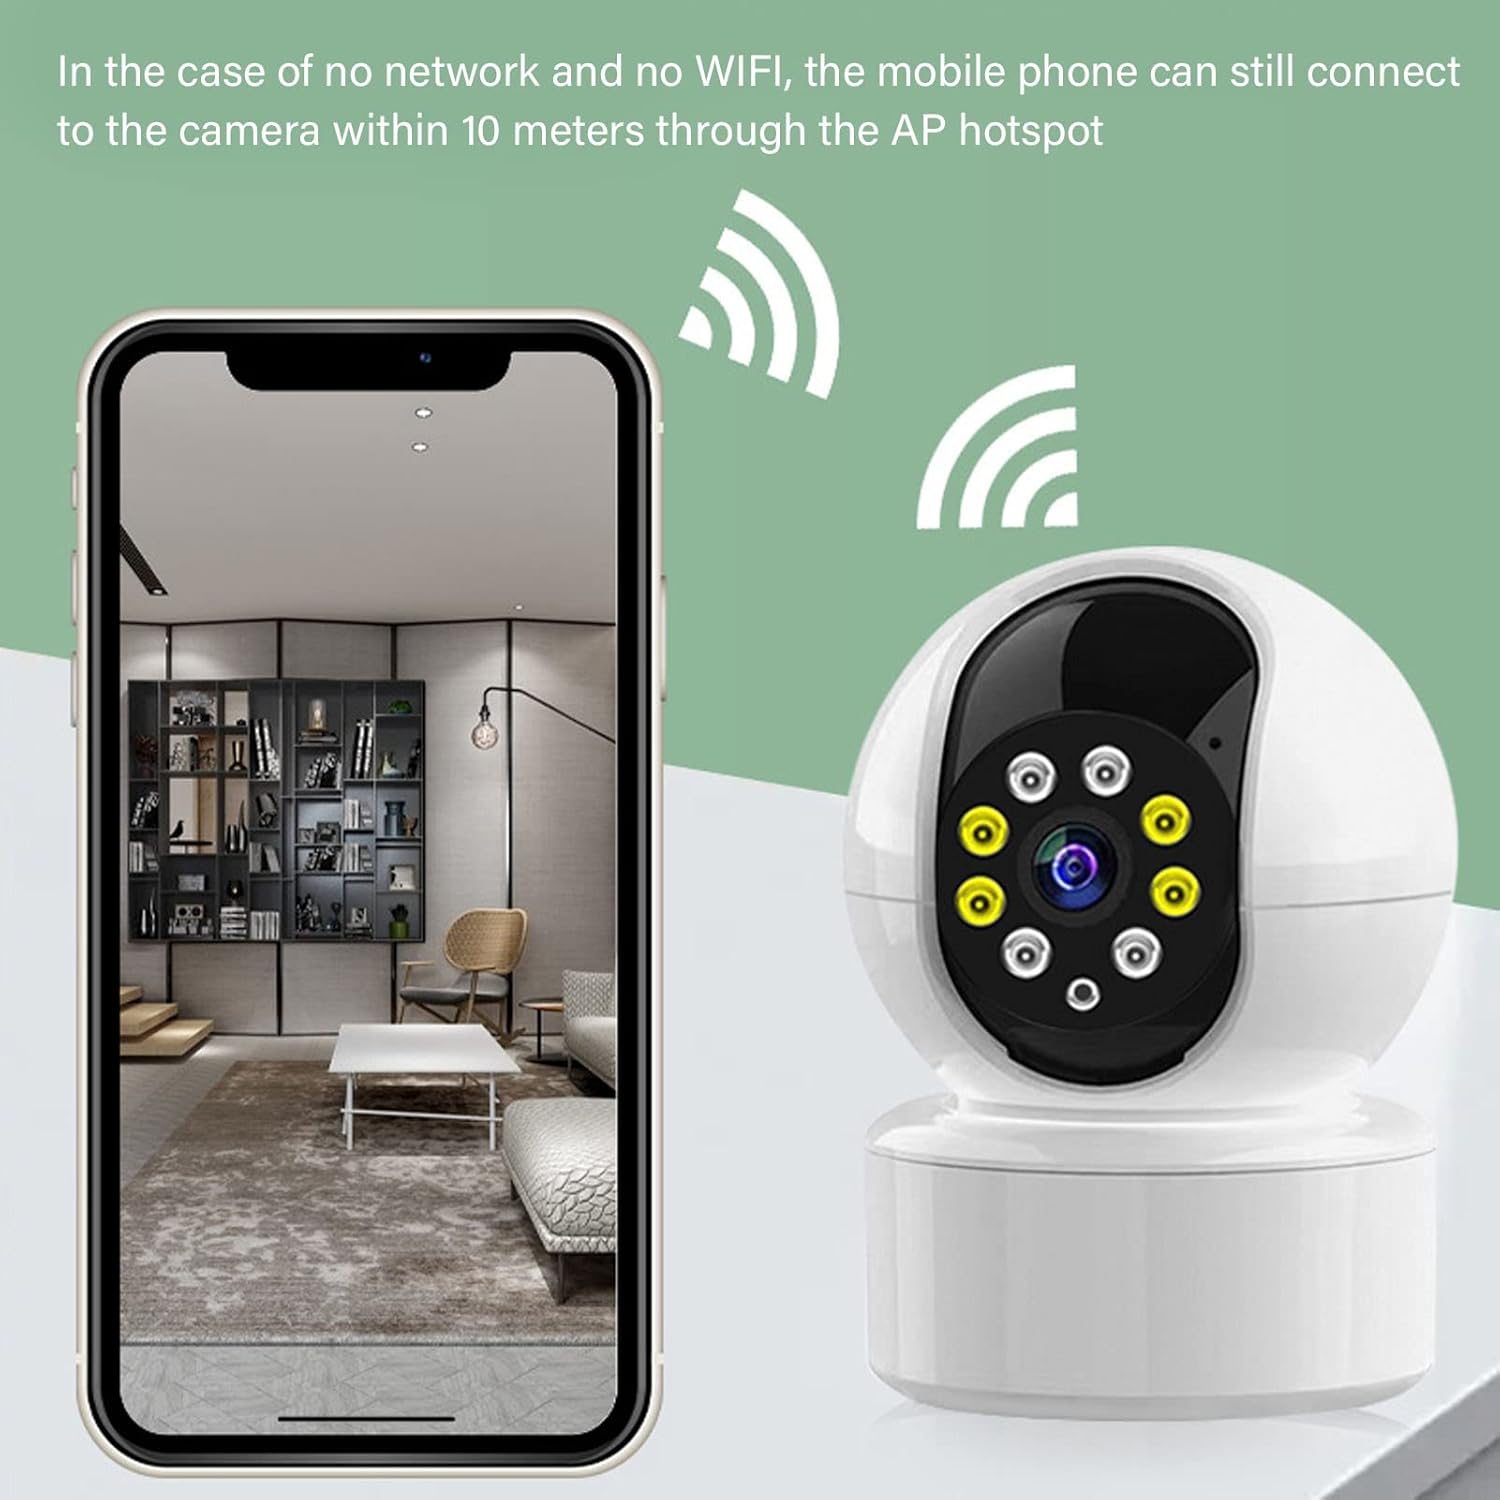
Figure 5: AP Hotspot Connection. This image illustrates how a mobile phone can connect directly to the camera via an AP hotspot within 10 meters, even without a network or WiFi connection, for initial setup or direct access.
4. Operating Instructions
Once your camera is set up, you can utilize its features through the mobile application:
- Live View: Open the app and select your camera to view the live video feed.
- Pan & Tilt Control: Use the directional controls within the app to remotely adjust the camera's horizontal (355°) and vertical (90°) viewing angles.
- Two-Way Audio: Tap the microphone icon in the app to speak through the camera's speaker, and listen through its microphone.
- Motion Detection & Alerts: Enable motion detection in the app settings. When motion is detected, you will receive real-time notifications on your smartphone. The camera can also automatically track the detected movement.
- Night Vision Modes: The camera automatically switches to night vision in low light. You may have options in the app to select between infrared and full-color night vision modes.
- Recording & Playback: Access recorded footage from either cloud storage or the installed Micro SD card through the app's playback feature.
- Sharing Access: In the app settings, you can invite other users to view your camera feed, allowing multiple family members to monitor simultaneously.

Figure 6: APP Remote Control for Pan and Tilt. This image shows a smartphone screen displaying the camera's live feed with overlaid arrows, indicating how users can remotely control the camera's wide viewing angle, including 90° vertical and 350° horizontal rotation.

Figure 7: Fluent Two-Way Audio Feature. This image depicts a child interacting with the camera, with speech bubbles indicating two-way communication. It highlights the camera's anti-noise microphone and speaker, enabling users to chat with family members anytime.

Figure 8: Real-Time Motion Detection Alarm. This image shows a smartphone displaying multiple alarm notifications, indicating that motion has been detected. It illustrates how the camera sends real-time alerts to the user's phone upon detecting movement.
5. Maintenance
Proper maintenance ensures the longevity and optimal performance of your camera:
- Cleaning: Gently wipe the camera lens and body with a soft, dry cloth. Avoid using harsh chemicals or abrasive materials that could damage the surface or lens.
- Firmware Updates: Periodically check the mobile application for available firmware updates. Keeping your camera's firmware updated ensures you have the latest features and security enhancements.
- SD Card Management: If using a Micro SD card, regularly back up important recordings and format the card periodically through the app to maintain performance and free up space.
- Power Supply: Ensure the camera is connected to a stable power source. Avoid frequent power interruptions.
6. Troubleshooting
If you encounter issues with your Elprico Smart Security Camera, refer to the following common problems and solutions:
| Problem | Possible Cause | Solution |
|---|---|---|
| Camera not powering on | Loose power connection; faulty adapter; no power at outlet. | Check power cable connection; try a different power outlet; ensure the adapter is working. |
| Cannot connect to Wi-Fi | Incorrect Wi-Fi password; camera too far from router; 5GHz Wi-Fi network used; router issues. | Verify Wi-Fi password; move camera closer to router; ensure you are connecting to a 2.4GHz network; restart your router. |
| No motion detection alerts | Motion detection disabled in app; incorrect sensitivity settings; app notifications blocked. | Enable motion detection in the app; adjust sensitivity; check phone's notification settings for the app. |
| Poor video quality | Weak Wi-Fi signal; dirty lens; insufficient lighting. | Improve Wi-Fi signal strength; clean the camera lens; ensure adequate lighting or check night vision settings. |
| Two-way audio not working | Microphone/speaker muted in app; app permissions not granted; network latency. | Check app for mute settings; grant microphone permissions to the app; ensure stable network connection. |
| SD card not recording | SD card full; faulty SD card; incorrect formatting; card not inserted correctly. | Format the SD card via the app; replace the SD card; ensure it is inserted correctly and supports up to 128GB. |
7. Specifications
Detailed technical specifications for the Elprico Smart Security Camera:
| Feature | Detail |
|---|---|
| Model Number | Elpricoku5omxprbq |
| Video Resolution | 1080p (3MP effective) |
| Material | Plastic |
| Power Input | 5 Watts |
| Dimensions (Package) | 17 x 10 x 9 cm |
| Weight (Package) | 262 grams |
| Pan Angle | 355° Horizontal |
| Tilt Angle | 90° Vertical |
| Night Vision | Infrared, Full-color LED (up to 9.8m) |
| Storage Options | Cloud Storage, Local Micro SD Card (up to 128GB) |
| Wireless Connectivity | Wi-Fi 802.11/b/g (2.4GHz only) |
| Supported Mobile OS | Android, iOS |
| Special Features | Motion Detector, Night Vision, Two-Way Audio, Smart Tracking |
8. Warranty and Support
For warranty information and technical support, please refer to the documentation provided with your purchase or contact the retailer/manufacturer directly. Keep your purchase receipt as proof of purchase for any warranty claims.
Manufacturer: Elprico