Introduction
This manual provides detailed instructions for the assembly, operation, and maintenance of your HOOBRO Industrial Printer Stand, Model BF22UPS01. Please read these instructions carefully before assembly and use to ensure safe and proper functionality.
What's in the Box
Before beginning assembly, ensure all components are present and undamaged. The package should contain:
- 1 x Printer Stand (disassembled components)
- 1 x Charging Station (integrated power strip)
- 1 x Accessory Kit (includes hardware and assembly tools)

Image showing all components included in the package, such as the wooden top, metal frames, mesh shelves, power strip, wheels, and assembly tools.
Setup Instructions
Step 1: Unpack and Identify Components
Carefully unpack all items from the box. Verify that all components listed in the "What's in the Box" section are present. Refer to the included instruction booklet for a detailed parts list and diagrams.
Video demonstrating the unboxing and identification of components for the HOOBRO printer stand.
Step 2: Assemble the Frame
Begin by connecting the metal frame pieces. Use the provided screws and hex key to secure the side frames to the crossbars. Ensure all connections are firm but do not overtighten until all parts are aligned.

Diagram illustrating the initial steps of assembling the metal frame structure.
Step 3: Attach Shelves
Slide the mesh shelves into the designated slots on the frame. Ensure they are properly seated and level. Secure them with the appropriate fasteners from the accessory kit.
Close-up of a hand installing a mesh shelf into the metal frame.
Step 4: Install the Top Board and Power Strip
Place the rustic brown top board onto the uppermost frame. Secure it using the provided screws. Attach the power strip to the side of the top board, ensuring the holes align for proper installation.
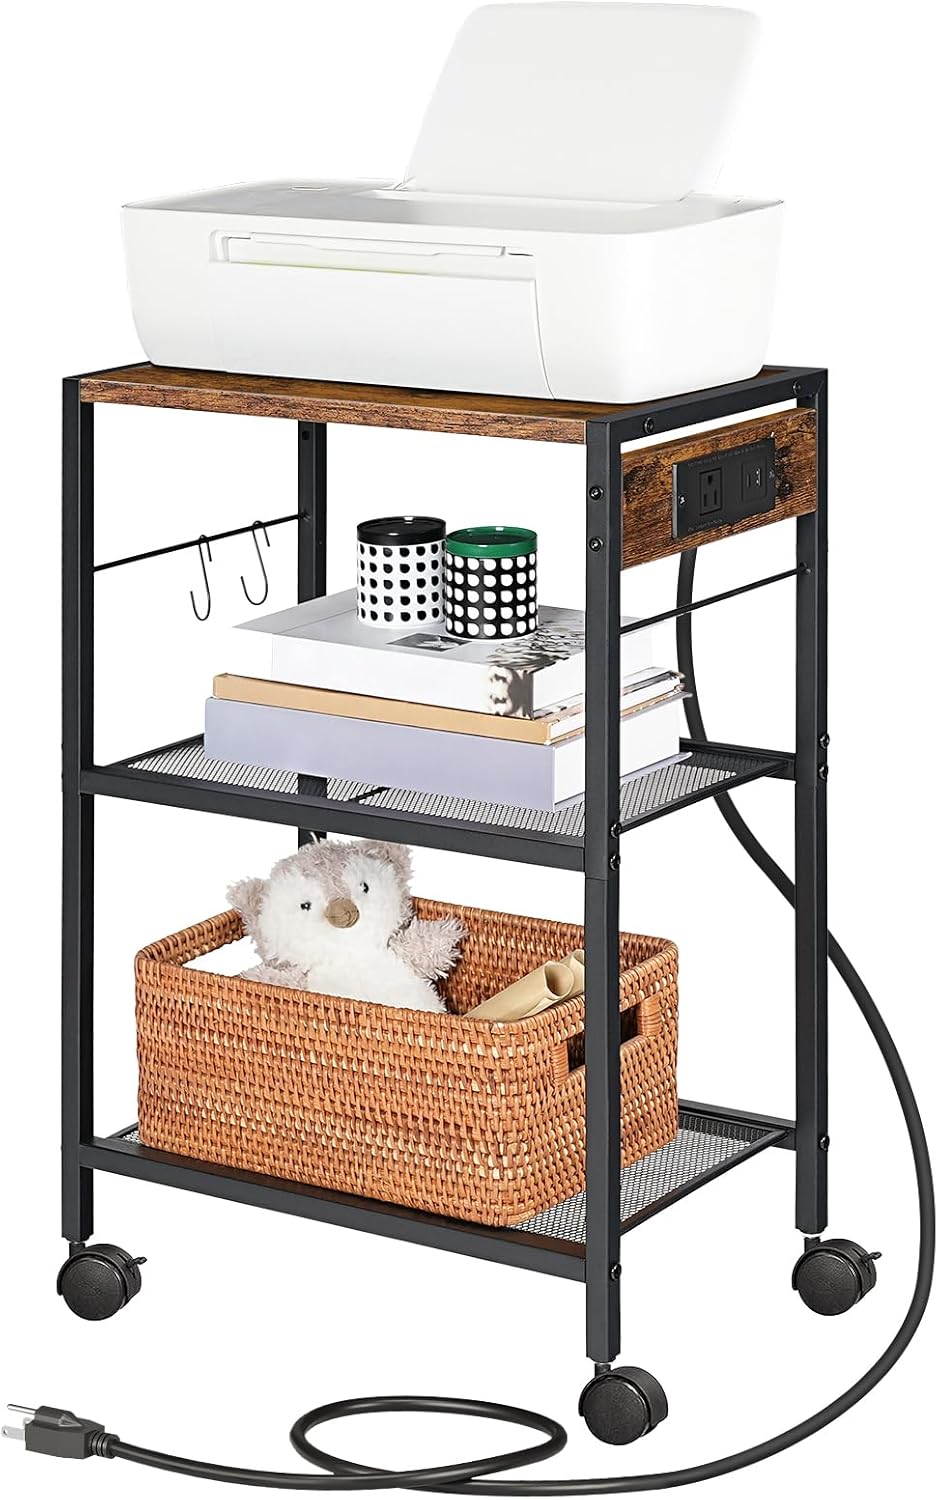
Image showing the top wooden board being placed and the power strip being attached to the side.
Step 5: Choose Base Option (Wheels or Adjustable Feet)
Your printer stand comes with both rolling casters and adjustable feet. Decide which option best suits your needs for mobility or stationary placement.
Option A: Install Casters (Wheels)
Screw the four casters into the bottom of the stand's legs. Two of the casters have locking mechanisms for stability when the stand is in place.

Image showing the casters with locking mechanisms.
Option B: Install Adjustable Feet
If you prefer a stationary stand, screw the four adjustable feet into the bottom of the legs. These feet can be adjusted to level the stand on uneven surfaces.

Image showing the adjustable feet for leveling the stand.
Step 6: Attach Hooks
The stand includes two S-hooks. Attach these to the side bar for hanging headphones, cables, or other small items.

Close-up of two S-hooks hanging from the side metal bar of the stand.
Operating Instructions
Using the Power Outlets and USB Ports
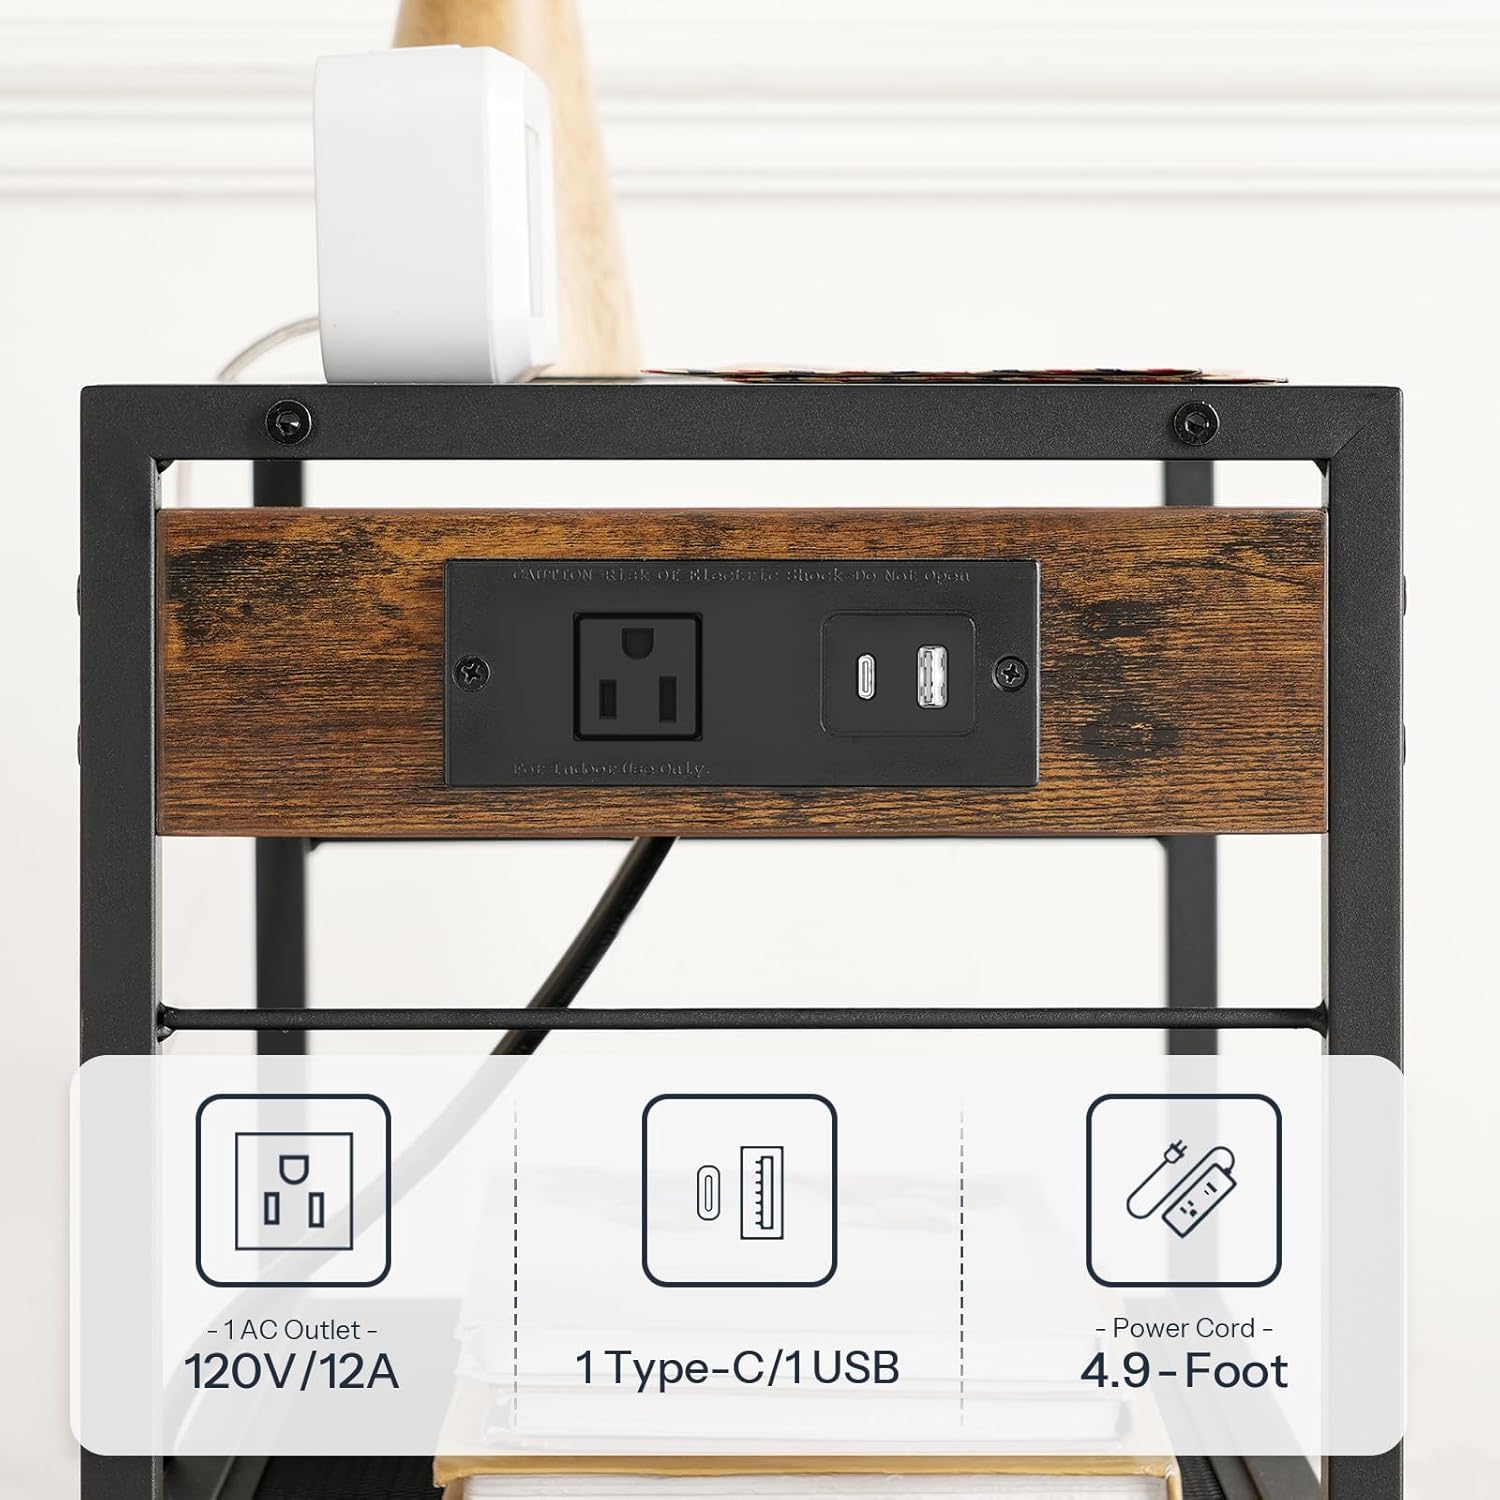
Plug the stand's power cord into a wall outlet. The integrated power strip provides two USB ports (Type-A and Type-C) and one standard AC outlet (120V/12A) for convenient charging of devices and powering your printer or other electronics.
Image showing the integrated power strip with USB and AC outlets on the side of the stand.
Organizing with Shelves and Hooks
Utilize the three tiers for organizing office supplies, paper, books, or other items. The top surface is ideal for your printer, while the mesh shelves below offer additional storage. The S-hooks can hold headphones, cables, or small bags.

The HOOBRO printer stand in an office setting, holding a printer, books, and other supplies.
Maintenance
Cleaning
Wipe surfaces with a soft, damp cloth. Avoid harsh chemicals or abrasive cleaners to prevent damage to the finish.
Fastener Check
Periodically check all screws and connections to ensure they remain tight. Retighten if necessary to maintain the stand's stability and structural integrity.
Weight Capacity
The top plate can bear up to 44 lbs (20 kg), and each mesh shelf can hold up to 17 lbs (7.7 kg). Do not exceed these weight limits to prevent damage or instability.
Diagram indicating the weight capacity for the top shelf (44 lbs) and lower mesh shelves (17 lbs each).
Troubleshooting
Stand is Wobbly
Ensure all screws are securely tightened. If using adjustable feet, adjust them to compensate for uneven flooring. If using casters, ensure the locking mechanisms are engaged when you want the stand stationary.
Power Outlets/USB Ports Not Working
Verify that the main power cord is securely plugged into a functioning wall outlet. Check for any tripped circuit breakers. If the issue persists, contact customer support.
Difficulty Assembling
Refer to the detailed instruction manual provided in the package. Ensure all parts are oriented correctly as shown in the diagrams. Do not force components together. If you encounter persistent issues, review the assembly video in the Additional Resources section.
Specifications
| Feature | Detail |
|---|---|
| Brand | HOOBRO |
| Model Number | BF22UPS01 |
| Dimensions (L x W x H) | 16.5 x 11 x 25.2 inches |
| Material | Engineered Wood, Iron |
| Tiers | 3 |
| Top Shelf Capacity | 44 lbs (20 kg) |
| Mesh Shelf Capacity | 17 lbs (7.7 kg) per shelf |
| Power Outlets | 1 x AC Outlet (120V/12A) |
| USB Ports | 2 x USB Ports (Type-A and Type-C) |
| Mobility | 4 Casters (2 lockable) or Adjustable Feet |
Warranty and Support
For warranty information or technical support, please refer to the documentation included with your product or visit the official HOOBRO website. You can also contact HOOBRO US directly via their Amazon store page:
Additional Resources
Product Overview Video
Official HOOBRO video showcasing the Industrial 3-Tier Printer Stand with Power Outlets, highlighting its features and uses.
Features Highlight Video
Official HOOBRO video detailing the 3-Tier Printer Stand's charging station and other functionalities.


