Introduction
This manual provides detailed instructions for the installation, operation, maintenance, and troubleshooting of your microSHIFT M26C RD-M26CL Rear Derailleur. Designed for 7- and 8-speed freewheel systems, this long cage derailleur ensures smooth and reliable gear changes for a wide range of cycling applications.
Please read this manual thoroughly before installation and use to ensure proper function and longevity of your component.
Setup and Installation
Proper installation is crucial for optimal performance. If you are unsure about any steps, consult a professional bicycle mechanic.
Tools Required:
- Hex wrench set (typically 5mm)
- Cable cutters
- Grease
- Torque wrench (recommended)
Installation Steps:
- Mounting the Derailleur:
Apply a thin layer of grease to the derailleur hanger threads. Thread the microSHIFT M26C RD-M26CL rear derailleur onto the derailleur hanger. Tighten the mounting bolt to the manufacturer's specified torque (typically 8-10 Nm). Ensure the derailleur is securely seated and aligned.
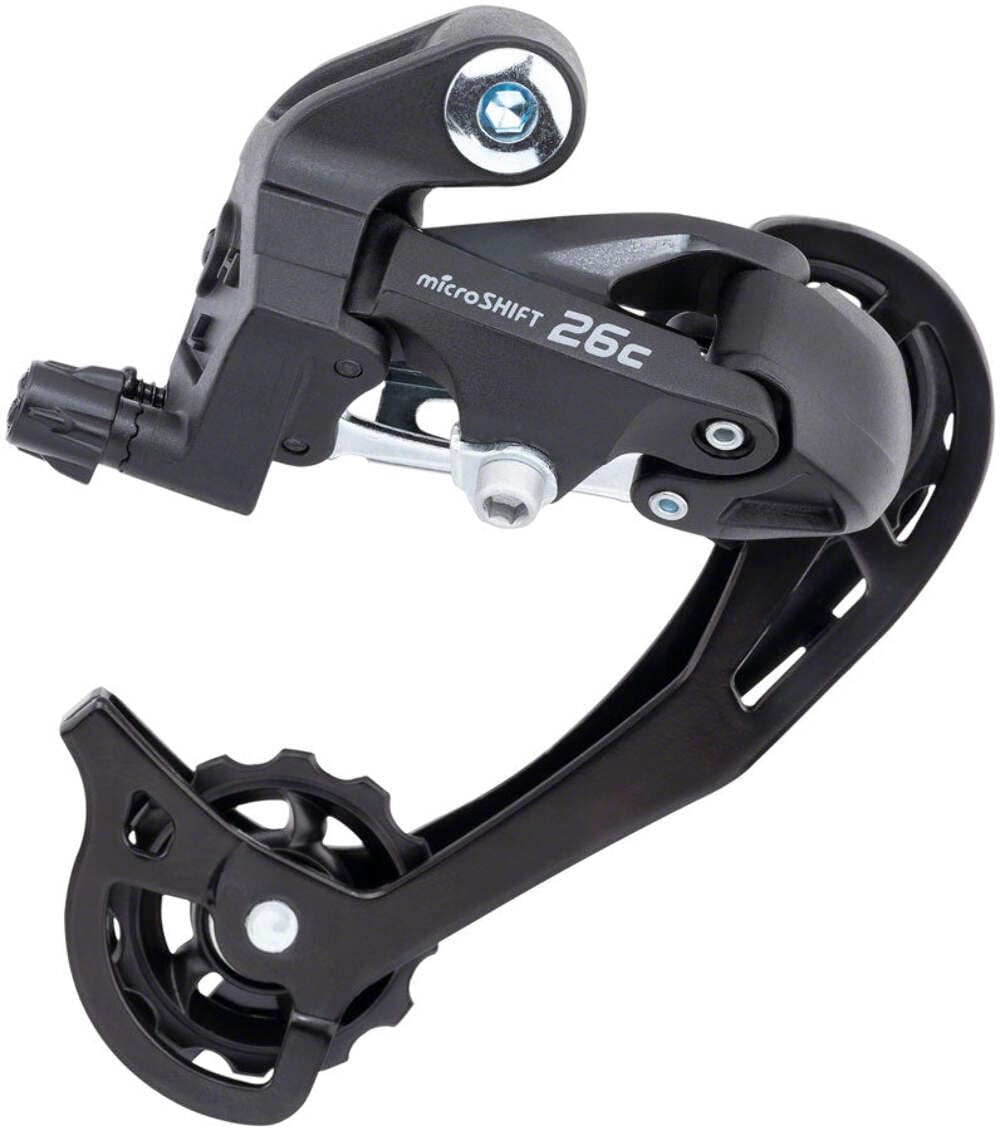
Image: The microSHIFT M26C RD-M26CL Rear Derailleur, showing its long cage design and mounting point. This image illustrates the component ready for installation onto a bicycle's derailleur hanger.
- Installing the Chain:
Route the bicycle chain through the derailleur's cage. Ensure the chain passes correctly over the guide pulley and tension pulley. The M26C is designed for 7/8 speed chains.
- Connecting the Shift Cable:
Route the shift cable from the shifter to the derailleur. Secure the cable to the derailleur's cable anchor bolt. Do not overtighten initially; adjustments will follow.
- Limit Screw Adjustment (H and L):
The H (High) limit screw controls the derailleur's inward movement, preventing the chain from shifting past the smallest cog and into the frame. The L (Low) limit screw controls the derailleur's outward movement, preventing the chain from shifting past the largest cog and into the spokes.
- H-Screw Adjustment: Shift the chain to the smallest cog. Turn the H-screw until the guide pulley is directly aligned with the smallest cog.
- L-Screw Adjustment: Shift the chain to the largest cog. Turn the L-screw until the guide pulley is directly aligned with the largest cog.
- B-Tension Adjustment:
The B-tension screw adjusts the gap between the upper guide pulley and the largest cog. Shift the chain to the largest cog. Adjust the B-tension screw so there is a small, consistent gap (approximately 5-6mm) between the top of the guide pulley and the bottom of the largest cog. This ensures smooth shifting and prevents chain rub.
- Cable Tension Adjustment:
With the chain on the smallest cog, pull the shift cable taut and tighten the cable anchor bolt. Shift through all gears. If shifting is slow or hesitant, turn the barrel adjuster counter-clockwise to increase cable tension. If the chain overshifts or rubs, turn the barrel adjuster clockwise to decrease tension.
Operating Your Derailleur
The microSHIFT M26C RD-M26CL derailleur is designed for intuitive operation with compatible 7- or 8-speed shifters. Always shift gears while pedaling forward with moderate pressure. Avoid shifting under heavy load or when stationary to prevent damage to the drivetrain components.
Shifting Tips:
- Anticipate terrain changes and shift proactively.
- Shift one gear at a time for smoother transitions.
- Avoid cross-chaining (e.g., largest front chainring with largest rear cog, or smallest front chainring with smallest rear cog) to reduce wear and improve efficiency.
Maintenance
Regular maintenance extends the life and performance of your derailleur.
Cleaning:
- Periodically clean the derailleur pulleys and cage with a degreaser and brush.
- Wipe down the derailleur body to remove dirt and grime.
Lubrication:
- Apply a small amount of bicycle chain lubricant to the pivot points of the derailleur and the pulley bearings.
- Lubricate the shift cable where it enters the housing and at the cable anchor point.
Inspections:
- Check for any loose bolts or fasteners and tighten them to specification.
- Inspect the derailleur hanger for bends or damage. A bent hanger can cause poor shifting.
- Examine the pulley wheels for excessive wear. Worn pulleys should be replaced.
- Check the shift cable and housing for fraying or damage. Replace if necessary.
Troubleshooting
| Problem | Possible Cause | Solution |
|---|---|---|
| Chain does not shift to smaller cogs. | Insufficient cable tension or H-limit screw too tight. | Increase cable tension (turn barrel adjuster counter-clockwise) or loosen H-limit screw. |
| Chain does not shift to larger cogs. | Excessive cable tension or L-limit screw too tight. | Decrease cable tension (turn barrel adjuster clockwise) or loosen L-limit screw. |
| Chain falls off the smallest cog. | H-limit screw too loose. | Tighten H-limit screw. |
| Chain falls off the largest cog into spokes. | L-limit screw too loose or bent derailleur hanger. | Tighten L-limit screw. Inspect and straighten/replace derailleur hanger. |
| Noisy shifting or chain rub. | Incorrect B-tension, cable tension, or worn pulleys. | Adjust B-tension, fine-tune cable tension, or replace worn pulleys. |
Specifications
- Model: microSHIFT M26C (RD-M26CL)
- Compatibility: 7-speed / 8-speed freewheel systems
- Cage Length: Long Cage
- Max Cog Size: 34T
- Min Cog Size: 13T
- Total Capacity (Chain Wrap): 45T
- Mount Type: Direct Mount (Braze-On Mount)
- Material: Steel and Composite
- Color: Black
- Weight: Approximately 0.75 lbs (340g)
- Manufacturer Part Number: RD-M26CL
- UPC: 657993356821
Warranty Information
This microSHIFT M26C RD-M26CL Rear Derailleur comes with a Limited Warranty. For specific terms, conditions, and duration of the warranty, please refer to the official microSHIFT website or contact their customer support. The warranty typically covers manufacturing defects and material flaws under normal use. Damage resulting from improper installation, abuse, neglect, accidents, or unauthorized modifications is generally not covered.
Please retain your proof of purchase for any warranty claims.
Support and Contact
For further assistance, technical support, or to inquire about replacement parts, please visit the official microSHIFT website or contact their customer service department.
Official microSHIFT Website: www.microshift.com
When contacting support, please have your product model (RD-M26CL) and proof of purchase available.


