Introduction
Thank you for choosing the FanJu FJ3364 Digital Weather Station Alarm Clock. This device provides accurate indoor and outdoor temperature and humidity readings, a weather forecast, and a daily alarm with a snooze function. Please read this manual carefully to ensure proper setup and operation.
Package Contents
- 1 x FanJu FJ3364 Digital Weather Station (Main Unit)
- 1 x Wireless Remote Sensor
- 1 x User Manual

Image: The main weather station unit and its accompanying wireless remote sensor.
Product Features
- Weather Forecast display
- DCF Radio Control Clock for automatic time synchronization (German region)
- Time display in optional 12 or 24-hour format
- Daily Alarm with Snooze Function
- Minimum/Maximum display for air humidity and temperature
- Indoor/Outdoor temperature (°C or °F) and humidity display
- 8-second Backlight activated by touching the LIGHT button
- Wireless Remote Sensor with 60-meter transmission range (open area)
- Ice Alert function for outdoor temperatures between -1°C and 2.8°C
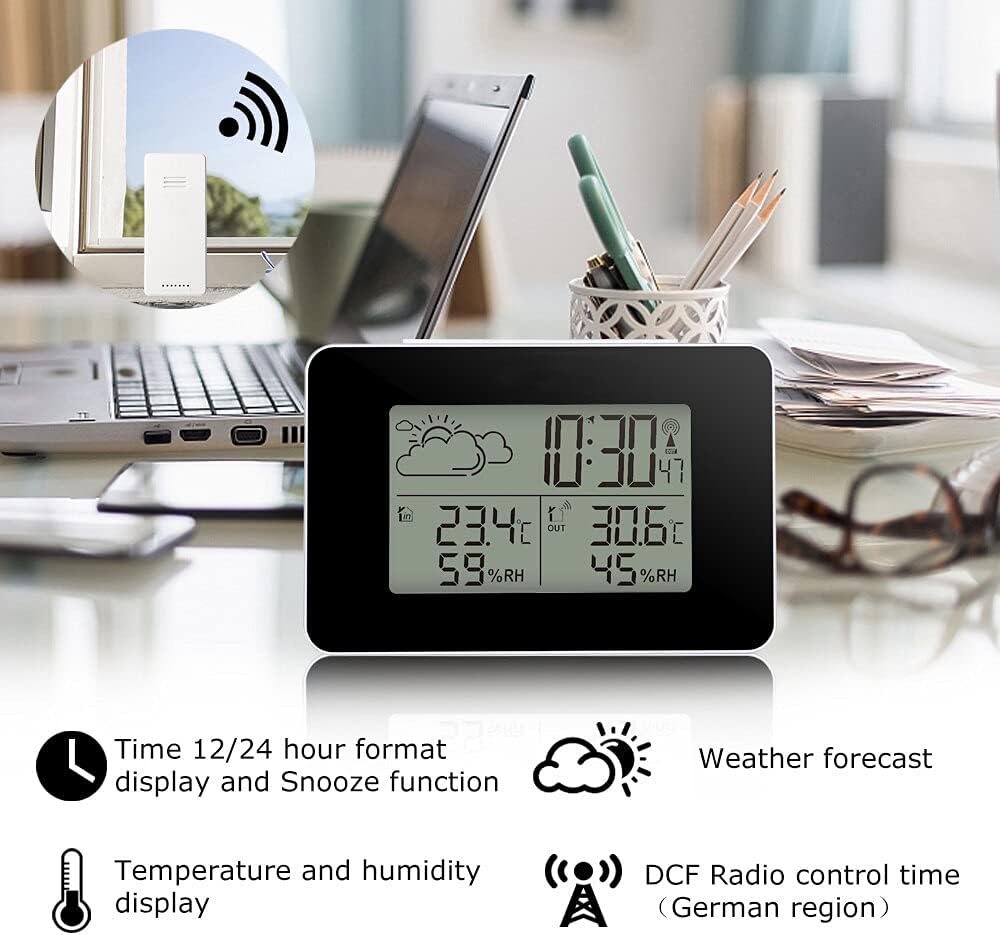
Image: The weather station's display showing various features including time, temperature, humidity, and weather forecast.
Setup
1. Battery Installation
The weather station and wireless sensor are battery-operated. Batteries are not included.
- Main Unit: Open the battery compartment (B6) on the back of the weather station. Insert 2 x AA batteries, observing the correct polarity (+/-).
- Wireless Remote Sensor: Open the battery compartment (C1) on the back of the sensor. Insert 2 x AAA batteries, observing the correct polarity (+/-).
After inserting batteries, the main unit will power on and begin searching for the wireless sensor.
2. Sensor Pairing
The main unit will automatically attempt to connect with the wireless sensor upon initial power-up. Ensure both devices are within range. If the connection is not established, or if you need to re-pair, press and hold the “-” button (B5) on the main unit for 3 seconds to manually search for the sensor.
3. Placement Recommendations
- Main Unit: Place the weather station indoors on a desktop or table. Avoid direct sunlight or heat sources.
- Wireless Remote Sensor: The sensor can be wall-mounted or placed on a table stand. For accurate outdoor readings, place it in a shaded, dry location, protected from direct rain and sunlight. Ensure it is within the 60-meter transmission range of the main unit.

Image: Detailed diagram identifying the LCD display parts (A1-A6), back buttons (B1-B6), and the outdoor sensor's battery compartment (C1).

Image: Example placement of the main unit on a bedside table and the wireless sensor mounted outdoors near a door.
4. Initial Measurement Stabilization
The product may have measurement errors during the initial period of operation. For optimal accuracy, allow the weather station and sensor to operate for more than 24 hours to stabilize readings.
Operating Instructions
Refer to the “Part B – Back button and power” section in the diagram for button identification (SET, MEM, +, -).
1. Time Setting
- DCF Automatic Time Setting: The weather station will automatically attempt to synchronize its time via the DCF radio signal (German region). This process usually occurs overnight. A signal icon will indicate successful synchronization.
- Manual Time Setting: If DCF synchronization is not available or desired, press and hold the “SET” button (B2) for 3 seconds to enter time setting mode. Use the “+” (B4) and “-” (B5) buttons to adjust values, and “SET” to confirm and move to the next setting (e.g., 12/24 hour format, hour, minute).
2. 12/24 Hour Format
During manual time setting, you can select between 12-hour (with AM/PM indicator) or 24-hour format.
3. Daily Alarm and Snooze Function
- Setting Alarm: In normal time display mode, press the “SET” button (B2) once to view the alarm time. Press and hold “SET” for 3 seconds to enter alarm setting mode. Use “+” and “-” to adjust the hour and minute, and “SET” to confirm.
- Activating/Deactivating Alarm: Press the “+” button (B4) in alarm time display mode to turn the alarm ON or OFF. An alarm icon will appear when active.
- Snooze Function: When the alarm sounds, touch the “SNOOZE/LIGHT” touch key (B1) to activate the snooze function. The alarm will sound again after a few minutes. To stop the alarm completely, press any other button.
4. Temperature Unit Selection (°C/°F)
In normal display mode, press the “-” button (B5) to switch between Celsius (°C) and Fahrenheit (°F) for temperature display.
5. Backlight
Touch the “SNOOZE/LIGHT” touch key (B1) on the top of the main unit to activate the backlight for approximately 8 seconds.
6. Minimum/Maximum Temperature and Humidity Display
Press the “MEM” button (B3) repeatedly to cycle through current, maximum (MAX), and minimum (MIN) recorded indoor and outdoor temperature and humidity values. To clear the recorded MAX/MIN values, press and hold the “MEM” button for 3 seconds while viewing the MAX/MIN records.
7. Weather Forecast Display
The weather station calculates a weather forecast based on changes in atmospheric pressure detected by the outdoor wireless sensor. The forecast is displayed via intuitive icons (A1) on the LCD screen. This is an estimation and may not always perfectly match local weather conditions.
8. Ice Alert
An ice alert icon will appear on the display when the outdoor temperature falls within the range of -1°C to 2.8°C, indicating potential icy conditions.
Maintenance
- Cleaning: Wipe the device with a soft, damp cloth. Do not use abrasive cleaners or solvents.
- Battery Replacement: Replace batteries in both the main unit and the wireless sensor when the low battery indicator appears on the display. Always replace all batteries at the same time with new ones of the same type.
- Storage: If storing the device for an extended period, remove all batteries to prevent leakage.
Troubleshooting
- No Display: Check battery polarity and ensure batteries are fresh.
- Outdoor Temperature/Humidity Not Displaying: Ensure the wireless sensor has fresh batteries and is within range (60 meters in open area) of the main unit. Try re-pairing the sensor by pressing and holding the “-” button (B5) on the main unit for 3 seconds.
- Inaccurate Readings: Allow the device to operate for at least 24 hours for stabilization. Ensure the sensor is placed in a shaded, dry area away from direct heat or cold sources.
- DCF Time Not Synchronizing: Ensure the device is placed in an area with good radio signal reception. Manual time setting can be used if DCF signal is weak or unavailable.
Specifications
| Model | FJ3364 |
| Indoor Temperature Range | -9.9°C to 50°C (14.2°F to 122°F) |
| Outdoor Temperature Range | -25°C to 50°C (-13°F to 122°F) |
| Indoor/Outdoor Humidity Range | 20% RH to 95% RH |
| Wireless Transmission Frequency | 433.92 MHz |
| Wireless Transmission Range | Up to 60 meters (open area) |
| Main Unit Power Supply | 2 x AA Batteries (not included) |
| Sensor Power Supply | 2 x AAA Batteries (not included) |
| Unit Weight | Approx. 1 Grams (Main Unit) |
| Color | White |

Image: Dimensions of the main weather station unit and the wireless remote sensor.
Warranty and Support
This product is manufactured by JKHFDDIG. For any questions, technical support, or warranty inquiries, please refer to the contact information provided with your purchase or contact your retailer. Please retain your proof of purchase for warranty claims.