Introduction
This manual provides comprehensive instructions for the safe and efficient operation of your VEVOR 70m Sewer Inspection Camera. Designed for inspecting pipes, drains, sewers, and other hard-to-reach areas, this device offers clear visual feedback to diagnose issues. Please read this manual thoroughly before initial use and retain it for future reference. Proper understanding and adherence to these instructions will ensure optimal performance and longevity of your inspection camera.
Safety Instructions
- Always ensure the power adapter and cables are in good condition before connecting to a power source.
- Do not operate the device in explosive atmospheres or near flammable liquids and gases.
- The camera head is IP68 waterproof, but the monitor unit is not. Avoid exposing the monitor to water or excessive moisture.
- Keep the device away from extreme temperatures, direct sunlight, and corrosive substances.
- Do not attempt to disassemble or repair the unit yourself. Contact qualified service personnel for assistance.
- Ensure the battery is charged in a well-ventilated area and avoid overcharging.
- Use only the provided or approved accessories and replacement parts.
- Store the device and its components properly in the carrying case when not in use to prevent damage.
Package Contents
Verify that all items listed below are present in your package:
- 1 x VEVOR Sewer Inspection Camera Unit (with 9-inch monitor and 70m cable reel)
- 1 x Camera Protective Cover (small)
- 1 x Camera Protective Cover (large)
- 1 x 16GB SD Card
- 1 x Power Adapter/Charger
- 1 x User Manual
Product Overview
Familiarize yourself with the main components of your VEVOR Sewer Inspection Camera system.

The system consists of a robust carrying case housing a 9-inch LCD monitor, a control panel, and a durable cable reel with a 70-meter (230 ft) fiberglass cable. The camera head is attached to the end of this cable.

The 9-inch TFT LCD monitor provides a clear 720p resolution display for real-time viewing of the inspection area. It features control buttons for recording, playback, and menu navigation, along with an SD card slot for data storage.

The camera head is constructed from durable 303 stainless steel with a sapphire lens, ensuring IP68 waterproof protection. It is equipped with 12 adjustable LED lights to provide ample illumination in dark pipes, and offers a 130° viewing angle.

The 70-meter (230 ft) semi-rigid cable features clear length markings, allowing you to accurately estimate the inspection depth. A flexible spring section near the camera head aids in navigating pipe bends.
Setup
- Charge the Battery: Connect the provided power adapter to the charging port on the control unit and plug it into a standard electrical outlet. Allow the unit to charge fully before first use (approximately 6 hours for a full charge). The battery indicator on the monitor will show charging status.
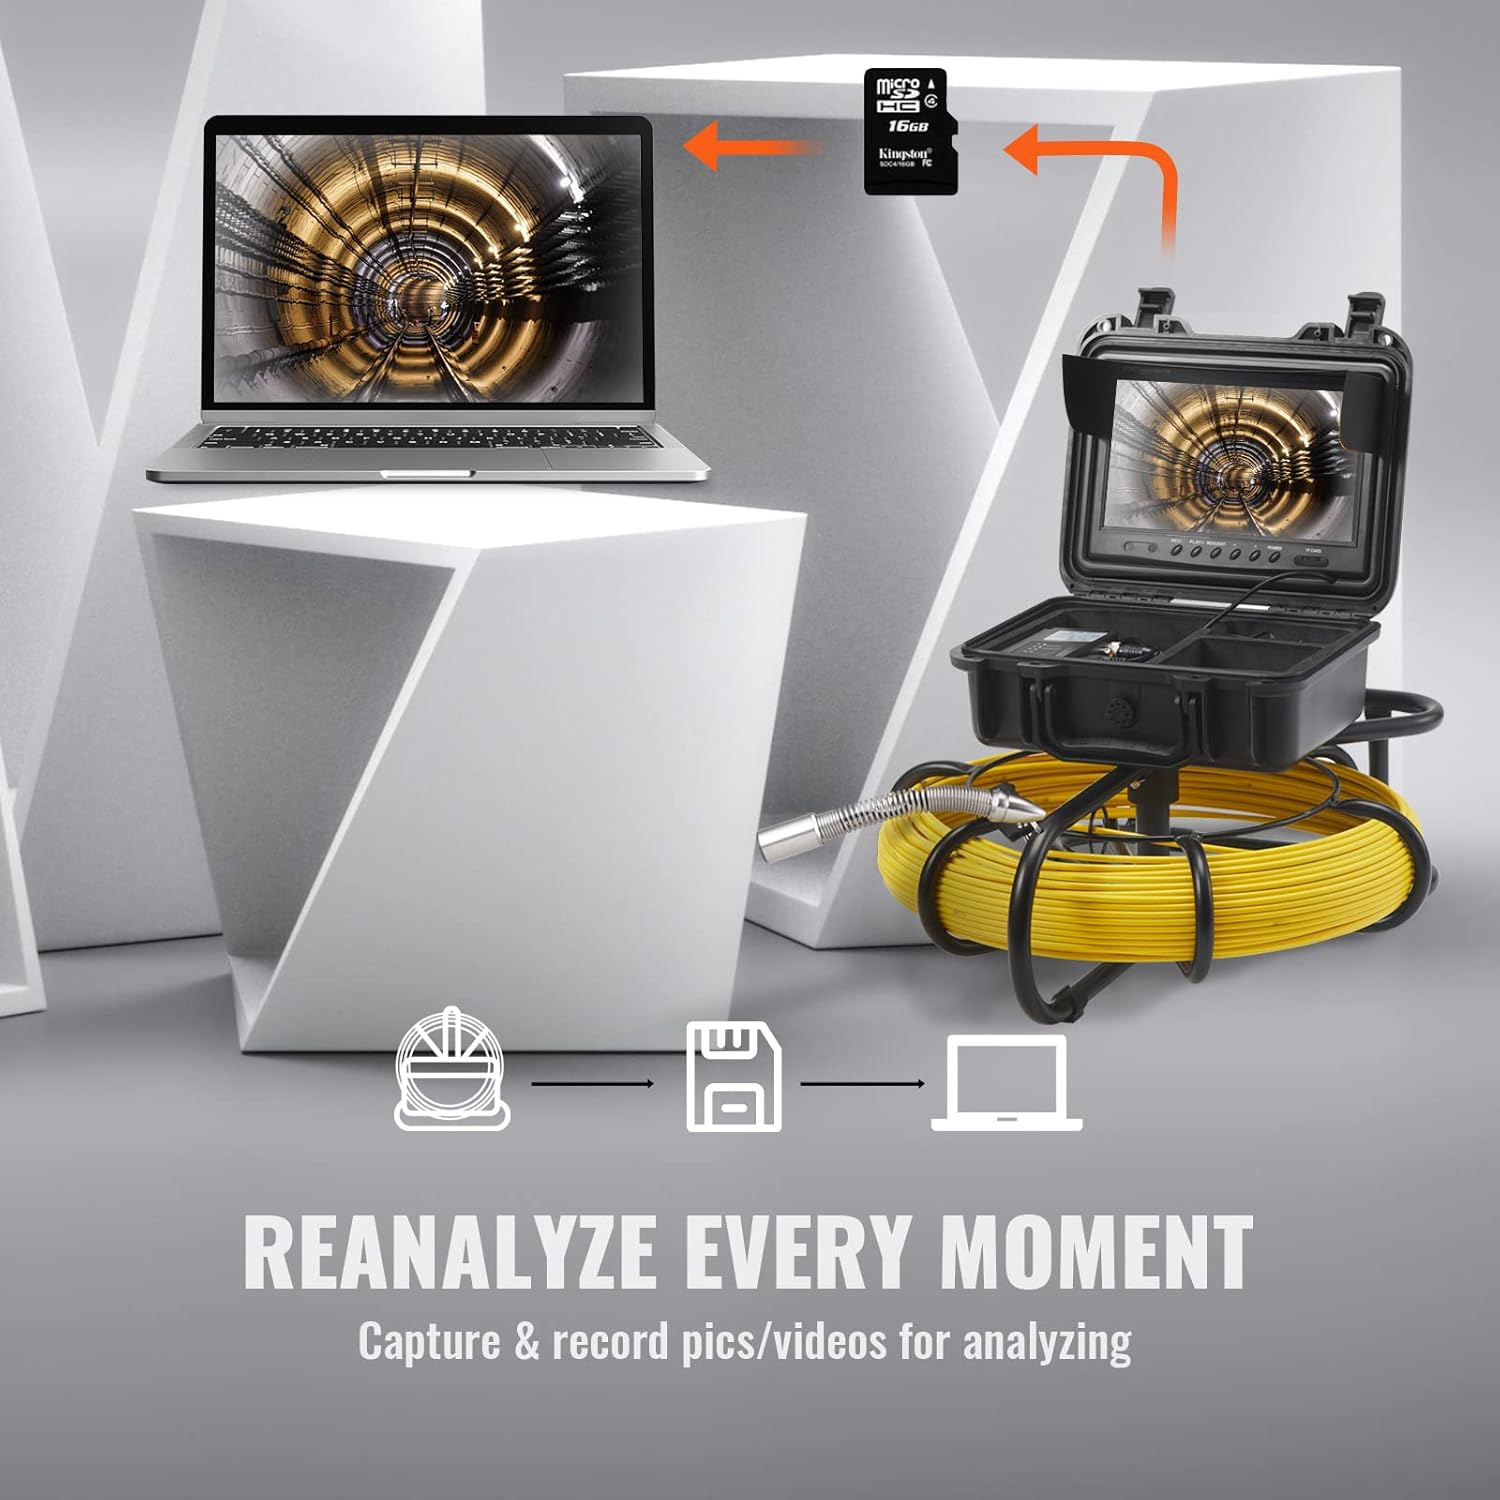
- Insert SD Card: Locate the SD card slot on the monitor's control panel. Insert the provided 16GB SD card firmly until it clicks into place. Ensure the card is inserted in the correct orientation.
- Attach Protective Cover: Select the appropriate camera protective cover (small or large) based on the pipe diameter you intend to inspect. Slide the cover over the camera head until it is securely in place. This protects the camera and helps center it within the pipe.
- Power On: Press and hold the 'POWER' button on the control panel to turn on the monitor. The screen should illuminate, displaying the camera's live feed.
Operating Instructions
- Adjust LED Brightness: Use the dedicated LED brightness control knob or buttons on the control panel to adjust the illumination level of the camera's LEDs. Increase brightness in dark pipes for a clearer image.
- Insert Camera: Carefully feed the camera head and cable into the pipe or drain. Use the cable reel to manage the cable length. Observe the length markings on the cable to track the inspection depth.
- Monitor and Navigate: Watch the live feed on the 9-inch monitor. Gently push and rotate the cable to guide the camera through the pipe. The flexible spring section helps navigate bends.
- Record Video: To start recording, press the 'REC/-' button. A recording indicator will appear on the screen. Press 'REC/-' again to stop recording. Videos are saved to the SD card.
- Take Photos: To capture a still image, press the 'PLAY/+' button briefly during live view. Photos are saved to the SD card.
- Playback: To review recorded videos or photos, navigate to the playback mode using the menu buttons. Select the desired file and press 'PLAY/+' to view.
- Data Transfer: After inspection, power off the unit and carefully remove the SD card. Insert the SD card into a computer's card reader to transfer and analyze the recorded images and videos.
Maintenance
- Cleaning the Camera Head: After each use, thoroughly clean the camera head and lens with a soft, damp cloth to remove any debris or residue. Ensure no abrasive materials are used that could scratch the sapphire lens.
- Cleaning the Monitor: Wipe the monitor screen and control panel with a soft, dry cloth. Avoid using liquid cleaners directly on the screen.
- Cable Care: Carefully wind the cable back onto the reel after each inspection. Avoid kinks or sharp bends in the cable, which can cause damage over time.
- Battery Care: For optimal battery life, fully charge the lithium-ion battery before storing the unit for extended periods. If storing for more than a month, recharge the battery every 3 months to maintain its capacity.
- Storage: Store the entire system in its original carrying case in a cool, dry place, away from direct sunlight and extreme temperatures.
Troubleshooting
| Problem | Possible Cause | Solution |
|---|---|---|
| No power to the monitor | Battery is depleted; Power button not pressed correctly; Faulty power adapter. | Charge the battery fully; Press and hold the power button for a few seconds; Check power adapter connection. |
| No image on screen | Camera cable not connected properly; Camera head damaged; Monitor settings. | Ensure camera cable is securely connected; Inspect camera head for visible damage; Check monitor input settings. |
| Cannot record video/take photos | SD card not inserted; SD card full; SD card faulty; Recording button not pressed correctly. | Insert SD card; Delete old files or use a new SD card; Try reformatting the SD card (backup data first); Press 'REC/-' firmly. |
| Image is dark or unclear | LED brightness too low; Camera lens dirty; Insufficient ambient light. | Adjust LED brightness using the control knob; Clean the camera lens; Ensure adequate lighting if possible. |
| Camera gets stuck in pipe | Obstruction in pipe; Sharp bend; Incorrect protective cover size. | Gently pull back and try to maneuver around the obstruction; Use the appropriate protective cover for pipe diameter. Do not force the camera. |
Specifications
Detailed technical specifications for the VEVOR 70m Sewer Inspection Camera.

| Feature | Specification |
|---|---|
| Brand | VEVOR |
| Model Number | 230 ft Sewer Camera |
| Monitor Size | 9 inches |
| Video Recording Resolution | 720p |
| Camera Lens Diameter | 0.9 inches (23 mm) |
| Camera LEDs | 12 adjustable LEDs |
| Water Resistance Level | IP68 (Camera Head) |
| Cable Length | 70 meters (230 ft) |
| Battery Type | Lithium-ion |
| Battery Capacity | 4500 mAh |
| Battery Life | Up to 6 hours |
| Media Type | SD Card (16GB included) |
| Product Dimensions (L x W x H) | 32 x 14.99 x 50.8 cm (12.6 x 5.9 x 20 inches) |
| Product Weight | 8.66 kg (19.1 lbs) |
| Connectivity Technology | HDMI |
| Color | Black and Yellow |
Warranty and Support
This VEVOR product is covered by a standard manufacturer's warranty against defects in materials and workmanship. The specific terms and duration of the warranty may vary by region and retailer. Please retain your proof of purchase for warranty claims.
For technical support, troubleshooting assistance, or to inquire about replacement parts, please contact the retailer where you purchased the product or visit the official VEVOR website for customer service contact information. Please have your model number and purchase date available when contacting support.