Introduction
Thank you for choosing the KENWOOD Digital Air Fryer HFP80.000BK. This appliance is designed to provide a healthier way to cook your favorite meals, utilizing rapid hot air circulation for frying, grilling, broiling, roasting, baking, and toasting with minimal oil. Please read this manual thoroughly before first use to ensure safe and optimal operation of your new air fryer.
Important Safety Instructions
When using electrical appliances, basic safety precautions should always be followed, including the following:
- Read all instructions before use.
- Do not touch hot surfaces. Use handles or knobs.
- To protect against electric shock, do not immerse cord, plugs, or the main unit in water or other liquid.
- Close supervision is necessary when any appliance is used by or near children.
- Unplug from outlet when not in use and before cleaning. Allow to cool before putting on or taking off parts.
- Do not operate any appliance with a damaged cord or plug, or after the appliance malfunctions or has been damaged in any manner.
- The use of accessory attachments not recommended by the appliance manufacturer may cause injuries.
- Do not use outdoors.
- Do not let cord hang over edge of table or counter, or touch hot surfaces.
- Do not place on or near a hot gas or electric burner, or in a heated oven.
- Extreme caution must be used when moving an appliance containing hot oil or other hot liquids.
- Always attach plug to appliance first, then plug cord into the wall outlet. To disconnect, turn any control to "off", then remove plug from wall outlet.
- Do not use appliance for other than intended use.
- Ensure the appliance is placed on a stable, heat-resistant surface, away from walls and other appliances, to allow for proper air circulation.
- Do not block any ventilation openings.
Product Overview
Familiarize yourself with the components of your KENWOOD Digital Air Fryer.

Figure 1: Front view of the Kenwood Digital Air Fryer HFP80.000BK, showcasing its sleek black design and digital control panel.

Figure 2: Angled view of the air fryer, highlighting the intuitive digital touch control panel with various preset functions and time/temperature adjustments.
Key Components:
- Digital Control Panel: Touch-sensitive interface for setting time, temperature, and selecting cooking presets.
- Air Inlet: Located at the top of the unit, for air intake.
- Air Outlet: Located at the back of the unit, for hot air exhaust.
- Frying Basket: Non-stick coated basket for holding food.
- Basket Handle: For safe insertion and removal of the frying basket.
- Removable Non-Stick Basket with Handle: Ensures easy cleaning and safe handling.
Setup
- Unpacking: Carefully remove all packaging materials and promotional labels from the air fryer.
- Cleaning: Before first use, clean the frying basket and pan with hot water, dish soap, and a non-abrasive sponge. Wipe the inside and outside of the appliance with a damp cloth. Do not immerse the main unit in water.
- Placement: Place the air fryer on a stable, level, and heat-resistant surface. Ensure there is at least 10 cm (4 inches) of free space on the back and sides, and 10 cm (4 inches) above the appliance to allow for proper air circulation.
- Preheating (Optional): For optimal results, it is recommended to preheat the air fryer for 3-5 minutes before adding food.

Figure 3: Demonstrates how to safely remove the frying basket using its handle, essential for cleaning and loading food.
Operating Instructions
Basic Operation:
- Plug the power cord into a grounded wall outlet.
- Carefully pull the frying basket out of the air fryer.
- Place the ingredients into the frying basket. Do not exceed the MAX fill line.
- Slide the frying basket back into the air fryer. Ensure it clicks into place.
- Press the Power button to turn on the appliance.
- Select a preset cooking function or manually set the desired temperature and time using the TEMP/TIME controls. The temperature can be adjusted up to 200°C.
- Press the START button to begin cooking.
- Some ingredients require shaking halfway through the preparation time. The air fryer may beep to remind you to shake the basket.
- When the cooking time has elapsed, the air fryer will beep. Carefully pull out the basket and empty the food.
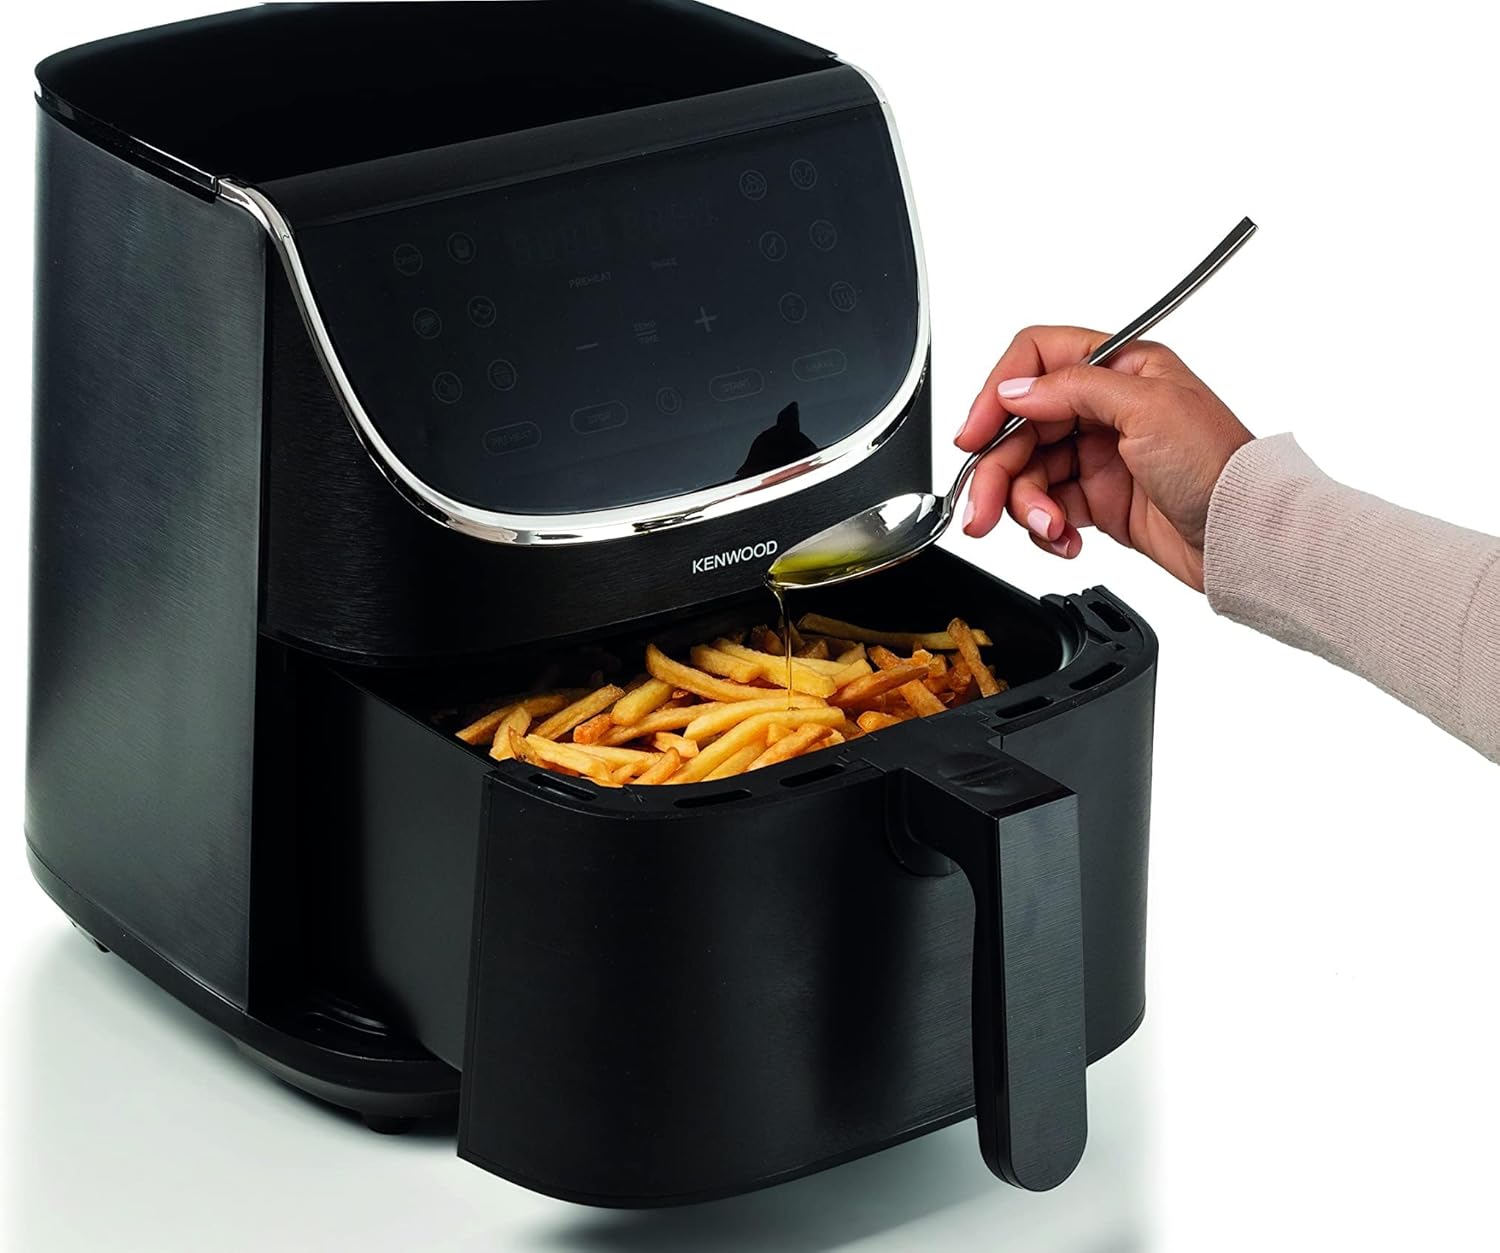
Figure 4: Illustrates the minimal oil requirement, showing a spoonful of oil being added to fries in the air fryer basket, promoting healthier cooking.

Figure 5: A visual representation of the rapid hot air circulation system within the air fryer, explaining how heat is evenly distributed for thorough cooking.
Max Crisp Function:
The Max Crisp function is designed for achieving extra crispy results, particularly for frozen foods. Refer to the recipe book for specific instructions on using this function for various dishes.
Preset Cooking Functions:
The air fryer comes with 12 pre-set cooking functions for common dishes like frozen chips, fresh potatoes, vegetables, steak/red meat, fish, chicken, pizza, dehydration, baked desserts, and defrost. Simply select the desired icon on the digital control panel.
Maintenance and Cleaning
Proper cleaning ensures the longevity and performance of your air fryer.
- Before Cleaning: Always unplug the appliance and allow it to cool down completely before cleaning.
- Frying Basket and Pan: The non-stick frying basket and pan are dishwasher safe. Alternatively, they can be cleaned with hot water, dish soap, and a non-abrasive sponge. For stubborn residue, soak them in hot water for about 10 minutes.
- Main Unit: Wipe the exterior of the air fryer with a damp cloth. Never immerse the main unit in water or any other liquid.
- Heating Element: Use a cleaning brush to remove any food residue from the heating element.
- Storage: Store the appliance in a cool, dry place once it is clean and completely dry.
Troubleshooting
Refer to this section for common issues and their solutions.
| Problem | Possible Cause | Solution |
|---|---|---|
| Air fryer does not work. | The appliance is not plugged in. | Plug the main plug into a grounded wall socket. |
| The timer has not been set. | Set the timer to the desired preparation time. | |
| Ingredients are not cooked evenly. | The amount of ingredients in the basket is too large. | Put smaller batches of ingredients in the basket. |
| Temperature is too low. | Increase the temperature. | |
| White smoke comes out of the appliance. | Fat splashes from previous use are still in the pan. | Clean the pan and basket thoroughly after each use. |
| Fresh fries are not crispy. | You did not use the right potato type. | Use fresh potatoes that are suitable for frying. |
| The fries were not rinsed properly before frying. | Rinse the potato sticks properly to remove starch. |
Specifications
Detailed technical specifications for the KENWOOD Digital Air Fryer HFP80.000BK.

Figure 6: Diagram illustrating the physical dimensions of the Kenwood Digital Air Fryer, including height, width, and depth measurements.
- Brand: Kenwood
- Model Number: OWHFP80.000BK
- Color: Black
- Product Dimensions: 40.5 x 39.5 x 32.5 cm (L x W x H)
- Capacity: 7 Liters / 2.8 Kg
- Power / Wattage: 1800 watts
- Voltage: 240 Volts (DC)
- Material: Aluminum, Plastic
- Special Features: Temperature Control, Max Crisp Function, 12 Pre-set Cooking Functions, Rapid Hot Air Circulation
- Item Weight: 9.98 Kilograms
Warranty and Support
Kenwood products are manufactured to the highest quality standards and are guaranteed against defects in materials and workmanship. For specific warranty terms and conditions, please refer to the warranty card included with your product or visit the official Kenwood website.
For technical support, spare parts, or service inquiries, please contact Kenwood customer service or an authorized service center in your region. Keep your purchase receipt as proof of purchase for warranty claims.
Extended warranty options may be available from third-party providers:
- 1-Year Extended Warranty by Salama Care
- 2-Year Extended Warranty by Salama Care
For more information, visit the Official Kenwood Store on Amazon.