Important Safety Instructions
Read and understand all safety warnings and instructions before operating this pressure washer. Failure to follow the warnings and instructions may result in electric shock, fire, and/or serious injury.
- GFCI Protection: The power cord is equipped with a Ground Fault Circuit Interrupter (GFCI) plug to provide additional protection against electric shock. Do not bypass or modify the GFCI.
- Total Stop System (TSS): This pressure washer features a Total Stop System that automatically shuts off the motor when the trigger is released. This extends the pump's life and conserves energy.
- Safety Lock: The spray gun includes a safety lock to prevent accidental engagement of the trigger. Always engage the safety lock when the pressure washer is not in use or when changing nozzles.
- Always wear appropriate personal protective equipment, including eye protection, during operation.
- Ensure all connections are secure before starting the unit to prevent leaks and potential hazards.
- Do not direct the water stream at people, pets, or electrical devices.

This image shows the safety features: GFCI protection on the power plug, the Total Stop System mechanism on the spray gun, and the safety lock on the spray gun handle, designed to prevent accidental operation and enhance user safety.
Product Overview and Components
The SWIPESMITH Electric Pressure Washer SI-TH004 is designed for efficient cleaning tasks around your home. Familiarize yourself with its main components before use.
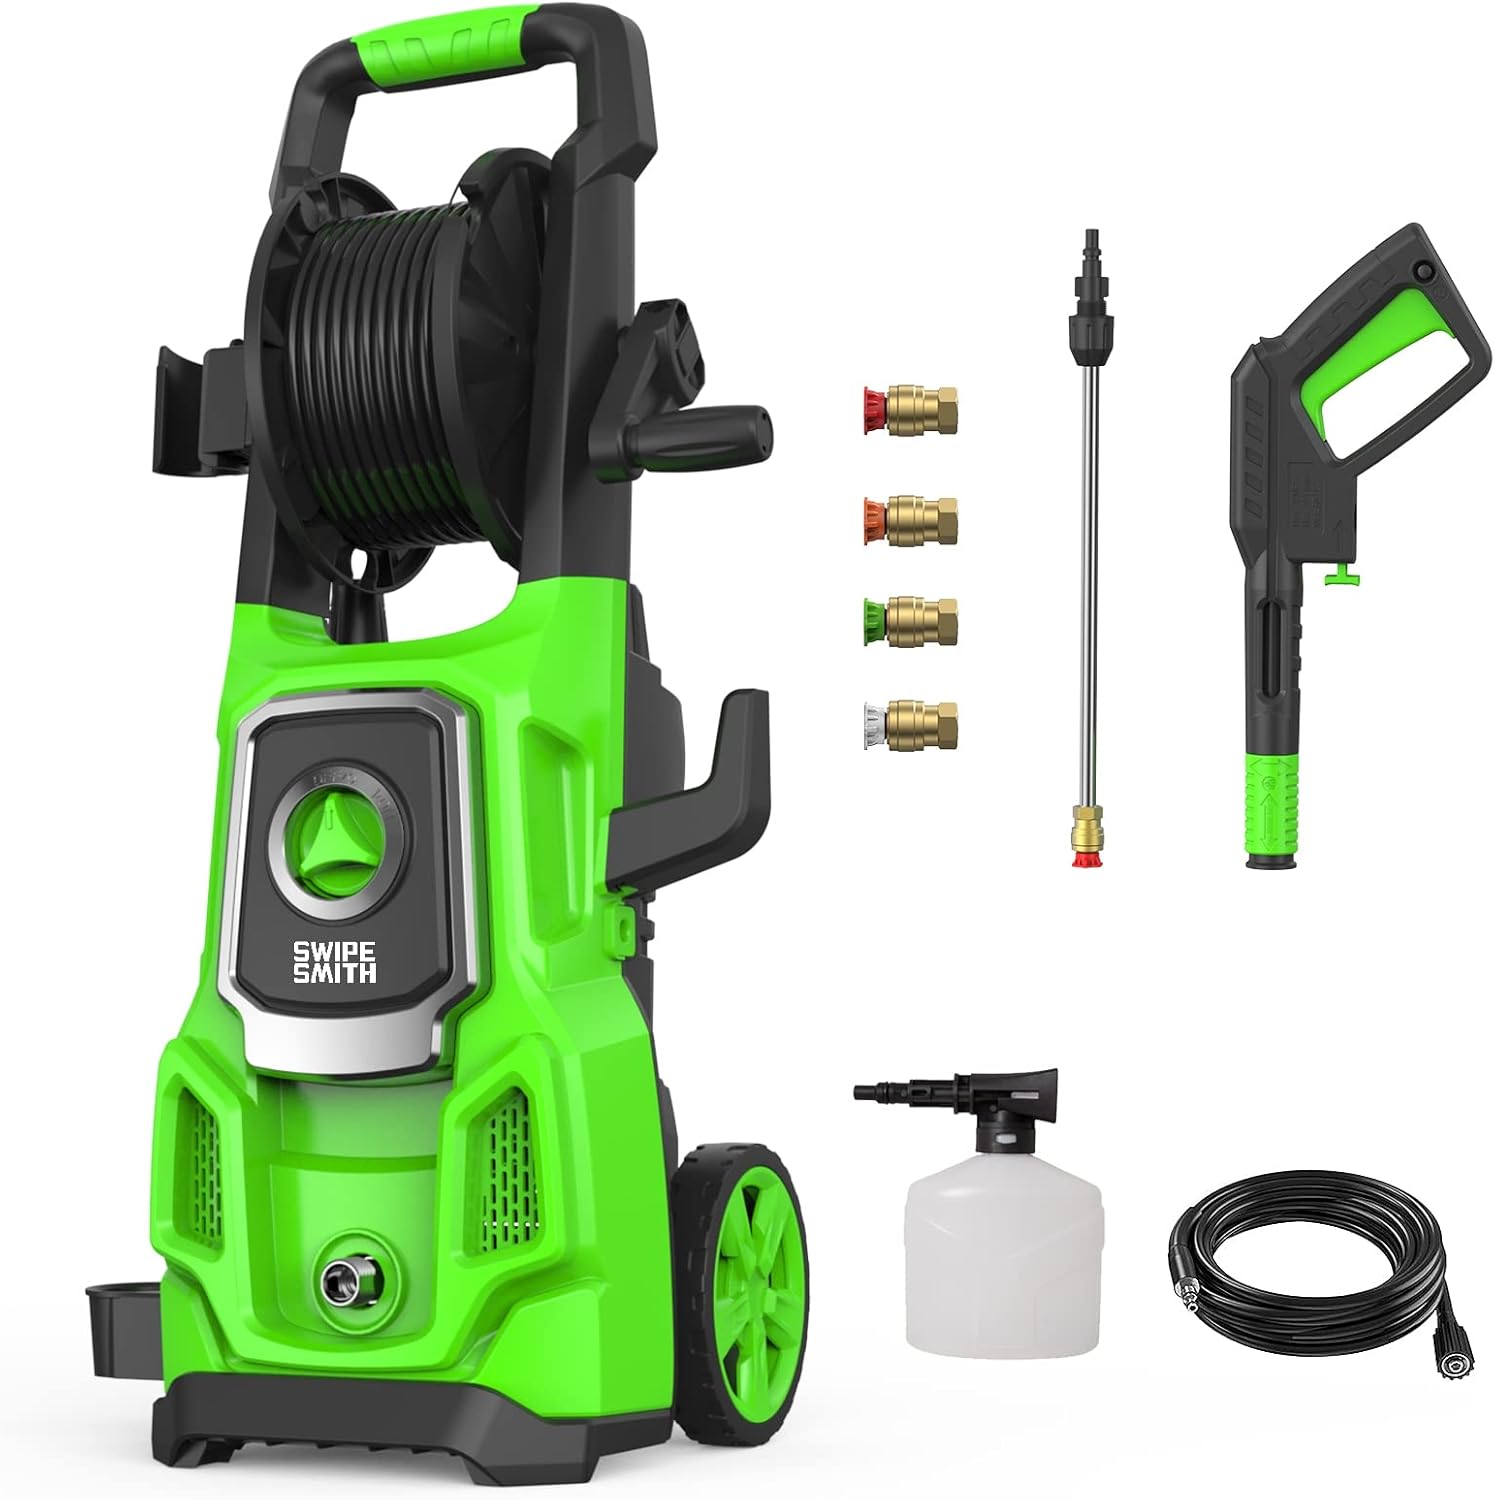
This image displays the complete SWIPESMITH Electric Pressure Washer unit, including the main body with hose reel, spray gun, extension wand, four quick-connect nozzles, and foam cannon.
Key Components:
- Main Pressure Washer Unit with Motor
- High-Pressure Hose Reel
- Spray Gun with Safety Lock
- Extension Wand
- Four Quick-Connect Nozzles (0°, 15°, 25°, 40°)
- Foam Cannon
- Water Inlet Connector
- Power Cord with GFCI Plug

This image highlights the integrated storage solutions: a nozzle holder for the quick-connect nozzles, a hose reel for the high-pressure hose, a power cord hook for the electrical cord, and a dedicated holder for the foam cannon, ensuring all accessories are organized and easily accessible.
Setup Instructions
- Unpacking and Assembly: Carefully remove all components from the packaging. Assemble the handle, wheels, and any other detachable parts as per the included assembly guide. Ensure all connections are firm.
- Connect Water Supply:
- For tap connection: Attach a garden hose (not included) to the water inlet connector on the pressure washer. Ensure the garden hose is free of kinks and has a minimum diameter of 1/2 inch.
- For bucket connection: The pressure washer is capable of drawing water from a bucket. Ensure the bucket is placed above the unit and the water inlet hose is fully submerged.
Note: Always use a clean water source. Do not use hot water.
- Connect High-Pressure Hose: Connect one end of the high-pressure hose to the outlet on the pressure washer unit and the other end to the spray gun. Tighten securely by hand.
- Attach Spray Gun and Nozzle: Insert the extension wand into the spray gun and twist to secure. Select the desired quick-connect nozzle and push it firmly into the end of the extension wand until it clicks into place.
- Connect Power: Plug the GFCI-equipped power cord into a grounded 120V electrical outlet. Press the "RESET" button on the GFCI plug if necessary.
Operating Instructions
- Prime the Pump: Before turning on the power, turn on the water supply completely. Squeeze the trigger on the spray gun to release air from the system until a steady stream of water flows from the nozzle. This primes the pump and prevents damage.
- Start the Pressure Washer: Turn the ON/OFF switch on the unit to the "ON" position. The motor will start when the trigger is squeezed and stop when released (Total Stop System).
- Using Quick-Connect Nozzles:
The pressure washer includes four quick-connect nozzles, each designed for specific cleaning tasks:
- 0° (Red): Produces a concentrated, high-impact stream for stubborn stains and hard-to-reach areas. Use with extreme caution as it can damage surfaces.
- 15° (Yellow): Provides a powerful, narrow spray for intensive cleaning of hard surfaces like concrete and brick.
- 25° (Green): Offers a wider spray pattern suitable for general cleaning of wood decks, fences, and siding.
- 40° (White): Delivers a broad, gentle spray for delicate surfaces such as vehicles, patio furniture, and windows.
Always turn off the pressure washer and engage the safety lock before changing nozzles.

This image visually demonstrates the four quick-connect nozzles (0°, 15°, 25°, 40°) and their corresponding spray patterns, along with their recommended uses for different surfaces and cleaning intensity.
- Using the Foam Cannon:
The foam cannon is ideal for applying detergent to surfaces for enhanced cleaning, especially for vehicles.
- Fill the foam cannon reservoir with appropriate pressure washer detergent.
- Attach the foam cannon to the spray gun.
- Operate the pressure washer to apply a rich foam layer to the desired surface.
- Allow the detergent to dwell for a few minutes (refer to detergent instructions), then rinse thoroughly with a suitable nozzle.

This image depicts the foam spray mode in action, with the pressure washer's foam cannon applying a thick layer of foam to a car, illustrating its use for car washing.
- Cleaning Techniques:
Always start with a wider spray pattern (e.g., 40°) and a greater distance from the surface, gradually moving closer or switching to a narrower spray if more power is needed. Test on an inconspicuous area first.

This collage illustrates the wide application of the pressure washer, showing it being used to clean a tiled roof, a wooden fence, a car, and a wooden bench, demonstrating its versatility for different outdoor cleaning tasks.
- Shutting Down:
- Turn the ON/OFF switch to "OFF".
- Turn off the water supply.
- Squeeze the spray gun trigger to release any remaining pressure in the system.
- Engage the safety lock on the spray gun.
- Unplug the power cord.
Maintenance
Regular maintenance ensures optimal performance and extends the life of your pressure washer.
- Nozzle Cleaning: If a nozzle becomes clogged, use the included nozzle cleaning tool (or a thin wire) to clear any debris. Rinse thoroughly.
- Water Inlet Filter: Periodically check and clean the water inlet filter to prevent debris from entering the pump.
- Winter Storage (if applicable): If storing in freezing temperatures, drain all water from the pump, hose, and spray gun to prevent damage. Consider using a pump protector.
- Hose and Cord Management: After each use, properly coil the high-pressure hose onto the hose reel and wrap the power cord around its designated hook to prevent kinks and damage.
This image illustrates effective cord and hose management. It shows tangled hoses and cords "before" proper organization, and then "after" they have been neatly wound onto the integrated hose reel and power cord hook, promoting tidy storage and preventing damage.
Troubleshooting
| Problem | Possible Cause | Solution |
|---|---|---|
| Motor does not start |
|
|
| No pressure or low pressure |
|
|
| Water leaks |
|
|
Specifications
| Model Number | SI-TH004 |
| Max Pressure | 3500 PSI |
| Max Flow Rate | 2.6 GPM |
| Motor Power | 1800W |
| Power Source | AC Electric |
| Hose Length | 20 Feet |
| Power Cord Length | 35 Feet (approx.) |
| Product Dimensions | 49 x 32 x 31.5 cm |
| Item Weight | 9.48 kg |

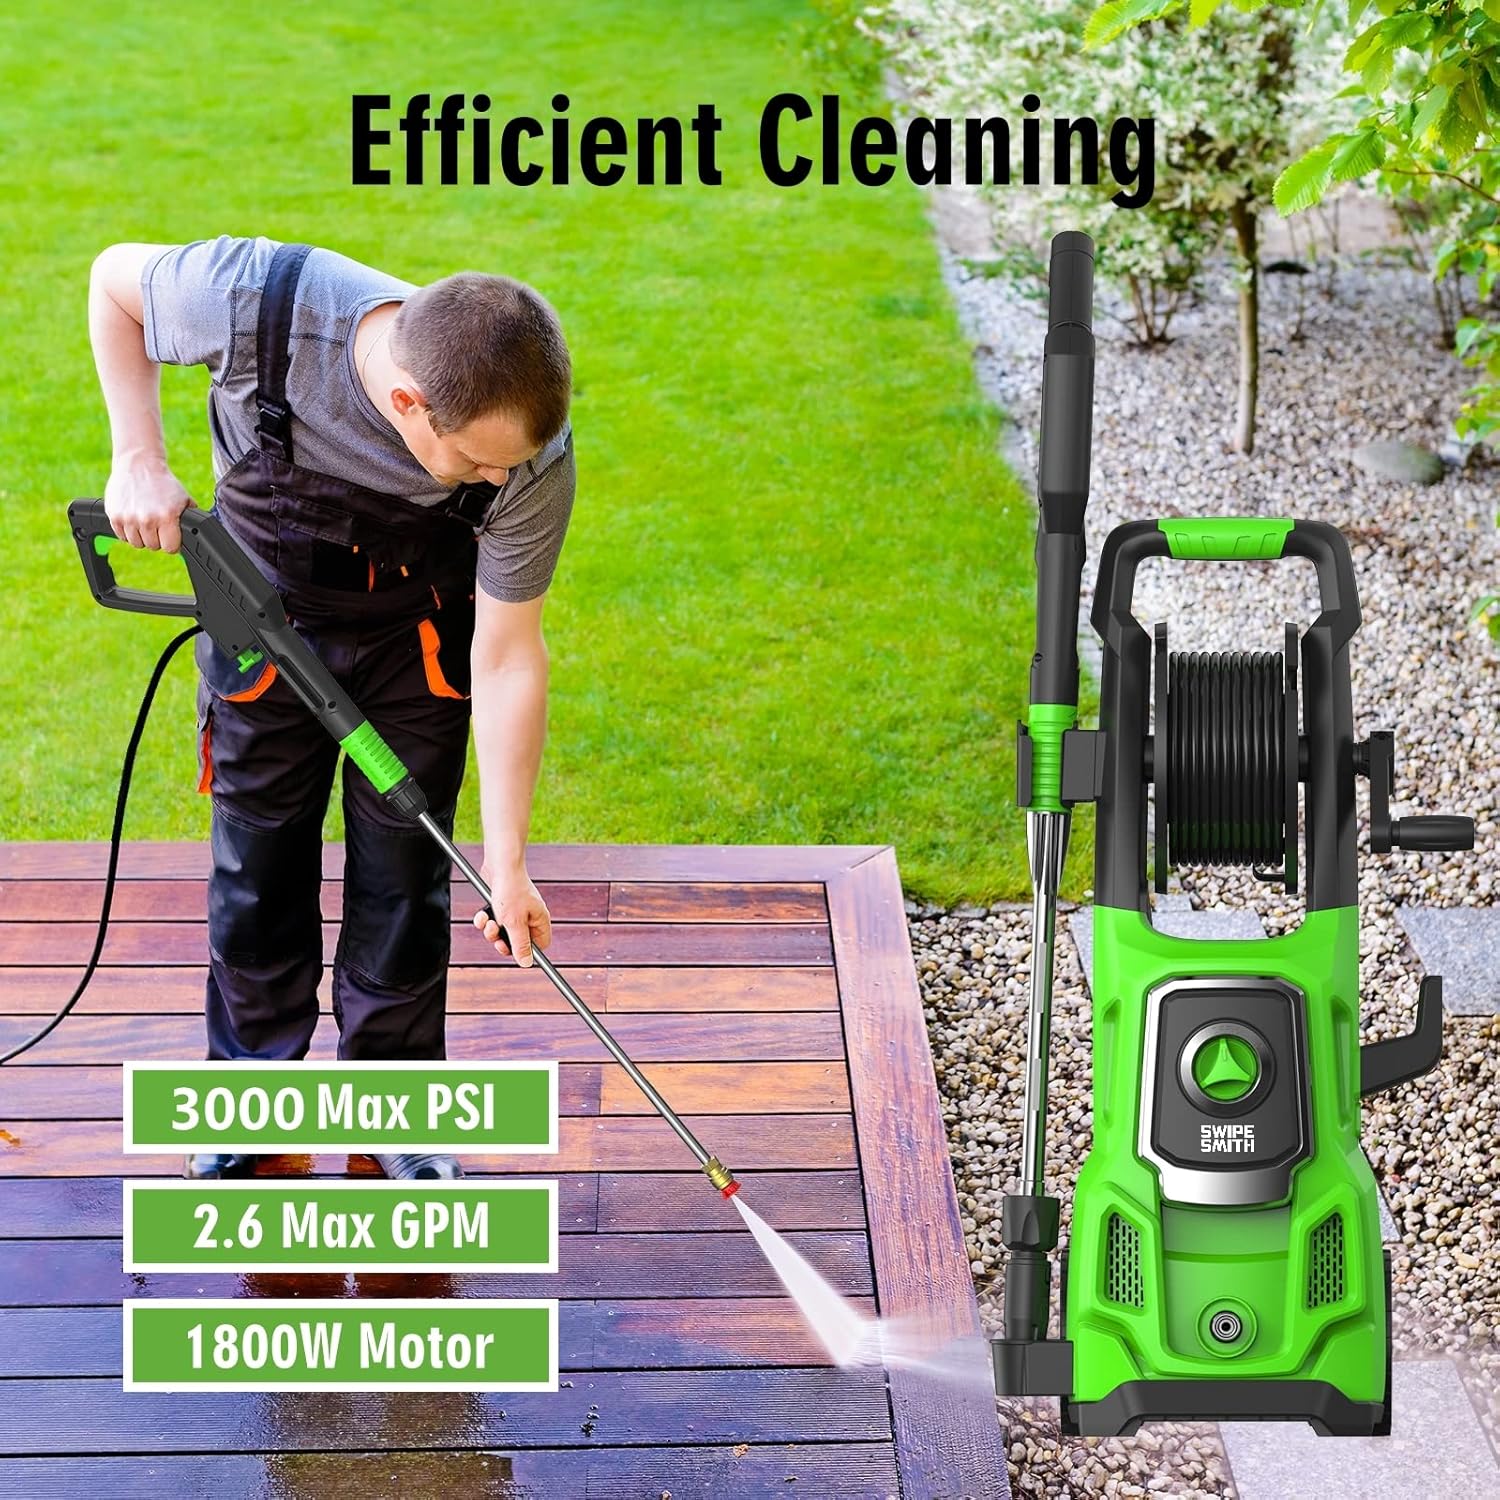
This image displays the SWIPESMITH Electric Pressure Washer alongside its key performance metrics: 3500 Max PSI, 2.6 Max GPM, and 1800W Motor, highlighting its efficient cleaning capabilities.
Warranty and Customer Support
SWIPESMITH is committed to providing high-quality products and customer satisfaction. For any assistance, questions, or concerns regarding your pressure washer, please contact our professional customer service team.
Customer Service Email: support@swipesmith.net
Please include your model number (SI-TH004) and a detailed description of your issue when contacting support to ensure a prompt and efficient resolution.