DSTMLOCKFTY D2000
DSTMLOCKFTY D2000 Smart Biometric Fingerprint Keypad Door Lock Instruction Manual
1. Introduction
Thank you for choosing the DSTMLOCKFTY D2000 Smart Biometric Fingerprint Keypad Door Lock. This advanced keyless entry system provides enhanced security and convenience for your home, office, or apartment. It offers multiple unlocking methods including fingerprint, passcode, IC card, and traditional mechanical keys. Please read this manual carefully before installation and operation to ensure proper use and optimal performance.

Image 1.1: Overview of the DSTMLOCKFTY D2000 Smart Lock components.
2. Package Contents
Please verify that all the following components are included in your package:
- Front Plate (Exterior Keypad Unit)
- Mounting Plate
- Back Plate (Interior Unit)
- Screw Packages (various screws for installation)
- User Manuals (this document)
- Fingerprint deadbolt door lock (main assembly)
- 3 Standard Mechanical Keys
- 2 Key Fob Cards (IC Cards)
- Latch
- Strike Plate
- Installation Instructions
- Programming Instructions
If any items are missing or damaged, please contact customer support.
3. Product Specifications
| Feature | Specification |
|---|---|
| Model Number | D2000 |
| Material | Zinc Alloy |
| Color | Black |
| Finish | Brushed |
| Lock Type | Keypad Deadbolt |
| Unlocking Methods | Fingerprint, Passcode, IC Card, Mechanical Key |
| Door Thickness Compatibility | 1.49 inches to 1.88 inches (37mm-48mm) |
| Adjustable Backset | 2-3/8 inches (60mm) or 2-3/4 inches (70mm) |
| Power Supply | 4*AAA Alkaline Batteries (not included) |
| Emergency Power | Type-C interface for emergency charging |
| Dimensions (L x W x H) | 18.3 x 13.3 x 8.2 cm (7.2 x 5.24 x 3.23 inches) |
| Weight | 997.9 g (approx. 2.2 lbs) |

Image 3.1: Lock dimensions and door compatibility.
4. Installation Guide
4.1 Pre-Installation Checks
- Door Thickness: Ensure your door thickness is between 1.49 inches (37mm) and 1.88 inches (48mm).
- Backset: Verify your door's backset is either 2-3/8 inches (60mm) or 2-3/4 inches (70mm). The latch is adjustable.
- Tools Required: A screwdriver is typically the only tool needed for installation.
4.2 Replacing Existing Hardware
The DSTMLOCKFTY D2000 is designed to replace most standard deadbolts and door handles. Remove your existing lock hardware before proceeding with the new installation.

Image 4.1: Replacing an old door handle with the smart lock.
4.3 Step-by-Step Installation (General)
Refer to the dedicated 'Installation Instructions' included in your package for detailed, visual steps. The general process involves:
- Install the latch into the door edge.
- Mount the exterior keypad unit, ensuring the spindle passes through the latch.
- Secure the mounting plate to the door.
- Connect the cable from the exterior unit to the interior unit.
- Attach the interior unit to the mounting plate.
- Install the batteries (4*AAA, not included) into the interior unit.
- Test the lock's functionality with a mechanical key before closing the battery cover.
5. Operation Guide
5.1 Initial Setup and Admin Passcode
Upon first power-up, you will need to set an Admin Passcode. This passcode is essential for programming and managing other users. Refer to the 'Programming Instructions' for detailed steps on setting the Admin Passcode and other user credentials.
5.2 Unlocking Methods

Image 5.1: Multiple unlocking methods.
- Fingerprint: Place your registered finger on the fingerprint sensor. The lock will unlock within 1 second if the fingerprint is recognized. Up to 100 fingerprints can be registered.
- Passcode: Enter your registered 4-8 digit passcode on the keypad. The lock supports up to 250 guest passcodes.
- Anti-Peeping Virtual Passcode: To prevent others from guessing your passcode, you can enter random digits before or after your actual passcode. For example, if your passcode is 123456, you can enter 987123456321. The lock will still recognize the correct sequence.

Image 5.2: Anti-peeping virtual passcode feature.
- IC Card (Key Fob): Present a registered IC card to the designated reader area on the lock. Up to 1000 IC cards can be registered.
- Mechanical Key: In case of battery depletion or electronic malfunction, use one of the provided mechanical keys to unlock the door manually.
5.3 Locking Methods
- Automatic Locking: The lock can be configured to automatically lock after a set period (10-900 seconds). This feature is turned off by default and can be enabled/adjusted via programming.
- One-Touch Locking: Press and hold the '#' button for 2 seconds to instantly lock the door from the outside.
- Manual Locking (Interior): Turn the knob on the interior unit to lock or unlock the door from the inside.
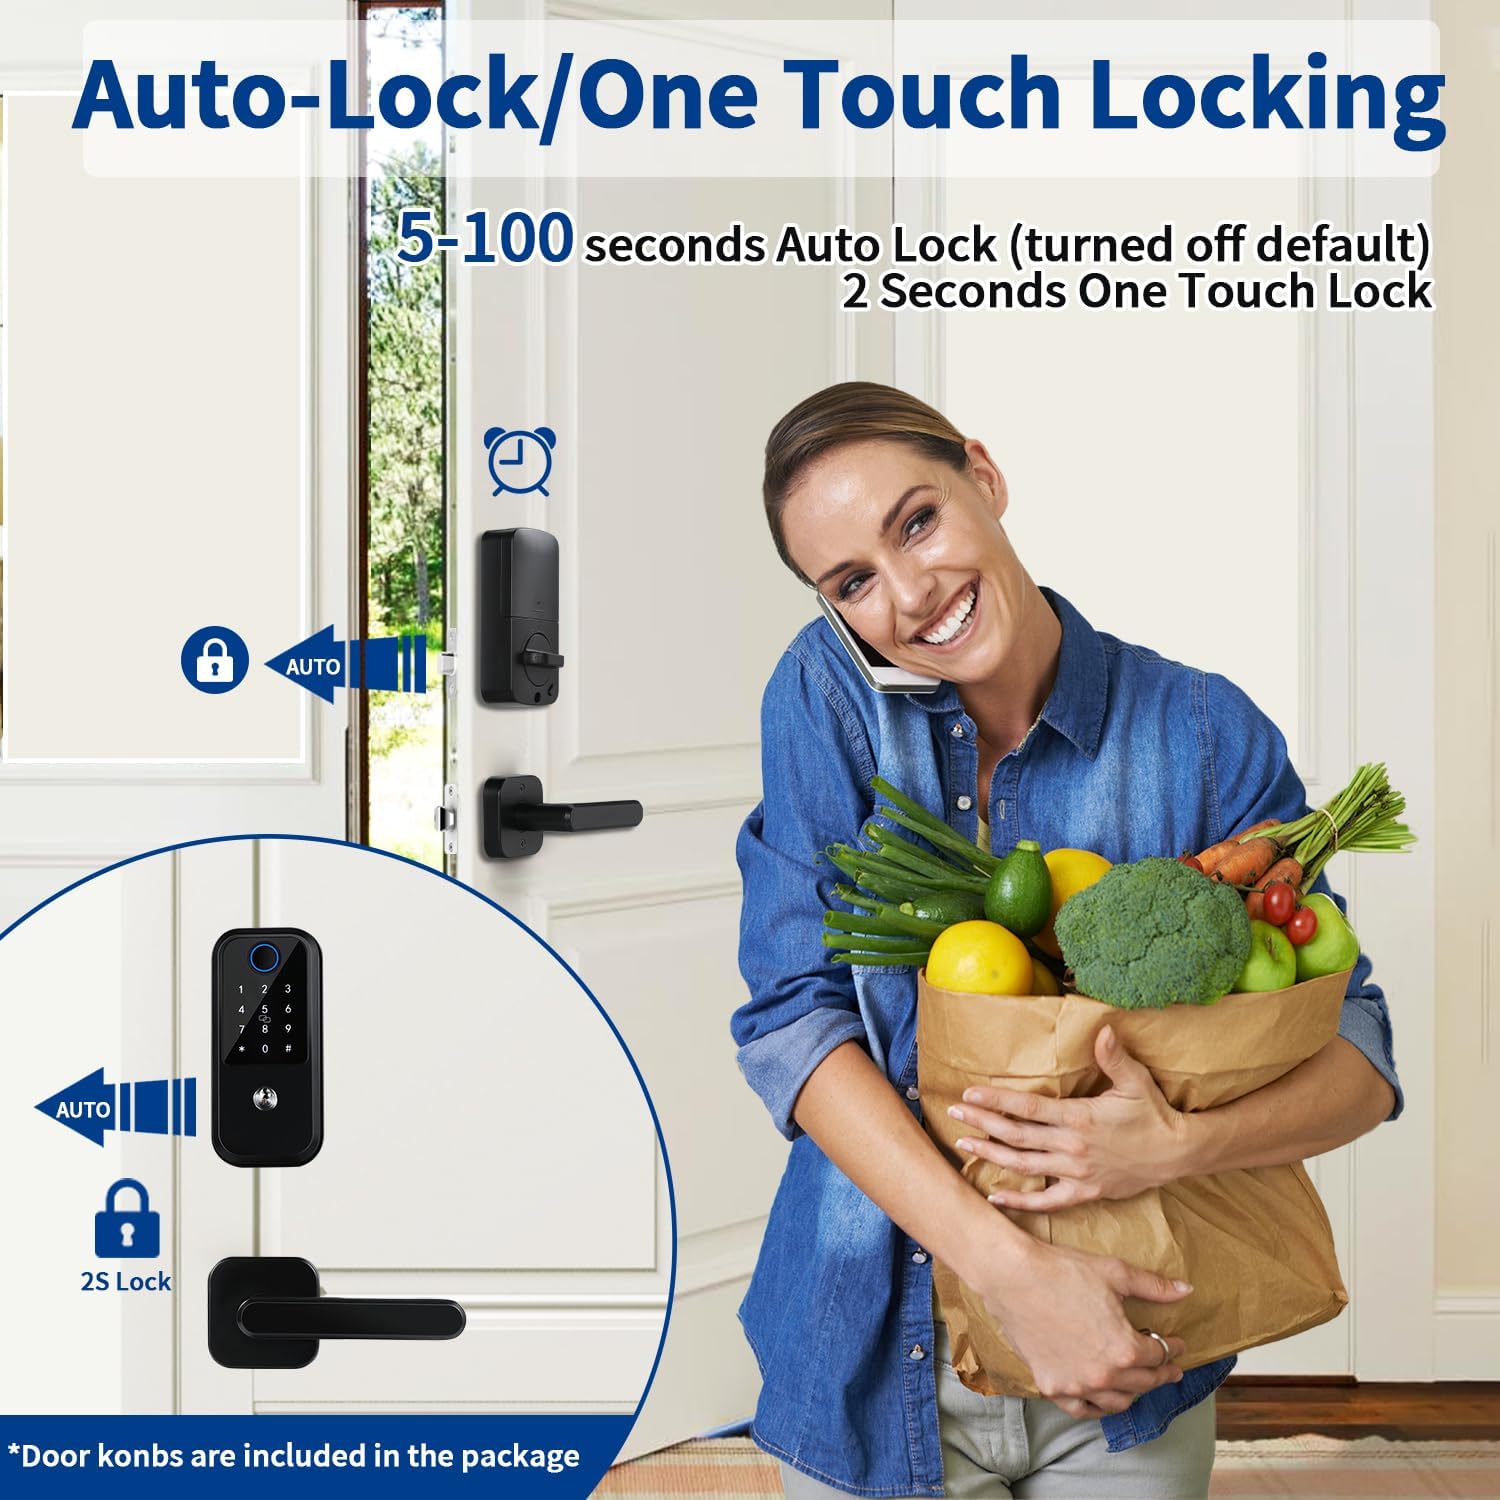
Image 5.3: Auto-lock and one-touch locking features.
6. Maintenance
6.1 Battery Replacement
The lock requires 4*AAA alkaline batteries (not included). When the battery level is low, the lock will provide a low battery alert. Replace all four batteries promptly to ensure continuous operation. Always use new, high-quality alkaline batteries.
6.2 Emergency Power
If the batteries completely deplete, you can use a Type-C cable to connect an external power bank for emergency charging to temporarily power the lock and gain entry. This is for emergency use only and not for daily charging.
6.3 Cleaning
Clean the lock's exterior surfaces with a soft, dry cloth. Avoid using abrasive cleaners, solvents, or harsh chemicals, as these can damage the finish and electronic components.
7. Troubleshooting
- Lock not responding: Check battery level. Replace batteries if low. Ensure the cable connection between the front and back units is secure.
- Fingerprint not recognized: Ensure your finger is clean and dry. Try re-registering your fingerprint if issues persist.
- Passcode not working: Verify the correct passcode is being entered. Ensure you are not accidentally triggering the anti-peeping feature incorrectly. Try resetting the lock to factory settings and re-programming (refer to programming instructions).
- Lock makes unauthorized access sound: This typically indicates an incorrect entry attempt. After several invalid attempts, the lock may temporarily disable the keypad for a period (e.g., 30 minutes) as a security measure.
- Door does not lock/unlock smoothly: Check for any obstructions in the door frame or latch mechanism. Ensure the lock is installed correctly and aligned with the strike plate.
- No voice feedback: Check if the volume setting is turned off or too low. Refer to programming instructions to adjust voice settings.
For further assistance, please consult the detailed programming instructions or contact customer support.
8. Warranty and Support
The DSTMLOCKFTY D2000 Smart Lock comes with a manufacturer's warranty. Please refer to the warranty card included in your package or visit the official DSTMLOCKFTY website for detailed warranty terms and conditions. For technical support, troubleshooting assistance, or warranty claims, please contact DSTMLOCKFTY customer service through the contact information provided with your product or on the official website.