1. Introduction
The HERCHR DT-2234C is a handheld digital photo tachometer designed for non-contact measurement of rotational speed (RPM). It utilizes a laser sensor to provide accurate and stable readings, making it suitable for various applications including motors, wheels, lathes, fans, and other rotating machinery. This manual provides detailed instructions for the safe and effective use of your device.

Figure 1: Front view of the HERCHR DT-2234C Digital Tachometer, displaying '60000' RPM on its LCD screen.
2. Safety Precautions
Please read and understand all safety instructions before operating the device. Failure to follow these instructions may result in injury or damage to the device.
- Laser Safety: This device emits a Class II laser. Do not stare directly into the laser beam or direct it towards others. Avoid direct eye exposure.
- Battery Safety: Ensure correct battery polarity when installing. Remove the battery if the device will not be used for an extended period to prevent leakage. Do not mix old and new batteries.
- Operating Environment: Use the device within the specified operating temperature range (0℃ to 50℃). Avoid exposure to extreme temperatures, humidity, dust, or strong electromagnetic fields.
- Maintenance: Do not attempt to disassemble or modify the device. Refer all servicing to qualified personnel.
3. Package Contents
Verify that all items are present in the package:
- 1 x HERCHR DT-2234C Digital Tachometer
- 1 x Blue Carrying Bag
- 3 x Reflective Tape Strips
- 1 x User Manual (English)

Figure 2: The complete package contents, including the tachometer, blue carrying bag, reflective tape, and user manual.
4. Product Overview
4.1 Components
- Laser Emitter/Receiver: Located at the top front, emits and receives the laser beam.
- LCD Display: 5-digit, 18mm (0.7") display for showing RPM readings.
- MEM Button: Used to recall maximum, minimum, and last measured values.
- TEST Button: Activates the laser and initiates measurement.
- Battery Compartment: Located on the rear for 9V battery installation.

Figure 3: Detailed view highlighting the laser sensor at the top and the 'MEM' and 'TEST' buttons on the front panel.
4.2 Key Features
- Non-contact measurement using laser technology.
- Wide measuring range: 2.5 RPM to 99,999 RPM.
- High resolution: 0.1 RPM (2.5-999.9 RPM) and 1 RPM (1000-99,999 RPM).
- High accuracy: ±(0.05% + 1 digit).
- Automatic range selection.
- Data hold function.
- Memory function for maximum, minimum, and last measured values.
- Low battery indication.
5. Specifications
| Parameter | Specification |
|---|---|
| Model | DT-2234C |
| Display | 5-digit, 18mm (0.7") LCD |
| Measuring Range | 2.5 RPM - 99,999 RPM |
| Resolution | 0.1 RPM (2.5-999.9 RPM), 1 RPM (1000-99,999 RPM) |
| Accuracy | ±(0.05% + 1 digit) |
| Measuring Distance | 50-500mm (2-20 inches) |
| Time Base | 6MHz Quartz Crystal Oscillator |
| Sampling Time | 0.8s (over 60 RPM) |
| Power Supply | 1 x 9V 6F22 Battery (not included) |
| Power Consumption | Approx. 30mA |
| Working Temperature | 0℃ ~ 50℃ (32℉ ~ 122℉) |
| Item Size | 130 x 68 x 26mm (5.1 x 2.7 x 1.0 inches) |
| Item Weight | Approx. 150g (5.3 oz) |

Figure 4: Diagram illustrating the physical dimensions of the tachometer: 130mm (5.1in) length, 68mm (2.7in) width, and 26mm (1.0in) thickness.
6. Setup
6.1 Battery Installation
- Locate the battery compartment cover on the back of the device.
- Slide the cover downwards to open.
- Insert one 9V 6F22 battery, ensuring correct polarity (+/-).
- Replace the battery compartment cover by sliding it upwards until it clicks into place.
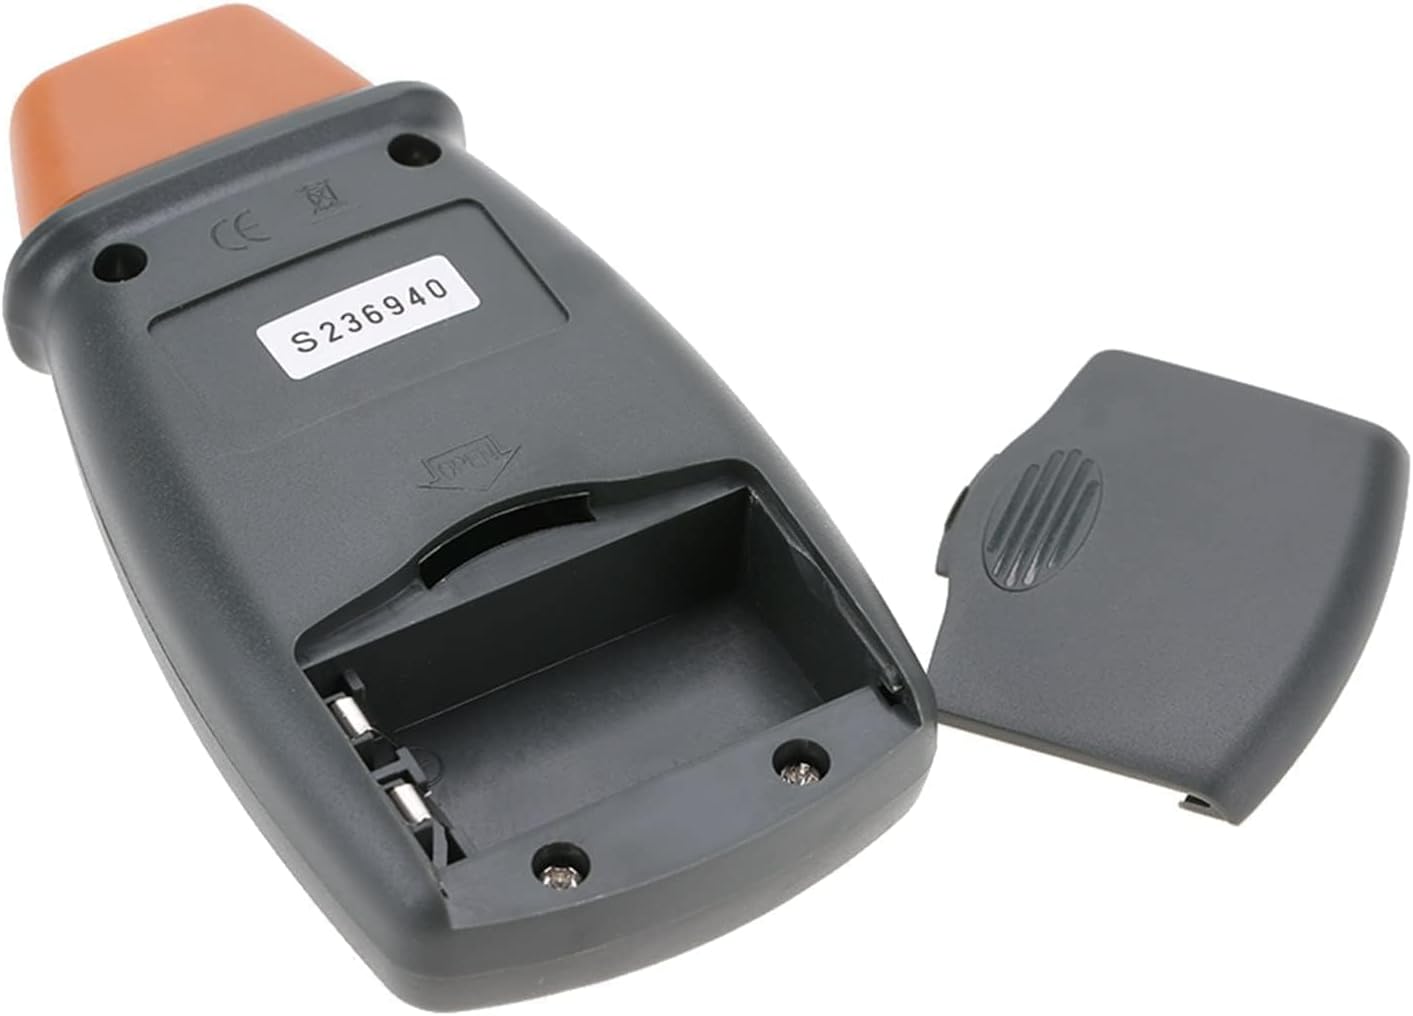
Figure 5: Rear view of the tachometer with the battery compartment open, showing where to insert the 9V battery.
6.2 Reflective Tape Application
For accurate measurements, a piece of reflective tape must be applied to the rotating object.
- Clean the surface of the rotating object where the measurement will be taken.
- Cut a small piece of reflective tape (approximately 10-12mm or 0.4-0.5 inches).
- Firmly attach the reflective tape to the rotating shaft or disk. Ensure the tape is flat and securely adhered.
- For best results, apply the tape to a non-reflective background. If the object is highly reflective, cover the surrounding area with black tape or paint to prevent false readings.
7. Operating Instructions
7.1 Taking Measurements
- Hold the tachometer firmly in your hand.
- Point the laser beam towards the reflective tape on the rotating object. Ensure the measuring distance is between 50mm and 500mm (2 to 20 inches).
- Press and hold the TEST button. The laser will activate, and the RPM reading will appear on the LCD display.
- Adjust the angle and distance until a stable reading is obtained. The device automatically selects the appropriate range.
- Release the TEST button to stop measuring. The last measured value will remain on the display.

Figure 6: A hand demonstrating how to hold the tachometer and point the laser towards a target for measurement.

Figure 7: A close-up image showing the tachometer's laser emitter active, projecting a red laser dot.
7.2 Memory Functions
While the TEST button is pressed and a measurement is active, the device automatically records the maximum, minimum, and last values. To recall these values after releasing the TEST button:
- Press the MEM button once to display the maximum (MAX) RPM value.
- Press the MEM button again to display the minimum (MIN) RPM value.
- Press the MEM button a third time to display the last measured (LAST) RPM value.
- Press the MEM button again to return to the current measurement mode (if TEST is pressed) or to clear the memory (if TEST is not pressed).

Figure 8: Examples of applications for the tachometer, including automobiles, washing machines, fans, and engines.

Figure 9: The tachometer in use, measuring the rotational speed of a washing machine drum, demonstrating its high sampling frequency, clear LCD display, and high measuring accuracy.
8. Maintenance
- Cleaning: Wipe the device with a soft, dry cloth. Do not use abrasive cleaners or solvents.
- Storage: Store the device in a cool, dry place away from direct sunlight. Remove the battery if storing for extended periods.
- Reflective Tape: Ensure the reflective tape is clean and securely attached for accurate readings. Replace worn or damaged tape.
9. Troubleshooting
| Problem | Possible Cause | Solution |
|---|---|---|
| No display or weak display | Low battery or incorrect battery installation. | Replace the 9V battery or ensure it is installed with correct polarity. |
| Unstable or inaccurate readings |
|
|
| Laser not emitting | Battery issue or device malfunction. | Check battery. If the issue persists, contact customer support. |
10. Customer Support
If you encounter any problems with your HERCHR DT-2234C Digital Tachometer, please do not hesitate to contact us. Our customer support team is dedicated to providing a satisfactory solution to any issues you may experience.
For assistance, please refer to the contact information provided with your purchase or visit the HERCHR official website.


