1. Introduction
Thank you for choosing the Topiky A11 Portable Car Jump Starter. This device is designed to provide emergency jump-starting for your vehicle, as well as serve as a portable power bank and an emergency LED light. Please read this manual carefully before use to ensure safe and optimal operation.

Image: The Topiky A11 Portable Car Jump Starter, showcasing its compact design and multiple functionalities.
2. Package Contents
Please check the package contents upon unboxing:
- 1 x Topiky A11 Car Jump Starter
- 1 x Smart Clip (Jumper Cables)
- 1 x Charging Cable
- 1 x Instruction Manual
- 1 x Storage Box
3. Specifications
| Type | Car Jump Starter |
| Material | PC |
| Built-in Battery | 12000mAh Lithium Battery |
| Starting Current | 600A |
| Peak Current | 1500A |
| LED Light Modes | Always On, Flashing, SOS |
| Cycle Life | >1000 times |
| Charging Time | 4-5 hours |
| Flame Retardant Class | V0 |
| Operating Temperature Range | -30℃ to 65℃ (-22°F to 149°F) |
| Voltage | 12 Volts |
| Model Number | Topikyfscrmi2wye |
The Topiky A11 is capable of jump-starting 12V vehicles with up to 7.0L gasoline engines or 5.0L diesel engines.
4. Safety Information
To ensure safe operation and prevent damage to the device or your vehicle, please observe the following safety guidelines:
- Multiple Protection: The jump starter features short circuit, overcurrent, reverse polarity, and overvoltage protection. It is UL listed for safety and reliability.
- Do not attempt to jump-start a vehicle if the jump starter's battery level is below 60%.
- Ensure the smart clip clamps are connected correctly to the positive (+) and negative (-) terminals of the vehicle battery. Reverse polarity can cause damage.
- Do not connect the red and black clamps together.
- Keep the device away from water, moisture, and flammable materials.
- Do not disassemble or modify the device.
- Store in a cool, dry place away from direct sunlight and extreme temperatures.

Image: Labeled diagram of the Topiky A11 Car Jump Starter's components and ports.
5. Setup
5.1 Initial Charging
Before first use, fully charge the Topiky A11 jump starter. Connect the provided charging cable to the jump starter's input port and a suitable USB power adapter (not included). The digital display will show the charging progress. Charging typically takes 4-5 hours.
5.2 Component Overview
Familiarize yourself with the jump starter's components:
- Emergency Light: Multi-mode LED flashlight.
- 12V Car Start Port: For connecting the smart clip.
- Function Keys: Control light modes and phone charging.
- Master Switch: Power on/off the unit.
- TYPE C Fast Charging Port: For charging the jump starter.
- USB Output 5V 2.1A: For charging digital products.
- Digital Display: Shows battery percentage and output status.
6. Operating Instructions
6.1 Jump Starting a Vehicle
Follow these steps to safely jump-start your vehicle:
- Ensure the jump starter has at least 60% charge.
- Insert the smart clip's blue connector into the 12V car start port on the jump starter.
- Connect the red clamp to the positive (+) terminal of the car battery.
- Connect the black clamp to the negative (-) terminal of the car battery.
- Go to your car and start the engine.
- Once the car starts, immediately remove the smart clip from the car battery terminals, then disconnect it from the jump starter.

Image: Visual guide demonstrating the four simple steps to jump-start a car.
6.2 Using LED Light Modes
The jump starter features three LED light modes for various situations:
- Night Lighting (Flashlight): Long press the ON/OFF button for three seconds to activate the steady flashlight mode.
- Flashing Reminder: Press the button again to switch to the flashing light mode.
- SOS Signal: Press the button a third time to activate the SOS signal mode.
- To turn off the light, long press the ON/OFF button again.

Image: Detailed explanation of the three LED light modes and their activation.
6.3 Charging External Devices
The Topiky A11 can also function as a power bank to charge your electronic devices:
- Connect your smartphone, tablet, or other USB-powered devices to the 5V 2.1A USB output port using a compatible charging cable.
- For faster charging, use the 37W Type-C output port with a compatible cable and device.
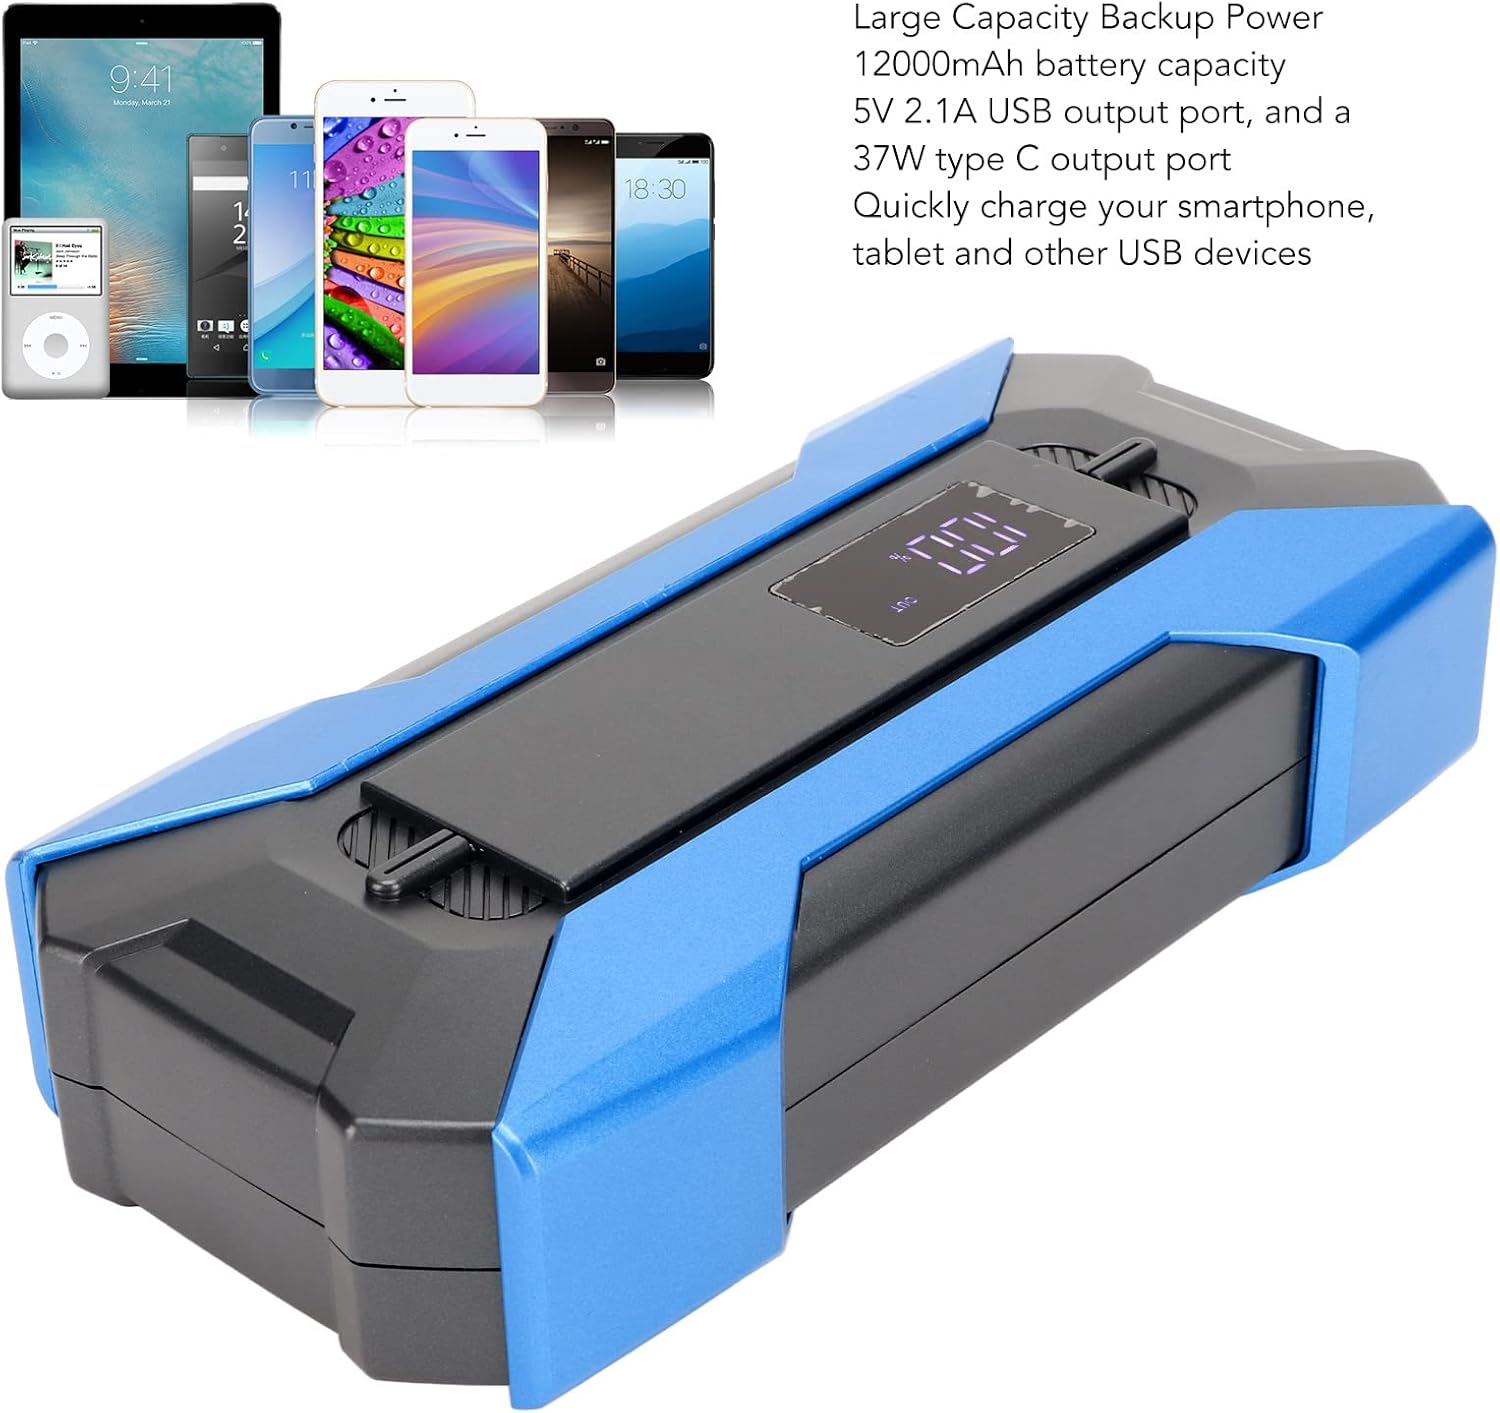
Image: The Topiky A11 acting as a large capacity backup power source for various electronic devices.
7. Maintenance
Proper maintenance ensures the longevity and reliability of your jump starter:
- Storage: Store the jump starter in its storage box in a cool, dry place, away from direct sunlight and extreme temperatures.
- Recharging: If the unit is not used for an extended period, recharge it every 3-6 months to maintain battery health and prevent deep discharge.
- Cleaning: Keep the smart clip clamps clean and free of dirt, dust, and corrosion. Use a dry cloth to wipe the unit.
- Battery Care: Avoid fully discharging the battery frequently, as this can reduce its overall lifespan.
8. Troubleshooting
If you encounter issues with your Topiky A11 jump starter, refer to the following common problems and solutions:
- Car Won't Start:
- Check if the jump starter has sufficient charge (at least 60%).
- Ensure the smart clip clamps are securely and correctly connected to the car battery terminals (red to positive, black to negative).
- Check for corrosion on car battery terminals and clean if necessary.
- Ensure the smart clip is fully inserted into the jump starter's port.
- Jump Starter Not Charging:
- Verify that the charging cable is properly connected to both the jump starter and the power adapter.
- Try a different charging cable or power adapter.
- Ensure the power outlet is functional.
- LED Light Not Working:
- Ensure the jump starter is powered on.
- Check the battery level of the jump starter.
- External Devices Not Charging:
- Ensure the jump starter is powered on.
- Verify the charging cable for your device is functional and correctly connected.
- Check the battery level of the jump starter.
9. Warranty
The Topiky A11 Portable Car Jump Starter comes with a 1 Year Warranty Against Manufacturer Defects. This warranty covers defects in materials and workmanship under normal use. It does not cover damage caused by misuse, accidents, unauthorized modifications, or improper maintenance.
Please retain your proof of purchase for warranty claims.
10. Support
For further assistance, technical support, or warranty inquiries, please contact your retailer or the manufacturer directly. Refer to your purchase documentation for specific contact information.
We are committed to providing reliable products and excellent customer service.