VEVOR Miter Saw Stand
VEVOR Miter Saw Stand User Manual
Model: Miter Saw Stand
1. Introduction
Thank you for choosing the VEVOR Miter Saw Stand. This manual provides essential information for the safe and efficient operation, assembly, and maintenance of your new miter saw stand. Please read this manual thoroughly before initial use and retain it for future reference.

Figure 1: VEVOR Miter Saw Stand in its operational configuration, with wood pieces in the foreground.
The VEVOR Miter Saw Stand is a versatile and robust tool designed to enhance your woodworking and construction projects. Its collapsible and rolling design ensures easy transport and storage, while its multi-functional capabilities allow it to serve as a miter saw stand, scaffold, creeper, dolly, and workbench.
2. Safety Instructions
Always adhere to the following safety guidelines to prevent injury and damage to the equipment:
- Read and understand all instructions before operating the stand.
- Ensure the stand is placed on a stable, level surface before use.
- Do not exceed the maximum load capacity of 330 lbs (150 kg).
- Always secure your miter saw firmly to the mounting brackets using the provided clamps.
- Keep hands and body parts clear of moving parts during adjustment or folding.
- Wear appropriate personal protective equipment (PPE) such as safety glasses and gloves.
- Do not modify the stand in any way. Use only original replacement parts.
- When using as a scaffold, ensure proper stability and follow all relevant safety protocols for working at height.
- When using as a creeper or dolly, ensure the path is clear and stable.
3. Product Overview
The VEVOR Miter Saw Stand is designed for versatility and ease of use. Key features include:
- Quick Folding Design: Allows for rapid setup and compact storage.
- 5-in-1 Application: Functions as a miter saw stand, scaffold, creeper, dolly, and workbench.
- Adjustable Height: Three height positions (22.44 in / 57 cm, 26.37 in / 67 cm, 30.71 in / 78 cm) for ergonomic use.
- Portable Movement: Equipped with super-grip rubber wheels and a side pull handle for easy transport.
- Remarkable Stability: Professional clamps secure the saw, and a non-slip textured surface enhances safety.
- Integrated Measurement Tools: Features a built-in scale and protractor for convenient measurements.

Figure 2: Illustrates the five primary applications of the stand: Miter Saw Stand, Scaffold, Creeper, Dolly, and Workbench.

Figure 3: Shows the three adjustable height positions of the stand for user comfort and versatility.
4. Assembly and Setup
The VEVOR Miter Saw Stand requires some assembly. Follow these steps carefully:
- Unpack Components: Carefully remove all parts from the packaging. Verify all components are present against the packing list (not provided in input, but standard for manuals).
- Assemble Legs: Attach the legs to the main frame. Ensure all bolts and fasteners are securely tightened.
- Install Wheels: Mount the directional wheels and universal wheels as indicated in the diagrams.
- Attach Mounting Brackets: Secure the miter saw mounting brackets to the stand's rails.
- Mount Miter Saw:
- Place your miter saw onto the mounting bracket.
- Ensure all holes on the saw base align with the bracket.
- Tighten the miter saw and the mounting bracket with the provided screws.

Figure 4: Step-by-step guide for mounting a miter saw onto the stand's brackets.
- Adjust Height: Use the height levers to select one of the three desired working heights. Ensure all four legs are locked into position before use.
5. Operation
Operating your VEVOR Miter Saw Stand is straightforward once assembled.
5.1 Using as a Miter Saw Stand
With your miter saw securely mounted, the stand provides a stable platform for cutting operations. The adjustable height allows for comfortable working positions, whether standing or sitting.

Figure 5: Close-up of the professional clamps used to fix the miter saw securely to the stand.
5.2 Adjusting Height
To adjust the stand's height, locate the height levers on each leg. Simultaneously depress the levers and slide the legs to the desired position (Position 1: 22.44 in / 57 cm, Position 2: 26.37 in / 67 cm, Position 3: 30.71 in / 78 cm). Ensure all four legs click into place securely before applying weight.
5.3 Folding and Transporting
The stand features a quick-folding design for easy storage and transport.
- Retract the legs to their lowest position.
- Fold both legs inward towards the main frame.
- Utilize the side carrying handle and directional wheels for convenient movement.

Figure 6: Demonstrates the quick folding mechanism for compact storage and portability, showing steps to retract and fold legs.

Figure 7: Highlights the directional wheel and side carrying handle for easy movement of the stand.
5.4 Using Integrated Measurement Tools
The stand's surface includes a built-in scale and protractor for quick and accurate measurements, reducing the need for auxiliary tools.
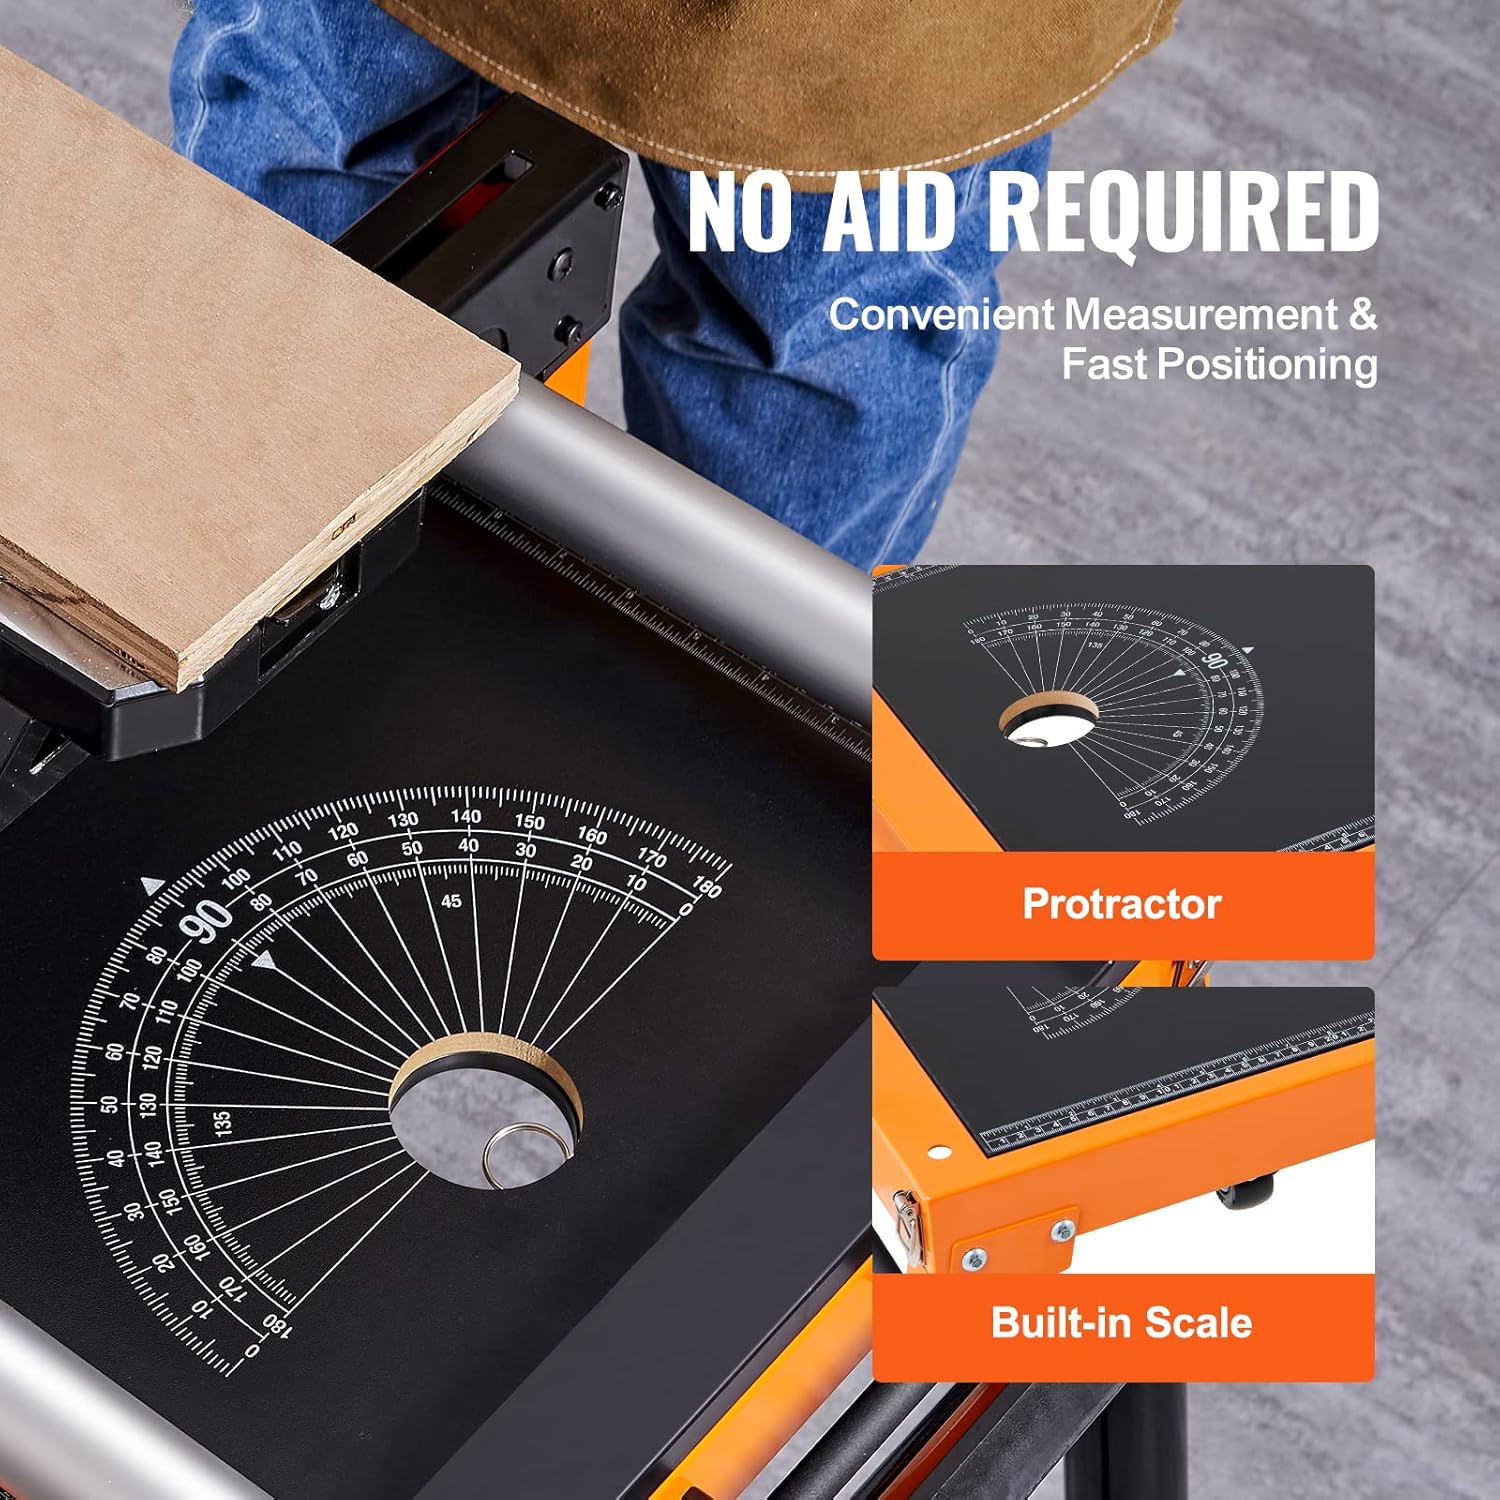
Figure 8: Close-up view of the integrated protractor and built-in scale on the stand's surface.
5.5 Multi-functional Use
Beyond a miter saw stand, this unit can be configured for other uses:
- Scaffold: The non-slip textured surface supports standing for light-duty elevated tasks.
- Creeper: When folded and lowered, it can be used as a creeper for working on low-lying objects.
- Dolly: The wheels and sturdy frame allow it to transport heavy objects.
- Workbench: The flat surface provides a stable area for various tasks.

Figure 9: Detail of the non-slip textured surface, suitable for standing or stacking, with a hand wearing a glove touching it.
6. Maintenance
Regular maintenance ensures the longevity and safe operation of your VEVOR Miter Saw Stand.
- Cleaning: Wipe down the stand with a damp cloth after each use to remove dust and debris. Avoid harsh chemicals.
- Inspection: Periodically inspect all bolts, nuts, and fasteners for tightness. Tighten any loose components.
- Lubrication: Apply a light lubricant to moving parts, such as the height adjustment mechanisms and wheel axles, as needed to ensure smooth operation.
- Storage: Store the stand in a dry, clean environment, preferably folded to save space.
7. Troubleshooting
This section addresses common issues you might encounter.
| Problem | Possible Cause | Solution |
|---|---|---|
| Stand is wobbly or unstable. | Loose fasteners; uneven surface; legs not fully locked. | Check and tighten all bolts and nuts. Move to a level surface. Ensure all height adjustment pins are fully engaged. |
| Difficulty adjusting height. | Mechanism dirty or stiff; pins not releasing properly. | Clean adjustment mechanisms. Apply a light lubricant. Ensure levers are fully depressed. |
| Wheels do not roll smoothly. | Debris in wheels; axles need lubrication. | Clear any debris from wheels. Lubricate wheel axles. |
| Miter saw not securely mounted. | Clamps not tightened; saw not aligned. | Ensure saw is correctly positioned on brackets. Fully tighten all mounting clamps and screws. |
8. Specifications
Detailed specifications for the VEVOR Miter Saw Stand:
| Feature | Specification |
|---|---|
| Model Number | Miter Saw Stand |
| Brand | VEVOR |
| Load Capacity | 330 lbs (150 kg) |
| Net Weight | 45 lbs (20.4 kg) |
| Product Dimensions (L x W x H) | 47.2 x 25.2 x 5.9 inches (120 x 64 x 15 cm) |
| Adjustable Height Positions | Position 1: 22.44 in / 57 cm Position 2: 26.37 in / 67 cm Position 3: 30.71 in / 78 cm |
| Table Weight Bearing | 200-330 lbs / 90-150 kg |
| Directional Wheel Load-bearing | 220 lbs / 91 kg |
| Universal Wheel Load-bearing | 99 lbs / 45 kg |
| UPC | 840281565740 |

Figure 10: Detailed dimensions and load capacities of the miter saw stand.
Ask a question about this manual
Ask about setup, troubleshooting, compatibility, parts, safety, or missing instructions. Manuals+ will review the question and use this page’s manual context to help answer it.