Outwell 651158
ANNATTO Cooker 2 Burners EN417 User Manual
Brand: Outwell
Introduction
Thank you for choosing the Outwell ANNATTO 2-Burner Cooker. This manual provides essential information for the safe and efficient operation, maintenance, and troubleshooting of your new cooker. Please read this manual thoroughly before use and retain it for future reference.
Safety Information
Always prioritize safety when operating gas appliances. Failure to follow these instructions could result in fire, explosion, property damage, personal injury, or death.
- Use outdoors only. Never operate this appliance indoors or in an enclosed space.
- Ensure adequate ventilation.
- Keep away from flammable materials.
- Do not leave the appliance unattended while in use.
- Check for gas leaks regularly using a soapy water solution. Never use a flame to check for leaks.
- Keep children and pets away from the appliance during operation.
- Use only with the specified gas type and pressure. Refer to the product specifications.
- Allow the cooker to cool completely before cleaning or storing.
Product Overview
The Outwell ANNATTO cooker is a portable two-burner gas stove designed for outdoor cooking. It features a compact design with integrated wind shields and individual burner controls.

Figure 1: The Outwell ANNATTO cooker with its lid open, revealing the two gas burners and the removable pot supports. The integrated side wind shields are also visible, extended outwards.

Figure 2: A top-down perspective of the cooker with the lid fully open. This view clearly shows the two burner grates and the underlying burners, ready for cooking. The gas hose connection point is visible on the right side.

Figure 3: The Outwell ANNATTO cooker in its closed and compact state. The front panel displays the two control knobs for the burners and the central latch mechanism, making it easy to transport.

Figure 4: A detailed view of the cooker's control panel. It highlights the individual burner control knobs, the red ignition button, and the power switch, providing clear access for operation.
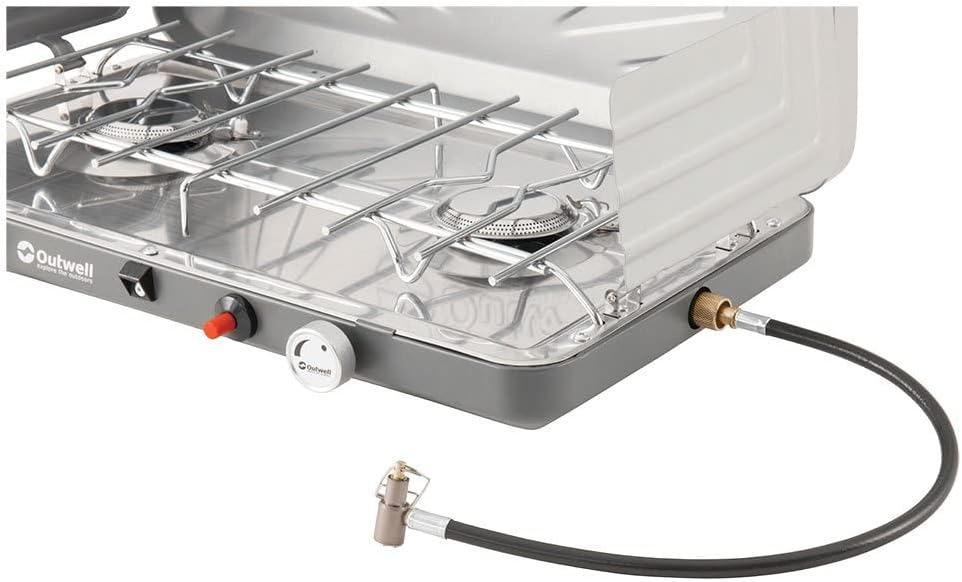
Figure 5: This image shows the side of the cooker with the gas hose connected to the appliance's inlet. The hose leads to the regulator, which would then connect to a gas cylinder, illustrating the setup for fuel supply.
Setup
- Unpack: Carefully remove the cooker from its packaging. Retain packaging for storage if desired.
- Positioning: Place the cooker on a stable, level, non-combustible surface outdoors, away from any flammable materials, buildings, or vehicles. Ensure adequate clearance above and around the cooker.
- Open Lid and Wind Shields: Unlatch the lid and open it fully. Extend the side wind shields outwards to provide protection from wind.
- Connect Gas Supply:
- Ensure both burner control knobs are in the "OFF" position.
- Connect the gas hose (with regulator, if not integrated) to the cooker's gas inlet port. Ensure a secure, leak-free connection.
- Connect the other end of the hose/regulator to your gas cylinder. Tighten all connections by hand, then use a wrench for a final snug fit if required, but do not overtighten.
- Leak Test: Before first use and after every gas cylinder change, perform a leak test.
- Mix a solution of equal parts liquid dish soap and water.
- Apply the solution to all gas connections (cooker inlet, hose connections, regulator connection to cylinder).
- Slowly open the gas cylinder valve.
- If bubbles appear, there is a leak. Immediately close the gas cylinder valve and tighten the connection. Repeat the test. If leaks persist, do not use the cooker and contact customer support.
Operating Instructions
- Prepare for Ignition: Ensure the cooker is set up safely and the gas cylinder valve is open.
- Ignite a Burner:
- Push in and slowly turn one burner control knob counter-clockwise to the "HIGH" position.
- Immediately press the red ignition button repeatedly until the burner ignites.
- If the burner does not ignite within 5 seconds, turn the control knob to "OFF", wait 5 minutes for gas to disperse, and then repeat the ignition process.
- Adjust Flame: Once ignited, adjust the flame by turning the control knob between "LOW" and "HIGH" settings. A stable blue flame is ideal.
- Cooking: Place appropriate cookware on the pot supports over the lit burner.
- Turning Off: When finished cooking, turn the burner control knob clockwise to the "OFF" position. Close the valve on the gas cylinder. Allow the cooker to cool completely before handling or storing.
Maintenance
Regular cleaning and maintenance will prolong the life of your cooker and ensure safe operation.
- Cleaning:
- Ensure the cooker is completely cool and disconnected from the gas supply before cleaning.
- Remove the pot supports and burner caps. Wash them with warm, soapy water. Rinse thoroughly and dry completely.
- Wipe down the cooker body and stainless steel surfaces with a damp cloth and mild detergent. Avoid abrasive cleaners or scouring pads.
- Clean any food spills immediately to prevent stubborn stains.
- Storage: Store the cooker in a dry, well-ventilated area, away from direct sunlight and extreme temperatures. Ensure it is clean and dry before storage.
- Inspection: Periodically inspect the gas hose for cracks, cuts, or damage. Check all connections for tightness. If any damage is found, replace parts immediately with genuine Outwell components.
Troubleshooting
| Problem | Possible Cause | Solution |
|---|---|---|
| Burner does not ignite. |
|
|
| Flame is weak or inconsistent. |
|
|
| Smell of gas. |
|
|
For issues not listed here, or if troubleshooting steps do not resolve the problem, please contact Outwell customer support.
Specifications
- Model Name: ANNATTO cooker 2 burners EN417
- Brand: Outwell
- Part Number: 651158
- Dimensions (LxWxH): 13.78" x 9.84" x 17.72" (35cm x 25cm x 45cm approx. when open/in use)
- Item Package Dimensions (LxWxH): 17.24" x 9.13" x 2.68"
- Package Weight: 1.44 Kilograms
- Color: Grey
- Number of Items: 1
- Maximum Energy Output: 2200 Watts
- Power Source: Gas (EN417 compatible)
- Material: (Specific material not detailed, generally metal construction)
Warranty and Support
Outwell products are manufactured to high quality standards and are warranted against defects in materials and workmanship. For specific warranty terms and conditions, please refer to the warranty card included with your product or visit the official Outwell website.
For technical support, spare parts, or warranty claims, please contact Outwell customer service. Contact information can typically be found on the Outwell website or on your purchase receipt.
Website: www.outwell.com (Please check for regional variations)
Related Documents - 651158
 |
Outwell Etna Solo Gasguard Portable Gas Stove - Safety and Usage Information Essential safety and usage instructions for the Outwell Etna Solo Gasguard portable gas stove, model 651263. Learn about gas type, cartridge compatibility (MSF-1A, EN417), and safe outdoor operation. |
 |
Outwell Appetizer Maxi Portable Gas Stove User Manual | Model 651160 User manual for the Outwell Appetizer Maxi portable gas stove (Model: 651160 / BDZ-2X155). Provides detailed instructions on safe operation, setup, gas cartridge replacement, maintenance, and safety precautions for camping and outdoor use. |
 |
Outwell Etna Solo Gasguard Portable Gas Stove - Model 651263 / JY-500F-1 - User Manual This document is the user manual for the Outwell Etna Solo Gasguard portable gas stove, model 651263 / JY-500F-1. It provides comprehensive instructions on operation, safety precautions, gas cartridge replacement, and maintenance. Designed for outdoor use, it details how to connect and use the stove safely and efficiently. |
 |
Outwell Etna Solo Gas Stove: Safety and Specifications Technical specifications and safety warnings for the Outwell Etna Solo gas stove, model 651355. Information on gas type, cartridge compatibility (MSF-1A, EN417), usage, and warnings. |
 |
Climaset Refrigerant Replacement Instructions Step-by-step instructions and safety guidelines for using Climaset refrigerant replacement for R134a automotive air conditioning systems. |
 |
Fire Beetle Stove - Model 690065 / CS-G05CS - Oase Outdoors Information about the Oase Outdoors Fire Beetle Stove (Model 690065 / CS-G05CS), including gas type, cartridge compatibility with EN417 approved ALOCS canisters (CS-G13/CS-G14), outdoor use recommendation, and safety warnings regarding hot parts. |
Ask a question about this manual
Ask about setup, troubleshooting, compatibility, parts, safety, or missing instructions. Manuals+ will review the question and use this page’s manual context to help answer it.