Product Overview
This manual provides detailed instructions for the installation, operation, and maintenance of your Bewinner LGA 1200 Motherboard. Please read this manual thoroughly before installation and use to ensure optimal performance and longevity of your product.
The Bewinner LGA 1200 Motherboard is designed for desktop computers, featuring an H510 chipset and supporting dual-channel DDR4 memory. It includes integrated network card, audio chip, and various USB 3.2 interfaces, making it suitable for gaming, office, and media playback applications.

Figure 1: Top-down view of the Bewinner LGA 1200 Motherboard, showing the CPU socket, RAM slots, and various ports.
Package Contents
Please verify that all items listed below are included in your package:
- 1 x Bewinner LGA 1200 Motherboard
- 1 x I/O Baffle
- 1 x User Manual (this document)
- 1 x SATA Cable
Note: The motherboard is shipped with a built-in CR2032L Li Mn battery for the CMOS.
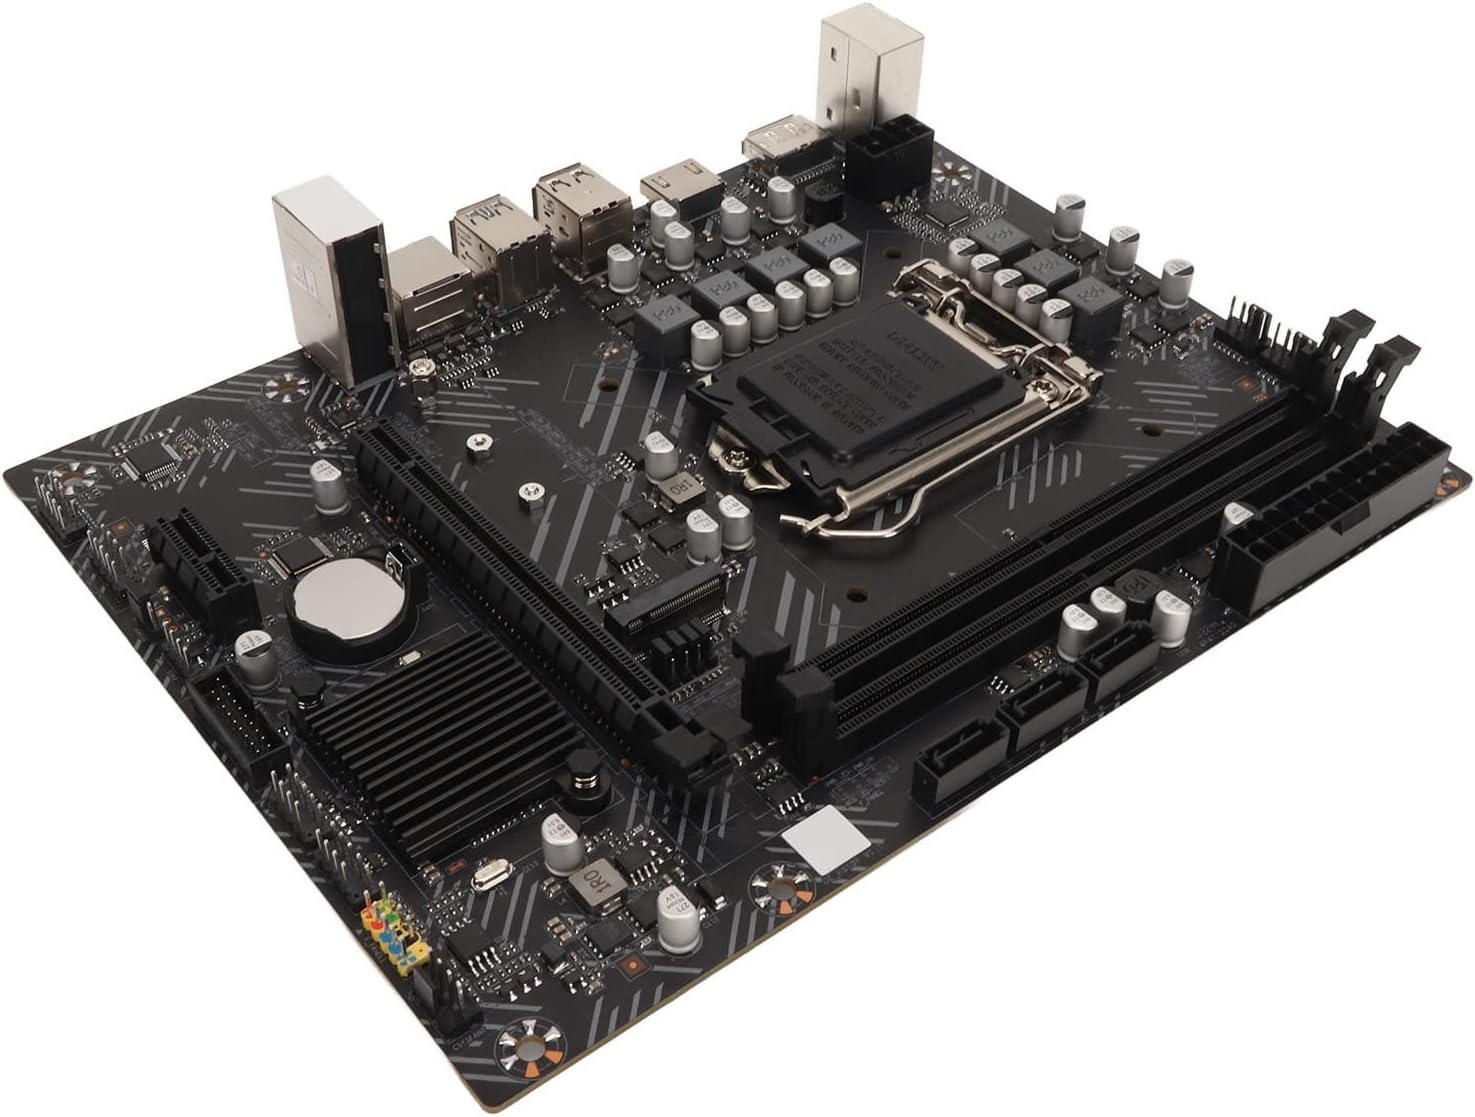
Figure 2: The Bewinner motherboard alongside its included accessories: an I/O baffle and a SATA cable.
Setup and Installation
Follow these steps carefully to install your motherboard into your computer system.
1. Prepare Your Workspace
- Ensure your computer is powered off and unplugged from the wall outlet.
- Work on a clean, static-free surface. Use an anti-static wrist strap if available.
2. Install the CPU
- Locate the LGA 1200 CPU socket on the motherboard.
- Gently lift the load lever and open the CPU socket cover.
- Align the CPU with the socket, ensuring the golden triangle on the CPU matches the triangle on the socket. Do not force the CPU into the socket.
- Close the socket cover and press down the load lever until it clicks into place.
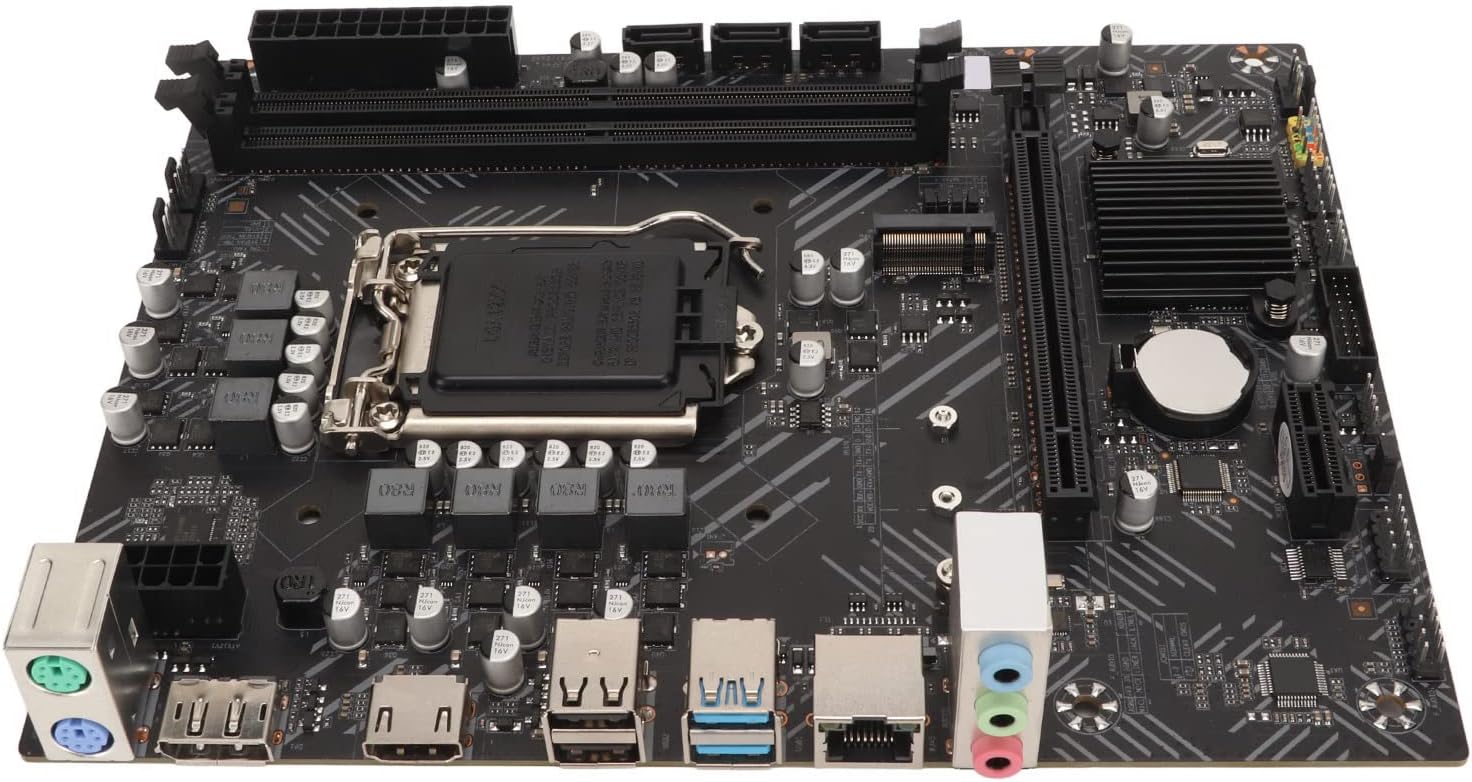
Figure 3: Detailed view of the LGA 1200 CPU socket, ready for processor installation.
3. Install DDR4 Memory
- Locate the two DDR4 DIMM slots.
- Open the clips at both ends of the memory slot.
- Align the notch on the DDR4 memory module with the key in the DIMM slot.
- Press down firmly on both ends of the memory module until the clips snap into place.
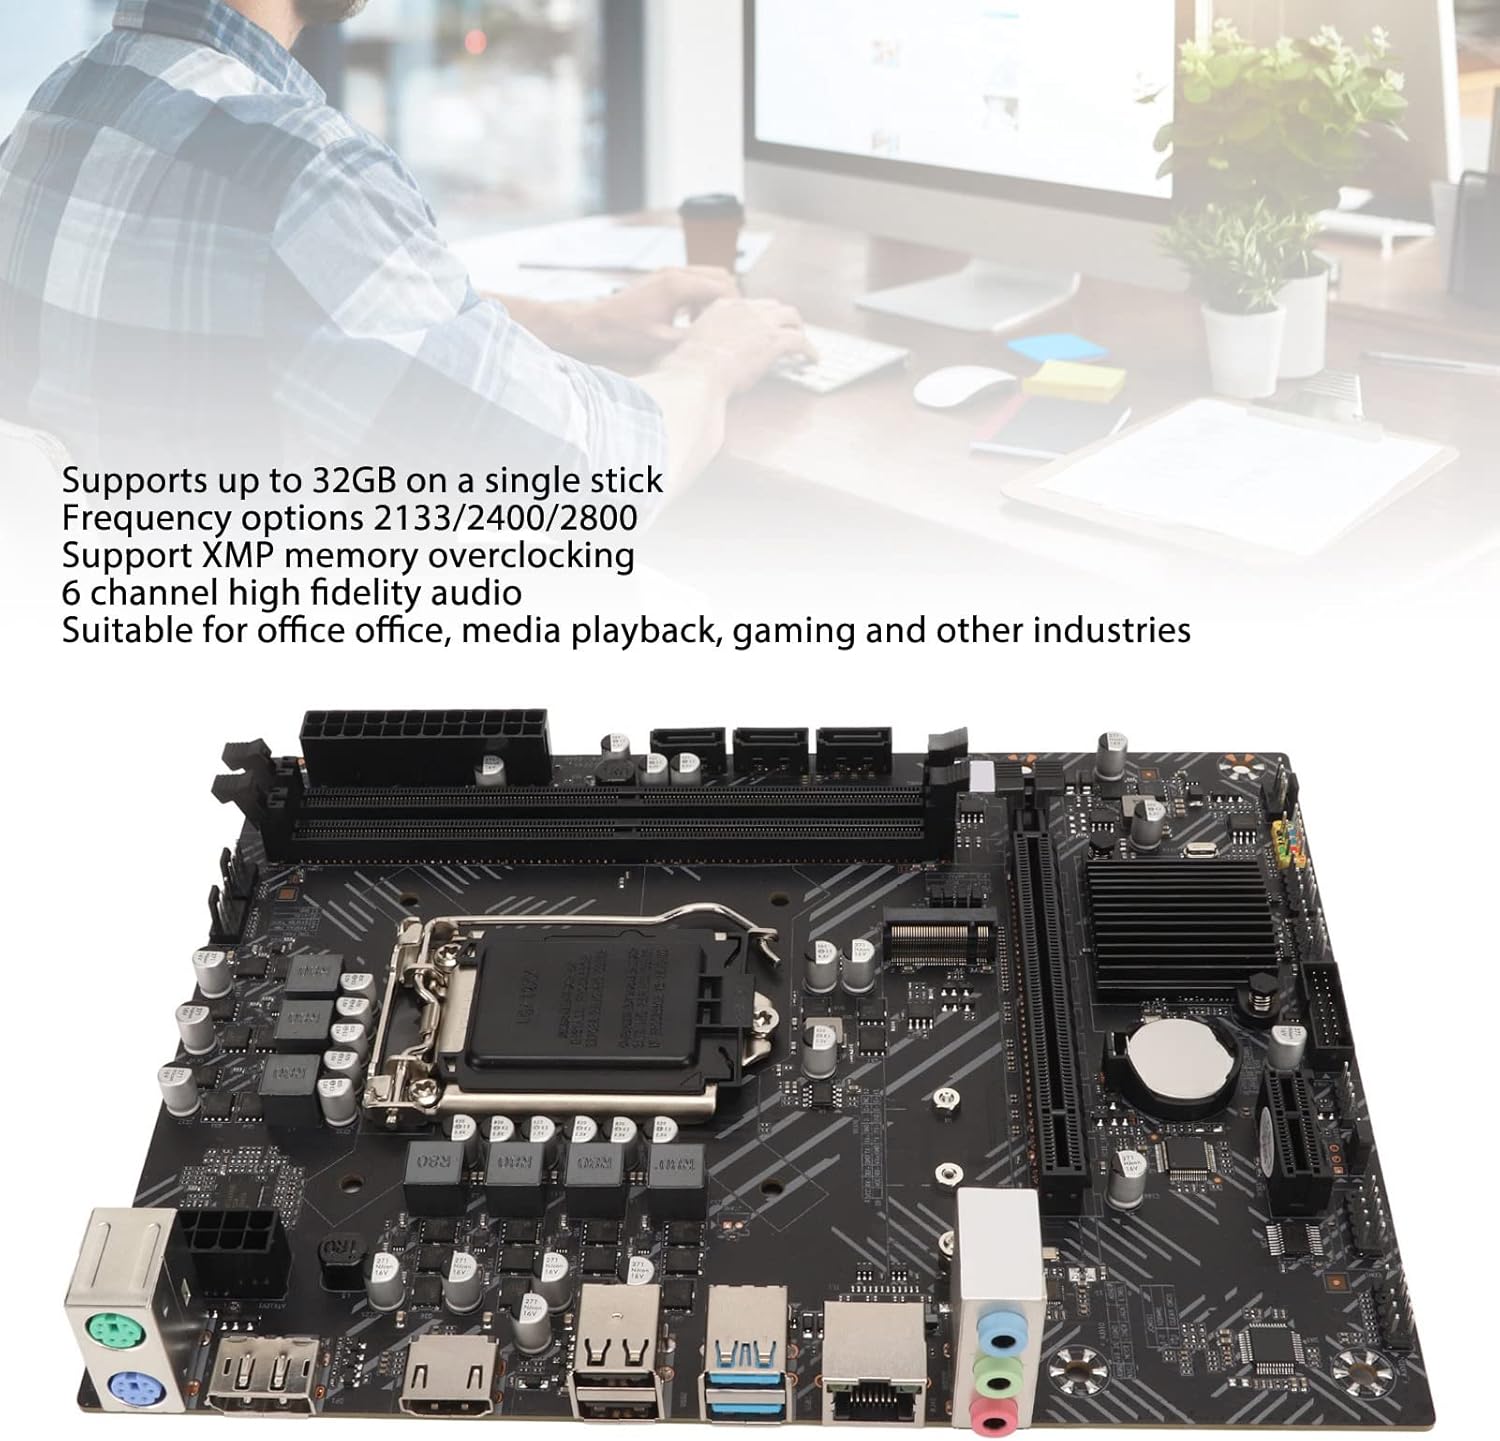
Figure 4: The motherboard highlighting the dual DDR4 memory slots and the CPU area.
4. Install Storage Devices (SATA / M.2)
- Connect SATA data cables from your storage drives (HDD/SSD) to the 3xSATA3.0 interfaces on the motherboard.
- For M.2 SSDs, insert the M.2 module into the M.2 interface, ensuring proper alignment. Secure it with the provided screw. Note that the M.2 interface supports both SATA and NVME modes (jumper switching may be required).
5. Install Expansion Cards (PCIe)
- Insert your graphics card into the 1xPCIE 16X interface.
- Other expansion cards can be installed in the 1xPCIE 1X interface.
6. Connect Power Supply
- Connect the 24-pin ATX power connector from your power supply to the main power socket on the motherboard.
- Connect the 8-pin (or 4-pin) CPU power connector to the CPU power socket.
7. Connect Front Panel Cables
- Connect the power button, reset button, HDD LED, and power LED cables from your PC case to the corresponding pins on the motherboard's front panel header.
- Connect the front panel USB 2.0 and USB 3.0 cables to the 2xF USB2.0 Pins and 1xUSB3.0 pins respectively.
- Connect the front panel audio cable to the 1xF AUDIO Audio Front Pins.
- Connect the system speaker to the 1xJ SPK Buzzer Pin.
8. Install Motherboard into Chassis
- Carefully place the motherboard into your PC chassis, aligning it with the standoffs.
- Secure the motherboard with screws.
- Install the I/O baffle into the chassis opening before securing the motherboard.

Figure 5: An example of the motherboard being installed into a computer chassis, showing the general orientation.
Operating Instructions
Once the motherboard and all components are correctly installed, you can proceed with system operation.
First Boot
- Connect your monitor, keyboard, and mouse to the appropriate rear I/O ports.
- Plug in the power cord to your power supply and turn on the power switch.
- Press the power button on your PC case.
- The system should power on and display the BIOS/UEFI screen.
BIOS/UEFI Configuration
The BIOS (Basic Input/Output System) or UEFI (Unified Extensible Firmware Interface) is the first software that runs when your computer starts. It allows you to configure hardware settings.
- To enter BIOS/UEFI setup, typically press the DEL or F2 key repeatedly during startup.
- Configure boot order, enable/disable integrated peripherals, and set system time.
- Save changes and exit BIOS/UEFI to continue with operating system installation.
Operating System Installation
Install your preferred operating system (e.g., Windows, Linux) from a bootable USB drive or DVD. Follow the on-screen instructions provided by the operating system installer.
Driver Installation
After installing the operating system, install the necessary drivers for the motherboard components. These typically include:
- Chipset drivers
- Integrated graphics drivers (if using onboard video)
- Network (LAN) drivers
- Audio drivers
- USB drivers
Drivers can usually be found on the manufacturer's website or an included driver CD/USB drive.
Maintenance
Proper maintenance ensures the longevity and stable operation of your motherboard.
- Keep it Clean: Regularly clean dust from inside your computer case, especially around the CPU cooler, chipset heatsinks, and fan headers. Use compressed air for best results.
- Ensure Proper Airflow: Make sure your PC case has adequate ventilation to prevent overheating.
- BIOS/UEFI Updates: Periodically check the Bewinner website for BIOS/UEFI updates. Updates can improve stability, compatibility, and performance. Follow update instructions carefully to avoid system damage.
- Driver Updates: Keep your drivers updated to ensure optimal performance and compatibility with new software and hardware.
- CMOS Battery: The motherboard uses a CR2032L Li Mn battery for CMOS. If you experience issues with system time or BIOS settings resetting, the battery may need replacement.
Troubleshooting
This section provides solutions to common issues you might encounter.
| Problem | Possible Cause | Solution |
|---|---|---|
| System does not power on. | Loose power connections, faulty power supply, incorrect front panel wiring. | Check all power cables (24-pin ATX, 8-pin CPU). Ensure front panel power switch is correctly connected. Test with a known good power supply. |
| No display on monitor. | Incorrect display cable connection, faulty graphics card, RAM not seated correctly. | Ensure monitor cable is securely connected to the correct port (motherboard or graphics card). Reseat RAM modules. Test graphics card in another slot or with another card. |
| System reboots unexpectedly or crashes. | Overheating, unstable power, faulty RAM, driver issues. | Check CPU and case fan operation. Ensure proper airflow. Run memory diagnostic tools. Update drivers. |
| USB devices not recognized. | Outdated USB drivers, faulty USB port, incorrect front panel USB connection. | Install or update USB drivers. Try different USB ports. Verify front panel USB connections. |
| No audio output. | Incorrect audio driver, wrong audio port used, faulty speakers/headphones. | Install or update audio drivers. Ensure speakers/headphones are connected to the correct audio jack. Check audio settings in the operating system. |
| BIOS settings reset after power off. | CMOS battery depleted. | Replace the CR2032L CMOS battery on the motherboard. |
If you encounter issues not listed here, please refer to the support section or consult a qualified technician.
Technical Specifications
| Feature | Specification |
|---|---|
| Item Type | Motherboard |
| Material | PCB |
| Chipset | For Intel H510 Chipset |
| CPU Socket | LGA 1200 (for Intel 1200 pin processor) |
| Memory | 2 x DDR4 Memory Slots, Frequency Optional 2133/2400/2800 MHz, Maximum Support 32GB (single stick) |
| Hard Disk Interfaces | 3 x SATA3.0 Interface, 1 x M.2 interface (Supports SATA/NVME Mode, jumper switching) |
| Built-in Front Panel Pins | 2 x F USB2.0 Pins (expandable by 4xUSB2.0), 1 x USB3.0 pins (expandable by 2xUSB3.0), 1 x F AUDIO Audio Front Pins, 1 x J SPK Buzzer Pin, 1 x JCMOS Initial BIOS Pin, 1 x CPU FAN Processor Fan Pin, 2 x CSYSFAN Chassis Fan Pins |
| Rear I/O Ports | 4 x USB2.0, 2 x USB3.2, 1 x PS/2 Keyboard/Mouse Interface, 1 x F AUDIO Standard Audio 3-in-1 Interface, 1 x COM Pins |
| Expansion Slots | 1 x PCIE 16X Interface, 1 x PCIE 1X Interface |
| Display Interfaces | 1 x High Definition Multimedia Interface (HDMI), 1 x DP (DisplayPort) |
| Graphics Card Slot | 1 x PCIE 16X |
| Network Card | Integrated Network Card |
| CMOS Battery | Li Mn Battery, Model: CR2032L, Capacity: 140mAh (included) |
| Working Temperature | -10℃ to 60℃ |
| Working Humidity | 0-95% Relative Humidity, Non Condensing |
| Model Number | Dilwegqbk1w98o4 |
| Package Dimensions | 27.4 x 21.3 x 5.8 cm |
| Weight | 570 g |
Warranty and Support
For warranty information and technical support, please contact Bewinner customer service or visit their official website. Keep your purchase receipt as proof of purchase.
- Manufacturer: Bewinner
- Product Model: Dilwegqbk1w98o4
- ASIN: B0BTHW9NH1
- Online Support: Refer to the official Bewinner website for the latest drivers, FAQs, and support contact information.
