1. Introduction
This manual provides essential information for the safe and efficient operation of your EVJUICION Level 2 EV Charger. This portable electric vehicle charger is designed for home use, offering fast and reliable charging for all J1772 compatible electric vehicles.
2. Safety Information
For detailed safety guidelines, please refer to the official Safety Information PDF. Adherence to all safety instructions is crucial for preventing injury and damage.
- The EV charger has passed UL/TUV/CE/FCC certification, ensuring compliance with safety standards.
- The control box is robust, designed to withstand significant pressure (e.g., 1.5 tons car crushing test).
- Built-in protections are included to prevent damage to the vehicle during charging.
- An IP67 waterproof rating ensures safe operation indoors or outdoors, even in rainy conditions.
- Always ensure the charging cable and connectors are free from damage before use.
- Do not attempt to disassemble or repair the charger yourself. Contact qualified personnel for service.
3. Product Features
- 6X Fast EV Charger: Equipped with a NEMA 14-50 plug for 220V-240V outlets, delivering up to 7.68kW of output power, up to 6 times faster than a standard OEM 8A Level 1 charger.
- Universal Compatibility: Charges all J1772 EVs, PHEVs, and Teslas (Tesla requires a J1772 adapter for charging).
- Safe Charging: UL/TUV/CE/FCC certified with robust control box and IP67 waterproof rating.
- Adjustable Charging Speed and Time: Amperage settings of 10/16/20/24/32A to match household circuits. Features a delayed start timer for off-peak charging.
- Real-time Monitoring: Built-in LED screen displays charging status, including amperage, voltage, charging time, temperature, progress, and errors.
- Portable Design: Compact and includes a 25-foot charging cable for flexible installation and everyday use, with a carrying bag for portability.
4. Setup and Installation
The EVJUICION Level 2 EV Charger is designed for easy setup. It can be wall-mounted for permanent installation or used as a portable unit.
4.1 Unpacking
Carefully remove all components from the packaging. Ensure the charger, cable, and the included carrying bag are present and undamaged.
4.2 Power Connection
Connect the NEMA 14-50 plug to a compatible 220V-240V outlet. Ensure the outlet is properly grounded and rated for the charger's output.
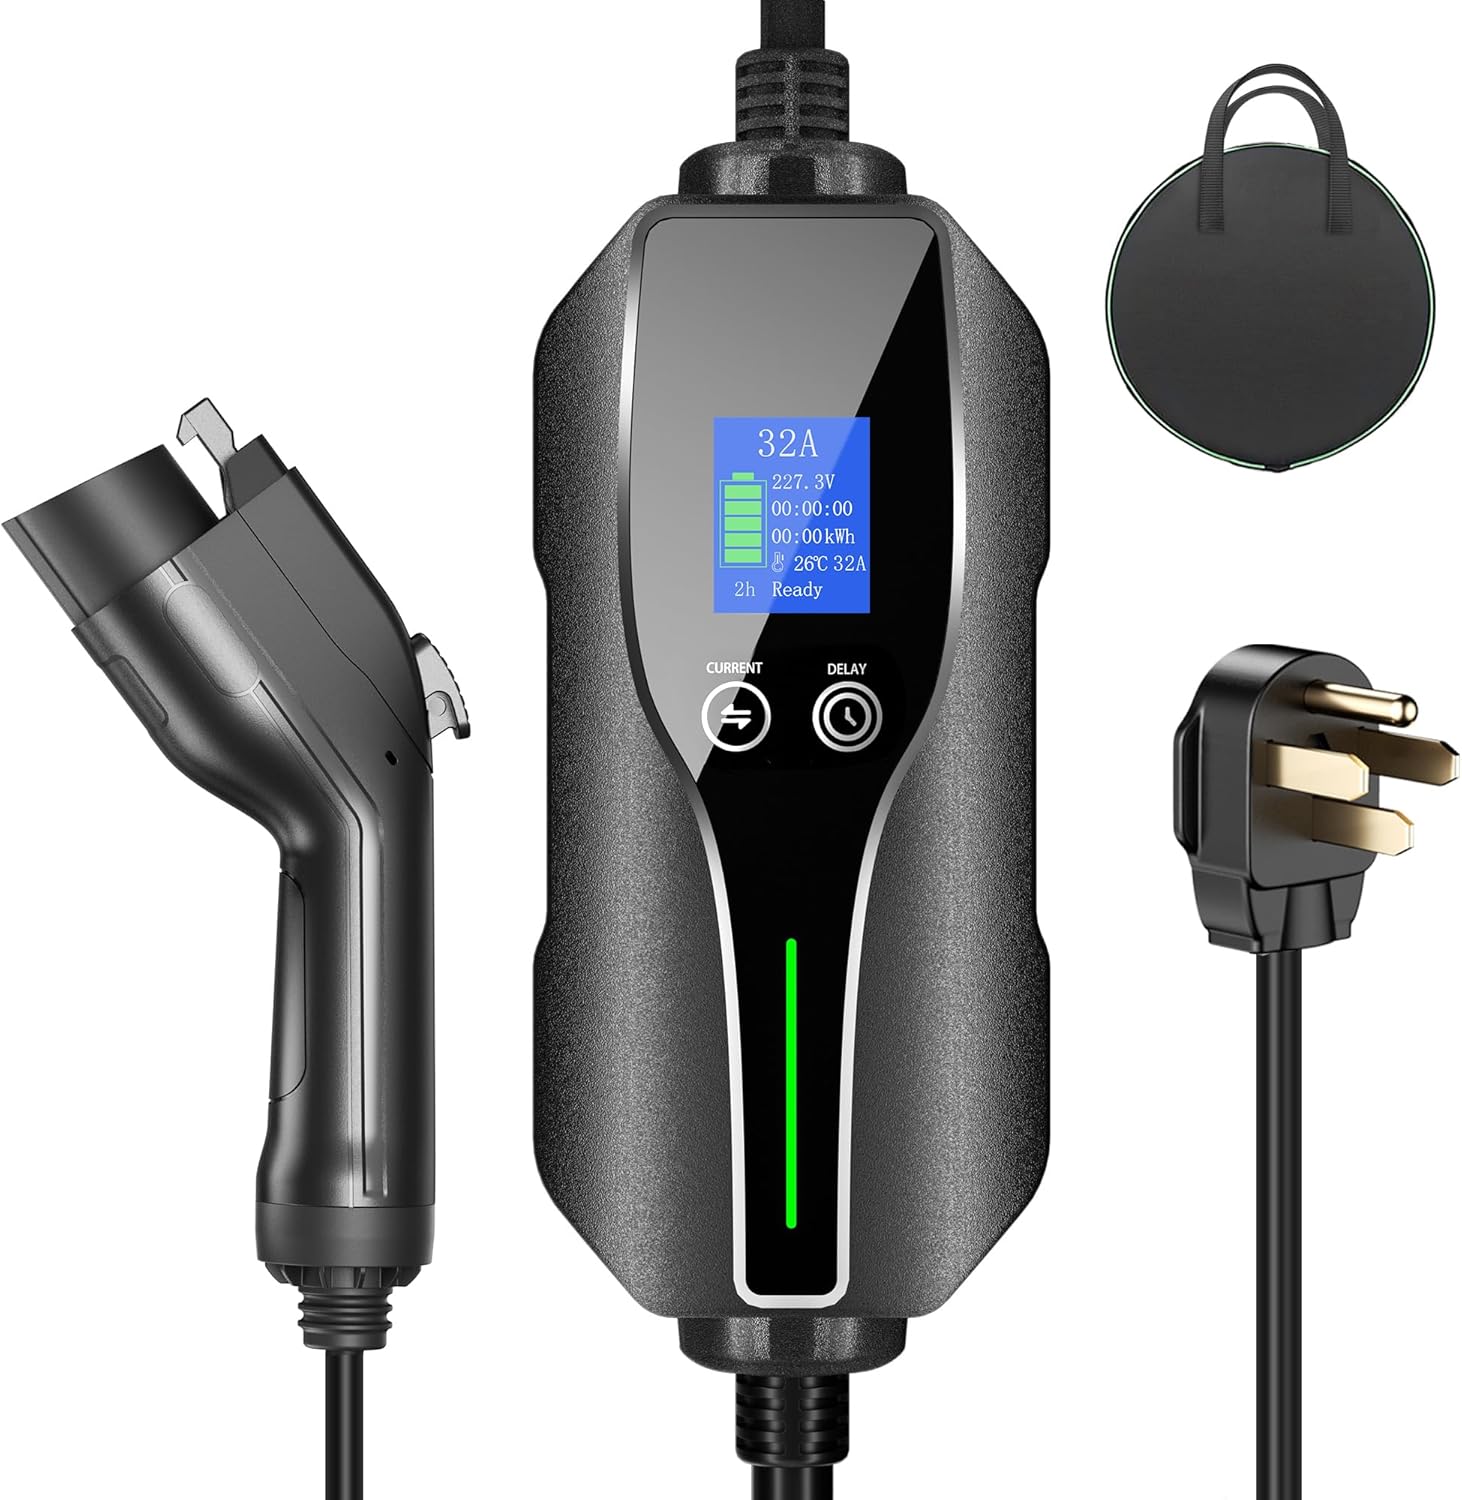
Figure 4.1: EVJUICION Level 2 EV Charger components including the NEMA 14-50 plug and J1772 connector.
4.3 Wall Mounting (Optional)
For permanent installation, the charger supports wall mounting. Use appropriate hardware (not included) to secure the control box to a sturdy wall surface. Ensure the mounting location allows for easy access to the vehicle and power outlet.

Figure 4.2: Example of the EV charger installed on a wall for convenient home charging.
4.4 Cable Management
The 25-foot cable provides ample reach. Ensure the cable is not kinked or placed in a position where it could be damaged or cause a tripping hazard.
5. Operating Instructions
5.1 Connecting to Your EV
- Ensure the charger is properly connected to the power outlet.
- Open your vehicle's charging port.
- Insert the J1772 connector firmly into your vehicle's charging port. For Tesla vehicles, use a compatible J1772 adapter (sold separately).
- The charger's LED screen will display the charging status.

Figure 5.1: The J1772 connector is universally compatible with most electric vehicles.
5.2 Adjusting Charging Parameters
The charger allows you to adjust the charging amperage and set a delayed start time.
- Adjustable Amperage: Press the "CURRENT" button on the control box to cycle through available amperage settings: 10A, 16A, 20A, 24A, and 32A. Select the amperage that matches your home's electrical circuit capacity.
- Delayed Start Timer: Press the "DELAY" button to set a delayed start time for charging. This feature is useful for scheduling charging during off-peak electricity hours to save costs.

Figure 5.2: The control box allows for real-time data display and adjustment of charging current.
5.3 Monitoring Charging Status
The built-in LED screen and indicator lights provide real-time feedback on the charging process.
- The LED screen displays current voltage, charging time, total kWh charged, and temperature.
- Indicator lights show power status, connection status, charging progress, and error notifications.

Figure 5.3: Real-time monitoring of charging status via the LED screen and indicator lights.
5.4 Official Product Video
Video 5.1: Universal Compatible Charger for Fast Home Charging. This video demonstrates the charger's features and ease of use.
6. Maintenance
Regular maintenance ensures the longevity and safe operation of your EV charger.
- Keep the charger and cable clean and free from dust and debris. Use a soft, dry cloth for cleaning.
- Periodically inspect the charging cable and connectors for any signs of wear, cuts, or damage. Do not use if damaged.
- Store the charger in its included bag when not in use, especially if transporting it.
- Ensure the power outlet is clean and free from obstructions.

Figure 6.1: The charger features a durable cable with 100% pure copper wire and a flame-retardant cover for stable and safe charging.
7. Troubleshooting
If you encounter issues with your EV charger, refer to the following common troubleshooting steps:
| Problem | Possible Cause | Solution |
|---|---|---|
| Charger not powering on. | No power from outlet, loose connection. | Check the NEMA 14-50 outlet for power. Ensure the plug is fully inserted. |
| Vehicle not charging. | Connector not fully inserted, vehicle issue, incorrect amperage setting. | Ensure the J1772 connector is securely latched. Check vehicle's charging status. Adjust amperage setting. |
| Error message on LED screen. | Internal fault, overcurrent, over-temperature. | Refer to the LED screen's error code for specific issues. Disconnect and reconnect the charger. If the problem persists, contact customer support. |
| Slow charging. | Amperage set too low, vehicle limitation. | Increase the amperage setting on the charger if your circuit allows. Confirm your vehicle's maximum charging rate. |

Figure 7.1: The charger incorporates multiple security protections including short circuit, overcurrent, over temperature, leakage, overload, and ground protection.
8. Specifications
| Feature | Detail |
|---|---|
| Model Number | EV-Charger-5 |
| Brand | EVJUICION |
| Input Voltage | 240 Volts |
| Amperage | 32 Amps (Adjustable: 10/16/20/24/32A) |
| Output Power | Up to 7.68kW |
| Connector Type | NEMA 14-50 Plug |
| Connectivity Technology | SAE J1772 |
| Cable Length | 25 Feet |
| Waterproof Rating | IP67 |
| Item Weight | 7.89 pounds |
| Package Dimensions | 15 x 14.8 x 4.1 inches |
| Included Components | Carrying bag |

Figure 8.1: The charger's robust design allows it to withstand significant compression, ensuring durability.
9. Warranty and Support
EVJUICION offers a 3-year after-sale service for this product. For any inquiries, technical support, or warranty claims, please contact EVJUICION customer support through their official channels or the retailer where the product was purchased.
Your satisfaction is our greatest pursuit.