1. Introduction
The Tecsun GR-98 is a versatile emergency radio designed for reliable communication and utility in various situations. It features AM/FM and 7-band shortwave reception, multiple power options including a hand crank dynamo, an LED flashlight, and an emergency siren. This manual provides instructions for the proper setup, operation, and maintenance of your GR-98 radio.
2. Safety Instructions
- Do not expose the radio to extreme temperatures, direct sunlight, or high humidity.
- Avoid dropping the radio or subjecting it to strong impacts.
- Keep the radio away from strong magnetic fields.
- Do not attempt to disassemble or modify the radio. This will void the warranty and may cause damage.
- When using the hand crank, ensure it is rotated smoothly and consistently. Excessive force can damage the mechanism.
- Use only specified batteries (3 x AA or the included NiMH pack). Do not mix old and new batteries or different types of batteries.
- Dispose of batteries according to local regulations.
3. Package Contents
Please check the package for the following items:
- Tecsun GR-98 Emergency Radio
- Rechargeable NiMH 600 mAh Battery Pack (pre-installed or separate)
- Mini-USB Charging Cable
- Owner's Manual
4. Product Overview and Controls
Familiarize yourself with the various parts and controls of your Tecsun GR-98 radio.

Figure 4.1: Front view of the Tecsun GR-98 radio with key features indicated. This includes the telescopic antenna, LED flashlight, speaker grille, tuning dial, volume control, band selector switch, and the dynamo hand crank.
Key Components:
- Telescopic Antenna: Extends for improved FM and Shortwave reception.
- LED Flashlight: Provides illumination.
- Speaker: Audio output.
- Tuning Knob: Adjusts radio frequency.
- Volume Control: Adjusts audio output level.
- Band Selector Switch: Selects between FM, MW (AM), and SW (Shortwave) bands.
- SW Band Selector: Rotary switch to select specific shortwave bands (SW1-SW7).
- Light/Off/Siren Switch: Controls the flashlight and siren functions.
- Charge Select Switch: Selects between charging the internal NiMH battery or providing power to an external device (Phone).
- Dynamo Hand Crank: Used to manually generate power for the radio and internal battery.
- LED Charging Indicator: Illuminates when the internal battery is charging.
- Mini-USB Input (DC IN 5V): For charging the internal battery via an external USB power source.
- USB Output (DC OUT 5V): For charging external devices like smartphones.
- Earphone Jack (3.5mm): For private listening.
- Battery Compartment: Houses the NiMH battery pack or AA batteries.

Figure 4.2: Rear view of the Tecsun GR-98, highlighting the connectivity ports: DC IN 5V (mini-USB), DC OUT 5V (USB-A), and the 3.5mm earphone jack.
5. Setup
5.1 Powering the Radio
The GR-98 can be powered by three (3) AA batteries (not included) or the included rechargeable NiMH battery pack.
- Battery Installation:
- Open the battery compartment cover on the back of the radio.
- If using AA batteries, insert three (3) AA batteries, observing the correct polarity (+/-).
- If using the NiMH battery pack, ensure it is properly connected and seated in the compartment.
- Close the battery compartment cover securely.
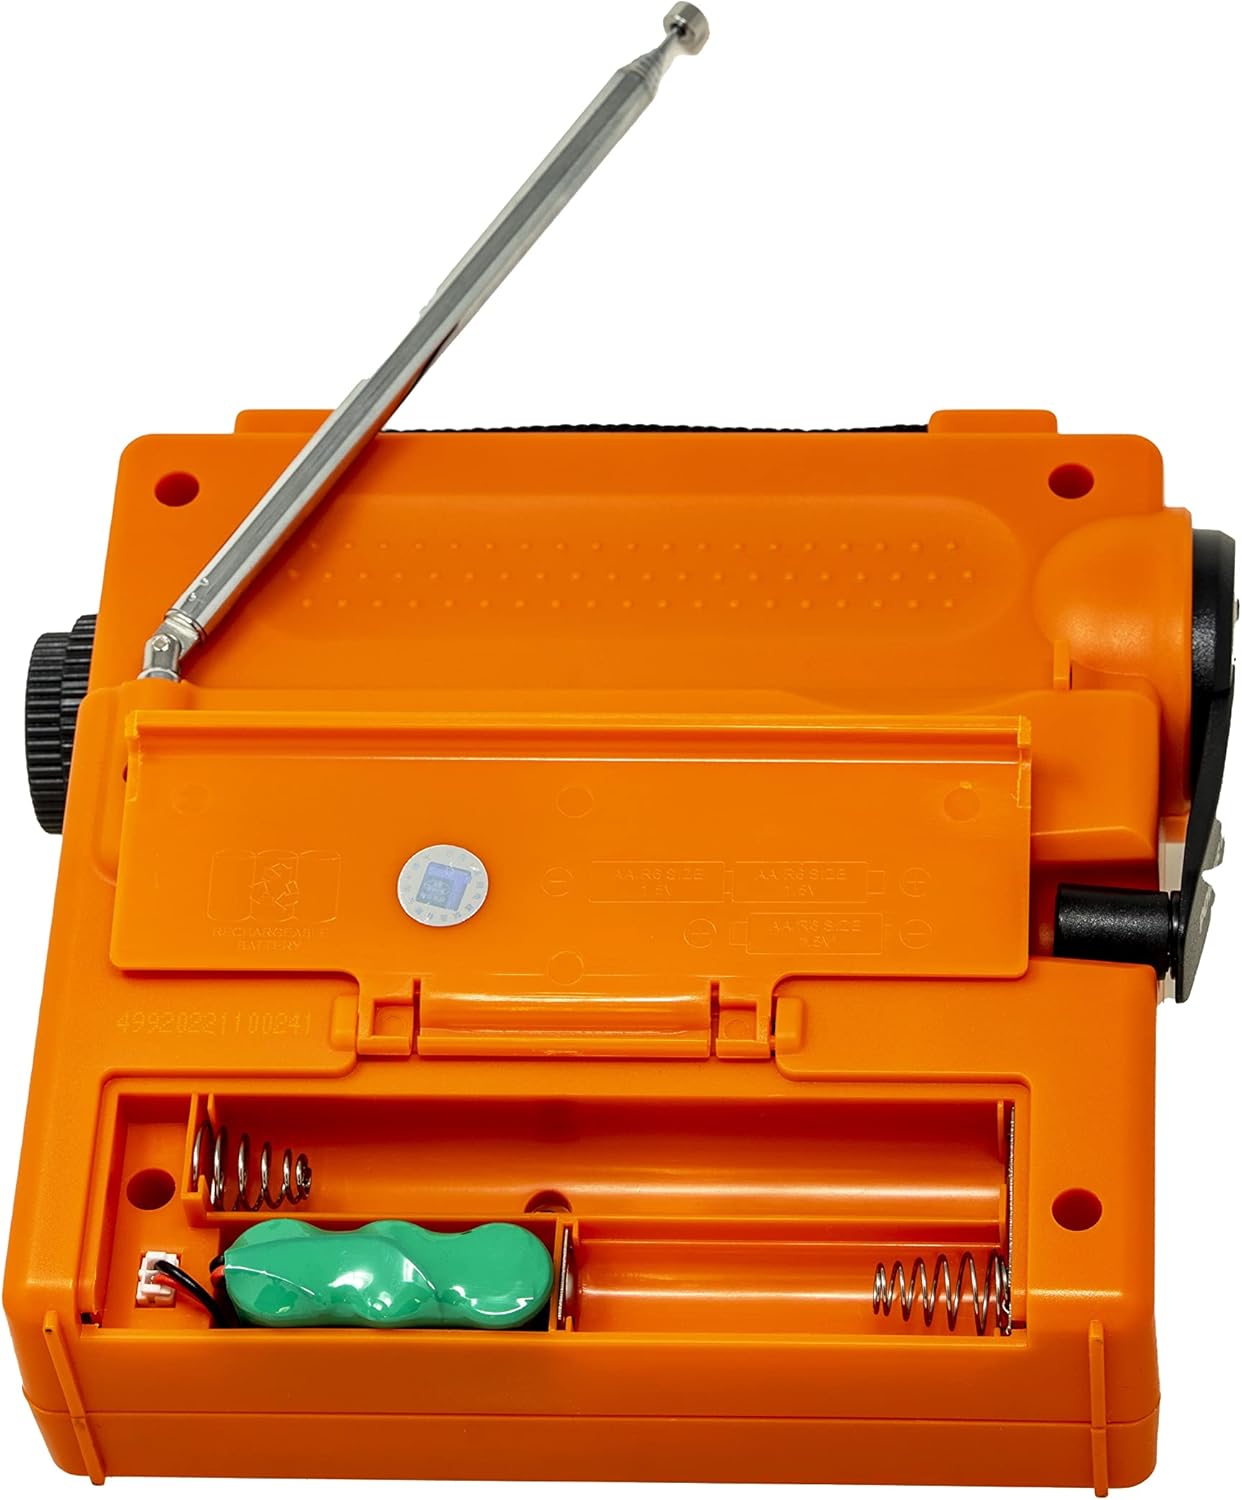
Figure 5.1: The battery compartment with the NiMH battery pack installed and slots for optional AA batteries.
5.2 Charging the Internal Battery
The internal NiMH battery pack can be charged via the hand crank dynamo or a mini-USB cable.
- Hand Crank Charging:
- Unfold the hand crank handle located on the side of the radio.
- Rotate the crank clockwise or counter-clockwise at a steady pace (approximately 120-150 RPM).
- The LED charging indicator will illuminate, indicating that the battery is charging.
- Crank for at least 1-3 minutes for basic radio operation or longer for more significant charge.
- USB Charging:
- Connect the supplied mini-USB cable to the "DC IN 5V" port on the back of the radio.
- Connect the other end of the USB cable to a standard USB power adapter (5V/500mA, not included) or a computer USB port.
- The LED charging indicator will illuminate during charging.

Figure 5.2: The hand crank extended for manual power generation.
6. Operating Instructions
6.1 Radio Operation
- Power On: Rotate the Volume control clockwise to turn on the radio.
- Select Band: Use the Band Selector switch to choose between FM, MW (AM), or SW (Shortwave).
- Extend Antenna: For FM and Shortwave reception, fully extend the telescopic antenna. For AM (MW), the internal ferrite bar antenna is used, so the telescopic antenna is not required.
- Tune Station: Rotate the Tuning Knob to scan for radio stations.
- Adjust Volume: Rotate the Volume control to your desired listening level.
- Shortwave Band Selection: If SW is selected, use the SW Band Selector knob to choose one of the seven shortwave bands (SW1-SW7).
6.2 Flashlight and Siren
The GR-98 includes an LED flashlight and an emergency siren with a flashing red light.
- Flashlight: Slide the Light/Off/Siren switch to the "Light" position to turn on the LED flashlight.
- Siren: Slide the Light/Off/Siren switch to the "Siren" position to activate the emergency siren and flashing red light.
- Turn Off: Slide the switch to the "Off" position to turn off both functions.
6.3 Emergency Smartphone Charging
The radio can provide emergency power to charge a smartphone or other small USB-powered devices.
- Ensure the internal NiMH battery pack has sufficient charge.
- Connect your smartphone's USB charging cable to the "DC OUT 5V" port on the back of the radio.
- Slide the "CHARGE SELECT" switch to the "PHONE" position.
- The radio will begin charging your device. Note that this is intended for emergency power boosts, not full charges.
6.4 Earphone Use
For private listening, connect 3.5mm earphones (not included) to the earphone jack on the back of the radio. The speaker will automatically mute.
7. Maintenance
- Cleaning: Wipe the radio with a soft, damp cloth. Do not use abrasive cleaners or solvents.
- Storage: When not in use for extended periods, store the radio in a cool, dry place. If using AA batteries, remove them to prevent leakage.
- Battery Care: Regularly charge the internal NiMH battery pack, even if not frequently used, to maintain its lifespan. Avoid fully discharging the battery for long periods.
8. Troubleshooting
| Problem | Possible Cause | Solution |
|---|---|---|
| No power / Radio does not turn on | Low or depleted batteries (AA or NiMH). Incorrect battery installation. | Charge the internal NiMH battery using the hand crank or USB. Replace AA batteries if used. Check battery polarity. |
| Poor radio reception | Antenna not extended (FM/SW). Weak signal. Interference. | Fully extend the telescopic antenna for FM/SW. Reposition the radio. Try tuning slowly. |
| Smartphone not charging | Internal battery too low. Incorrect switch position. Cable issue. | Charge the internal NiMH battery. Ensure "CHARGE SELECT" is set to "PHONE". Check USB cable connection. |
| Hand crank is stiff or makes noise | Mechanism needs lubrication or is damaged. | Apply a small amount of silicone-based lubricant if accessible. If persistent, contact support. |
9. Specifications
| Feature | Detail |
|---|---|
| Power Source | 3 x AA batteries (not included) Rechargeable NiMH 600 mAh battery pack (included) |
| Frequency Coverage | FM: 87-108 MHz AM (MW): 522-1620 KHz Shortwave (SW): - SW1: 5.6 – 6.4 MHz - SW2: 6.8 – 7.6 MHz - SW3: 9.2 – 10.0 MHz - SW4: 11.6 – 12.2 MHz - SW5: 13.4 – 14.2 MHz - SW6: 15.0 – 15.9 MHz - SW7: 17.1 – 18.0 MHz |
| Dimensions (W x H x D) | Approx. 6.75 x 6.25 x 2.5 inches (17.1 x 15.9 x 6.4 cm) |
| Weight | Approx. 17 oz (482 g) |
| Connectivity | Mini-USB input (5V/500mA) USB output (5V) 3.5mm Earphone jack |
| Special Features | DSP IC for high sensitivity & selectivity Dynamo hand crank power LED flashlight Siren alarm with flashing red light Emergency smartphone charging |

Figure 9.1: Approximate dimensions of the Tecsun GR-98 radio.
10. Warranty and Support
For warranty information and technical support, please refer to the documentation provided at the time of purchase or contact your retailer. Keep your purchase receipt as proof of purchase.