SREMTCH MH2128
SREMTCH 80W Soldering Iron Kit User Manual
Model: MH2128 | Brand: SREMTCH
1. Introduction
Thank you for choosing the SREMTCH 80W Adjustable Temperature Soldering Iron Kit. This comprehensive kit is designed for various electronic repair, DIY projects, and soldering tasks, offering precise temperature control, rapid heating, and a portable design. This manual provides essential information for safe and effective use of your soldering iron kit.

Image: The complete SREMTCH 80W Soldering Iron Kit, including the iron, various tips, solder wire, desoldering pump, and stand, all neatly arranged.
2. Safety Precautions
Always observe the following safety guidelines to prevent injury or damage:
- Ensure proper ventilation in your workspace to avoid inhaling solder fumes.
- Always wear appropriate eye protection when soldering.
- The soldering iron tip becomes extremely hot. Avoid direct contact with skin or flammable materials.
- Place the soldering iron securely on its stand when not in use.
- Keep out of reach of children.
- Disconnect the power cord when the tool is not in use or before performing maintenance.
3. Package Contents
Your SREMTCH Soldering Iron Kit includes the following components:
- 1 x 80W Adjustable Temperature Soldering Iron with ON/OFF Switch
- 1 x Desoldering Pump
- 1 x Soldering Iron Stand with Cleaning Sponge
- 5 x Multiple Soldering Iron Tips
- 1 x Solder Wire (50g, 0.8mm)
- 1 x PU Carry Bag

Image: A visual representation of the soldering iron, desoldering pump, soldering stand, various soldering tips, solder wire, and the multifunctional tool bag included in the kit.
4. Setup Instructions
- Prepare Your Workspace: Ensure your work area is clean, well-ventilated, and free of flammable materials.
- Assemble the Stand: Place the soldering iron stand on a stable, heat-resistant surface. Insert the cleaning sponge into the designated slot on the stand. Dampen the sponge slightly with water before use.
- Select a Tip: Choose the appropriate soldering tip for your task and securely attach it to the soldering iron. Ensure it is fully seated.
- Connect Power: Plug the soldering iron into a standard 110V AC power outlet.

Image: A user preparing their workstation and beginning a soldering task on a circuit board, demonstrating proper setup and handling.
5. Operating Instructions
- Power On: Flip the ON/OFF switch on the soldering iron to the 'ON' position. The LCD screen will illuminate.
- Set Temperature: Use the temperature adjustment knob to set the desired temperature. The LCD screen displays the current temperature in Celsius. The temperature range is 200℃ - 450℃ (392℉ to 842℉), adjustable in 50-degree increments.
- Heating Time: The soldering iron heats up quickly, reaching operating temperature in approximately 15-30 seconds due to its inner-heated ceramic technology.
- Tinning the Tip: Once heated, apply a small amount of solder to the tip. This 'tins' the tip, improving heat transfer and preventing oxidation.
- Soldering: Touch the heated tip to the joint you wish to solder, ensuring both components are heated simultaneously. Apply solder to the heated joint, not directly to the iron tip. Allow the solder to flow smoothly and form a strong connection.
- Cleaning the Tip: Periodically wipe the hot tip on the damp cleaning sponge to remove excess solder and oxidation. This maintains tip performance.
- Power Off: After use, turn the ON/OFF switch to the 'OFF' position and place the iron securely on its stand. Allow it to cool completely before storing.
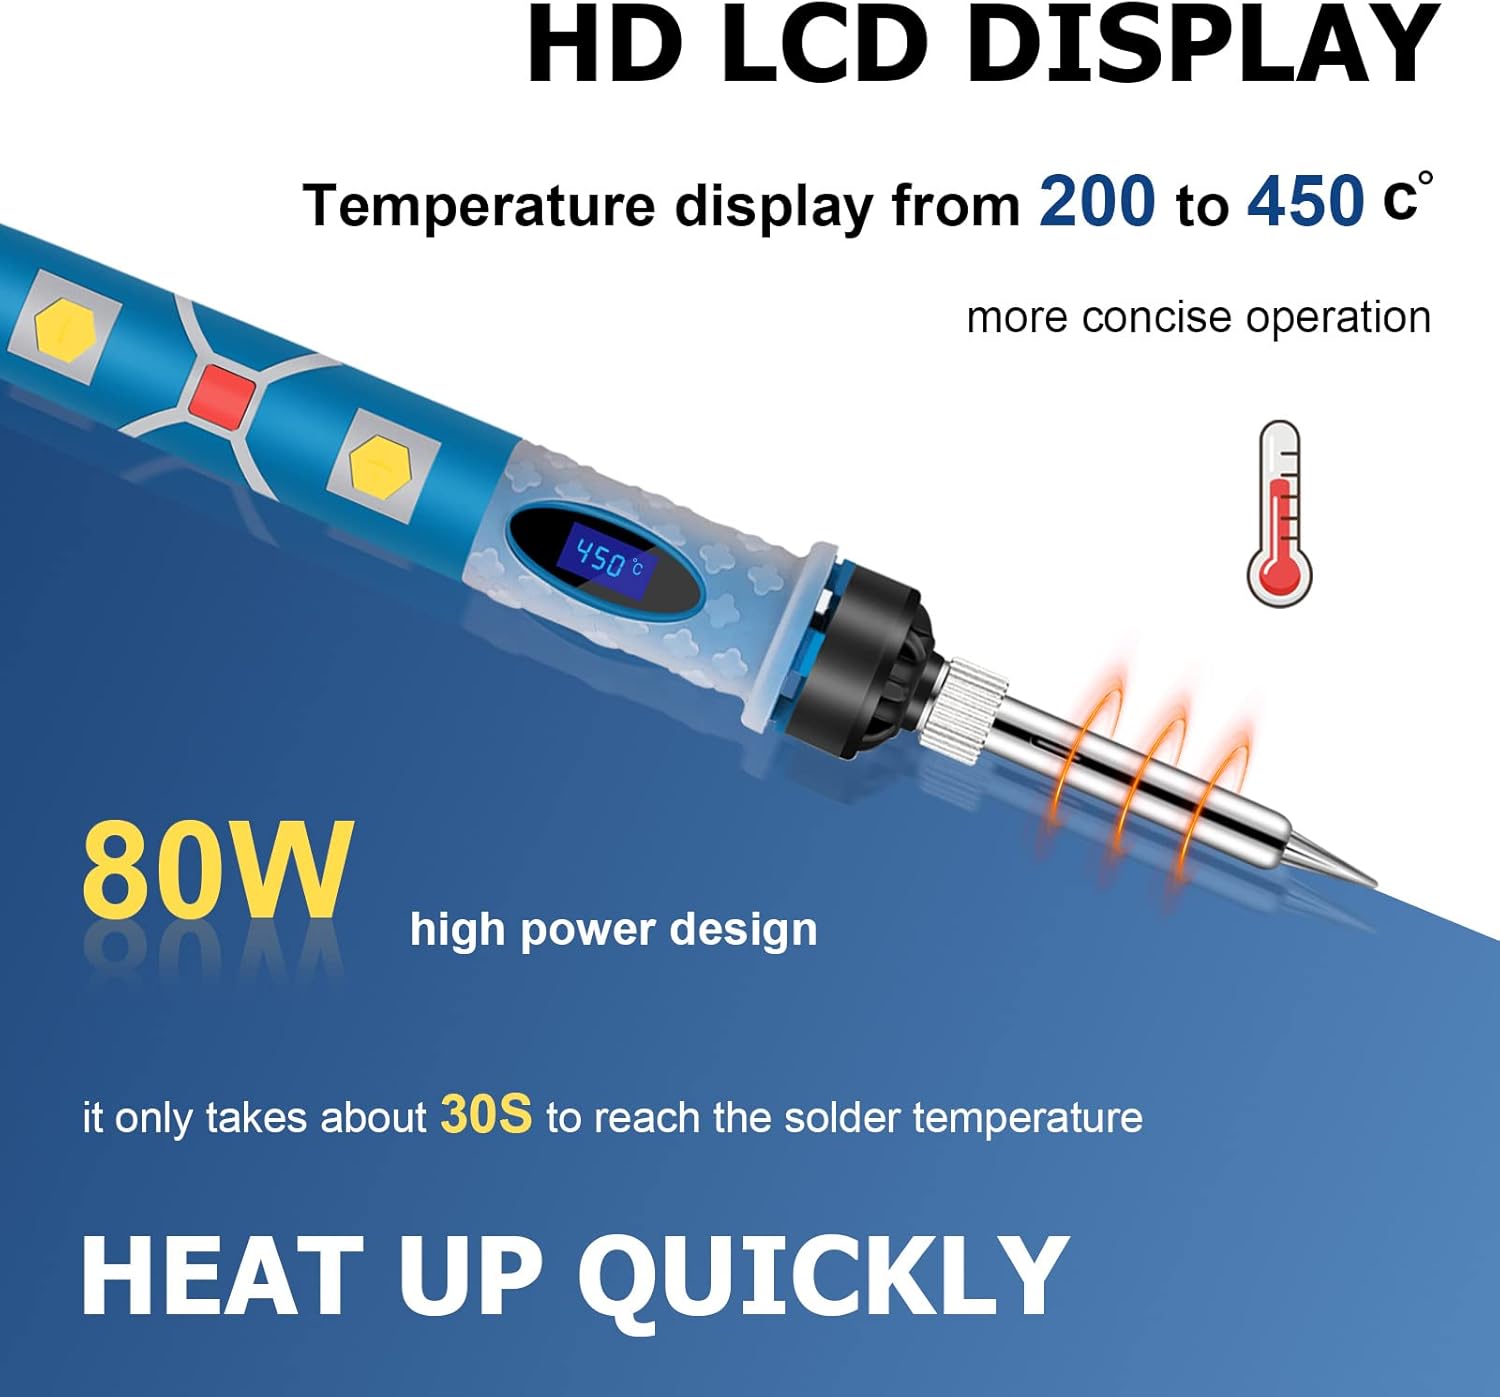
Image: A detailed view of the soldering iron's LCD display, highlighting its 80W power and rapid heating capability, which allows it to reach soldering temperature in approximately 30 seconds.
6. Common Applications
The SREMTCH Soldering Iron Kit is versatile and suitable for a wide range of applications, including but not limited to:
- Welding circuit boards and electronic components.
- Home DIY projects and repairs.
- Appliance repair.
- Jewelry welding.
- Repairing electric wires.
- Working on smart phones, toys, watches, cars, and computers.
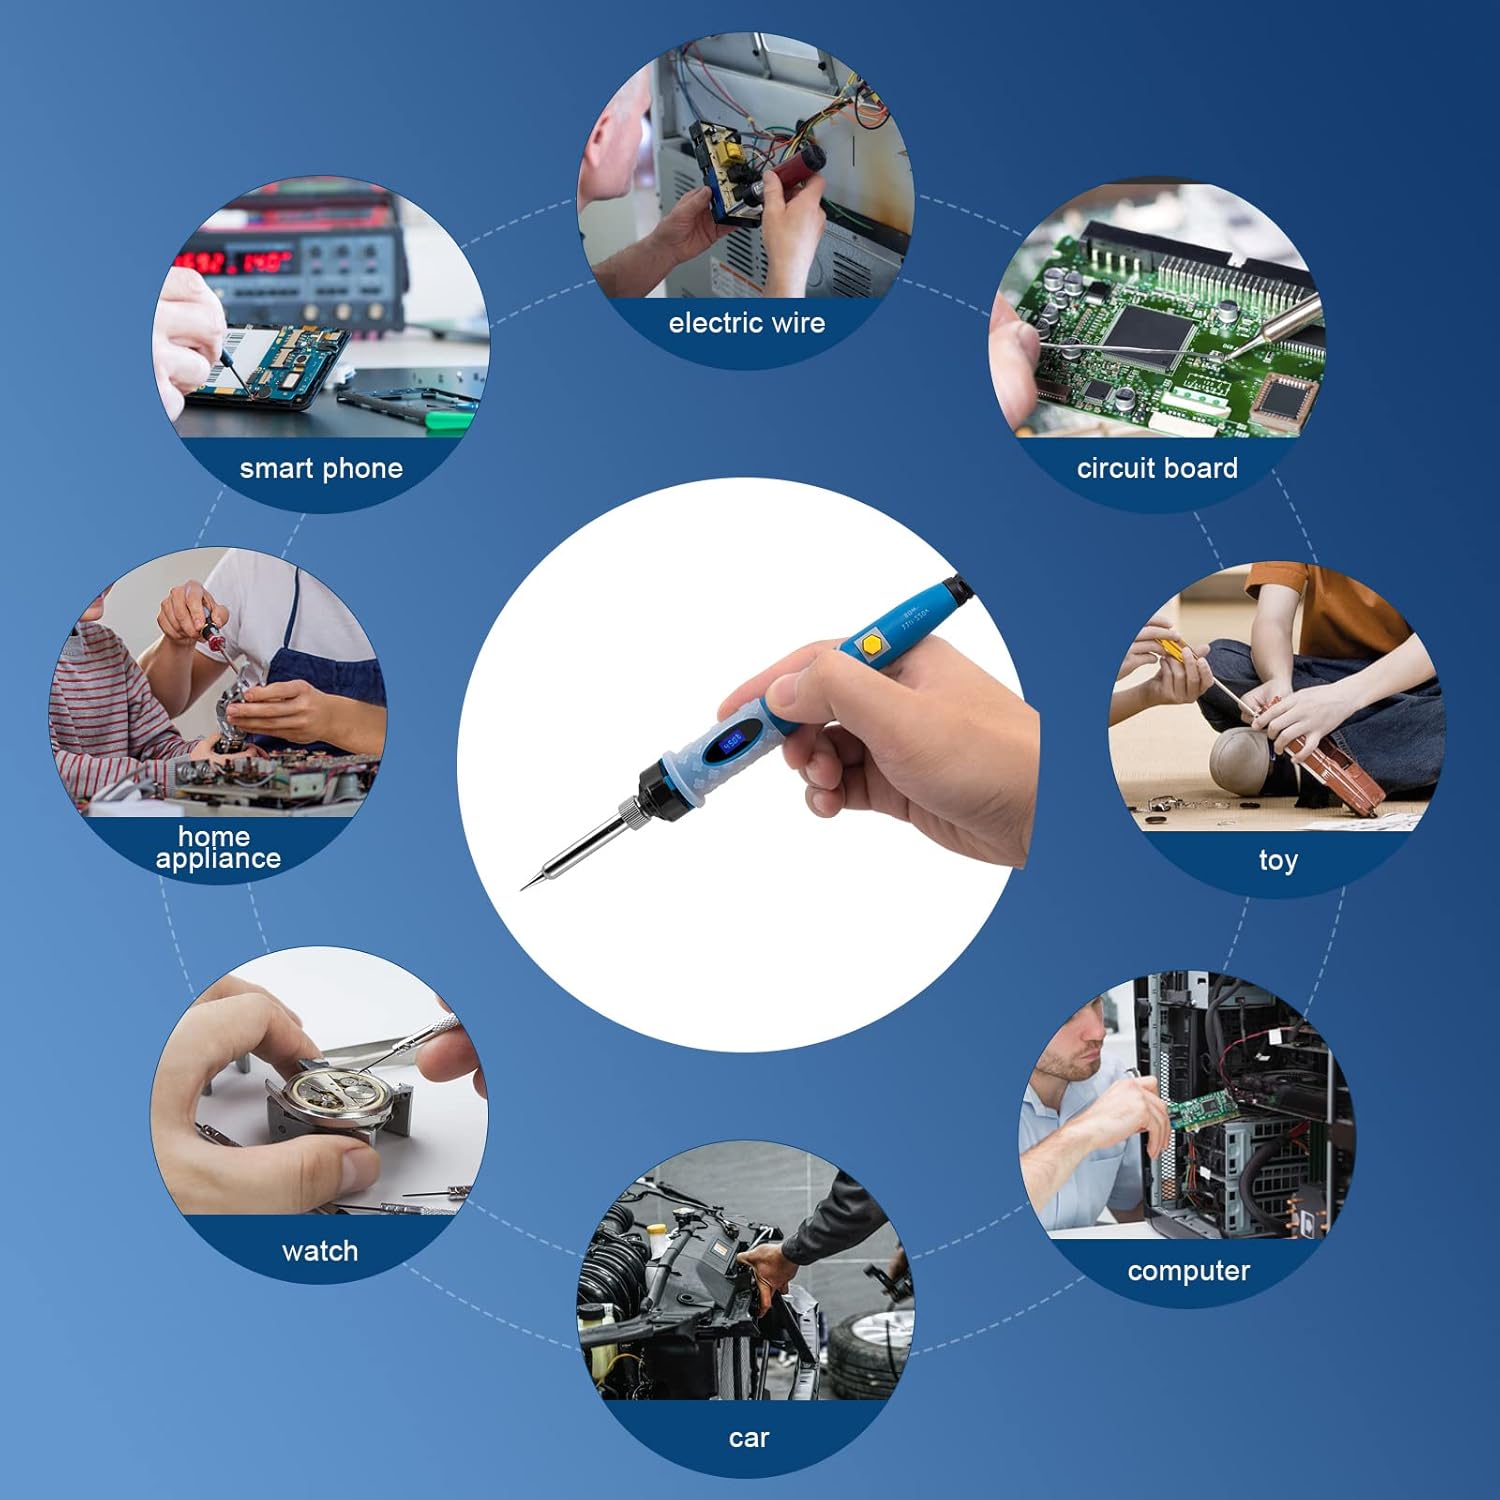
Image: A circular diagram illustrating diverse applications for the soldering iron, including repairs for smartphones, electric wires, circuit boards, toys, home appliances, watches, cars, and computers.
7. Maintenance
- Tip Cleaning: Regularly clean the soldering tip using the damp sponge provided. For stubborn residue, use brass wool or a tip cleaner. A clean tip ensures efficient heat transfer and extends tip life.
- Tip Tinning: Always tin the tip with a small amount of solder before and after each use, especially before storing. This prevents oxidation.
- Tip Replacement: If a tip becomes heavily corroded or damaged, replace it with a new one. Ensure the iron is cool before changing tips.
- Storage: Store the soldering iron and its components in the provided carry bag in a dry, cool place when not in use.
8. Troubleshooting
| Problem | Possible Cause | Solution |
|---|---|---|
| Iron not heating up. | Not plugged in; ON/OFF switch off; faulty power outlet. | Check power connection; turn ON/OFF switch on; try a different outlet. |
| Solder not melting easily. | Temperature too low; dirty/oxidized tip; incorrect solder type. | Increase temperature; clean and tin the tip; ensure solder is appropriate for electronics. |
| Tip turning black/not accepting solder. | Oxidation; insufficient tinning. | Clean the tip thoroughly and re-tin immediately. If severely damaged, replace the tip. |
| LCD display not working. | Power issue; internal fault. | Check power. If problem persists, contact customer support. |
9. Technical Specifications
| Feature | Specification |
|---|---|
| Brand | SREMTCH |
| Model Number | MH2128 |
| Wattage | 80 Watts |
| Voltage | 110 Volts |
| Temperature Range | 200℃ - 450℃ (392℉ - 842℉) |
| Heating Technology | Inner-heated Ceramic |
| Display | LCD Digital Screen |
| Power Source | AC |
| Item Weight | 420 Grams (14.8 ounces) |
| Handle Material | Ceramic |
| Included Components | Soldering Iron, Desoldering Pump, Soldering Iron Stand, 5 Soldering Tips, Solder Wire, Carry Bag |
10. Warranty and Support
SREMTCH provides a 1-Year Warranty Support for this soldering iron kit. This warranty covers manufacturing defects and issues arising from normal use.
For any questions, technical assistance, or warranty claims, please contact SREMTCH customer service through the retailer's platform or the official SREMTCH website. Please have your model number (MH2128) and purchase date ready when contacting support.
Ask a question about this manual
Ask about setup, troubleshooting, compatibility, parts, safety, or missing instructions. Manuals+ will review the question and use this page’s manual context to help answer it.