Introduction
This manual provides comprehensive instructions for the safe and efficient installation, operation, and maintenance of your Tresco L-SPFL8WA-40K-1 Snip Flexible LED Panel. Please read this manual thoroughly before installation and retain it for future reference.
The Tresco Snip Flexible LED Panel is a versatile lighting solution designed for continuous, even illumination. Its flexible, paper-thin design allows it to conform to curved surfaces and be customized by snipping into smaller sections.
Safety Information
WARNING: Risk of Electric Shock. Disconnect power before installation or servicing.
- Ensure all electrical connections comply with local codes and regulations.
- This product is rated for 24VDC. Do not connect to higher voltage power sources.
- For indoor use only. Do not expose to moisture or outdoor elements.
- Do not attempt to modify or repair the panel beyond the specified snipping and re-connection instructions.
- Handle with care to avoid damaging the flexible circuit board.
Package Contents
Verify that all components are present before beginning installation:
- (1) Tresco L-SPFL8WA-40K-1 Snip Flexible LED Panel (24" x 9")
- (Optional, depending on kit): Connectors for re-connection
- (Optional, depending on kit): 24VDC Power Supply (sold separately or included with specific kits)
Setup and Installation
The Tresco Snip Flexible LED Panel offers unique flexibility for custom lighting applications. Follow these steps for proper installation.
1. Planning and Preparation
Before installation, plan your layout. The panel can be cut into smaller 3" x 3" (76 mm x 76 mm) squares. Identify the desired location and ensure a clean, dry surface for mounting.
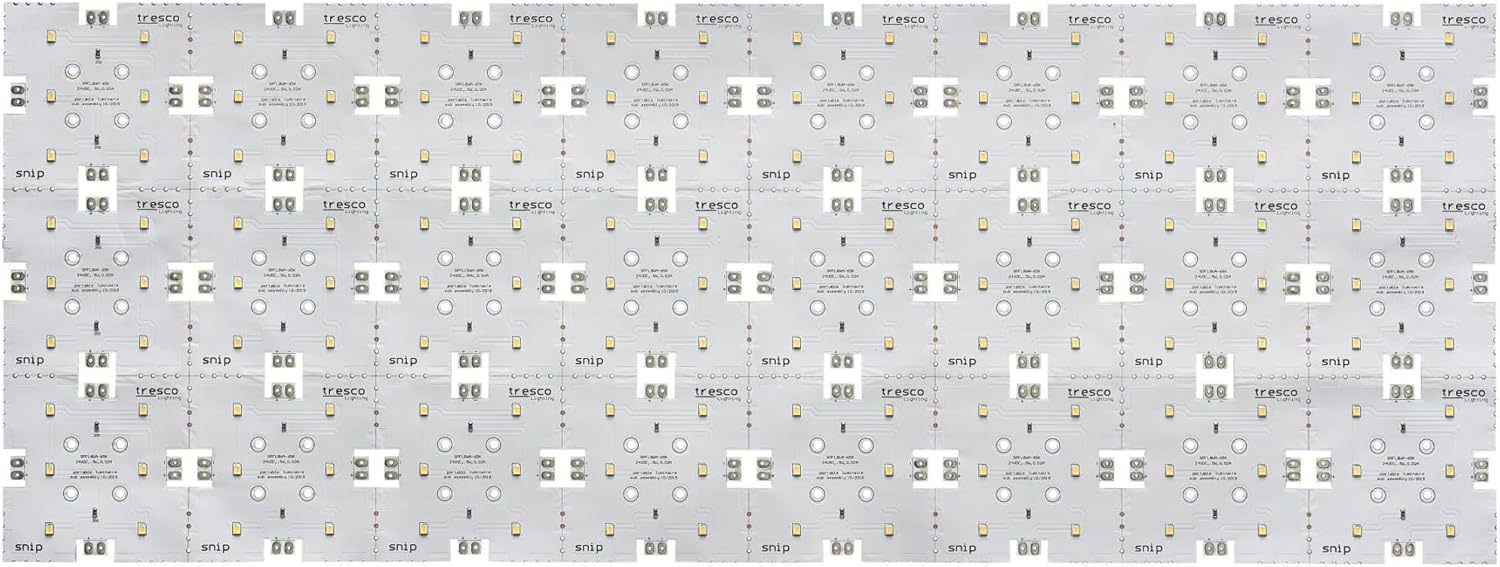
Image 1: Full view of the Tresco Snip Flexible LED Panel, showing multiple individual LED sections.
2. Cutting the Panel (Optional)
If a smaller size or custom shape is required, the panel can be snipped along designated cut lines. These lines are typically marked on the panel. Use sharp scissors for a clean cut.

Image 2: A hand using scissors to cut the flexible LED panel along a designated line.
CAUTION: Only cut along the marked lines to avoid damaging the electrical circuits.
3. Re-connecting Sections (Optional)
Cut sections can be re-connected using appropriate connectors (sold separately or included). Ensure correct polarity (+ to + and - to -) when connecting.

Image 3: Two smaller sections of the LED panel connected together with a specialized connector.

Image 4: A close-up view of the connection points on the LED panel, showing the positive and negative terminals.
4. Mounting the Panel
The panel typically features an adhesive backing for easy installation. Peel off the protective liner and firmly press the panel onto the desired surface. Ensure the surface is clean, dry, and smooth for optimal adhesion.

Image 5: The reverse side of the LED panel, revealing the adhesive strips for mounting.
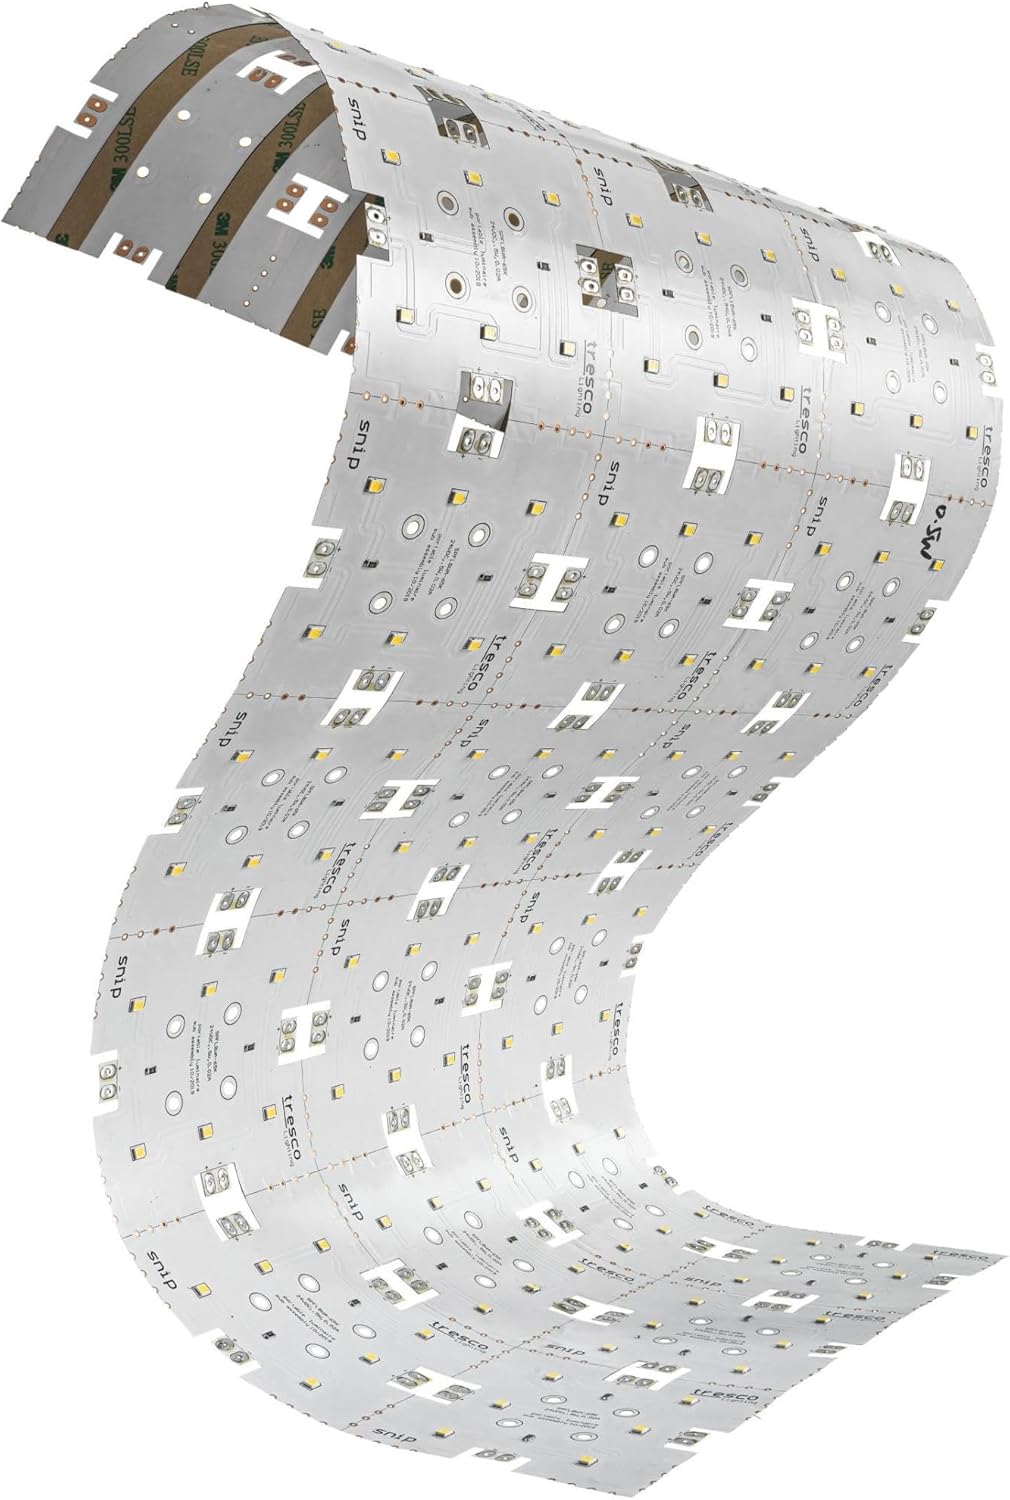
Image 6: The flexible LED panel bent to conform to a curved surface, demonstrating its adaptability.
5. Electrical Connection
Connect the panel to a compatible 24VDC power supply (not included unless specified). Observe correct polarity: positive (+) to positive and negative (-) to negative. Incorrect wiring can damage the panel.
Operating Instructions
Once properly installed and connected to a 24VDC power supply, the LED panel will illuminate when power is supplied.
- Power On/Off: Control the power to the panel via the connected power supply or a switch integrated into your lighting system.
- Dimming: This panel is capable of being dimmed. To utilize dimming functionality, a compatible 24VDC dimmable power supply and dimmer switch are required (sold separately). Follow the instructions provided with your dimming system.
Maintenance
The Tresco Snip Flexible LED Panel requires minimal maintenance.
- Cleaning: Gently wipe the surface with a soft, dry, or slightly damp cloth. Do not use abrasive cleaners or solvents, as these can damage the panel.
- Inspection: Periodically inspect the panel and connections for any signs of damage or wear.
Troubleshooting
| Problem | Possible Cause | Solution |
|---|---|---|
| Panel does not illuminate. | No power, incorrect wiring, faulty power supply, damaged panel. |
|
| Panel is dim or flickers. | Insufficient power, incompatible dimmer, loose connection. |
|
| Only part of the panel illuminates. | Damage to a section, improper re-connection. |
|
Specifications
| Feature | Detail |
|---|---|
| Model Number | L-SPFL8WA-40K-1 |
| Dimensions (L x W x H) | 24" x 9" x 0.06" (610 mm x 229 mm x 1.5 mm) |
| Weight | 0.62 lbs (approx. 9.9 oz) |
| Input Voltage | 24VDC |
| Wattage | 8 watts (per 1.5 sq ft panel) |
| Lumens | 765.6 |
| Color Temperature | 4000K (Cool White) |
| Color Rendering Index (CRI) | 93 CRI |
| Average Hours | 50,000 hours |
| Dimming Capability | Yes (with compatible dimmable power supply) |
| Indoor/Outdoor Usage | Indoor |
| Material | Polyimide |
| Manufacturer | Tresco |
Warranty Information
This Tresco Snip Flexible LED Panel is covered by Tresco's 5-year limited warranty. This warranty covers defects in materials and workmanship under normal use. Please retain your proof of purchase for warranty claims.
For detailed warranty terms and conditions, please refer to the official Tresco Lighting website or contact their customer support.
Support and Contact
If you encounter any issues not covered in this manual or require further assistance, please contact Tresco Lighting customer support.
For the most up-to-date contact information, please visit the official Tresco Lighting website.
Note: Always refer to the manufacturer's official website for the latest product information, support, and warranty details.


