1. Introduction
Thank you for choosing the Keyluv Buffet Storage Cabinet. This manual provides essential information for the safe assembly, operation, and maintenance of your new furniture. Please read these instructions carefully before beginning assembly and retain them for future reference.

Image 1.1: The Keyluv Buffet Storage Cabinet in Grey Wash, featuring three drawers and three cabinet doors.
2. Important Safety Information
To ensure safe use and prevent damage, please observe the following:
- Handle with Care: Due to the weight of the components, it is recommended that two adults handle and assemble this cabinet.
- Secure TV Properly: If using the cabinet as a TV console, ensure the television is securely placed and consider using anti-tip straps to prevent accidental tipping.
- Ventilation: Assemble in a well-ventilated area. MDF material may release a slight odor initially, which will dissipate.
- Weight Limit: Do not exceed the maximum weight capacity of 180 lbs (81.6 kg) on the top surface. Distribute weight evenly.
- Stability: Ensure the cabinet is placed on a flat, stable surface.
3. Package Contents
Before assembly, verify that all parts and hardware are present. Refer to the detailed parts list provided in your separate assembly guide. If any parts are missing or damaged, contact customer support immediately.
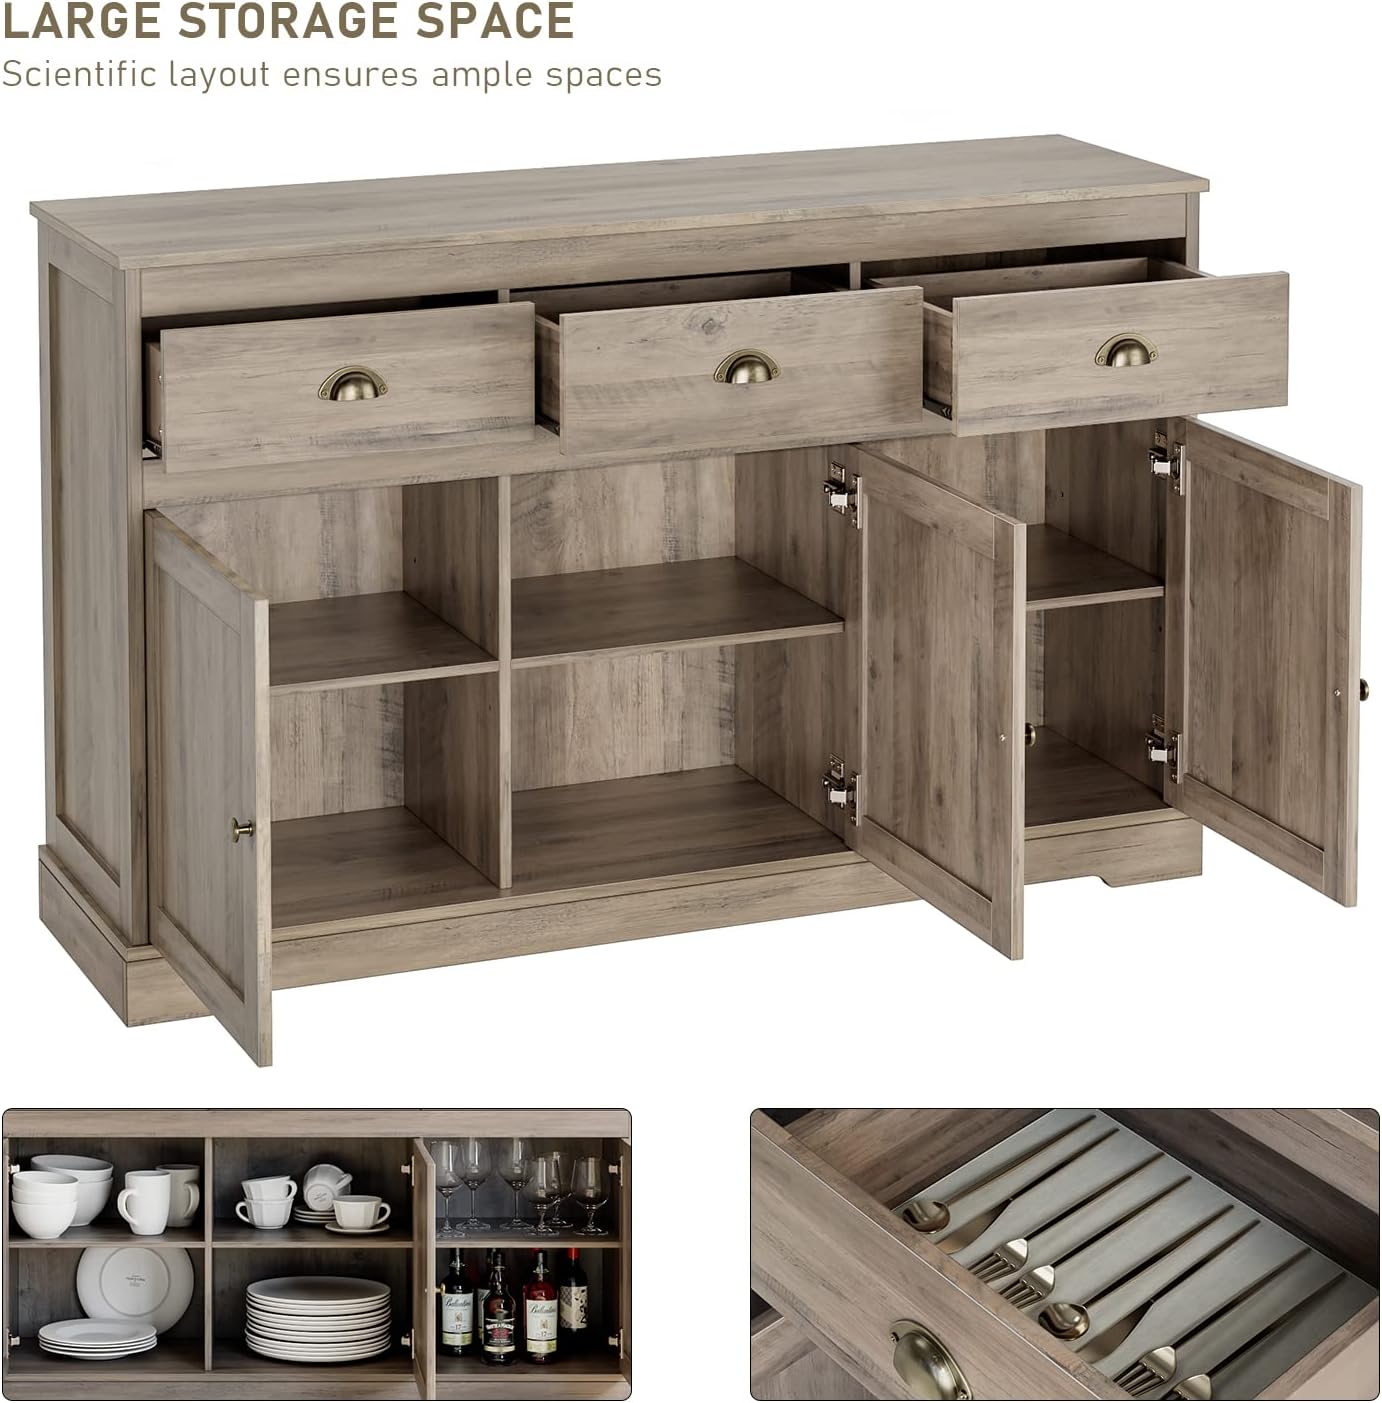
Image 3.1: The cabinet with all doors and drawers open, illustrating the internal storage layout and adjustable shelves.
4. Assembly Instructions
Assembly typically requires two adults and takes approximately 2-3 hours. Please follow the step-by-step pictorial instructions included in your product packaging. A Phillips head screwdriver is generally required.
4.1 General Assembly Tips
- Unpack all components and lay them out on a soft, clean surface to prevent scratches.
- Identify each part using the labels and the parts list.
- Do not overtighten screws, as this may damage the material.
- Ensure all cam locks and dowels are properly seated for maximum stability.
- When installing drawers, note that they may be numbered and designed for specific slots (e.g., left to right). If drawers do not fit smoothly, try re-arranging them according to any markings.

Image 4.1: Detailed views of the sturdy retro drawer handles, high-quality metal hinges, and smooth drawer slides used in the cabinet construction.
5. Operating Instructions
5.1 Using the Drawers
The three top drawers operate on smooth slides. To open, gently pull the burnished gold handle. To close, push until fully seated. Avoid forcing drawers if they encounter resistance.
5.2 Adjusting the Shelves
The shelves inside the cabinet doors are adjustable to three different heights. To adjust a shelf:
- Empty the shelf of all contents.
- Carefully lift the shelf and remove it from the support pegs.
- Relocate the support pegs to the desired height holes within the cabinet.
- Place the shelf back onto the support pegs, ensuring it is level and secure.

Image 5.1: Detail illustrating the adjustable shelf feature, allowing for three different height positions to accommodate various items.
6. Maintenance
6.1 Cleaning
Wipe the cabinet surfaces with a soft, damp cloth. Avoid using harsh chemicals, abrasive cleaners, or excessive moisture, as these can damage the finish. Dry immediately with a clean cloth.
6.2 General Care
- Periodically check all screws and fasteners to ensure they remain tight. Retighten as necessary.
- Protect the top surface from spills and heat using coasters or placemats.
- Avoid direct sunlight exposure for prolonged periods to prevent fading.
7. Troubleshooting
7.1 Drawers Do Not Close Smoothly
- Check Drawer Placement: Ensure each drawer is in its correct position. Some drawers are specifically designed for certain slots and may be numbered.
- Inspect Slides: Verify that the drawer slides are properly aligned and free of obstructions.
- Hardware Tightness: Check that all screws securing the drawer slides to both the drawer and the cabinet frame are tight.
7.2 Doors Are Misaligned
- Hinge Adjustment: Most cabinet hinges allow for minor adjustments. Refer to the hinge manufacturer's instructions (if provided) or common hinge adjustment guides to align the doors.
- Hardware Tightness: Ensure all screws securing the hinges to both the door and the cabinet frame are tight.
7.3 Cabinet Wobbles
- Level Surface: Ensure the cabinet is on a flat, level surface. Use shims if necessary.
- Tighten All Fasteners: Re-check and tighten all assembly screws and cam locks throughout the entire cabinet structure.
8. Specifications
| Brand | Keyluv |
| Model Name | Buffet Sideboard |
| Model Number | KBLFV038G |
| Color | Grey Wash |
| Product Dimensions (D x W x H) | 15.6" x 53.5" x 34.1" (39.6 cm x 135.9 cm x 86.6 cm) |
| Item Weight | 100.8 lbs (45.7 kg) |
| Material | Engineered Wood |
| Weight Limit (Top Surface) | 180 lbs (81.6 kg) |
| Number of Drawers | 3 |
| Number of Doors | 3 |
| Adjustable Shelves | Yes (3 positions) |
| Assembly Required | Yes |

Image 8.1: Dimensional diagram of the cabinet, including overall measurements and individual drawer dimensions.
9. Warranty and Support
Keyluv is committed to providing quality products. For specific warranty details, please refer to the documentation included with your purchase or contact Keyluv customer service. If you encounter any issues during assembly or use, or if you have questions, please reach out to our support team for assistance.
Contact information for support can typically be found on the packaging or on the Keyluv official website.