1. Introduction
Thank you for choosing the XTRONS TIX125L 10.1-inch Android 12 Car Stereo. This advanced multimedia system features an Octa-core processor, 8GB RAM, 128GB ROM, built-in GPS, Wi-Fi, 4G connectivity, Apple CarPlay, Android Auto, and a Digital Sound Processor (DSP). Its rotatable QLED display offers a versatile and intuitive user experience. This manual provides essential information for installation, operation, maintenance, and troubleshooting to ensure optimal performance and user satisfaction.
2. Safety Information
- Professional Installation Recommended: Due to the complexity of car electrical systems, professional installation is highly recommended to prevent damage to the unit or your vehicle.
- Power Supply: Ensure the unit is connected to a 12V DC power supply with a negative ground. Incorrect voltage can cause damage.
- Wiring: Follow all wiring diagrams carefully. Improper wiring can lead to malfunctions, electrical shorts, or fire.
- Driving Safety: Do not operate the unit in a way that distracts you from driving. Always prioritize road safety.
- Temperature: Avoid exposing the unit to extreme temperatures or direct sunlight for prolonged periods.
- Moisture: Keep the unit dry. Exposure to moisture can cause damage.
- Ventilation: Ensure adequate ventilation around the unit to prevent overheating.
3. Package Contents
Please check the contents of your package against the list below:
- XTRONS TIX125L Main Head Unit
- Power Wiring Harness
- RCA Output/Input Cables
- GPS Antenna
- USB Cables (x2)
- 4G LTE Antenna
- Mounting Brackets (x2 pairs)
- Screws
- External Microphone
- User Manual (this document)

Figure 3.1: Included accessories and main unit.
4. Setup and Installation
This section provides general guidelines for installing your XTRONS TIX125L car stereo. For specific vehicle models, additional adapters or professional assistance may be required.
4.1 Pre-Installation Steps
- Disconnect Battery: Before starting, disconnect the negative terminal of your vehicle's battery to prevent electrical shorts.
- Remove Old Unit: Carefully remove your existing car stereo from the dashboard.
- Inspect Wiring: Identify the vehicle's wiring harness. You may need a vehicle-specific adapter harness (not included) to connect to the XTRONS unit.
4.2 Wiring Connections
- Power Harness: Connect the provided power wiring harness to the unit and then to your vehicle's wiring. Ensure all connections (power, ground, ACC, illumination) are correct.
- GPS Antenna: Connect the GPS antenna and mount it in a location with a clear view of the sky (e.g., on the dashboard or under the windshield).
- 4G LTE Antenna: Connect the 4G LTE antenna for cellular data connectivity.
- Wi-Fi Antenna: The unit has a built-in Wi-Fi module. Ensure no obstructions block its signal.
- USB Cables: Route the USB cables to an accessible location (e.g., glove compartment) for connecting USB drives or smartphones.
- External Microphone: Connect the external microphone for improved call quality during Bluetooth hands-free operation. Position it near the driver.
- RCA Cables: Connect RCA cables for external amplifiers, subwoofers, or auxiliary video inputs/outputs as needed.
- Optional Connections: Connect optional accessories such as a rear-view camera, DVR camera, DAB+ box, or TPMS kit according to their respective manuals.
4.3 Mounting the Unit
- Secure the Main Unit: Use the provided mounting brackets and screws to secure the main unit into the dashboard opening.
- Adjust Display: The 10.1-inch display is rotatable and adjustable. Position it for optimal viewing angle and accessibility.
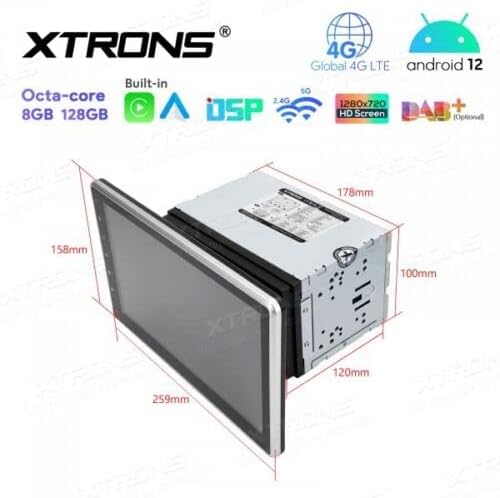
Figure 4.1: Unit dimensions for installation planning.
4.4 Post-Installation
- Reconnect Battery: Reconnect the negative terminal of your vehicle's battery.
- Initial Power On: Turn on the vehicle ignition and power on the stereo.
- Test Functions: Verify all functions, including audio, radio, GPS, Bluetooth, and touchscreen responsiveness.
5. Operating Instructions
This section details the operation of the XTRONS TIX125L car stereo's various features.
5.1 Basic Operation
- Power On/Off: Press and hold the power button (usually on the front panel) to turn the unit on or off. A short press typically mutes/unmutes audio.
- Touchscreen Interface: Navigate the Android 12 interface by tapping, swiping, and pinching on the capacitive touchscreen.
- Volume Control: Adjust volume using the physical buttons or on-screen controls.
- Home Screen: The main screen provides access to frequently used applications and widgets.

Figure 5.1: Main user interface with navigation and media playback.
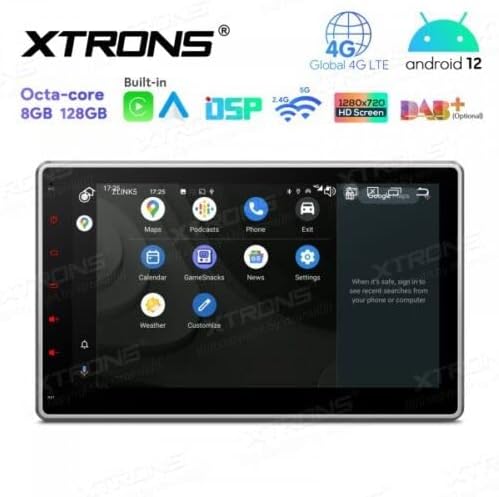
Figure 5.2: Android app drawer with various applications.
5.2 GPS Navigation
The unit comes with a built-in GPS module. You can use pre-installed navigation apps or download others from the Google Play Store.
- GPS Antenna: Ensure the GPS antenna is properly connected and has a clear view of the sky for accurate positioning.
- Map Updates: Keep your navigation maps updated for the best routing experience.
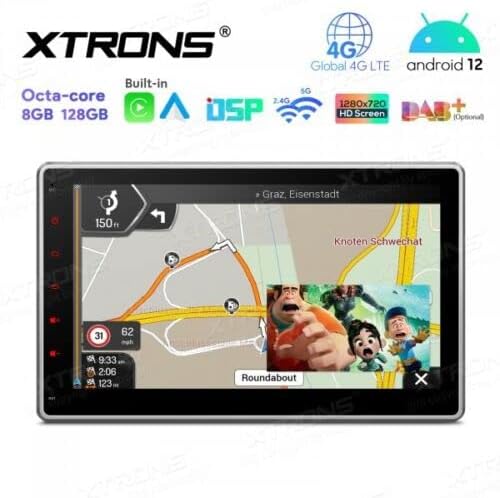
Figure 5.3: Navigation interface with split-screen functionality.
5.3 Bluetooth 5.0
Connect your smartphone via Bluetooth for hands-free calling and audio streaming.
- Pairing: Go to Bluetooth settings on the unit and your phone. Search for available devices and select the XTRONS unit to pair.
- Hands-Free Calling: Make and receive calls directly from the unit's screen. Use the external microphone for clear voice transmission.
- Audio Streaming: Play music from your phone through the car stereo speakers.
5.4 Wi-Fi and 4G Connectivity
Access the internet and online services using Wi-Fi or a 4G SIM card.
- Wi-Fi: Connect to a Wi-Fi hotspot (e.g., from your phone or home network) via the Wi-Fi settings.
- 4G LTE: Insert a compatible 4G SIM card into the designated slot (if available) and connect the 4G antenna for mobile data access.
5.5 Apple CarPlay / Android Auto
Integrate your smartphone for a safer and smarter driving experience.
- Connection: Connect your iPhone or Android phone via USB or wirelessly (if supported by your phone and the unit's software).
- Features: Access navigation, music, messages, and other compatible apps directly on the stereo display.

Figure 5.4: Apple CarPlay / Android Auto interface.
5.6 Digital Sound Processor (DSP)
Customize your audio experience with the built-in DSP.
- Equalizer: Adjust frequency bands to fine-tune the sound output to your preference.
- Sound Effects: Explore various sound presets and effects.
5.7 Screen Mirroring
Display your smartphone's screen directly on the car stereo.
- Connection: Follow the instructions within the Screen Mirroring app on the unit to connect your phone (usually via Wi-Fi or USB).
5.8 USB/SD Playback
Play media files from USB drives or SD cards.
- USB Ports: Connect USB flash drives (up to 128GB) to the provided USB ports.
- SD Card Slot: Insert an SD card (up to 64GB) into the designated slot.
- Media Player: Use the built-in media player app to browse and play audio or video files.
5.9 Radio (FM/AM, DAB+)
Listen to your favorite radio stations.
- FM/AM: Use the radio app to scan for stations, save presets, and switch between FM and AM bands.
- DAB+ (Digital Audio Broadcasting): This feature requires an optional DAB+ receiver box (not included). Once connected, you can enjoy higher quality digital radio broadcasts.
5.10 Steering Wheel Controls
Control the stereo using your vehicle's steering wheel buttons.
- Configuration: This feature typically requires a vehicle-specific CAN-Bus adapter (not included) and configuration within the unit's settings.
5.11 Rear Camera and DVR Input
Enhance driving safety with optional camera systems.
- Rear Camera: Connect an optional rear-view camera. The display will automatically switch to the camera view when the vehicle is in reverse gear.
- DVR Camera: Connect an optional DVR (Digital Video Recorder) camera to record your driving.
5.12 TPMS Support
Monitor your tire pressure with an optional TPMS (Tire Pressure Monitoring System) kit.
- Connection: This feature requires an optional TPMS kit (not included). Once connected, tire pressure data will be displayed on the unit.
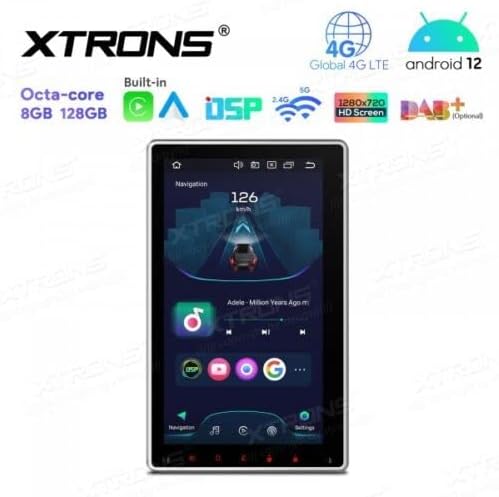
Figure 5.5: Vertical screen orientation for navigation.
6. Maintenance
Proper maintenance ensures the longevity and optimal performance of your car stereo.
- Cleaning the Screen: Use a soft, lint-free cloth to gently wipe the touchscreen. For stubborn smudges, slightly dampen the cloth with water or a screen-safe cleaner. Avoid harsh chemicals.
- General Cleaning: Keep the unit and surrounding area free from dust and debris.
- Software Updates: Periodically check the XTRONS official website for available software or firmware updates to improve performance and add new features. Follow update instructions carefully.
7. Troubleshooting
If you encounter issues with your XTRONS TIX125L, refer to the following common problems and solutions.
| Problem | Possible Cause | Solution |
|---|---|---|
| Unit does not power on. | No power connection, blown fuse, incorrect wiring. | Check power wiring, vehicle fuse box, and the unit's fuse. Ensure battery is connected. |
| No sound. | Volume muted, incorrect audio source, speaker wiring issues. | Check volume level, ensure correct audio source is selected. Verify speaker connections. |
| Poor GPS signal or no signal. | GPS antenna not connected, antenna obstructed, faulty antenna. | Ensure GPS antenna is securely connected and mounted in a clear location. Replace antenna if necessary. |
| Bluetooth connection issues. | Device not in pairing mode, interference, incorrect pairing process. | Ensure both devices are in pairing mode. Delete previous pairings and try again. Move closer to the unit. |
| Touchscreen unresponsive. | Software glitch, screen dirty, hardware issue. | Restart the unit. Clean the screen. If problem persists, contact support. |
| Apps crash or freeze. | Insufficient memory, software bug, incompatible app. | Close background apps. Clear app cache. Update software if available. Uninstall and reinstall problematic apps. |
If the problem persists after trying these solutions, please contact XTRONS customer support for further assistance.
8. Specifications
Below are the technical specifications for the XTRONS TIX125L car stereo:
- Brand: XTRONS
- Model: TIX125L
- Screen Size: 10.1 Inches
- Display Type: QLED, Capacitive Touchscreen, LED
- Operating System: Android 12
- Processor: Octa-Core
- RAM: 8GB
- ROM: 128GB (Expandable via USB/SD)
- Connectivity: Bluetooth 5.0, USB, Wi-Fi, 4G LTE (SIM card reader included)
- Navigation: Built-in GPS (Supports various map types)
- Special Features: Apple CarPlay, Android Auto, Digital Sound Processor (DSP), Screen Mirroring, Rotatable Display, Equalizer
- Supported Storage: USB (up to 128GB), SD (up to 64GB)
- Control Method: Touchscreen
- Mounting Type: In-dash
- Compatible Vehicle Type: Motorcycle (Note: Product description states 'Motocicletta', but typically these units are for cars. Please verify compatibility with your specific vehicle.)
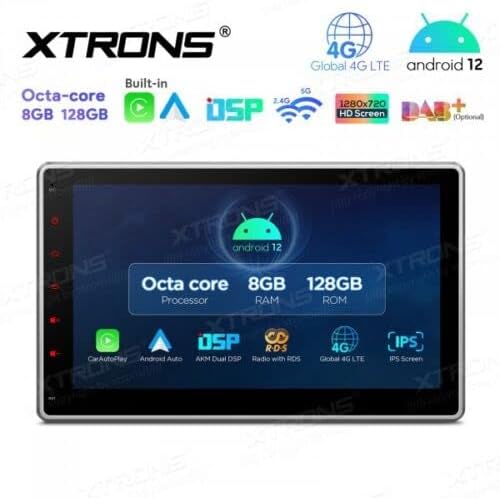
Figure 8.1: Key features and specifications overview.
9. Warranty and Support
For warranty information, please refer to the warranty card included with your product or visit the official XTRONS website. If you require technical assistance, have questions about installation, or need troubleshooting beyond what is covered in this manual, please contact XTRONS customer support. Have your product model number (TIX125L) and purchase details ready when contacting support.
XTRONS Official Website: www.xtrons.com (Please verify the exact support contact details on their website.)