1. Product Overview
The VoleStay ES30B Biometric Home Safe provides secure storage for your valuables, documents, firearms, and other important items. It features multiple access methods including biometric fingerprint recognition, a digital keypad, and traditional backup keys. Constructed from durable carbon steel, this safe is designed for reliability and ease of use in home, office, or hotel environments.
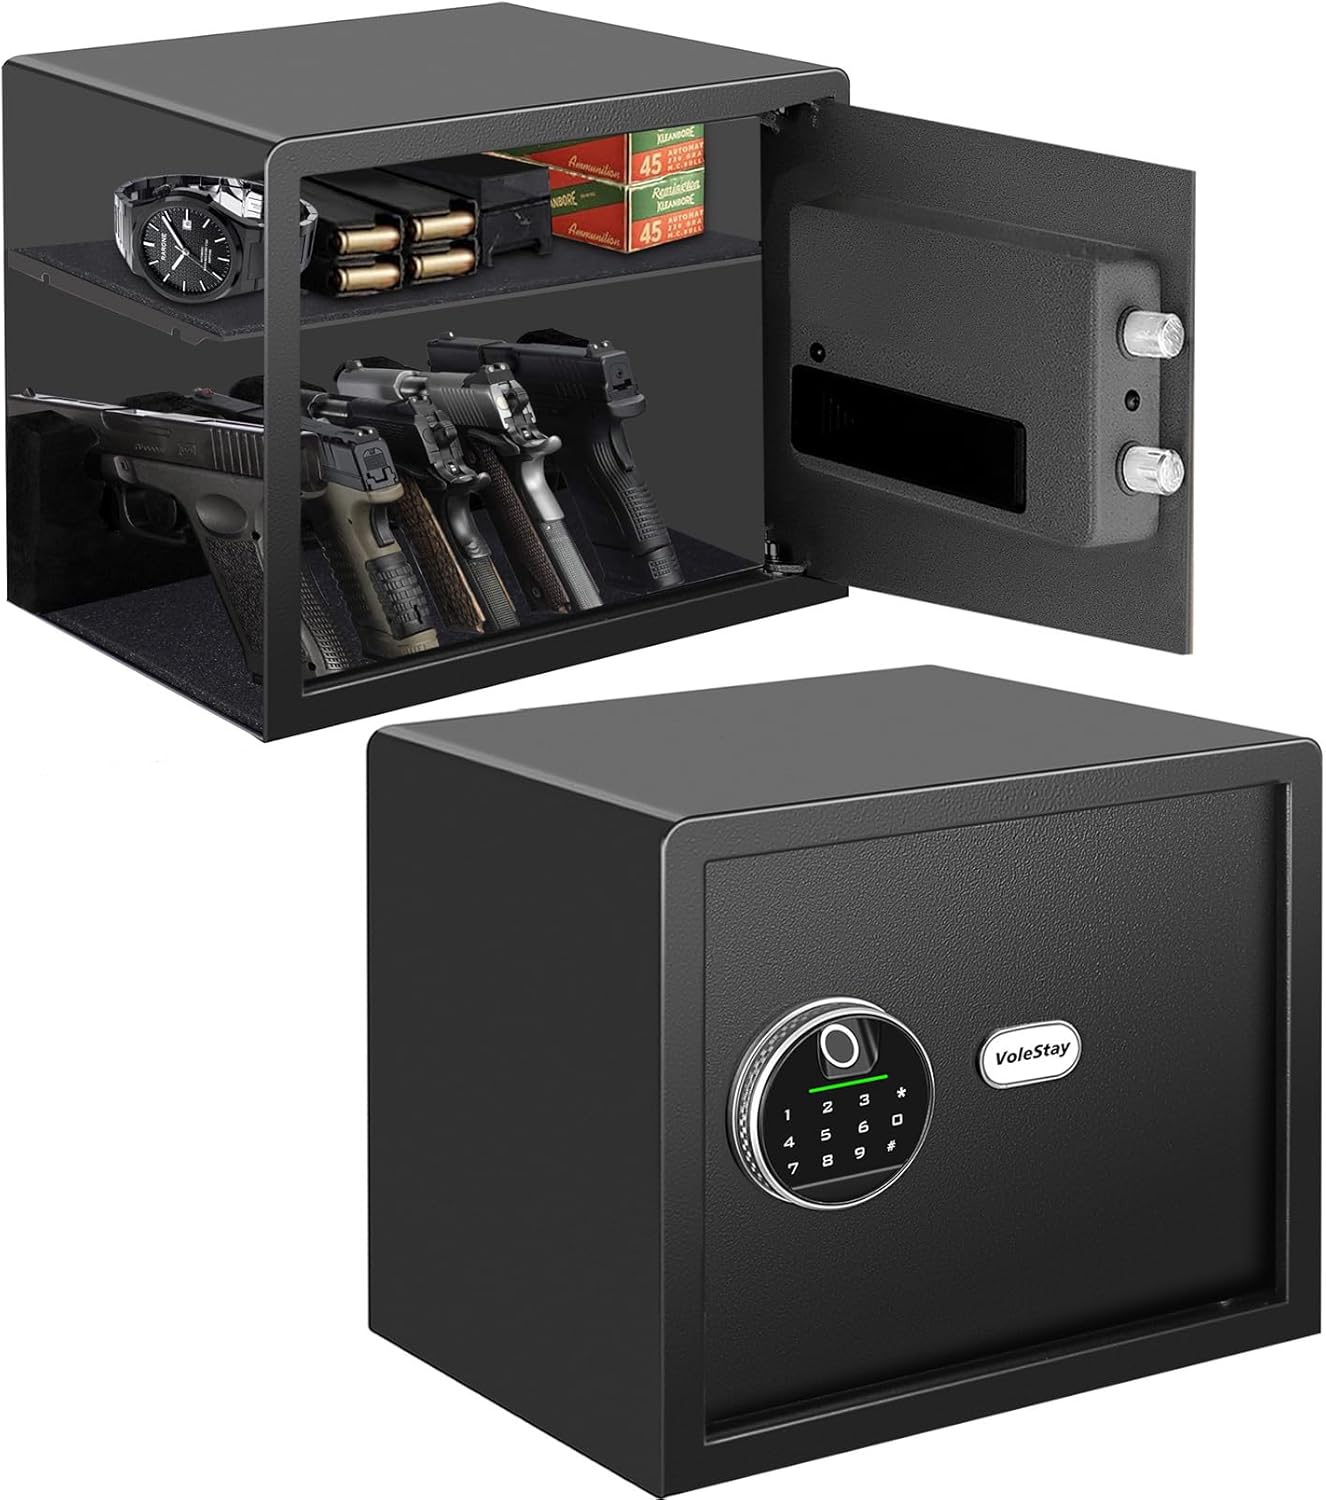
Image 1.1: The VoleStay ES30B Biometric Home Safe, illustrating its compact design and interior capacity with a removable handgun rack and shelf.
Key Features:
- Biometric Fingerprint Access: Stores up to 20 fingerprints for quick access (under 1 second).
- Digital Keypad: 10-digit keypad for millions of code combinations.
- Backup Key Access: Two emergency keys for manual override.
- Durable Construction: Reinforced solid carbon steel (14 gauge door, 16 gauge wall) with 2 live-door bolts.
- Interior Capacity: 1.2 cubic feet with a removable 5-position handgun rack and shelf.
- Security Features: Anti-theft alarm, silent mode, anti-pry design.
- Convenience: Internal LED light, low battery reminder, 9V emergency power port.

Image 1.2: The detachable foam handgun rack, capable of holding up to five full-size pistols, can be customized or removed.
2. Package Contents
Please check the package carefully to ensure all items are present and undamaged.
- VoleStay ES30B Biometric Home Safe
- Battery Holder (for internal batteries)
- Backup Keys (2)
- Removable Shelf
- Removable Handgun Rest (foam)
- Mounting Hardware (bolts and anchors)
- Instruction Manual (this document)
3. Setup
3.1 Identifying Components

Image 3.1: Front panel components including fingerprint reader, keypad, and keyhole location.
3.2 Battery Installation
- Locate the battery compartment on the inside of the safe door. It may be covered by a velcro flap.
- Open the battery compartment cover, typically requiring a small screwdriver.
- Insert 4 AAA batteries (not included) according to the polarity markings (+/-).
- Close the battery compartment cover.
- Test the keypad or fingerprint reader to ensure power is supplied.
Note: A 9V battery port is available on the front panel for emergency power if internal batteries are depleted. This is for temporary power only and does not install inside the safe.
3.3 Initial Access and Programming
Upon first use, access the safe using the backup keys. The keyhole is located under the VoleStay logo plate on the front panel. Gently pry off the logo plate to reveal the keyhole.
- Open with Backup Key: Insert one of the backup keys into the keyhole and turn it while rotating the handle to open the safe door.
- Set Administrator Code: With the door open, locate the reset button inside the safe (usually on the back of the door or near the hinge). Press the reset button. The indicator light on the keypad will illuminate. Enter a new 4-8 digit PIN code on the keypad, then press '#' to confirm. Re-enter the same PIN code and press '#' again. The indicator light will confirm successful programming. This is your administrator code and cannot be changed once set.
- Enroll Fingerprints:
- Press the reset button inside the safe. The indicator light will illuminate.
- Place your finger on the fingerprint reader. Lift and repeat 5-8 times, rotating your finger slightly each time, until the indicator light confirms successful enrollment.
- Repeat for additional fingerprints (up to 20).
- Set User Code (Optional): After setting the administrator code, you can set additional user codes. Press the reset button, then enter the administrator code, press '#', then enter a new 4-8 digit user code, press '#', re-enter the user code, and press '#'.
Important: Keep backup keys in a secure location outside the safe.
3.4 Mounting the Safe
The safe includes pre-drilled holes and hardware for floor or wall mounting to enhance security.

Image 3.2: Example of mounting the safe using pre-drilled holes and hardware.
- Choose a suitable location for mounting (e.g., solid wall stud, floor).
- Mark the drilling points through the pre-drilled holes at the back or bottom of the safe.
- Drill pilot holes at the marked locations.
- Position the safe and secure it using the provided mounting hardware (bolts and anchors).
- Ensure the safe is firmly attached and cannot be easily removed.
4. Operating Instructions
4.1 Opening the Safe
- Using Fingerprint: Place your enrolled finger on the fingerprint reader. If recognized, the safe will unlock, and the door will spring open slightly.
- Using PIN Code: Enter your programmed PIN code on the keypad, then press '#'. If correct, the safe will unlock, and the door will spring open slightly.
- Using Backup Key: If batteries are dead or electronic access fails, gently pry off the VoleStay logo plate to reveal the keyhole. Insert a backup key and turn it while rotating the handle to open.
Upon opening, an internal LED light will illuminate for approximately 30 seconds to assist visibility.
4.2 Closing and Locking the Safe
Close the safe door firmly. The safe will automatically lock. Ensure the handle is in the locked position if applicable.
4.3 Silent Mode
To enable or disable silent mode (which mutes keypad beeps), refer to the specific instructions in your manual for the key sequence. This feature is useful for discreet access.

Image 4.1: Visual representation of key operational features including low battery reminder and emergency power port.
5. Maintenance
5.1 Battery Replacement
When the low battery indicator illuminates, replace the 4 AAA batteries promptly to ensure continuous operation. Follow the steps in Section 3.2.
5.2 Cleaning
Clean the exterior of the safe with a soft, damp cloth. Avoid abrasive cleaners or solvents that could damage the finish or electronic components. Keep the fingerprint reader clean and dry for optimal performance.
5.3 General Inspection
Periodically inspect the safe for any signs of wear or damage. Ensure the door hinges and locking bolts operate smoothly. If any issues are detected, contact customer support.
6. Troubleshooting
- Safe does not open with fingerprint:
- Ensure your finger is clean and dry.
- Try re-enrolling your fingerprint (refer to Section 3.3).
- Ensure batteries are not depleted. Use the 9V emergency power port if necessary.
- Safe does not open with PIN code:
- Verify the PIN code entered is correct.
- Ensure batteries are not depleted. Use the 9V emergency power port if necessary.
- If the keypad is unresponsive, try tapping it multiple times before entering the code (as noted in some user experiences).
- Low Battery Indicator: Replace the 4 AAA batteries immediately. Use the 9V emergency power port if the safe is inaccessible due to dead batteries.
- Alarm sounds unexpectedly: The anti-theft alarm activates after 3 consecutive incorrect code entries. Wait for the alarm to reset or use a correct access method.
- Safe door does not close properly: Check for any obstructions inside the safe or around the door frame. Ensure the safe is on a level surface.
7. Specifications
| Feature | Detail |
|---|---|
| Brand | VoleStay |
| Model Number | ES30B |
| Product Dimensions (External) | 13"D x 13.8"W x 11.8"H (33cm D x 35cm W x 30cm H) |
| Capacity | 1.2 Cubic Feet |
| Material | Carbon Steel |
| Lock Type | Biometric, Digital Keypad, Key |
| Door Thickness | 14 Gauge Steel |
| Wall Thickness | 16 Gauge Steel |
| Item Weight | 25.8 pounds |
| Mounting Type | Floor Mount, Wall Mount |
| Power Source | 4 x AAA Batteries (not included), 9V Emergency Battery Port |
| Special Features | Portable, Anti-theft Alarm, Silent Mode, Internal LED Light, Low Battery Reminder, Anti-Pry Design |

Image 7.1: External dimensions of the VoleStay ES30B Biometric Home Safe.
8. Warranty and Support
For warranty information or technical support, please contact VoleStay customer service. Refer to the contact information provided with your purchase or visit the official VoleStay website.
When contacting support, please have your model number (ES30B) and purchase date available.