1. Introduction
Thank you for choosing the Outsunny Garden Greenhouse. This manual provides essential information for the safe assembly, operation, and maintenance of your greenhouse. Please read these instructions carefully before use and retain them for future reference. This greenhouse is designed to protect plants, vegetables, and flowers from adverse weather conditions, promoting optimal growth.
2. Safety Information
- Adverse Weather Conditions: This greenhouse is not suitable for use in adverse weather conditions such as strong winds, heavy snow, or severe storms. Disassemble or secure the greenhouse appropriately during such conditions to prevent damage or injury.
- Assembly: Ensure all parts are correctly assembled and secured according to the instructions. Improper assembly can lead to instability.
- Anchoring: Always use the provided ground stakes and tie-downs to firmly anchor the greenhouse to the ground. Bury the extended edges of the cover and the lower part of the metal structure for added stability.
- Ventilation: Ensure adequate ventilation, especially on warm days, to prevent overheating of plants.
- Children and Pets: Keep children and pets away from the greenhouse during assembly and ensure they do not play unsupervised around the structure.
- Sharp Edges: Be cautious of potential sharp edges on metal components during assembly. Wear protective gloves if necessary.
3. Package Contents
Your Outsunny Garden Greenhouse package should contain all necessary components for assembly. Please verify all parts are present and undamaged before beginning assembly. Refer to the assembly diagram for a complete list of parts.

Image: The product is delivered in one package, as indicated by the 'Outsunny' branded cardboard box.
4. Setup and Assembly
Follow these steps to assemble your Outsunny Garden Greenhouse. It is recommended to have at least two people for assembly.
4.1. Frame Assembly
- Unpack all components and lay them out. Identify each part using the assembly diagram.
- Connect the steel tubes to form the base frame. Ensure all connections are secure.
- Assemble the vertical supports and roof frame, connecting them to the base.
- Ensure the entire steel frame is stable and all joints are tightly fitted.
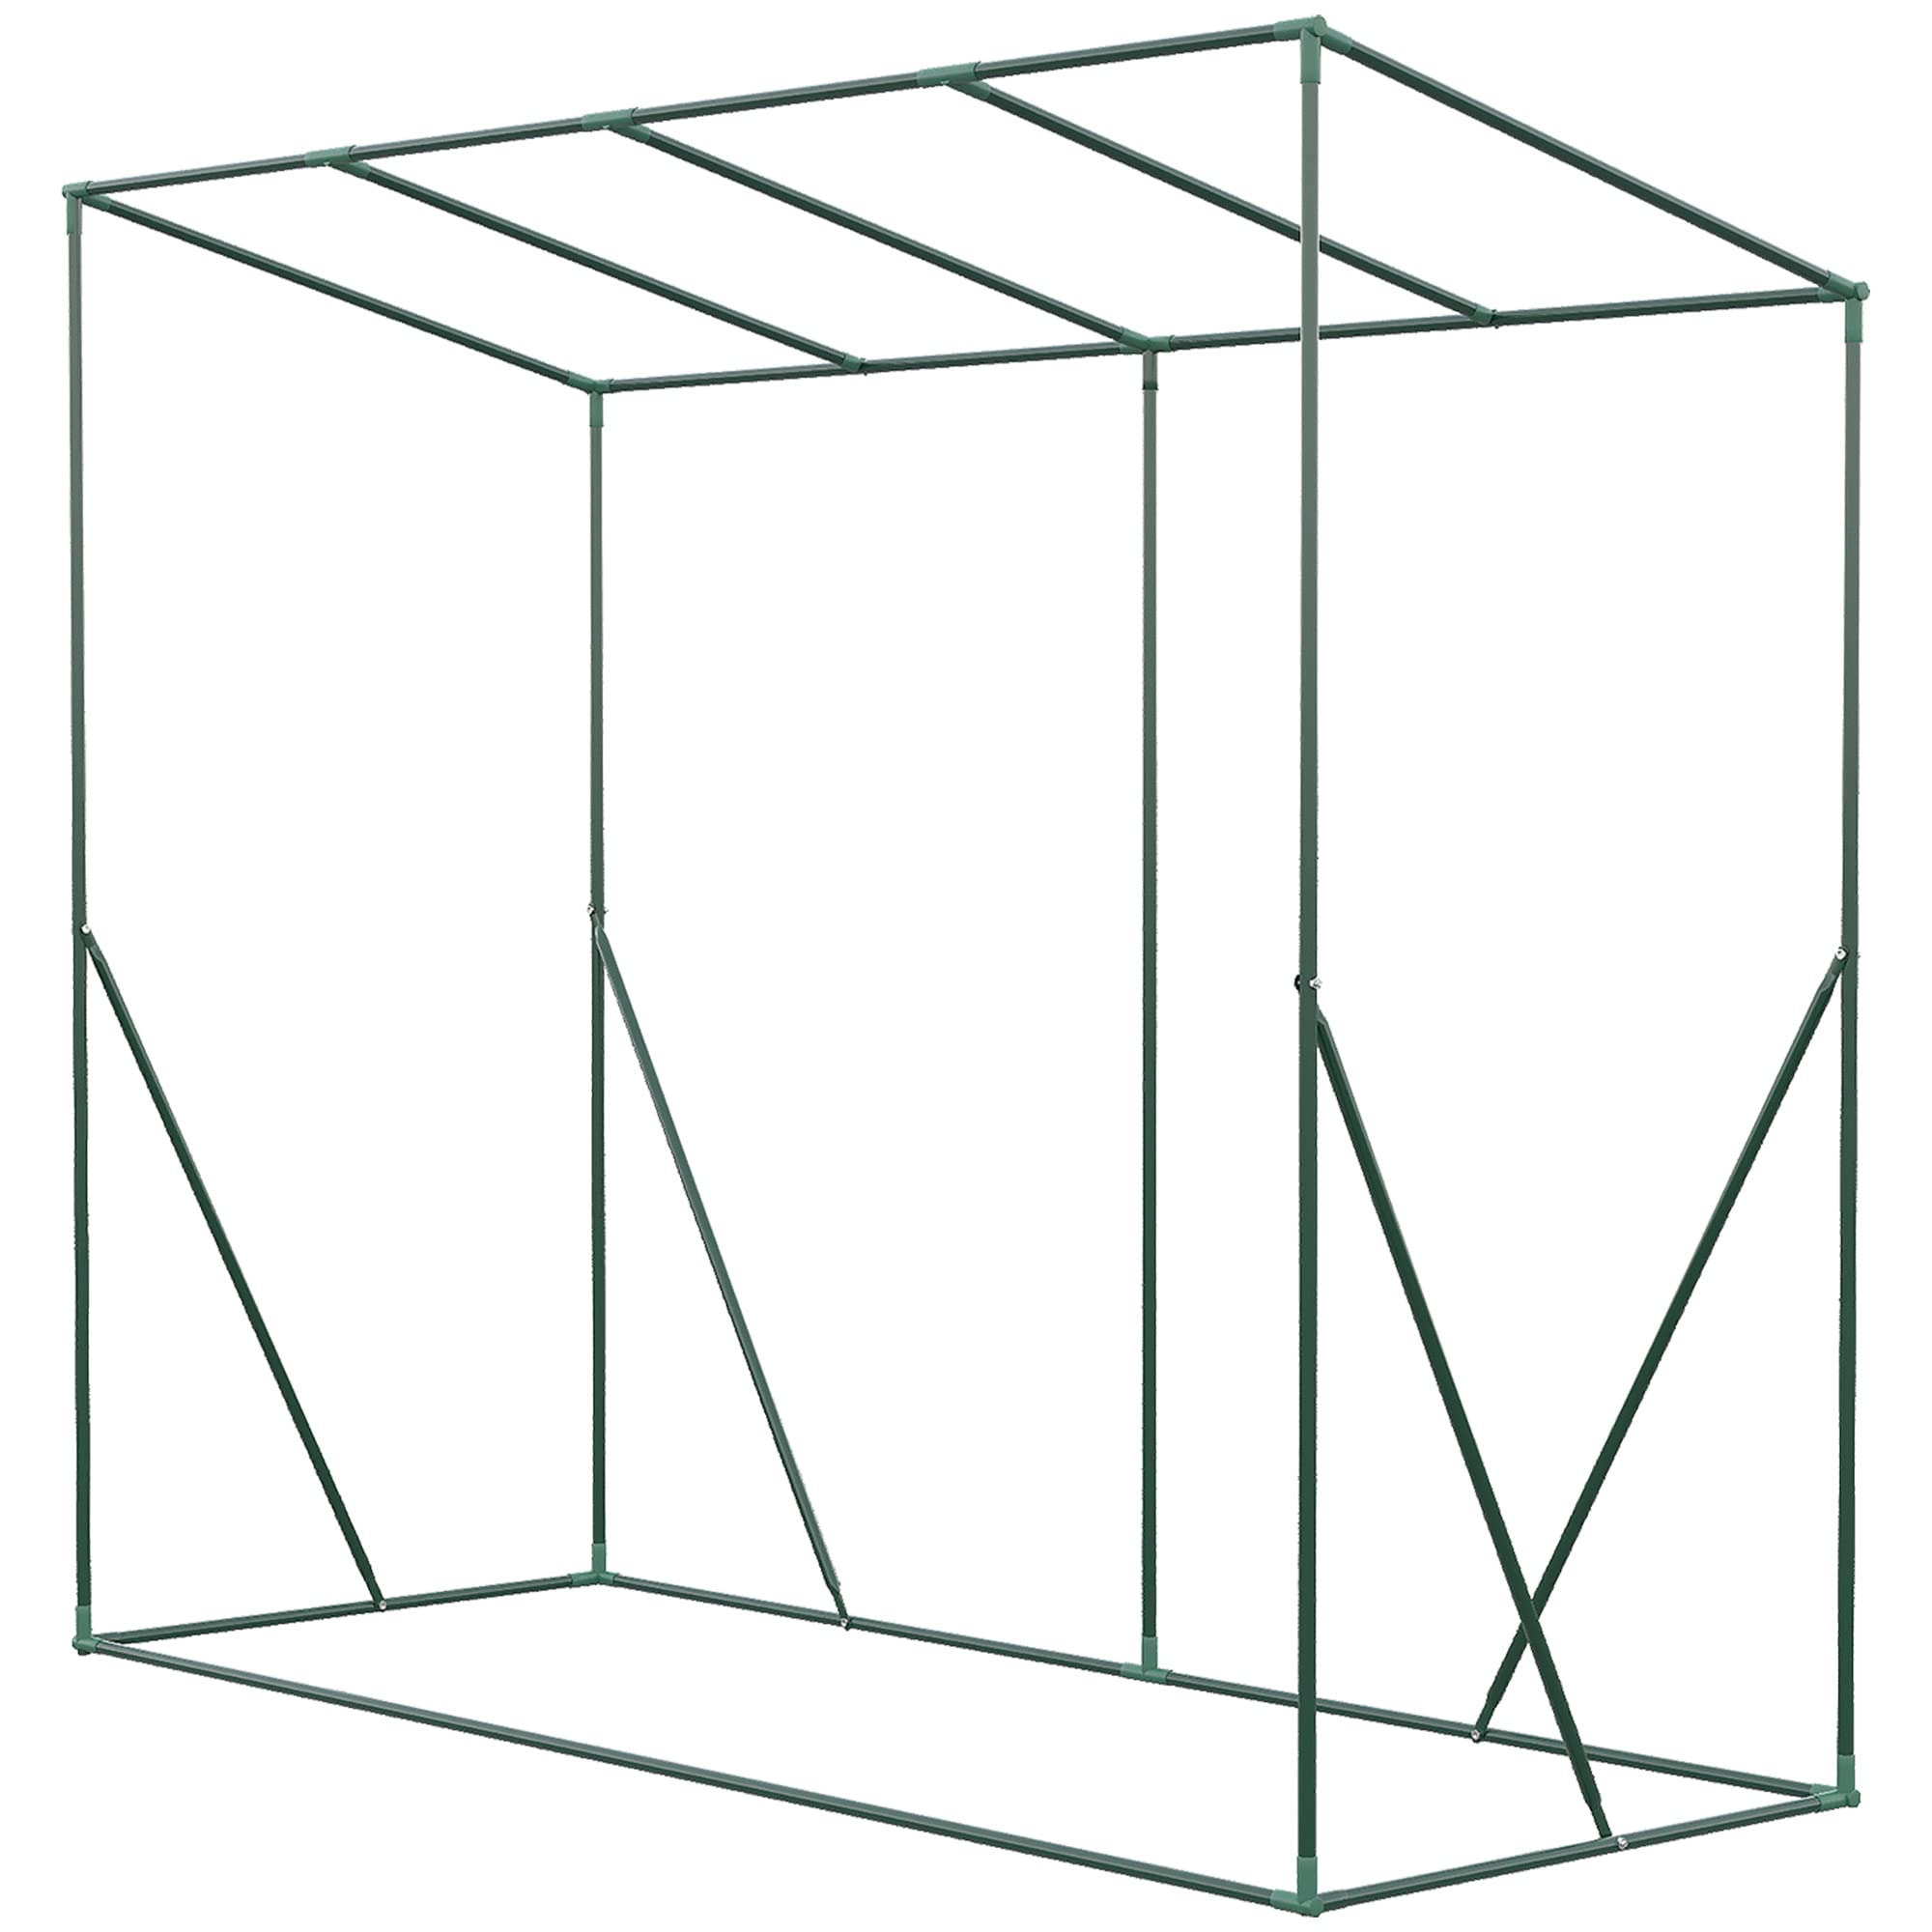
Image: The robust steel frame structure of the greenhouse before the cover is applied.
4.2. Cover Installation
- Carefully drape the PE cover over the assembled steel frame.
- Align the cover so that the door opening and side windows are correctly positioned.
- Secure the cover to the frame using any integrated ties or fasteners.
4.3. Securing the Greenhouse
For maximum stability, especially against wind, follow these steps:
- Ground Stakes and Tie-downs: Use the four provided ground stakes and tie-downs to firmly secure the greenhouse to the soil. Attach the tie-downs to the frame and anchor them into the ground.
- Burying Edges: The extended 10 cm edges of the PE cover should be buried deep into the soil. This helps to prevent wind from lifting the cover and provides additional insulation.
- Burying Frame Base: The lower part of the metal structure should also be completely buried in the ground for enhanced stability.
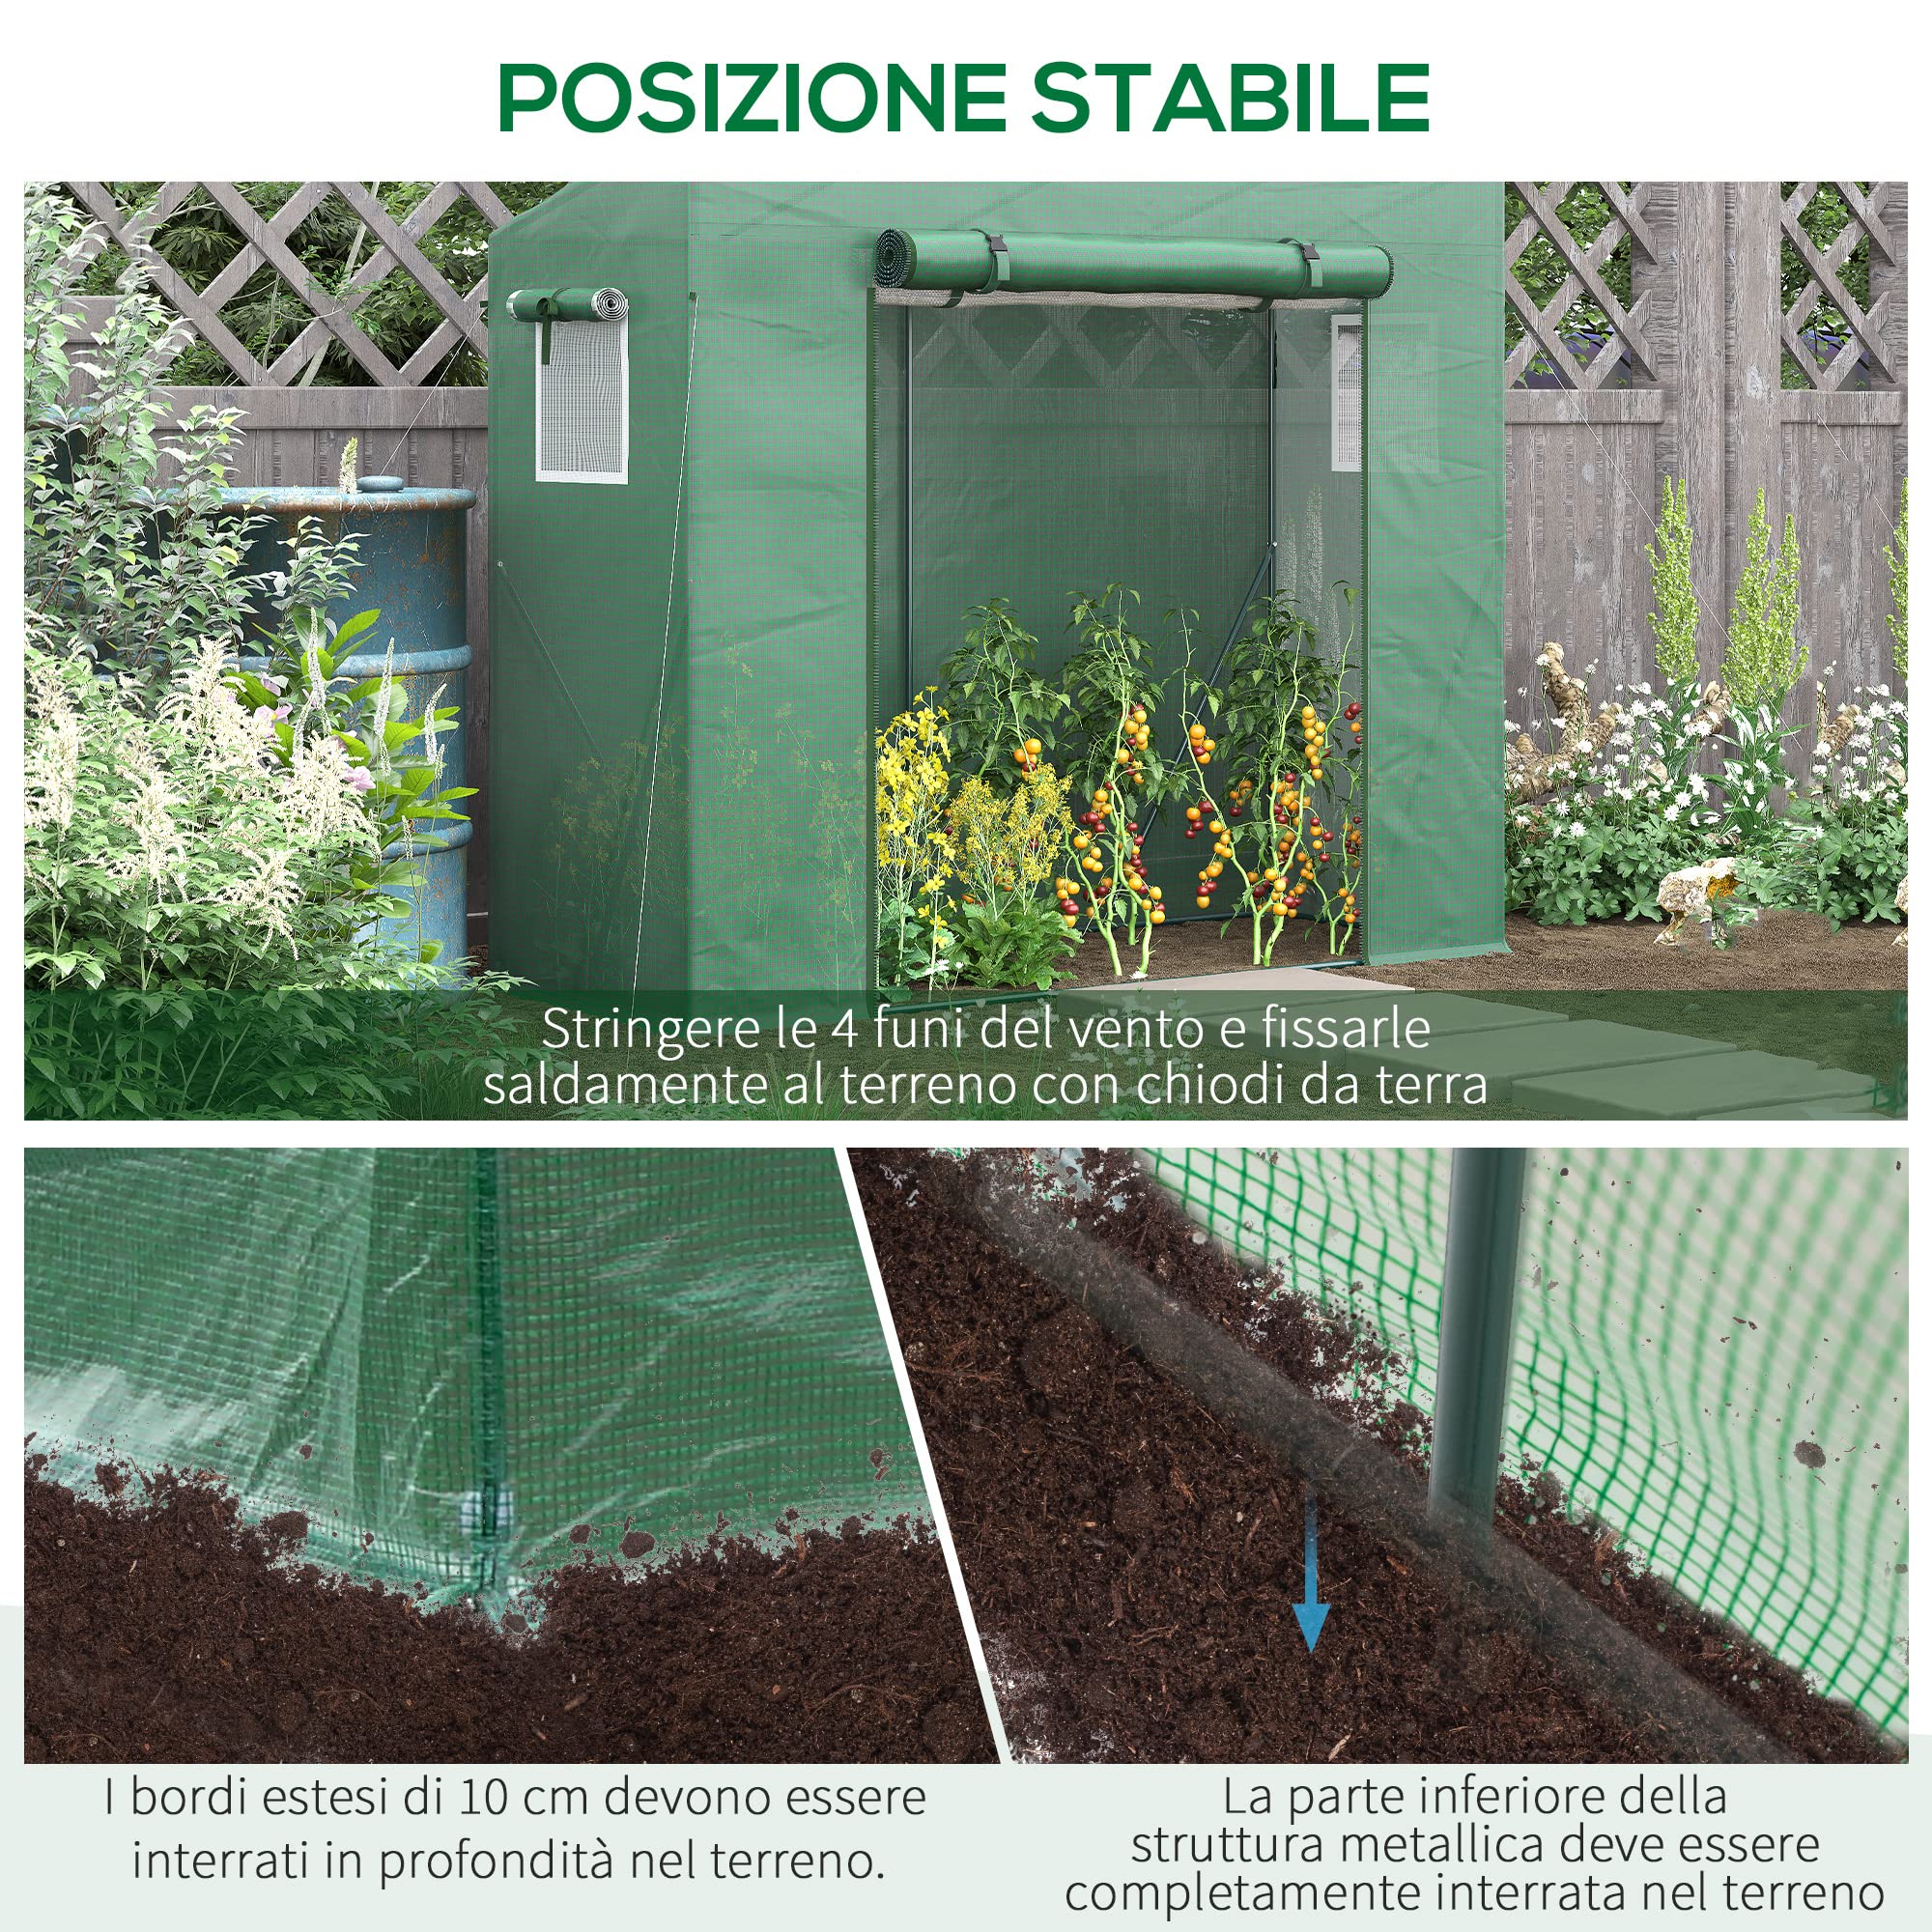
Image: Instructions on how to secure the greenhouse: tighten ropes with ground stakes, bury the 10 cm extended cover edges, and bury the lower metal frame into the soil.
4.4. Door and Window Setup
- The greenhouse features a roll-up zippered door for easy access. Unzip and roll up the door, securing it with the integrated fasteners at the top.
- The two side windows are also roll-up mesh windows, designed for ventilation. Roll them up and secure them as needed.
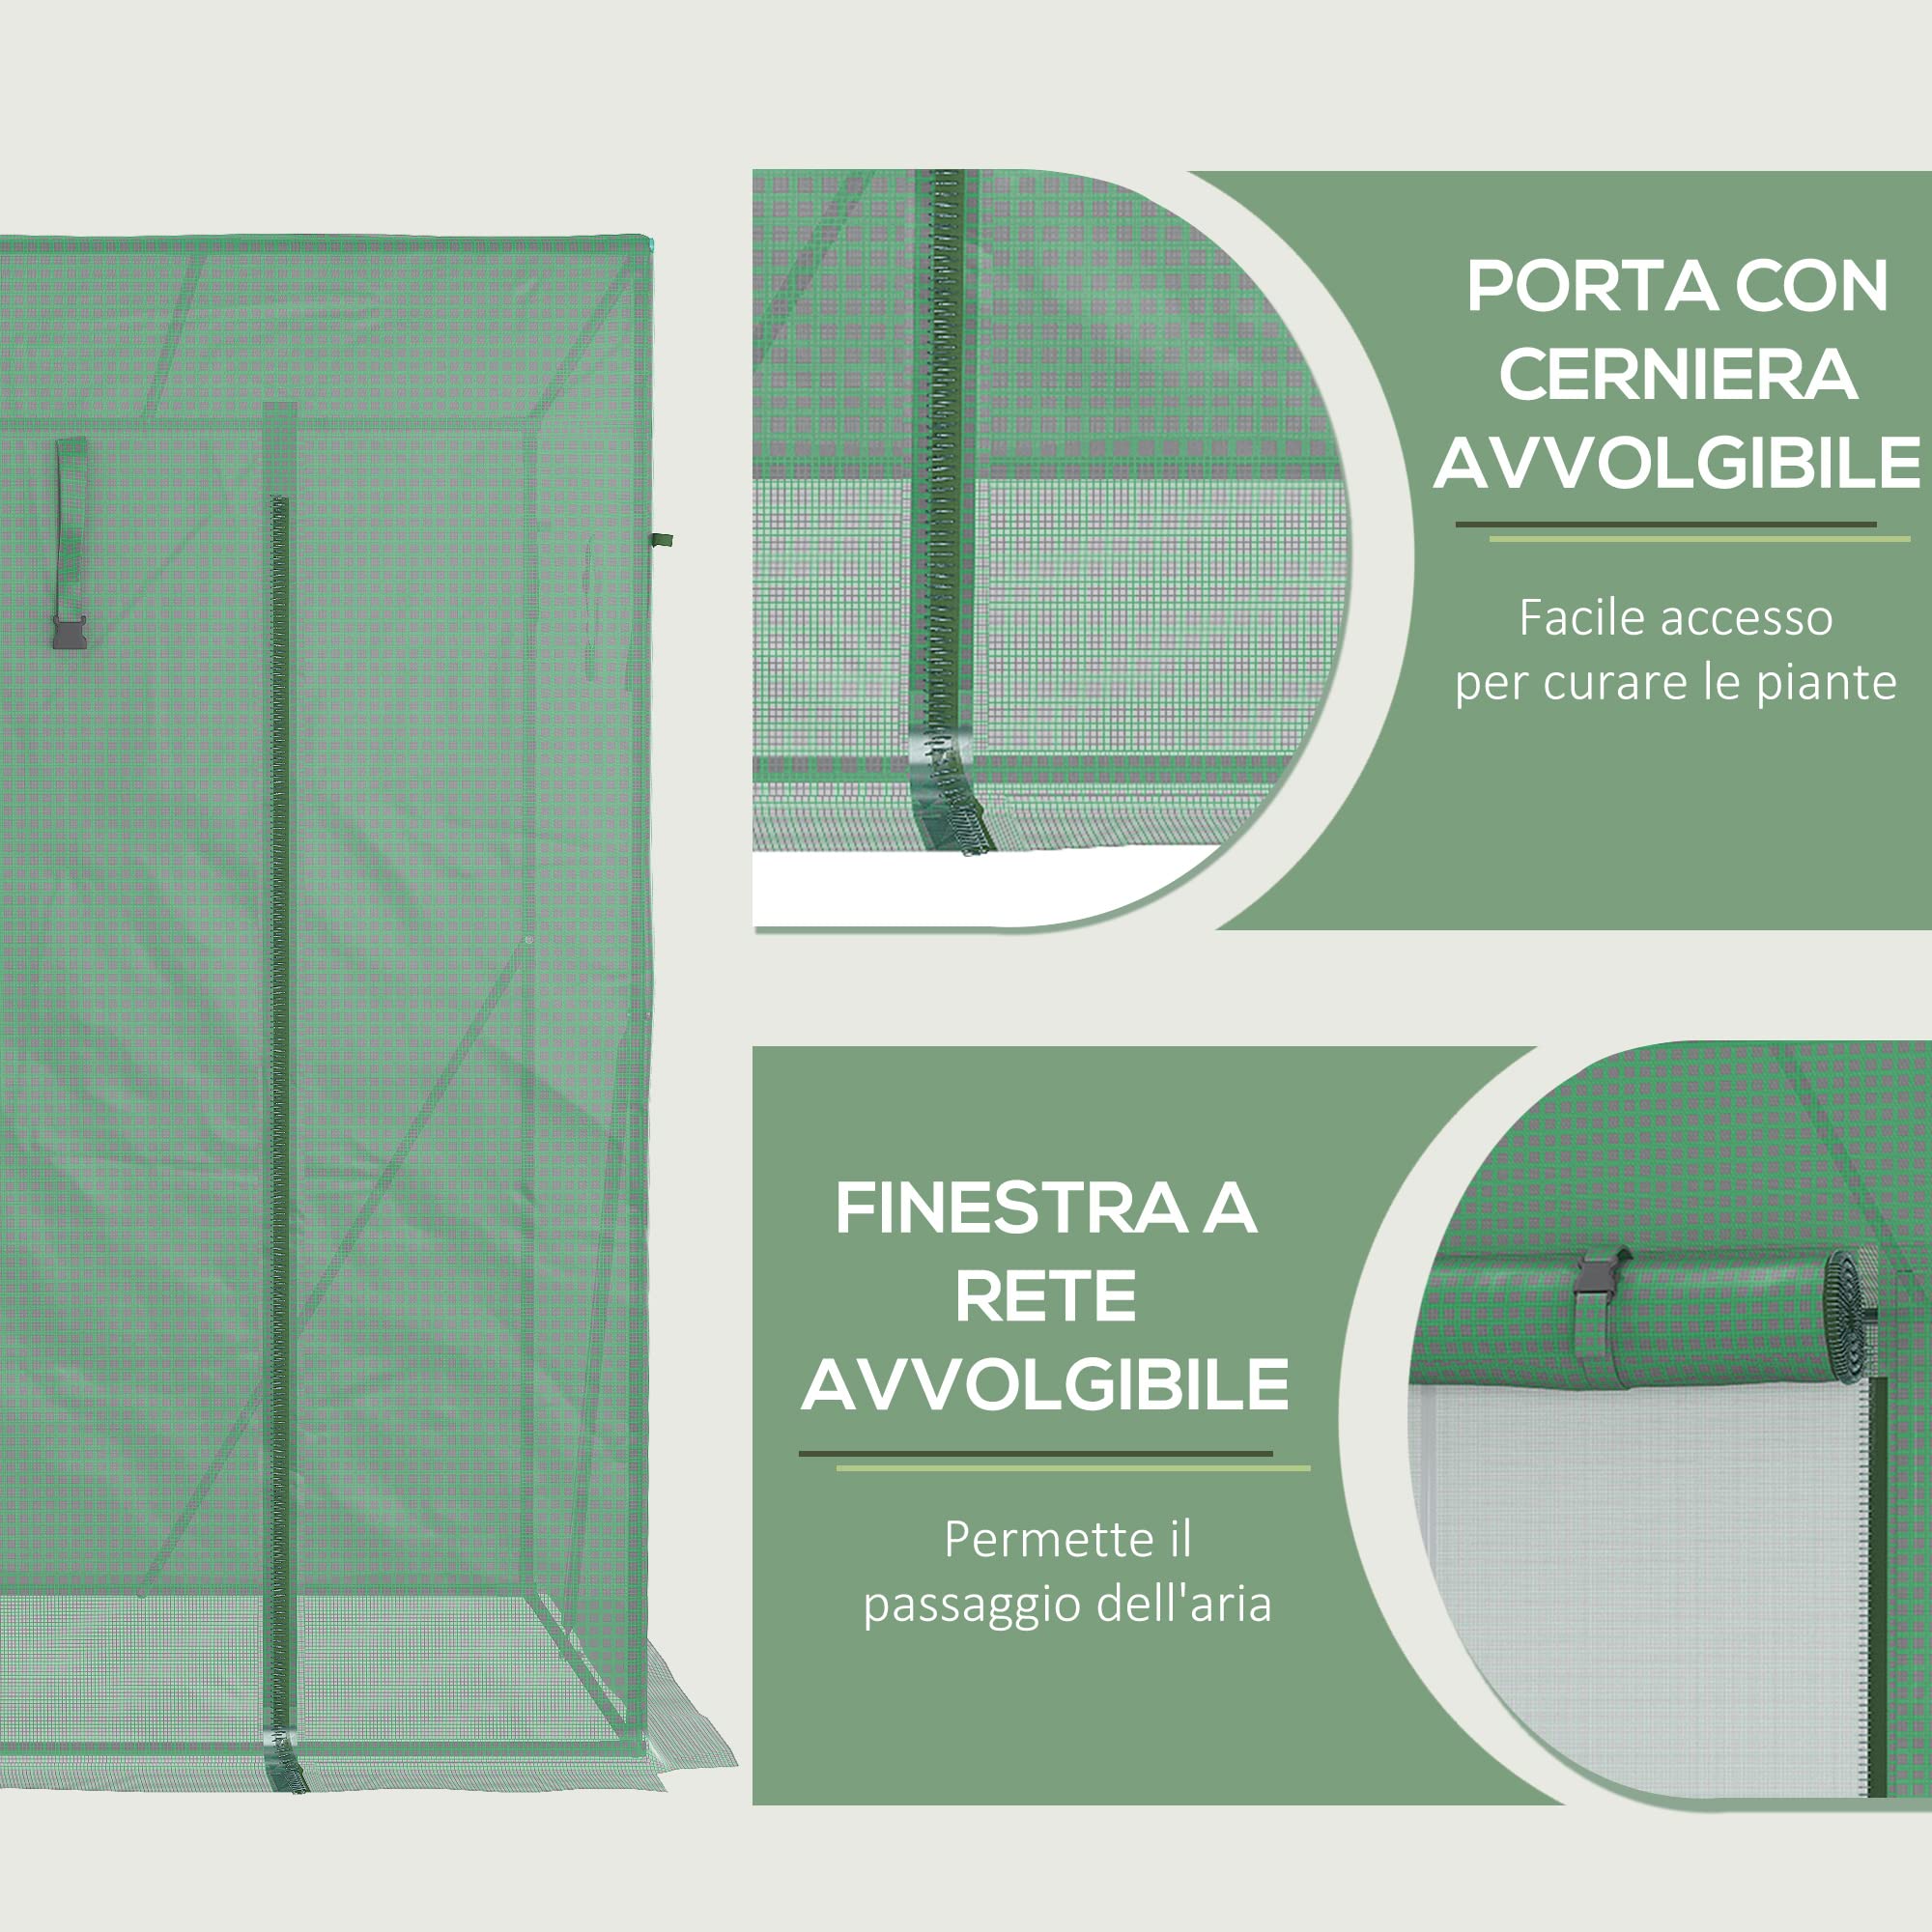
Image: Detailed view of the roll-up zippered door for easy plant access and the roll-up mesh window for improved ventilation.
5. Operating Instructions
This greenhouse is designed to create an optimal environment for plant growth.
- Access: Use the large zippered door for convenient entry and exit, allowing easy care for your plants.
- Ventilation: Utilize the two side roll-up mesh windows to control airflow and temperature inside the greenhouse. Open them on warm days to prevent overheating and close them to retain heat.
- Protection: The PE cover protects your plants from cold, wind, and excessive sun, creating a stable environment for cultivation.
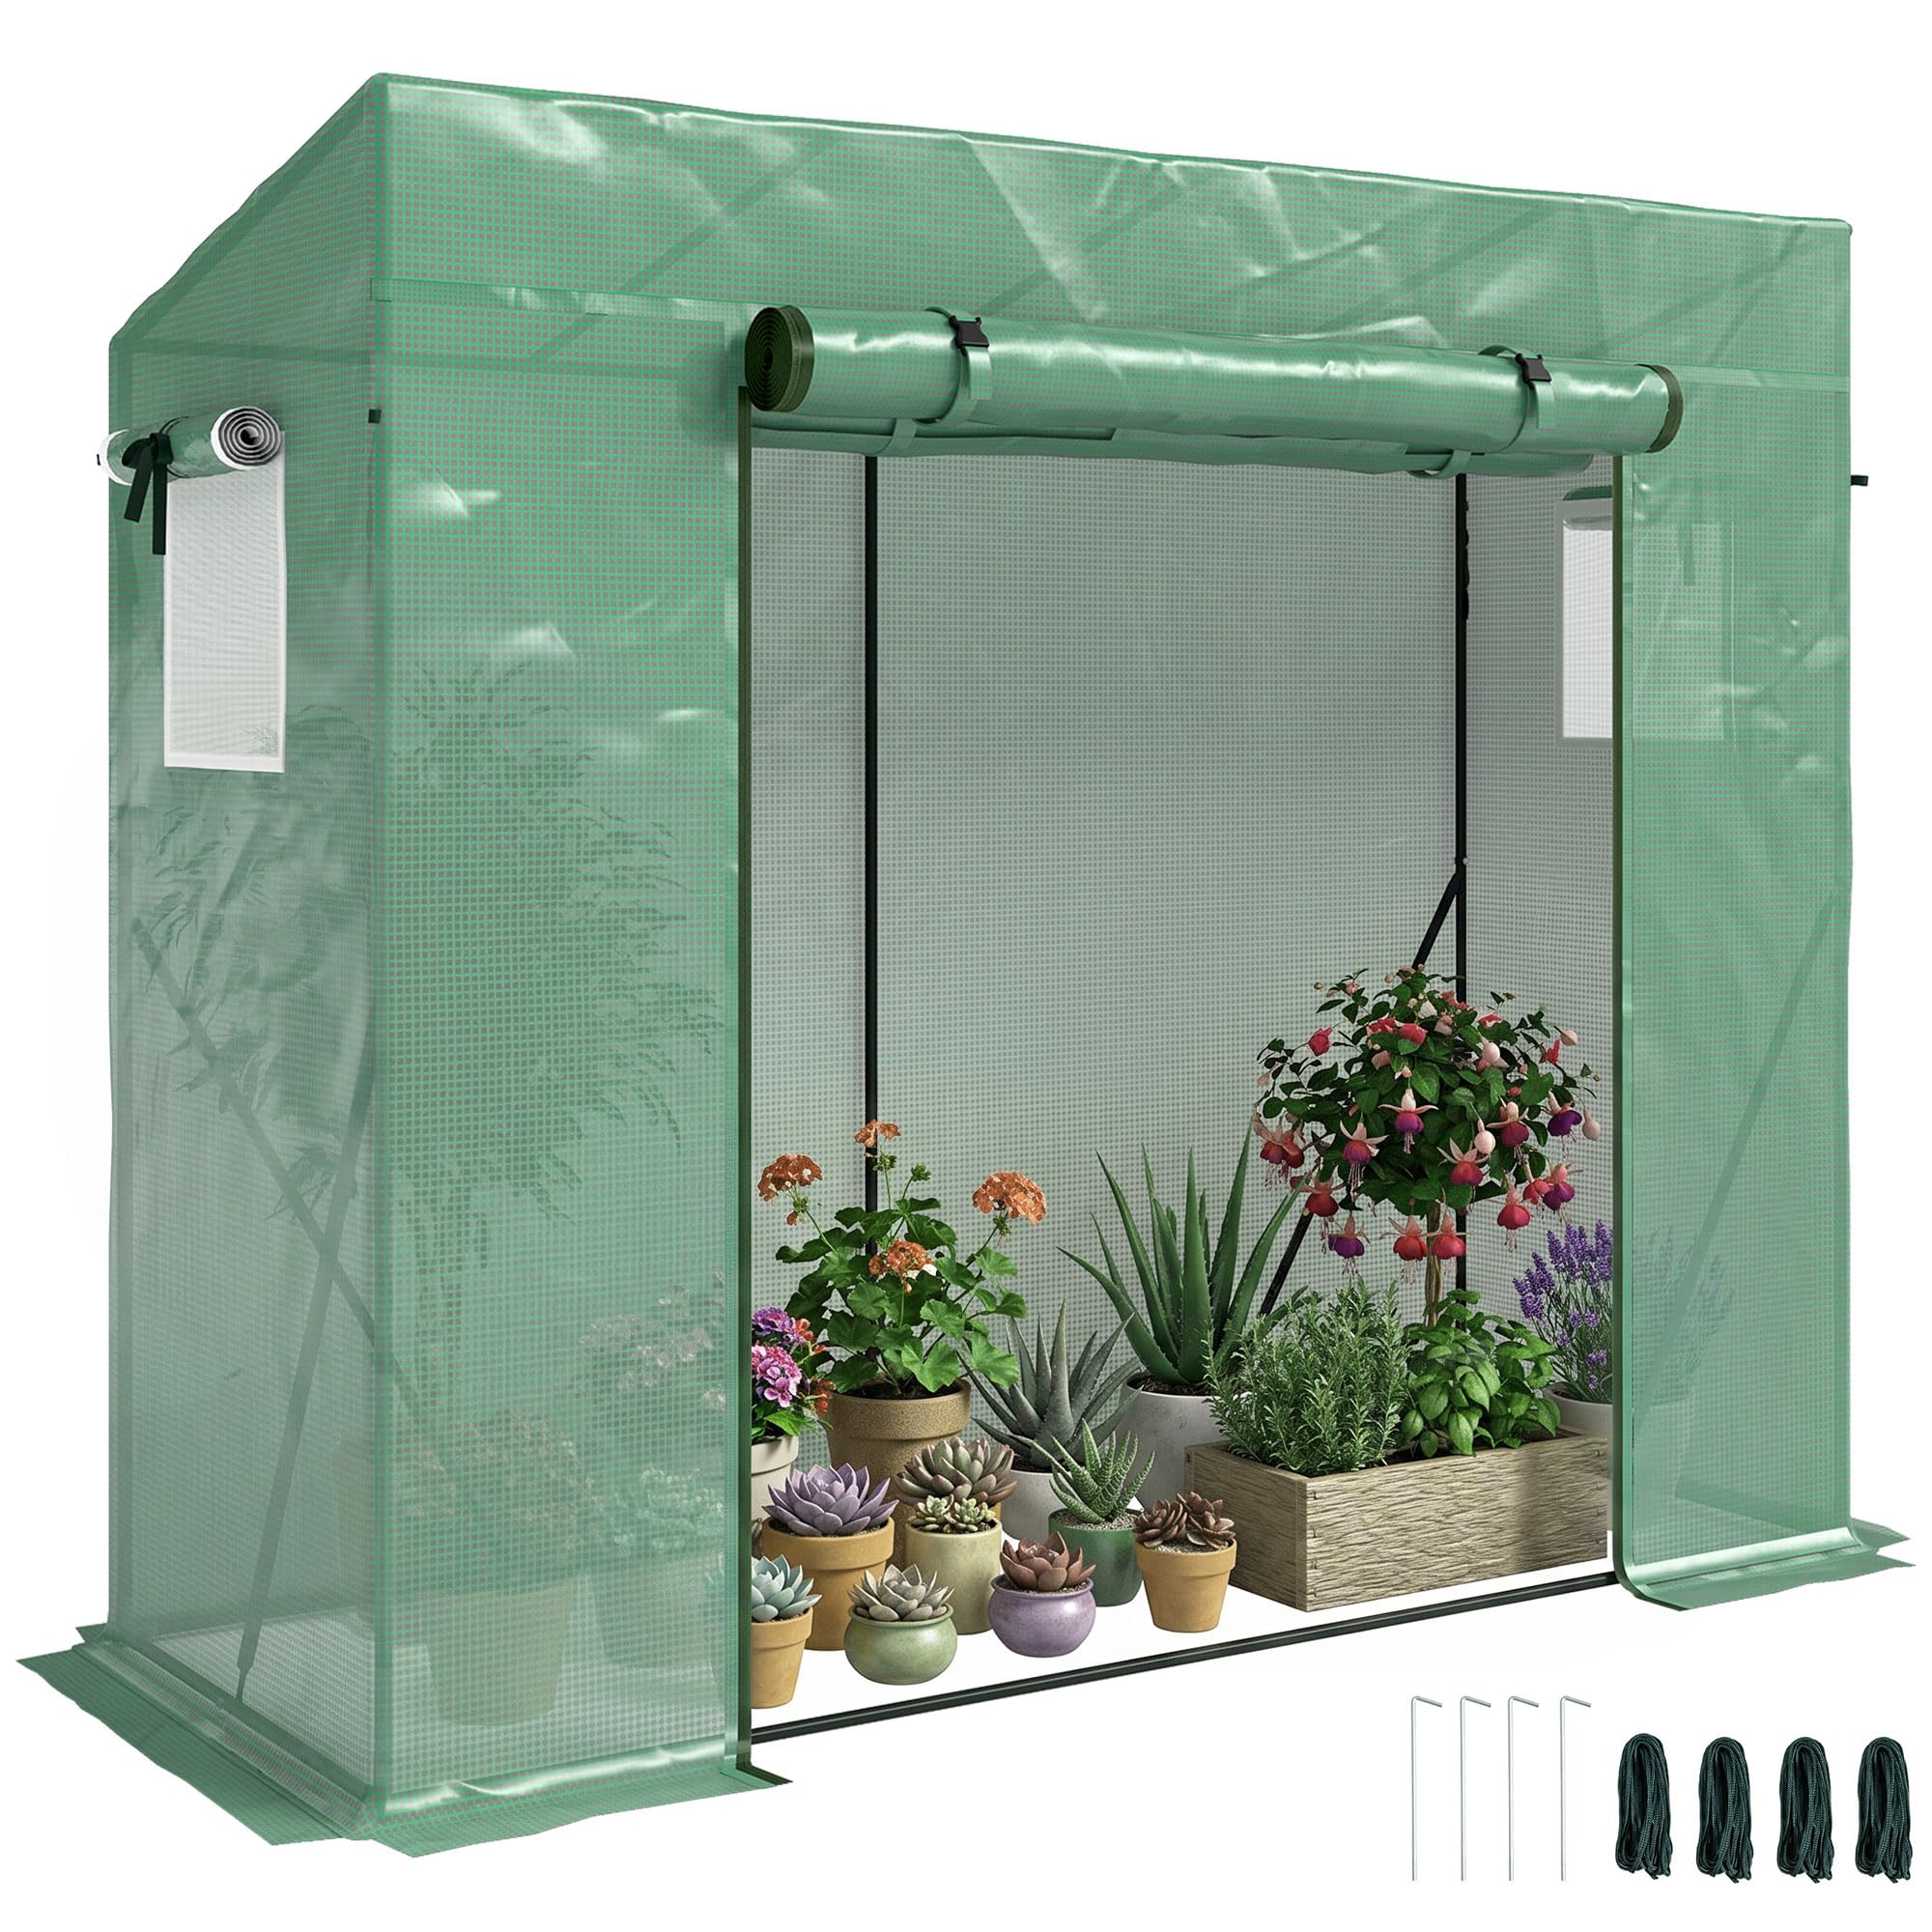
Image: The Outsunny garden greenhouse in use, providing a sheltered environment for growing various plants like tomatoes.

Image: Inside the greenhouse, various plants are thriving, demonstrating its utility for cultivation.
6. Maintenance
- Cleaning: Clean the PE cover periodically with mild soap and water. Avoid harsh chemicals that could damage the material.
- Frame Inspection: Regularly check the steel frame for any signs of rust, damage, or loose connections. Tighten any loose bolts or replace damaged parts as needed.
- Cover Inspection: Inspect the PE cover for tears or holes. Small tears can be repaired with appropriate repair tape to prolong the life of the cover.
- Anchoring Check: Periodically verify that the ground stakes and tie-downs are still firmly secured and that the buried edges remain in place.
- Seasonal Storage: If not in use during off-seasons, it is recommended to disassemble and store the greenhouse in a dry, protected area to extend its lifespan.
7. Troubleshooting
- Greenhouse Instability: If the greenhouse feels unstable, ensure all frame connections are tight and that the ground stakes and tie-downs are properly installed and secured. Verify that the cover edges and frame base are buried as instructed.
- Poor Ventilation/Overheating: Ensure both side windows are fully open to allow maximum airflow. Consider partially opening the main door if more ventilation is needed.
- Water Accumulation on Roof: Ensure the roof is taut to prevent water pooling. If persistent, check the frame assembly for proper alignment.
- Damage from Wind: If the greenhouse is damaged by wind, it indicates it was not adequately secured or was exposed to conditions beyond its design limits. Refer to the safety information regarding adverse weather.
8. Specifications
| Feature | Specification |
|---|---|
| Brand | Outsunny |
| Model Number | 845-144V02GN |
| Overall Dimensions (L x W x H) | 200L x 77W x 148-169H cm (2L x 0.77W x 1.69H meters) |
| Door Dimensions (L x H) | 120L x 150H cm |
| Item Weight | 4.5 kg |
| Cover Material | Polyethylene (PE) |
| Frame Material | Alloy Steel |
| Color | Green |
| Number of Doors | 1 |
| Number of Vents | 2 (Side Windows) |
| Special Features | Anti-UV, Reinforced Top Cover |
| Closure Type | Zipper |
| Usage Environment | Outdoor |
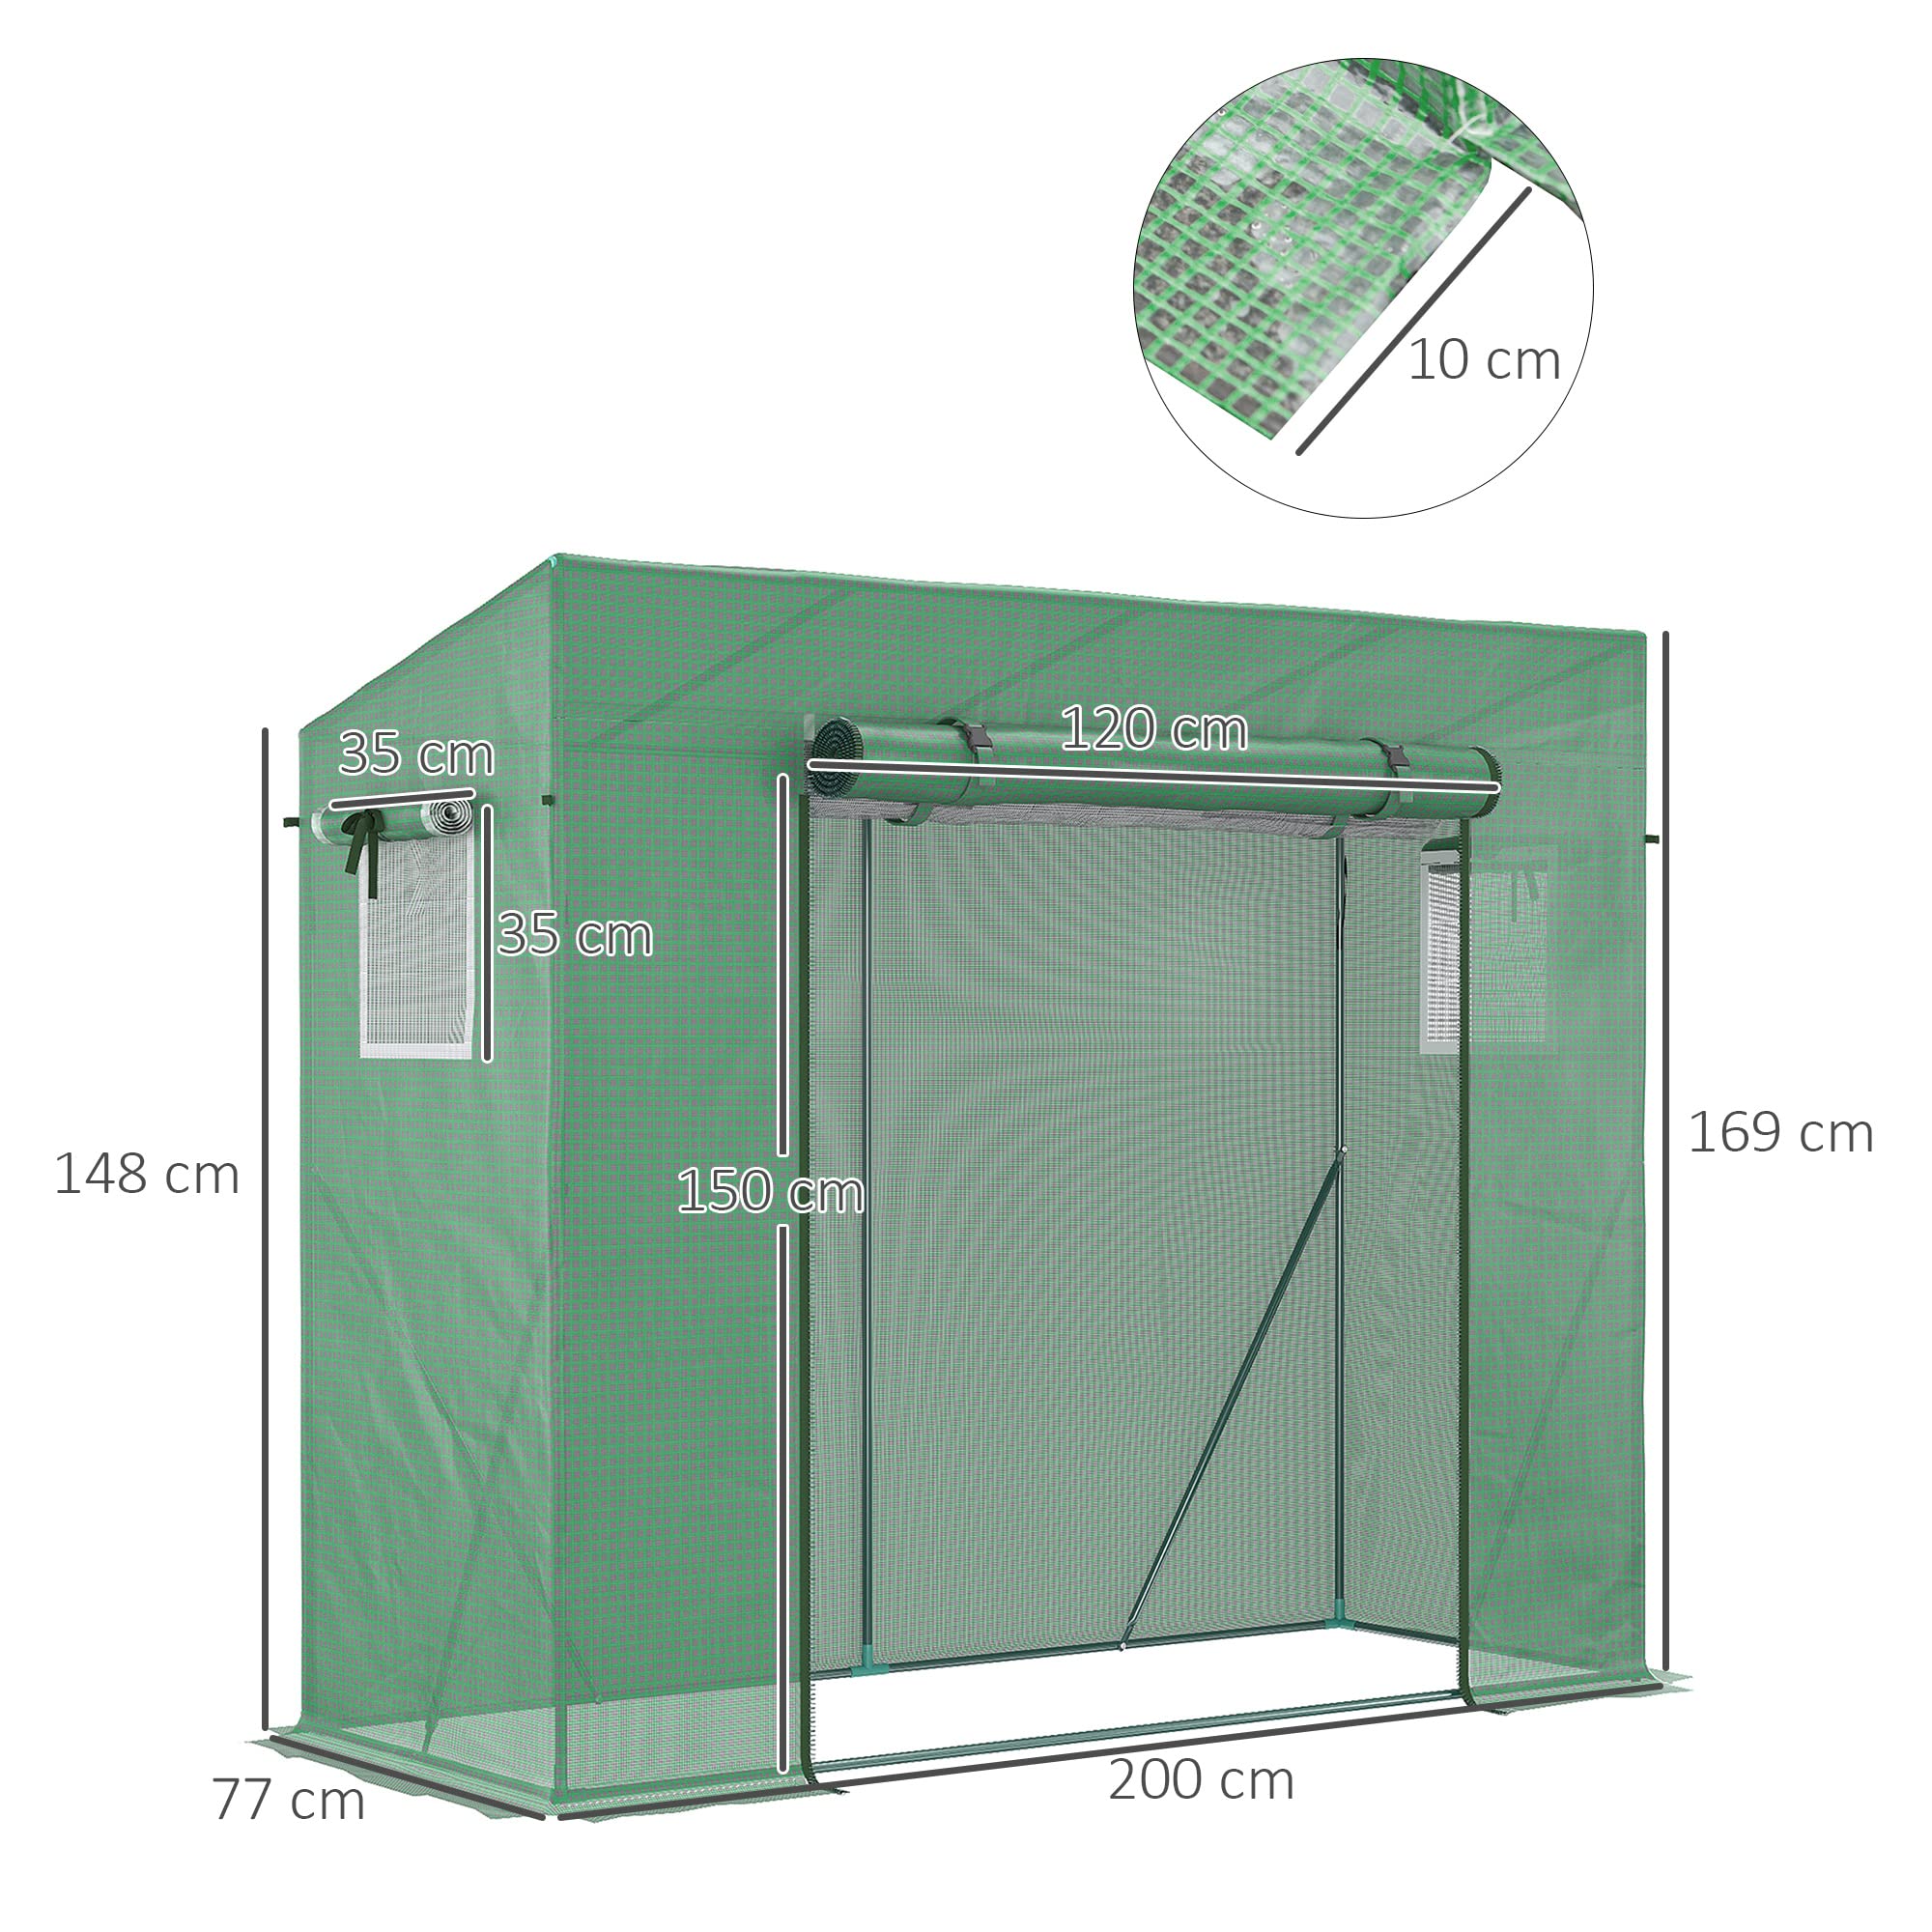
Image: Detailed dimensions of the greenhouse, including overall length, width, height, and door measurements.
9. Warranty and Support
For any questions regarding assembly, missing parts, or product performance, please contact the seller or manufacturer directly. Retain your proof of purchase for warranty claims. The manufacturer is Aosom Italy.