Introduction
This manual provides essential instructions for the installation, operation, and maintenance of your Red Hawk LGT-180 Turn Signal. Designed for 12-48V golf carts, this turn signal system enhances safety and compliance. Please read these instructions thoroughly before installation and use to ensure proper function and longevity of the product.
Product Overview
The Red Hawk LGT-180 Turn Signal is a multi-functional control lever designed for golf cart applications. It integrates turn signal functionality with additional features for enhanced vehicle control.
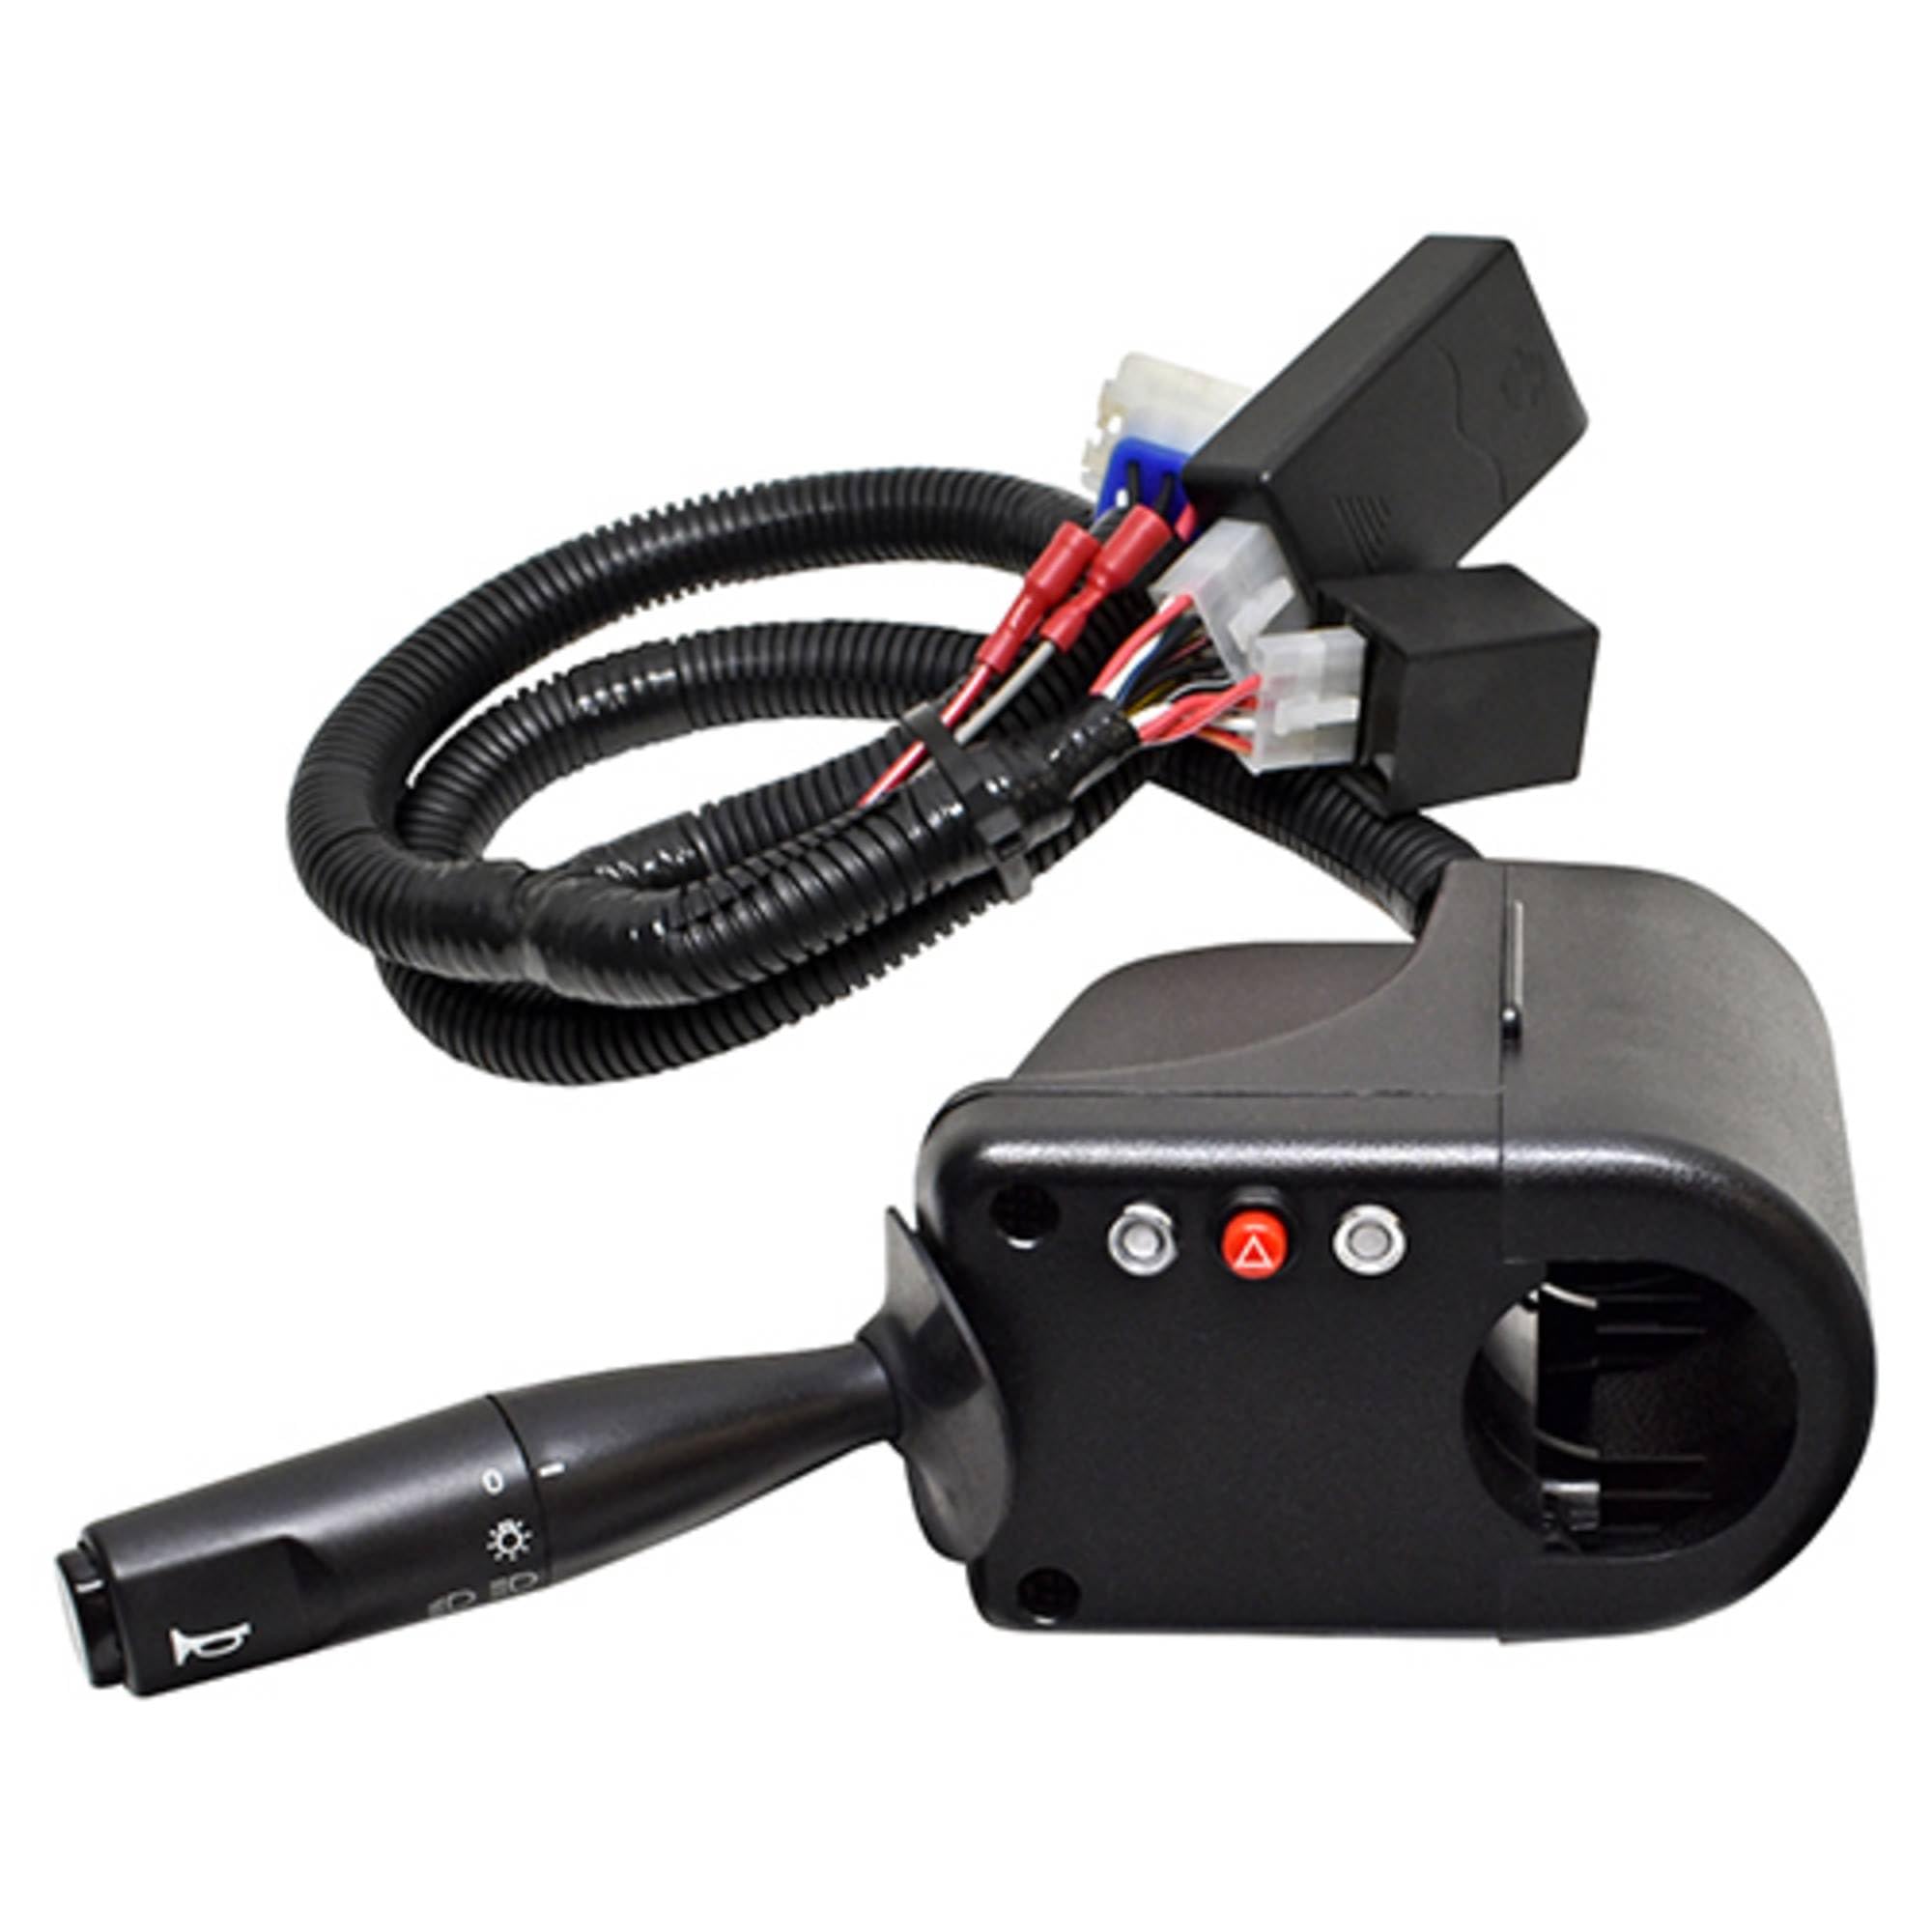
Image: The Red Hawk LGT-180 Turn Signal control lever. This image displays the physical appearance of the turn signal unit, featuring a black lever with a horn button at the end, a rotating switch for various light functions, and a main body with hazard buttons and indicator lights. The unit is designed for mounting on a steering column.
The LGT-180 unit features the following primary controls and indicators:
- Horn Button: Located at the tip of the lever, used to activate the vehicle's horn.
- Turn Signal Lever: Moves up for right turn, down for left turn, and centers for "OFF".
- High Beam Function: Pull the lever towards the driver to engage high beam headlights. (Requires RHOX HIGH/LOW Beam enabled LED headlights.)
- Light Control Dial: A rotating switch on the lever for "ON", "OFF", and "Accent Lights Only" positions.
- Hazard Button: A prominent red button to activate hazard warning lights.
- Indicator Lights: Small lights on the main body of the unit to show active marker lights and hazard lights.
- Snap-On Hardware Cover: A protective cover for the mounting hardware, ensuring a clean installation.
Setup and Installation
Installation of the LGT-180 Turn Signal requires basic electrical knowledge and tools. If you are unsure about any steps, it is recommended to seek professional assistance.
- Safety First: Disconnect the main battery pack of your golf cart before beginning any electrical work to prevent accidental shorts or injury.
- Mounting: Securely mount the turn signal lever in an accessible location on your golf cart's steering column or dashboard. Ensure it does not obstruct steering or other controls.
- Wiring Connections:
- Identify the appropriate wiring harness for your golf cart model.
- Connect the turn signal's power input to a 12-48V power source, ensuring correct polarity.
- Connect the left and right turn signal output wires to your golf cart's existing turn signal lights.
- Connect the horn output wire to the horn.
- If applicable, connect the high beam and accent light wires to their respective circuits.
- Ensure all connections are secure and insulated to prevent short circuits.
- Testing: Reconnect the battery. Test all functions: left turn, right turn, hazards, horn, high beam (if applicable), and accent lights (if applicable). Verify that all indicators illuminate correctly.
- Final Securement: Once all functions are verified, ensure all wiring is neatly routed and secured, and the snap-on hardware cover is properly installed.
Reliable Fitment: This part replaces OEM Number Red Hawk: LGT-180. Please verify this is the correct part number for your specific golf cart model before installation.
Operating Instructions
Familiarize yourself with the operation of the LGT-180 Turn Signal before driving your golf cart.
- Activating Turn Signals: Move the lever up for a right turn signal or down for a left turn signal. The corresponding indicator light on the unit will flash. The signal will typically self-cancel after the turn, or can be manually canceled by returning the lever to the center "OFF" position.
- Hazard Lights: Press the red hazard button to activate all four turn signals simultaneously. Press again to deactivate.
- Horn: Press the button at the end of the lever to sound the horn.
- High Beams: Pull the lever towards you to activate high beam headlights. This function requires compatible RHOX HIGH/LOW Beam enabled LED headlights.
- Accent Lights: Rotate the lever to the "Accent Lights Only" position to activate accent lighting, if installed and wired.
Maintenance
The Red Hawk LGT-180 Turn Signal is designed for durability and requires minimal maintenance.
- Cleaning: Wipe the unit with a soft, damp cloth. Avoid using harsh chemicals or abrasive cleaners, which can damage the finish or internal components.
- Inspection: Periodically check all wiring connections for tightness and signs of wear or corrosion. Ensure the mounting is secure.
- Bulb Replacement: If your golf cart's turn signal bulbs are not functioning, inspect and replace them according to your golf cart's manufacturer guidelines. This unit controls the signal to the bulbs but does not contain them.
Troubleshooting
If you experience issues with your LGT-180 Turn Signal, refer to the following common troubleshooting steps:
| Problem | Possible Cause | Solution |
|---|---|---|
| Turn signals do not light up. |
|
|
| Horn does not sound. |
|
|
| High beams do not activate. |
|
|
If problems persist after following these steps, contact customer support for further assistance.
Specifications
- Model: LGT-180
- Brand: RHOX (Red Hawk)
- Voltage Compatibility: 12-48V DC
- Product Dimensions: Approximately 10 x 8 x 5 inches
- Item Weight: Approximately 1.75 pounds
- Replaces OEM Part Number: Red Hawk LGT-180
- Functions: Turn Signals (Left/Right), Hazard Lights, Horn, High Beam (with compatible headlights), Accent Lights.
Warranty and Support
Your Red Hawk LGT-180 Turn Signal comes with a comprehensive warranty and support.
- 30-Day Return Policy: If your order does not meet your expectations, you may return it within 30 days for a refund. Items must be in original packaging and good, undamaged condition.
- 1-Year Warranty: Beyond the 30-day return period, the product is covered by a one-year warranty from the date of purchase. During this period, defective items will be replaced.
- Customer Support: For technical assistance, troubleshooting, or warranty claims, please contact RHOX customer service. Refer to your purchase documentation for contact details.