
1. Introduction
This manual provides essential instructions for the safe and efficient operation, maintenance, and care of your FSE CP-40 Stainless Steel Coffee Percolator. Please read this manual thoroughly before initial use and retain it for future reference. The FSE CP-40 is a durable 40-cup capacity coffee percolator designed for institutional, commercial, or large-event use, featuring automatic temperature control and a clear water level gauge.

Image: Front view of the FSE CP-40 Stainless Steel Coffee Percolator, showcasing its polished stainless steel exterior, black handles, spigot, and water level gauge.
2. Important Safety Instructions
To reduce the risk of fire, electric shock, or injury, always follow these basic safety precautions:
- Read all instructions before operating the appliance.
- Do not touch hot surfaces. Use handles or knobs.
- To protect against electrical hazards, do not immerse cord, plugs, or the appliance in water or other liquid.
- Close supervision is necessary when any appliance is used by or near children.
- Unplug from outlet when not in use and before cleaning. Allow to cool before putting on or taking off parts, and before cleaning the appliance.
- Do not operate any appliance with a damaged cord or plug, or after the appliance malfunctions or has been damaged in any manner. Contact customer service for examination, repair, or adjustment.
- The use of accessory attachments not recommended by the appliance manufacturer may result in fire, electric shock, or injury to persons.
- Do not use outdoors.
- Do not let cord hang over edge of table or counter, or touch hot surfaces.
- Do not place on or near a hot gas or electric burner, or in a heated oven.
- Always attach plug to appliance first, then plug cord into the wall outlet. To disconnect, turn any control to “off,” then remove plug from wall outlet.
- Do not use appliance for other than intended use.
- Ensure the brew stem is properly seated in the urn heat well before operation. Failure to do so can cause improper brewing or damage.
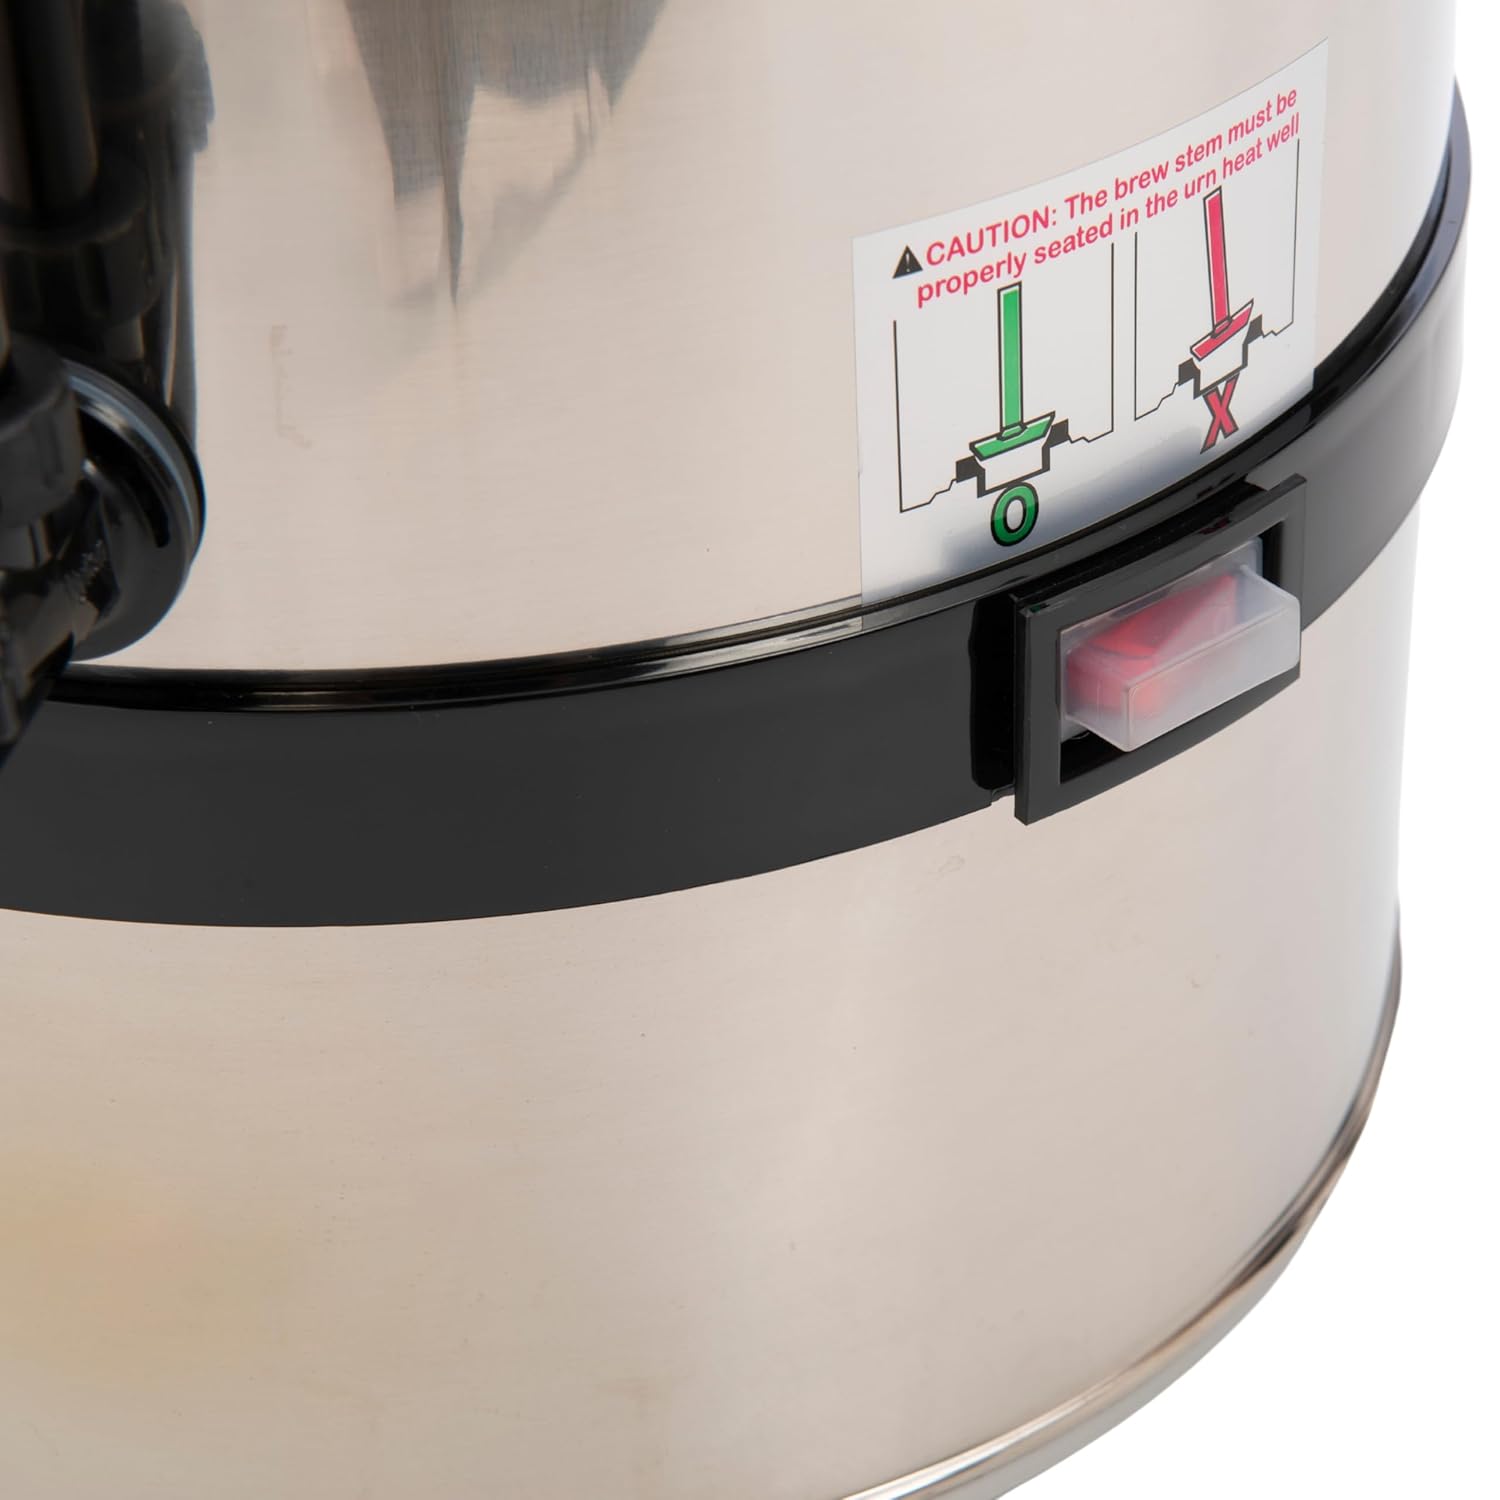
Image: A close-up view of the red power switch and a warning label on the FSE CP-40, illustrating the correct and incorrect seating of the brew stem.
3. Product Components
The FSE CP-40 Coffee Percolator consists of the following main parts:
- Lid: Stainless steel cover with a heat-resistant knob.
- Coffee Basket: Holds coffee grounds during brewing.
- Percolator Stem: Connects the coffee basket to the heating element, allowing water to circulate.
- Urn Body: Stainless steel container with heat-resistant handles.
- Water Level Gauge: Clear polycarbonate tube indicating the amount of coffee remaining.
- Spigot: Dispenses brewed coffee.
- Indicator Light: Red light that illuminates when brewing is complete and coffee is kept warm.
- Power Switch: On/Off switch for operation.

Image: Top view of the FSE CP-40 percolator lid, showing its domed shape and black knob.

Image: A hand lifting the lid off the FSE CP-40 percolator, revealing the interior.

Image: Interior view of the FSE CP-40 percolator, highlighting the central brew stem and the perforated base where the coffee basket rests.

Image: Close-up of the FSE CP-40 percolator's black spigot and the clear water level gauge with cup markings.
4. Setup Instructions
Before first use, wash all removable parts (lid, coffee basket, percolator stem) in warm, soapy water, rinse thoroughly, and dry. Wipe the exterior of the urn with a damp cloth.
- Placement: Place the percolator on a stable, level, heat-resistant surface away from walls or other appliances. Ensure adequate ventilation.
- Assemble Internal Parts: Insert the percolator stem into the heat well at the bottom of the urn. Place the coffee basket onto the percolator stem.
- Add Water: Fill the urn with cold, fresh water to the desired level, indicated by the water level gauge. Do not fill above the maximum fill line.
- Add Coffee Grounds: Add regular or percolator grind coffee to the coffee basket. Use approximately 1 tablespoon of coffee per cup (5 oz.) of water, adjusting to taste. Do not use fine grind coffee as it may seep through the basket.
- Secure Lid: Place the lid securely on the urn.
5. Operating Instructions
- Plug In: Plug the power cord into a standard 120V AC electrical outlet.
- Start Brewing: Flip the power switch to the 'ON' position. The percolator will begin the brewing cycle.
- Brewing Indicator: The red indicator light will illuminate when the brewing process is complete. The percolator will then automatically switch to a 'keep warm' function, maintaining the coffee at an optimal serving temperature.
- Serving: To dispense coffee, press down on the spigot handle. Release the handle to stop the flow.
- After Use: When all coffee has been served or when the percolator is no longer needed, flip the power switch to the 'OFF' position and unplug the unit from the wall outlet.
6. Cleaning and Maintenance
Regular cleaning ensures optimal performance and extends the life of your percolator.
- Unplug and Cool: Always unplug the percolator and allow it to cool completely before cleaning.
- Disassemble: Remove the lid, coffee basket, and percolator stem. Discard used coffee grounds.
- Wash Parts: Wash the lid, coffee basket, and percolator stem in warm, soapy water. Rinse thoroughly and dry completely.
- Clean Urn Interior: Fill the urn with warm, soapy water and use a soft brush or sponge to clean the interior. Pay attention to the heat well area. Rinse thoroughly multiple times to remove all soap residue.
- Clean Urn Exterior: Wipe the exterior of the urn with a damp cloth. Do not immerse the urn body in water.
- Spigot Cleaning: Periodically, the spigot may need more thorough cleaning. If removable, disassemble and clean all parts. Ensure no coffee residue builds up, which can affect flow.
- Descaling: Over time, mineral deposits may accumulate. To descale, fill the urn with a solution of equal parts white vinegar and water. Let it sit for an hour, then run a brew cycle with the solution (without coffee grounds). Rinse thoroughly with fresh water several times.
- Storage: Store the clean and dry percolator in a cool, dry place.
7. Troubleshooting
| Problem | Possible Cause | Solution |
|---|---|---|
| Coffee not brewing | Not plugged in; Power switch off; Brew stem not seated correctly; No water. | Ensure unit is plugged in and power switch is ON. Verify brew stem is properly inserted. Check water level. |
| Coffee tastes weak | Not enough coffee grounds; Coarse grind coffee; Brewing too quickly. | Increase coffee grounds. Use regular or percolator grind. Ensure proper water-to-coffee ratio. |
| Coffee tastes bitter/too strong | Too many coffee grounds; Fine grind coffee; Over-extraction. | Reduce coffee grounds. Avoid fine grind. Ensure brewing cycle completes naturally. |
| Coffee grounds in brewed coffee | Fine grind coffee; Coffee basket overflowed. | Use regular or percolator grind. Do not overfill coffee basket. |
| Spigot drips or leaks | Residue buildup; Loose spigot. | Clean spigot thoroughly. Tighten spigot if it is designed to be tightened. |
8. Specifications
- Model: CP-40
- Capacity: 40 cups (5 oz. each) / 1.6 gallons
- Material: Stainless Steel
- Power: 120V, 1350W, 11.25 Amps
- Dimensions: 18.5 x 10.25 x 11.5 inches
- Weight: 9.5 Pounds
- Special Feature: Automatic Temperature Control
- Certifications: ETL Listed, ETL Sanitation
9. Warranty and Support
For warranty information or technical support, please refer to the warranty card included with your product or contact FSE customer service directly. Keep your purchase receipt as proof of purchase for any warranty claims.
Manufacturer: fse
Date First Available: January 6, 2023


