1. Introduction
This manual provides detailed instructions for the setup, operation, maintenance, and troubleshooting of your PowerPlay DVR Video Recorder. This device is designed for high-efficiency video capture and recording, converting analog video sources to digital H.265 (HEVC) format at 60 frames per second.
The PowerPlay DVR is ideal for preserving old memories from VHS, VHS-C, 8mm, MiniDV, and Digital8 tapes, as well as for FPV recording and other analog video capture needs.
2. Product Overview
The PowerPlay DVR is a compact and portable device featuring a 2.4-inch screen for real-time monitoring. It supports recording resolutions of 720x576 (PAL) at 50fps and 720x480 (NTSC) at 60fps. The device utilizes H.265 (HEVC) compression for efficient storage.
2.1 Key Features
- High-Efficiency Recording: Captures smooth, high-quality video with H.265 (HEVC) compression and 60fps frame rate.
- Analog to Digital Conversion: Digitize various tape formats directly to a micro SD card (up to 512GB Class 10).
- Integrated Screen: 2.4-inch, 480(RGB) x 640 display with 600Cd/m2 luminance for monitoring.
- Portable Design: Compact and lightweight, includes a clip mount for hands-free use.
- Comprehensive Connectivity: Features USB Type-C, AV-IN (Audio L, Audio R, CVBS), and DC-OUT.
2.2 Device Layout
Familiarize yourself with the various ports and controls on your PowerPlay DVR.
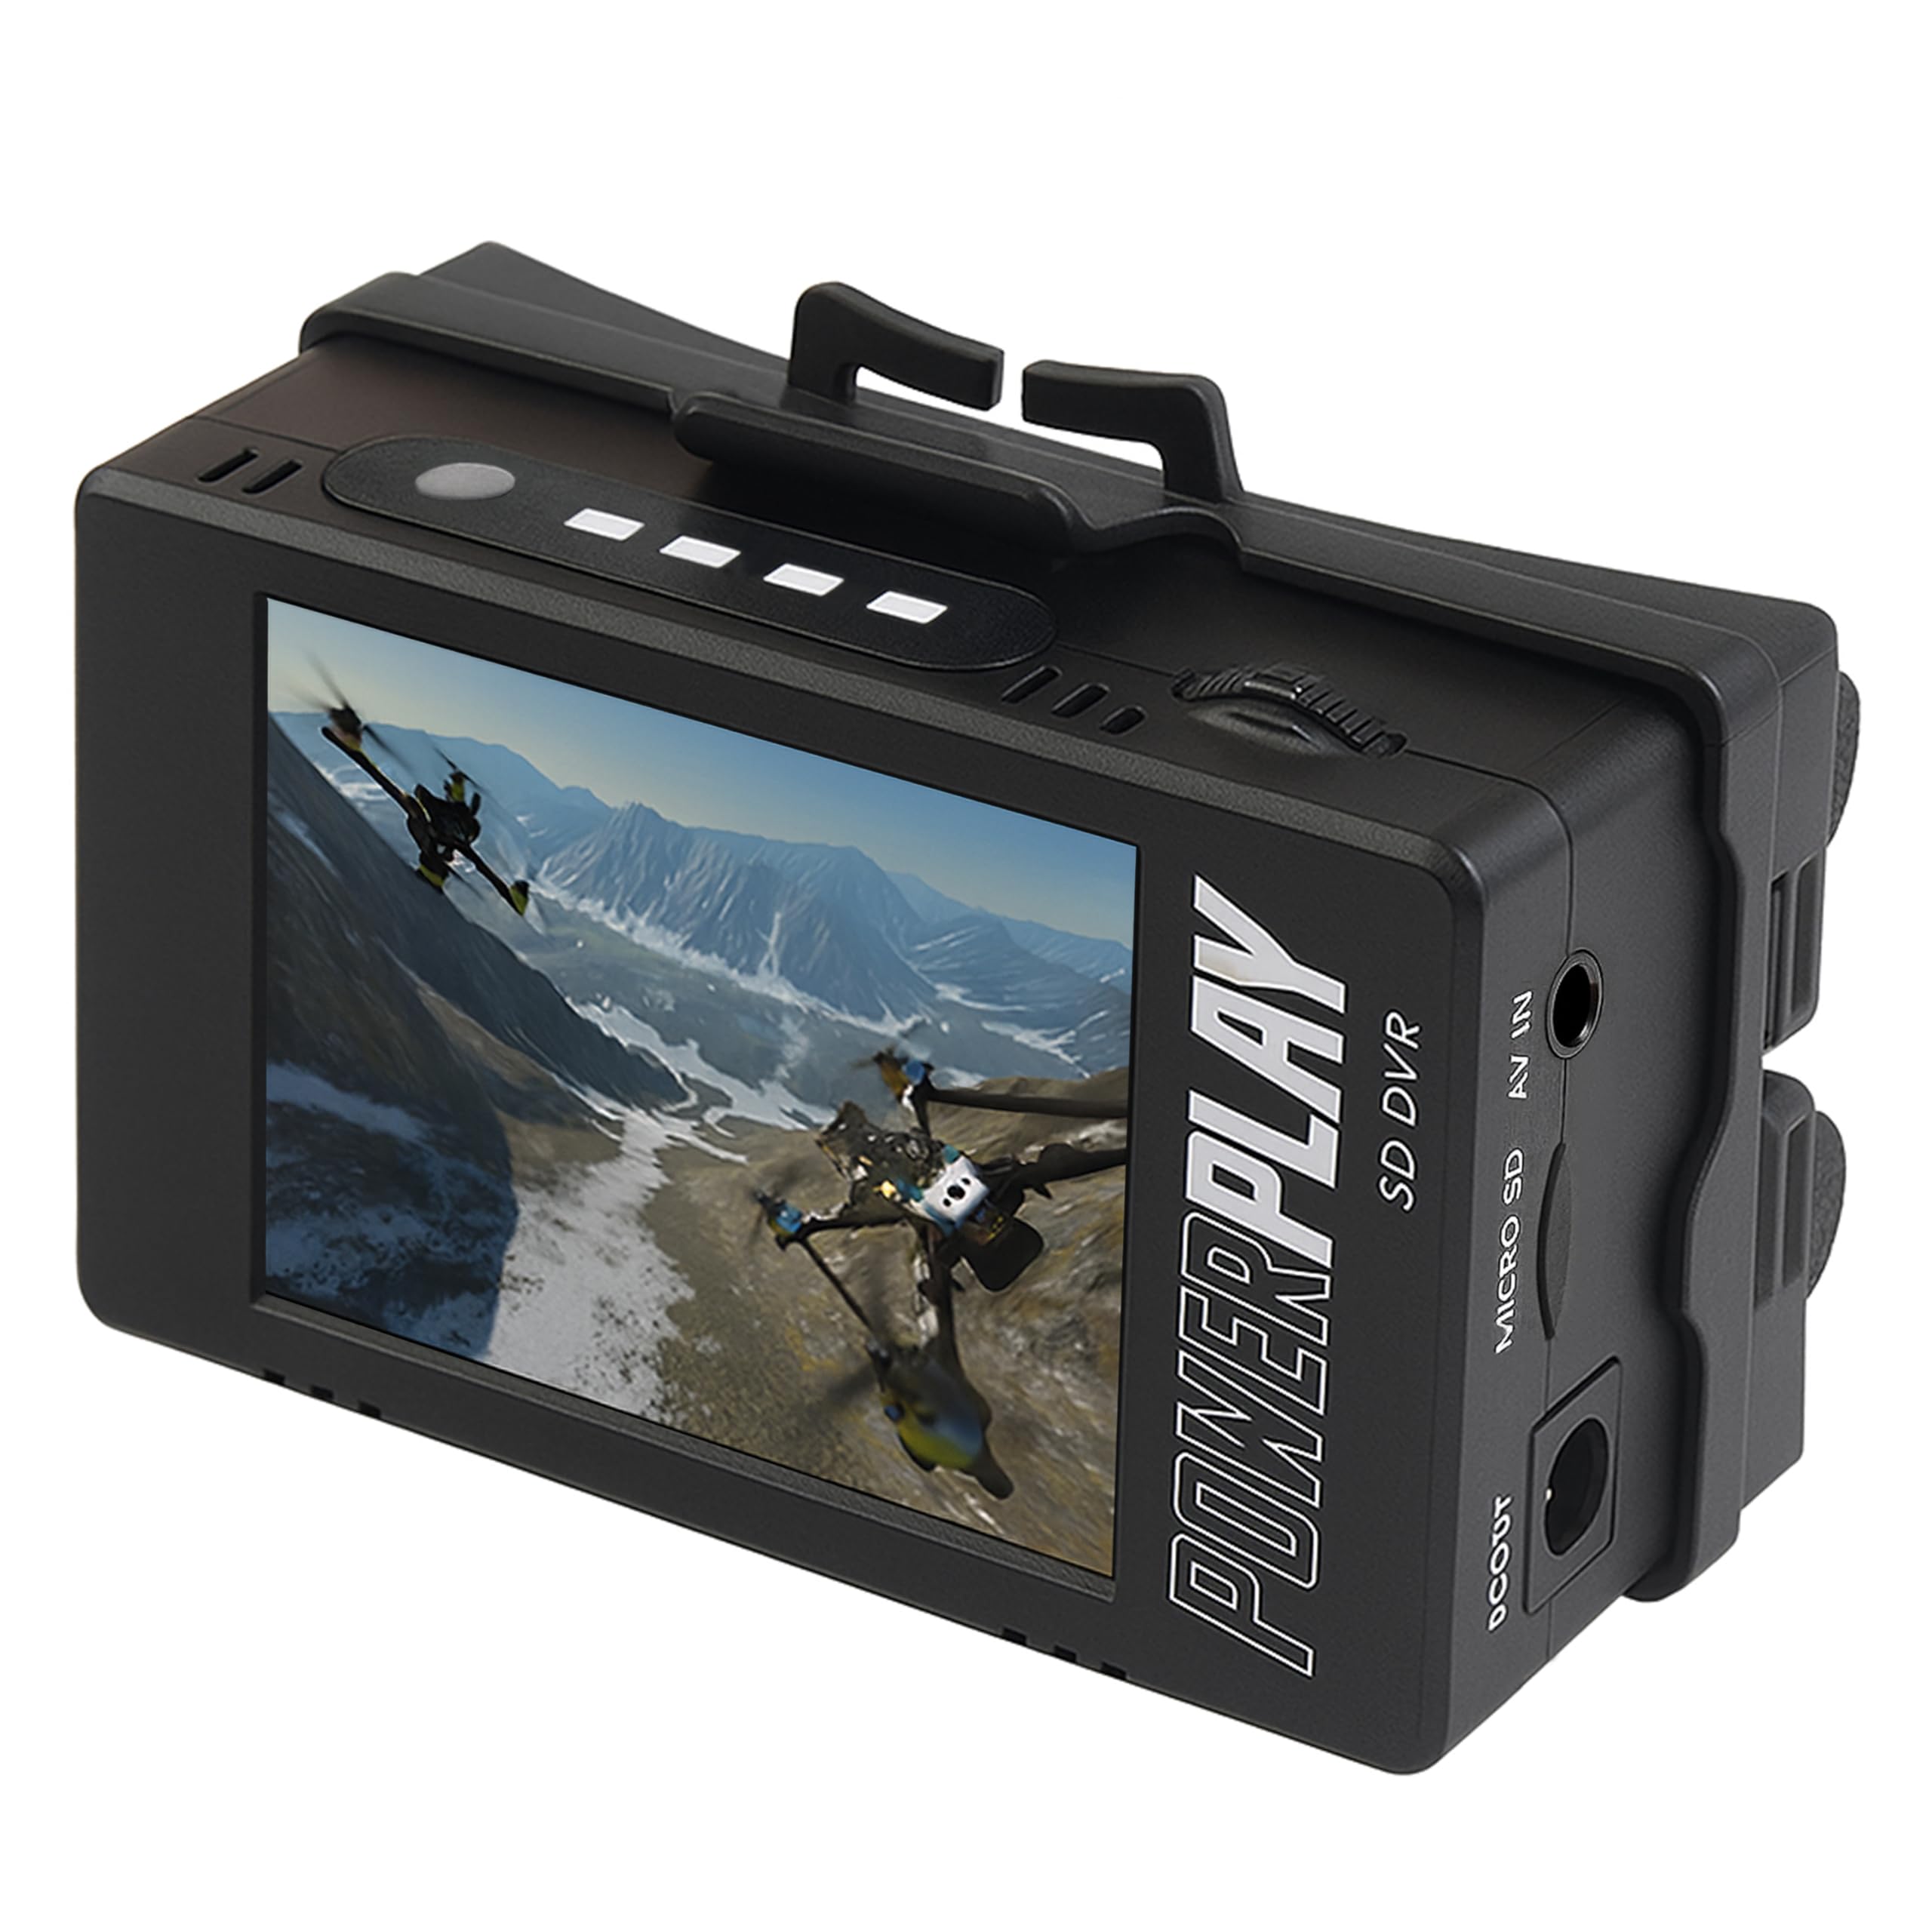
Figure 1: Front view of the PowerPlay DVR, showing the integrated 2.4-inch display and control buttons.

Figure 2: Side view of the PowerPlay DVR, highlighting the DC OUT port, Micro SD card slot, and AV IN (Audio L, Audio R, CVBS) ports.

Figure 3: Side view of the PowerPlay DVR, showing the USB Type-C port for data transfer and charging.

Figure 4: Top view of the PowerPlay DVR, displaying the navigation buttons (Back, Menu, OK, Mode, Rec/Stop), volume controls, and battery indicator lights.
3. Setup
Follow these steps to set up your PowerPlay DVR for recording.
3.1 Battery Installation
The PowerPlay DVR requires two 18500 Li-ion cells (≥2400mAh) for operation. Batteries are not included.
- Open the battery compartment cover.
- Insert two 18500 Li-ion cells, ensuring correct polarity (+/-).
- Close the battery compartment cover securely.
- If the device fails to power on after battery installation, charge via a certified USB-C cable.

Figure 5: View of the battery compartment with two 18500 Li-ion cells correctly inserted. Note the polarity markings.
CAUTION: Do not use AA batteries, as they can damage the PowerPlay DVR. Use only 2x18500 Li-ion batteries.
3.2 Micro SD Card Installation
A micro SD card (up to 512GB, Class 10 or higher with write speed ≥10MB/s) is required for recording. The micro SD card is not included.
- Locate the Micro SD card slot on the side of the device (refer to Figure 2).
- Insert the micro SD card into the slot until it clicks into place.
- To avoid recording errors or file corruption, ensure the micro SD card meets the specified requirements.
3.3 Connecting Your Video Source
Use the included AV cable to connect your analog video source (e.g., VCR, camcorder, DVD player) to the PowerPlay DVR.
- Connect the red, white, and yellow RCA connectors from the "OUT" ports of your video source (typically found on the back of VCRs or camcorders) to the corresponding AV IN ports (Audio L, Audio R, CVBS) on the PowerPlay DVR.
- Ensure a secure connection for all cables.
- The PowerPlay DVR's screen will remain blank until it detects a live signal from your video source.
Video 1: This video demonstrates how to connect a VHS player to a digital converter using RCA cables and initiate recording. It shows the process of inserting a USB drive, plugging in power, connecting AV terminals, playing a VHS tape, and pressing the record button.
4. Operating Instructions
4.1 Powering On/Off
- To power on, press and hold the Power button (usually marked with a circle and a vertical line) until the screen illuminates.
- To power off, press and hold the Power button until the device shuts down.
4.2 Recording Video
- Ensure your video source is connected and playing. The video feed should appear on the PowerPlay DVR's screen.
- Press the Rec/Stop button to begin recording. A red indicator light will typically illuminate to confirm recording is active.
- To stop recording, press the Rec/Stop button again. The recording will be saved to the inserted micro SD card.
Note: The PowerPlay DVR can automatically stop recording after a preset amount of time (e.g., 60, 90 minutes). Refer to the device's menu settings for configuration options.
Video 2: This video demonstrates real-time recording and monitoring on a similar mini DVR device. It shows the device's interface and how to start/stop recording to an SD card.
4.3 Playback
You can play back recorded videos directly on the device's screen or connect to an external display.
- On-Device Playback: Use the navigation buttons (up/down/left/right) and the OK button to browse and select recorded files for playback on the 2.4-inch screen.
- External Display Playback: Connect the PowerPlay DVR to a TV or monitor via the HDMI OUT port (if available on your model) or by inserting the micro SD card into a computer or compatible device.
4.4 Transferring Files
To transfer recorded files to a computer or other storage device:
- Remove the micro SD card from the PowerPlay DVR.
- Insert the micro SD card into a compatible card reader connected to your computer.
- Access the files on the micro SD card and transfer them to your desired location.
- Alternatively, connect the PowerPlay DVR directly to a computer using a USB Type-C cable. The device may appear as a mass storage device, allowing direct file transfer.
5. Maintenance
- Keep the device clean and free from dust. Use a soft, dry cloth for cleaning.
- Avoid exposing the device to extreme temperatures, moisture, or direct sunlight.
- Store the device and micro SD cards in a cool, dry place when not in use.
- Regularly back up your recorded files to prevent data loss.
6. Troubleshooting
- No Video/Audio on Screen:
- Ensure all AV cables are securely connected to the correct IN ports on the DVR and OUT ports on your video source.
- Verify that your video source (VCR, camcorder) is powered on and playing.
- If the video is staticky or blurry, the video source itself is likely the cause, not the converter. Try connecting your video source directly to a TV to verify signal quality.
- Recording Errors or File Corruption:
- Ensure you are using a Class 10 micro SD card (or higher) with a write speed of at least 10MB/s.
- Format the micro SD card using the device's menu options or a computer before first use.
- Device Not Powering On:
- Check that the 18500 Li-ion batteries are correctly installed with proper polarity.
- Ensure the batteries are charged. Connect the device to a power source using the USB Type-C cable.
7. Specifications
| Feature | Specification |
|---|---|
| Interface | USB: TYPE-C, AV-IN: Audio L, Audio R, CVBS |
| TF Card Support | MAX: 512GB, SD or SDHC (Class 10 recommended) |
| DC-OUT | 7.4V/1A |
| Screen | 2.4 inch, 480(RGB) * 640, Luminance 600Cd/m2 |
| Video Input | CVBS (PAL, NTSC 1.0Vp-p ±10%) |
| Record Video Resolution | AV 720x576 (PAL) 50fps, 720x480 (NTSC) 60fps |
| Video Capture Format | H.265 (HEVC) |
| Supported Audio Format | AAC, MP3 |
| Product Dimensions | 2.56 x 3.35 x 4.02 inches |
| Item Weight | 5.6 ounces |
| Color | Black |
8. Warranty & Support
For warranty information and technical support, please refer to the manufacturer's official website or contact their customer service department. Keep your purchase receipt as proof of purchase for any warranty claims.


