
Introduction
Thank you for choosing the TFA Dostmann 60.5018.01 Radio-Controlled Projection Alarm Clock. This device offers precise timekeeping, indoor and outdoor temperature monitoring, and a convenient projection feature. This manual provides essential information for the safe and efficient operation of your new alarm clock. Please read it thoroughly before use and keep it for future reference.
Safety Information
- Read all instructions before operating the device.
- Keep the device away from water, moisture, and extreme temperatures.
- Use only the specified power adapter (EU plug) and battery types (3 x 1.5V AAA for main unit, 2 x 1.5V AA for outdoor sensor).
- Do not mix old and new batteries, or different types of batteries.
- Dispose of batteries according to local regulations.
- Do not attempt to disassemble or repair the device yourself. Contact qualified service personnel.
- Avoid direct eye exposure to the projection light.
Package Contents
Ensure all items are present in the package:
- TFA Dostmann 60.5018.01 Radio-Controlled Projection Alarm Clock (Main Unit)
- Wireless Outdoor Temperature Sensor
- Power Adapter (EU plug)
- User Manual
Note: 3 x 1.5V AAA batteries for the main unit and 2 x 1.5V AA batteries for the outdoor sensor are not included and must be purchased separately.
Product Overview
Familiarize yourself with the main unit and its controls.

Figure 1: Front view of the main unit showing the display, 'ALARM' and 'CALENDAR' buttons.

Figure 2: Side view of the main unit with the adjustable projection arm. The 'ROTATE' wheel is visible on the projector.

Figure 3: Rear view of the main unit, indicating the battery compartment, 'AC 5.0V' power input, and control buttons ('-', 'SET', '+').

Figure 4: Wireless outdoor temperature sensor.
Main Unit Controls:
- SNOOZE/LIGHT Button: Activates snooze function, adjusts display backlight.
- ALARM Button: Accesses alarm settings.
- CALENDAR Button: Accesses calendar settings and display formats.
- SET Button: Enters setting mode, confirms selections.
- + / - Buttons: Adjusts values, cycles through options.
- Projection Arm: Rotates 270° for optimal projection angle.
- ROTATE Wheel (on projector): Adjusts projection focus/orientation.
Setup
1. Battery Installation (Main Unit)
- Open the battery compartment cover on the back of the main unit (refer to Figure 3).
- Insert 3 x 1.5V AAA batteries, observing the correct polarity (+/-).
- Close the battery compartment cover.
2. Battery Installation (Outdoor Sensor)
- Open the battery compartment cover on the outdoor sensor (refer to Figure 4).
- Insert 2 x 1.5V AA batteries, observing the correct polarity (+/-).
- Close the battery compartment cover.
3. Power Connection
For continuous operation and projection, connect the main unit to a power outlet using the provided power adapter. Plug the adapter into the 'AC 5.0V' port on the back of the unit (refer to Figure 3) and then into a wall socket.
4. Initial Setup and Sensor Pairing
Upon first power-up or after a battery change, the main unit will automatically search for the radio-controlled time signal and the outdoor sensor. This process may take several minutes.
- Place the outdoor sensor in a sheltered location outside, away from direct sunlight and rain, within 100 meters of the main unit.
- Ensure the main unit is placed in an area with good reception for the radio-controlled time signal (e.g., near a window).
- Once the time signal and sensor data are received, the time, date, indoor temperature, and outdoor temperature will be displayed.
Operating Instructions
1. Manual Time and Date Setting
If the radio-controlled time signal is not received, or if you are in a different time zone, you can set the time and date manually.
- Press and hold the SET button for approximately 3 seconds to enter setting mode.
- Use the + or - buttons to adjust the flashing value (e.g., time zone, hour, minute, year, month, day).
- Press SET to confirm each setting and move to the next.
- The setting mode will exit automatically after a few seconds of inactivity, or you can press SET repeatedly until the normal display returns.
2. Alarm Setting
- Press the ALARM button once to display the alarm time.
- Press and hold the ALARM button for 3 seconds to enter alarm setting mode.
- Use the + or - buttons to set the desired alarm hour and minute.
- Press ALARM to confirm each setting.
- Press ALARM again to activate or deactivate the alarm (an alarm icon will appear/disappear on the display).
3. Snooze Function
When the alarm sounds, press the SNOOZE/LIGHT button to activate the snooze function. The alarm will pause for a few minutes and then sound again. To stop the alarm completely, press any other button.
4. Display Backlight
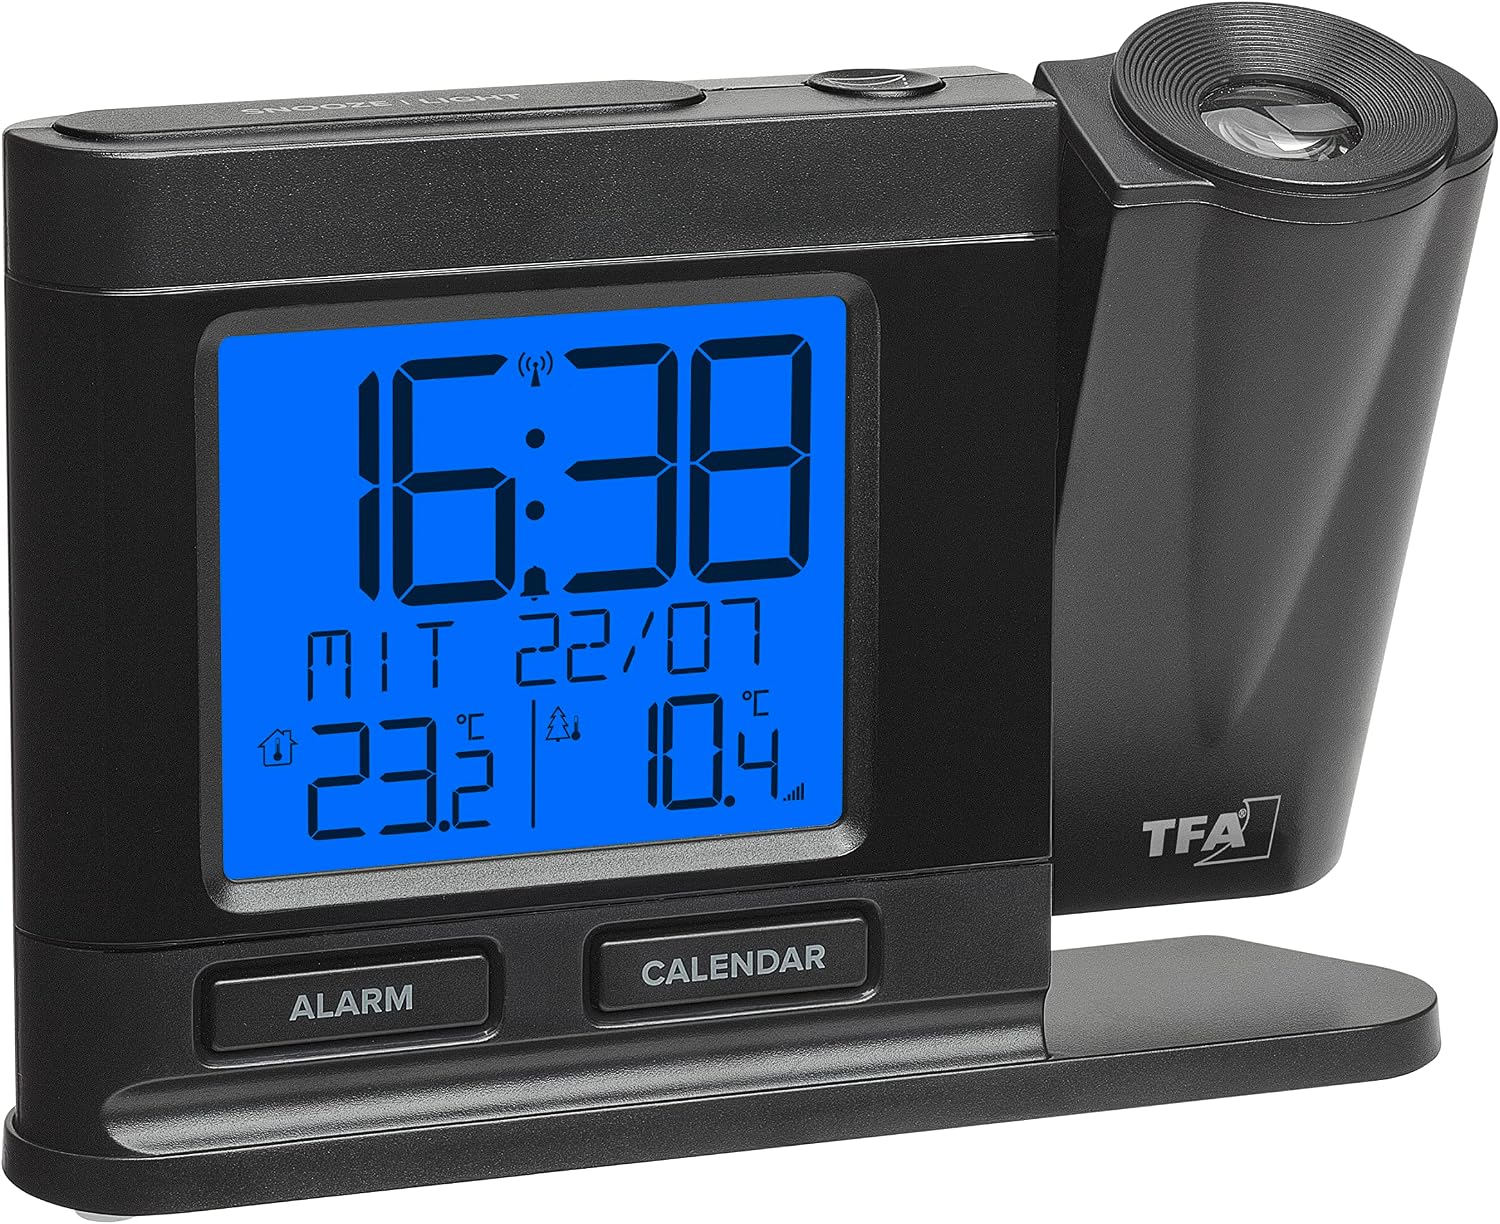
Figure 5: Display with blue backlight activated.
The display features 4 levels of brightness and an adjustable dimming function.
- Press the SNOOZE/LIGHT button to cycle through the backlight brightness levels.
- The dimming function can be set in the system settings to automatically adjust brightness during specific hours.
5. Projection Function

Figure 6: Time projected onto a wall.
The projection arm can rotate 270° to project the time, indoor temperature, or outdoor temperature onto a wall or ceiling.
- Adjust the projection arm to the desired angle.
- Use the ROTATE wheel on the projector to adjust the focus and orientation of the projected image for clarity.
- The projection display has 2 brightness levels, which can be adjusted in the settings.
- The projection can cycle between time, indoor temperature, outdoor temperature, or display all three alternately.
6. Language and Time Zone Settings
The device supports 4 languages for the day of the week display and menu (German, English, Spanish, French). A time zone adjustment from -12 to +12 hours is also available.
- Access these settings via the SET button in setting mode.
- Follow the on-screen prompts and use the + or - buttons to make selections.
Maintenance
Cleaning
- Wipe the device with a soft, damp cloth.
- Do not use abrasive cleaners or solvents.
- Ensure no moisture enters the device openings.
Battery Replacement
Replace batteries in both the main unit and the outdoor sensor when the low battery indicator appears on the display or when the device functions become unreliable. Follow the battery installation steps outlined in the Setup section.
Troubleshooting
| Problem | Possible Cause | Solution |
|---|---|---|
| No display/Device not turning on | No power, flat batteries, incorrect battery polarity. | Check power adapter connection. Replace batteries, ensuring correct polarity. |
| Time not synchronizing (radio-controlled) | Poor signal reception, interference, device too far from signal source. | Move the main unit closer to a window. Avoid electronic devices that may cause interference. Allow up to 24 hours for synchronization. Set time manually if necessary. |
| Outdoor temperature not displayed | Outdoor sensor not paired, flat batteries in sensor, sensor out of range. | Replace sensor batteries. Ensure sensor is within 100m of the main unit. Re-pair the sensor (refer to manual for specific re-pairing steps, usually involves pressing a reset button on the sensor and initiating a search on the main unit). |
| Projection is blurry or upside down | Focus not adjusted, projection orientation incorrect. | Use the ROTATE wheel on the projector to adjust focus. Rotate the projection arm or adjust the orientation setting if available. |
Specifications
| Model Number | 60.5018.01 |
| Dimensions (L x W x H) | 149 x 38 x 104 mm (Main Unit) |
| Weight | 175 grams |
| Material | Plastic |
| Power Supply (Main Unit) | 3 x 1.5V AAA batteries (not included) or AC adapter (included) |
| Power Supply (Outdoor Sensor) | 2 x 1.5V AA batteries (not included) |
| Indoor Temperature Range | 0°C to +50°C |
| Outdoor Temperature Range | -40°C to +60°C |
| Transmission Range (Outdoor Sensor) | Max. 100 meters (open field) |
| Transmission Frequency | 433 MHz |
| Display Type | Digital LCD |
| Special Features | Radio-controlled time, 270° projection, dimmable backlight, snooze, multiple time zones, 4 language menu. |
Warranty Information
TFA Dostmann products are manufactured with high-quality materials and undergo strict quality control. This product comes with a standard manufacturer's warranty against defects in materials and workmanship. The specific warranty period may vary by region and retailer. Please retain your proof of purchase for any warranty claims.
For detailed warranty terms and conditions, please refer to the documentation provided with your purchase or contact your retailer.
Support
If you encounter any issues that cannot be resolved using the troubleshooting guide, or if you require further assistance, please contact TFA Dostmann customer support or your retailer.
TFA Dostmann GmbH & Co. KG
Zum Ottersberg 12
D-97877 Wertheim am Main
Germany
You can also visit the official TFA Dostmann website for more information and support resources: www.tfa-dostmann.de


