Introduction
This manual provides detailed instructions for the installation, setup, operation, and maintenance of your YOSIMIKA Smart Door Lock, Model YD1-BK. Please read this manual thoroughly before installation and use to ensure proper function and safety. This smart lock offers multiple convenient access methods and advanced security features for your home or office.

Image: Overview of YOSIMIKA Smart Door Lock features.
Product Features
- Multiple Unlock Methods: Access your door using biometric fingerprint, keypad code, IC card, or a traditional physical key.
- Fast Fingerprint Recognition: Unlock the door with a single touch in approximately 0.3 seconds.
- Easy Installation: Designed to fit most standard door sizes with a thickness range of 35mm to 55mm (1-3/8 inches to 2-3/16 inches).
- Reversible Handle: The door handle can be configured for both left-handed and right-handed doors.
- User-Friendly Programming: Features an OLED display and voice guide for simplified setup and programming.
- Automatic Locking: Customizable auto-lock function can be set to engage 5, 10, 15, or 30 seconds after the door closes.
- Anti-Peep Passcode: Enhance security by adding random digits before or after your actual passcode to deter onlookers.
- Extensive User Capacity: Supports over 300 users with individual fingerprints, passcodes, or IC cards. Users can be added or removed at any time.
- Unlock Record Storage: Stores up to 2000 unlock records for security monitoring.
- Long Battery Life: Batteries typically last for one year. Includes a low battery warning function.
- Emergency Power: In case of complete battery depletion, use the backup physical key or a mobile power bank via the USB port for temporary power.
Package Contents
Please verify that all items listed below are included in your package:
- Smart Deadbolt Lock Assembly
- Door Handle Lock Assembly
- IC Cards (3 pieces)
- Backup Physical Keys (2 pieces)
- User Manual
- Accessory Package (screws, mounting hardware)
Specifications
| Brand | YOSIMIKA |
| Model Number | YD1-BK |
| Material | Zinc Alloy |
| Color | Black |
| Product Dimensions (LxWxH) | 35.6 x 27.9 x 10.2 cm (14 x 11 x 4 inches) |
| Item Weight | 2.26 kg (4.98 lbs) |
| Compatible Door Thickness | 33mm - 55mm (1-3/8 inches - 2-3/16 inches) |
| Operating Temperature | -20℃ to 60℃ (-4℉ to 140℉) |
| Operating Humidity | 5% to 95% (non-condensing) |
| Power Source | 4 x AA 1.5V Dry Batteries (not included) |
| Emergency Power | USB Port (for temporary power with power bank) |
| User Capacity | 300+ (Fingerprints, Passcodes, IC Cards) |
| Unlock Records | Up to 2000 records |
Installation
The YOSIMIKA Smart Door Lock is designed for straightforward installation. Ensure your door meets the specified thickness requirements (35mm-55mm). The handle is reversible to accommodate both left and right-handed door configurations.
1. Prepare Your Door
- Verify your door thickness is within 35mm to 55mm.
- Check existing boreholes. The lock is compatible with most standard door preparations.
- Determine the handing of your door (left or right) to prepare the handle assembly.
2. Install the Deadbolt and Strike Plate
- Insert the deadbolt into the door edge. Ensure the latch bolt is facing the correct direction.
- Secure the deadbolt with screws.
- Install the strike plate on the door frame, aligning it with the deadbolt.
3. Install Exterior and Interior Assemblies
- Feed the cables from the exterior assembly through the door.
- Mount the exterior assembly, ensuring the spindle passes through the deadbolt.
- Connect the cables to the interior assembly.
- Mount the interior assembly and secure it with screws.
4. Install Batteries
- Open the battery cover on the interior assembly.
- Insert 4 new AA 1.5V dry batteries, observing polarity. Do not use rechargeable batteries.
- Close the battery cover.
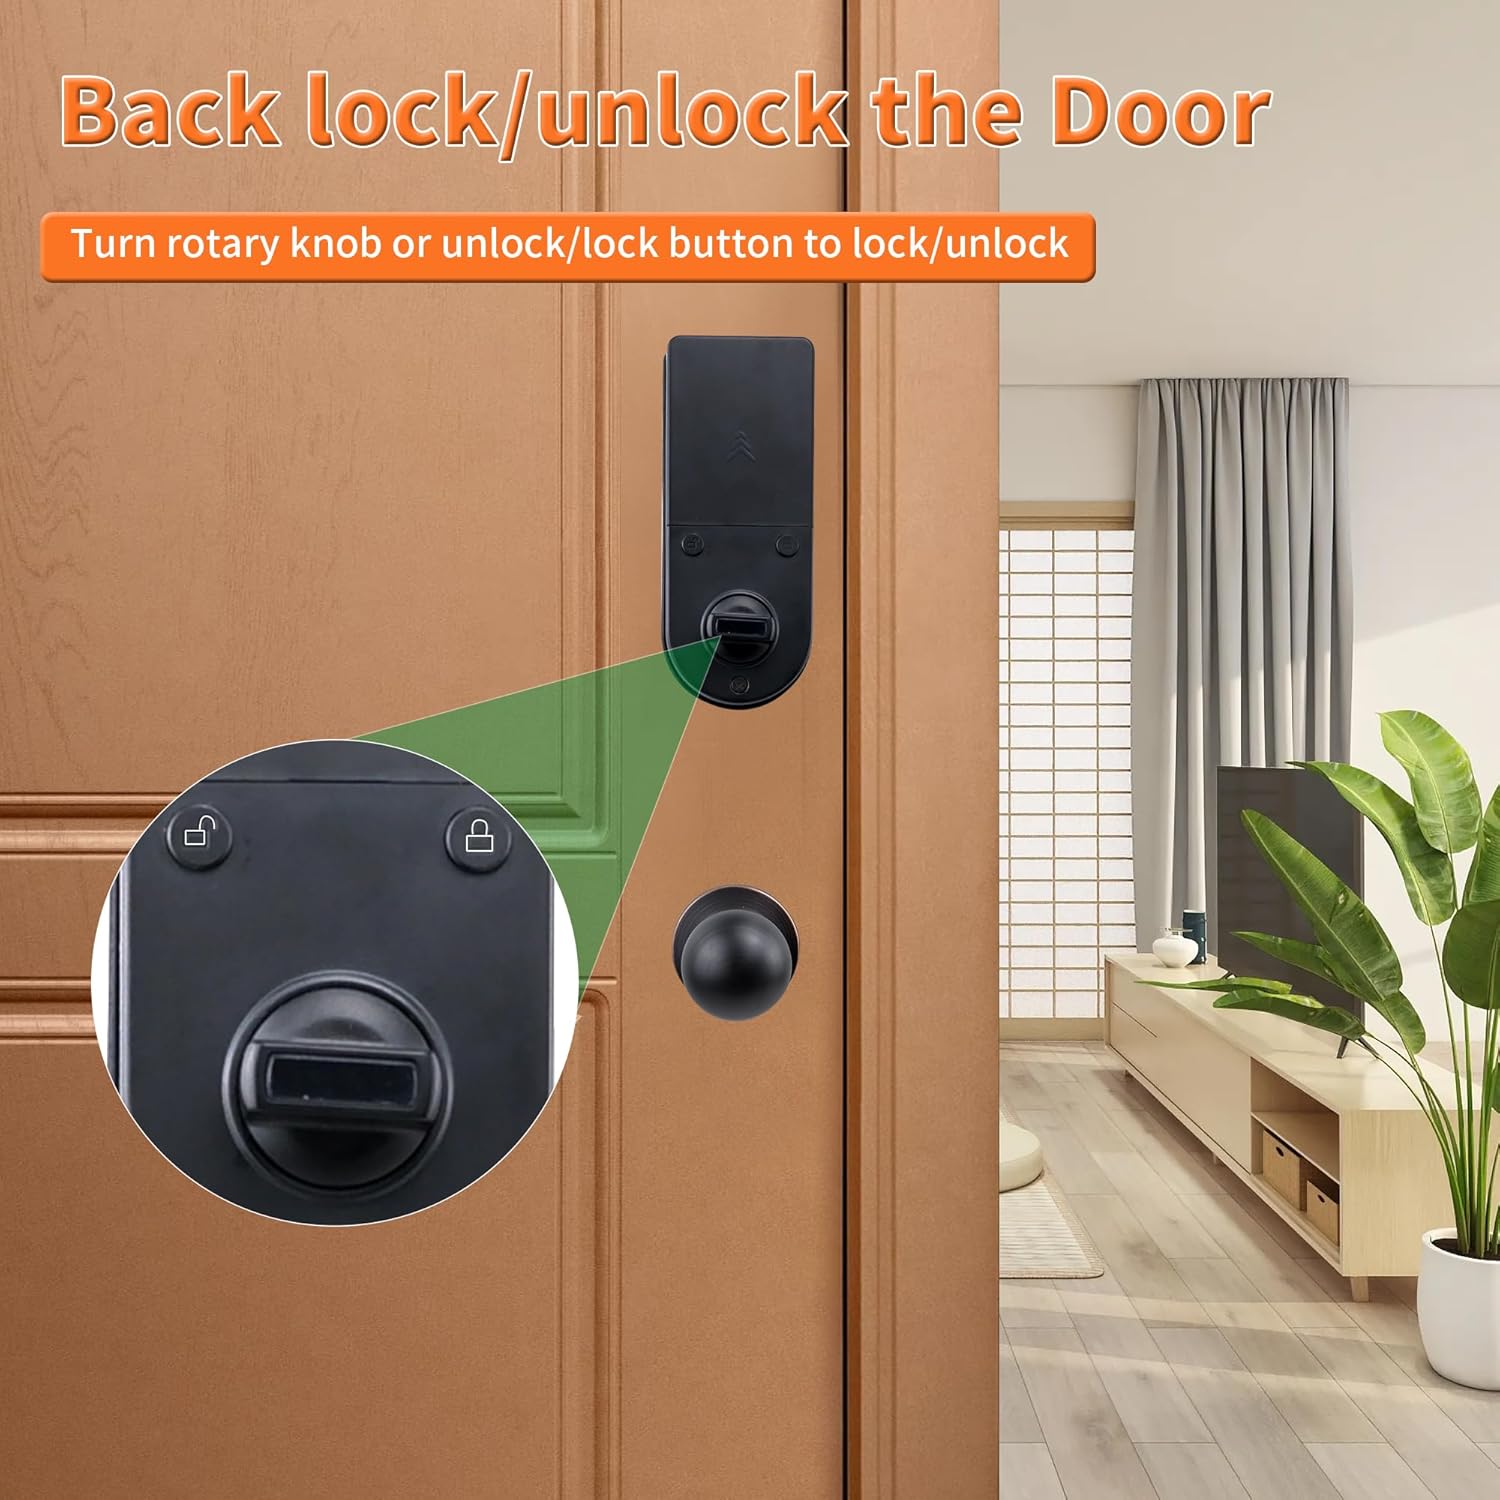
Image: Product dimensions and components for installation reference.
Setup and Programming
The OLED display and voice guide will assist you through the programming process.
1. Initial Setup (Administrator Creation)
- Upon first power-up, the lock will prompt you to create an administrator.
- Follow the voice prompts and on-screen instructions to register the first fingerprint, passcode, or IC card as the administrator.
2. Adding Users (Fingerprints, Passcodes, IC Cards)
- Access the programming menu using the administrator's credentials.
- Select the option to add a new user.
- Choose the desired access method (fingerprint, passcode, or IC card).
- Follow the voice and display prompts to register the new user's credentials.
- Repeat for additional users. The lock supports over 300 users.
3. Setting Auto-Lock Function
- Enter the programming menu as an administrator.
- Navigate to the auto-lock settings.
- Select the desired delay time: 5, 10, 15, or 30 seconds.
4. Anti-Peep Passcode Feature
- When entering your passcode, you can input any random digits before and after your actual code.
- Example: If your passcode is 123456, you can enter 987123456012. The lock will recognize the correct sequence within the longer string.

Image: User management for fingerprints, IC cards, and codes.
Operating Instructions
Unlocking the Door
The YOSIMIKA Smart Door Lock offers four methods for unlocking:
- Fingerprint: Place your registered finger on the fingerprint sensor. The lock will unlock if the fingerprint is recognized.
- Keypad Code: Enter your registered passcode on the keypad, optionally using the anti-peep feature.
- IC Card: Tap your registered IC card against the designated sensor area on the lock.
- Physical Key: Insert the backup physical key into the keyhole and turn to unlock.

Image: Multiple unlock methods for the smart door lock.
Locking the Door
- Automatic Lock: If enabled, the lock will automatically engage after the set delay (5, 10, 15, or 30 seconds) once the door is closed.
- Manual Lock (Exterior): Press the lock button on the keypad or hold down the '#' key for a few seconds.
- Manual Lock (Interior): Turn the rotary knob or press the lock button on the interior assembly.

Image: Interior lock/unlock mechanism.

Image: Auto-lock feature for enhanced security.
Maintenance
Battery Replacement
The lock will provide a low battery warning when power is running low. Replace all four AA 1.5V dry batteries promptly. Do not mix old and new batteries, and do not use rechargeable batteries, as their lower voltage (typically 1.2V) can affect performance.
Emergency Power
If the batteries completely deplete, you can use a mobile power bank connected to the USB port on the exterior assembly to temporarily power the lock and gain access. Alternatively, use one of the backup physical keys.
Cleaning
Wipe the lock's surface with a soft, dry cloth. Avoid using abrasive cleaners, solvents, or harsh chemicals, as these can damage the finish and electronic components.
Troubleshooting
- Lock not responding: Check battery levels. Replace batteries if low. If still unresponsive, use the physical key or emergency USB power.
- Fingerprint not recognized: Ensure your finger is clean and dry. Try re-registering your fingerprint if issues persist.
- Keypad not responding: Ensure the keypad is clean. If the screen is frozen, try removing and reinserting batteries (if accessible from inside) or using emergency power/key.
- Auto-lock not engaging: Verify the auto-lock setting is enabled and the delay time is configured correctly in the programming menu. Ensure the door closes completely and the deadbolt can extend without obstruction.
- Locking mechanism feels stiff: Check for any obstructions in the door frame or deadbolt path. Ensure the deadbolt hole in the door frame is deep enough for full extension. Lubricate moving parts if necessary with a silicone-based lubricant, avoiding oil-based products.
- Voice prompts are unclear: Adjust the volume setting in the programming menu if available.
Safety Information
- Always keep at least one physical backup key in a secure location outside your home.
- Do not expose the lock to extreme temperatures or direct water immersion.
- Ensure all users are properly instructed on how to operate the lock and its emergency features.
- Regularly check the battery level and replace batteries as needed to avoid being locked out.
- Do not attempt to disassemble or repair the lock yourself, as this may void the warranty and cause damage.
Warranty and Support
For warranty information or technical support, please refer to the contact details provided with your purchase documentation or visit the official YOSIMIKA website. Keep your purchase receipt as proof of purchase for warranty claims.
