1. Introduction
Thank you for choosing the Slochi Flush Mount LED Ceiling Light. This manual provides essential information for the safe installation, operation, and maintenance of your new lighting fixture. Please read these instructions thoroughly before installation and retain them for future reference.
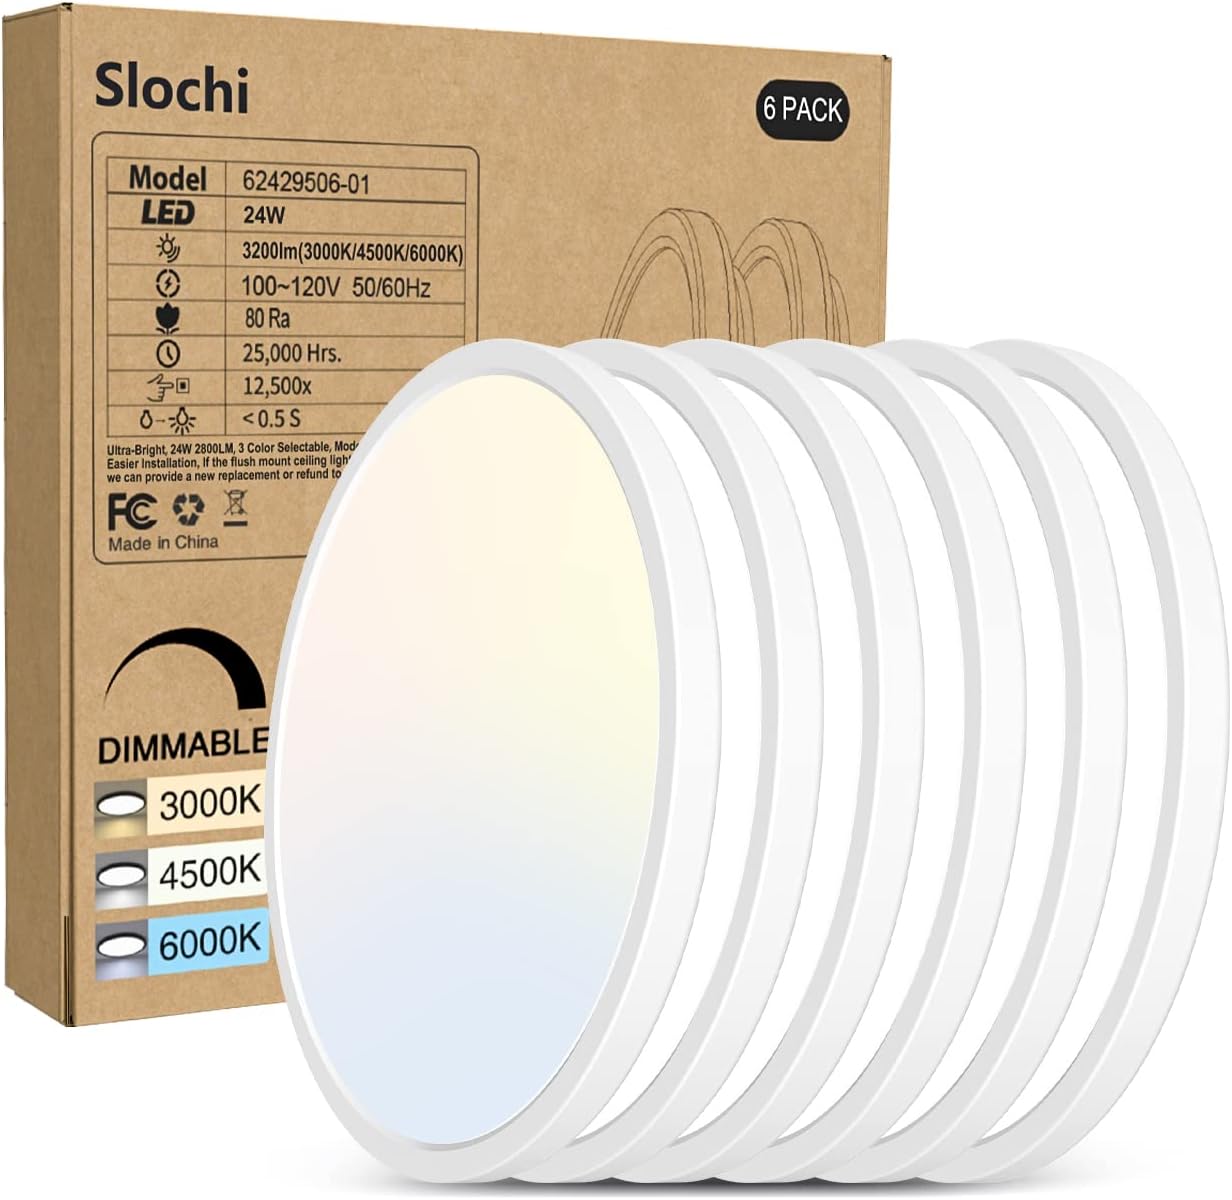
Image 1.1: Slochi Flush Mount LED Ceiling Light (6-pack) packaging.
2. Safety Information
To ensure safe installation and operation, please observe the following precautions:
- Always disconnect power at the circuit breaker before beginning installation or performing any maintenance.
- Consult a qualified electrician if you are unsure about the installation process.
- Do not attempt to modify the fixture in any way.
- Ensure all electrical connections are secure and comply with local electrical codes.
- This product is designed for indoor use only.
3. Package Contents
Verify that all components are present before installation:
- 6 x Slochi 24W LED Ceiling Light Fixtures
- 6 x Connectors
- 18 x Screws
- 1 x User Manual
4. Specifications
| Feature | Specification |
|---|---|
| Model Number | CL26A-6-WT |
| Voltage | AC100-120V |
| Power | 24W |
| Lumen Output | 2800LM |
| CRI | >85 |
| Light Beam Angle | 120° |
| Lifespan | 25,000 Hours |
| Material | PC (Plastic, Polycarbonate) |
| Product Diameter | 10.2 inches |
| Product Thickness | 0.94 inches |
| Waterproof & Dustproof Rating | IP44 |
| Color Temperatures | 3000K (Warm White), 4500K (Neutral White), 6000K (Cool White) |
| Dimmable Range | 10%-100% |
| Installation Type | Flush Mount |

Image 4.1: Product dimensions and compatibility with standard junction boxes.
5. Setup and Installation
Follow these steps for proper installation:
- Prepare for Installation: Ensure the power supply to the installation area is turned off at the circuit breaker.
- Remove Lamp Holder: Rotate the lamp holder counter-clockwise to detach it from the main light body.
- Mount Bracket: Pass the electrical wires through the center opening of the lamp holder. Secure the lamp holder bracket to the ceiling or wall junction box using the provided screws.
- Connect Wires: Connect the electrical wires from the ceiling to the fixture's wires using the provided connectors. Ensure proper polarity (live to live, neutral to neutral, ground to ground if applicable). Place the wiring ports in the appropriate locations within the junction box.
- Attach Light Body: Align the main light body with the mounted lamp holder and rotate it clockwise until it is securely fastened.
- Restore Power: Once installation is complete, restore power at the circuit breaker.

Image 5.1: Visual guide for the installation process.
6. Operation
6.1. Adjusting Color Temperature
The Slochi LED Ceiling Light offers three color temperature options: 3000K (Warm White), 4500K (Neutral White), and 6000K (Cool White). To change the color temperature:
- Turn off the electricity to the light fixture.
- Carefully unscrew or detach the ceiling lamp to access the internal switch.
- Locate the small switch on the back of the fixture and slide it to your desired color temperature setting (W for Warm, N for Neutral, C for Cool).
- Reattach the ceiling lamp securely.
- Restore power to the fixture.

Image 6.1: Internal switch for color temperature selection and visual examples.
6.2. Dimmable Functionality
This ceiling light is compatible with most Triac dimmers, allowing brightness adjustment from 10% to 100%. Ensure you use a compatible dimmer switch for optimal performance. Refer to your dimmer switch's instruction manual for specific operation details.

Image 6.2: Triac dimming capability and compatible dimmer switch example.
7. Maintenance
To maintain the appearance and performance of your Slochi LED Ceiling Light:
- Ensure the power is off before cleaning.
- Clean the fixture with a slightly wet and soft cloth.
- Do not use any cleaning solutions, abrasive cleaners, or solvents, as these may damage the finish or electrical components.
8. Troubleshooting
If you encounter issues with your ceiling light, refer to the following common troubleshooting steps:
- Light does not turn on:
- Check if the power supply is connected and the circuit breaker is on.
- Verify that all wire connections are secure.
- Ensure the light fixture is properly seated and locked into its base.
- Light flickers or dims unexpectedly:
- Confirm that the dimmer switch (if installed) is compatible with LED fixtures.
- Check for loose wiring connections.
- Ensure the voltage supply is stable and within the specified range (AC100-120V).
- Incorrect color temperature:
- Refer to Section 6.1 to adjust the internal color temperature switch.
If these steps do not resolve the issue, please contact customer support.
9. Warranty and Support
Slochi provides the following support for your product:
- 365 Days Support Guarantee: Comprehensive support for one year from the date of purchase.
- 30 Days Free Return & Exchange: Hassle-free returns and exchanges within 30 days of purchase.
For technical assistance or warranty claims, please refer to the contact information provided with your purchase documentation or visit the official Slochi website.

Image 9.1: Warranty and support information.