1. Introduction
This manual provides detailed instructions for the safe and effective operation of your U`King 18X12W RGBW 4-in-1 LED DJ Par Can Light. Please read this manual thoroughly before use and retain it for future reference. This LED Par Light is designed for stage lighting applications, offering various control modes and rich lighting effects.
2. Safety Instructions
- Always connect the unit to a grounded power outlet.
- Ensure the voltage of the power supply matches the voltage specified on the unit.
- Do not operate the unit if the power cord is damaged.
- Avoid direct eye exposure to the light source.
- Keep the unit away from rain or moisture to prevent electric shock.
- Ensure proper ventilation around the unit to prevent overheating.
- Do not attempt to repair the unit yourself. Refer all servicing to qualified personnel.
- Mount the fixture securely using appropriate hardware.
3. Package Contents
Verify that all items listed below are included in your package:
- Par lights (quantity as purchased, e.g., 8 units for 8 Packs)
- Knob screws (2 per light)
- Power cords (1 per light)
- Brackets (2 per light)
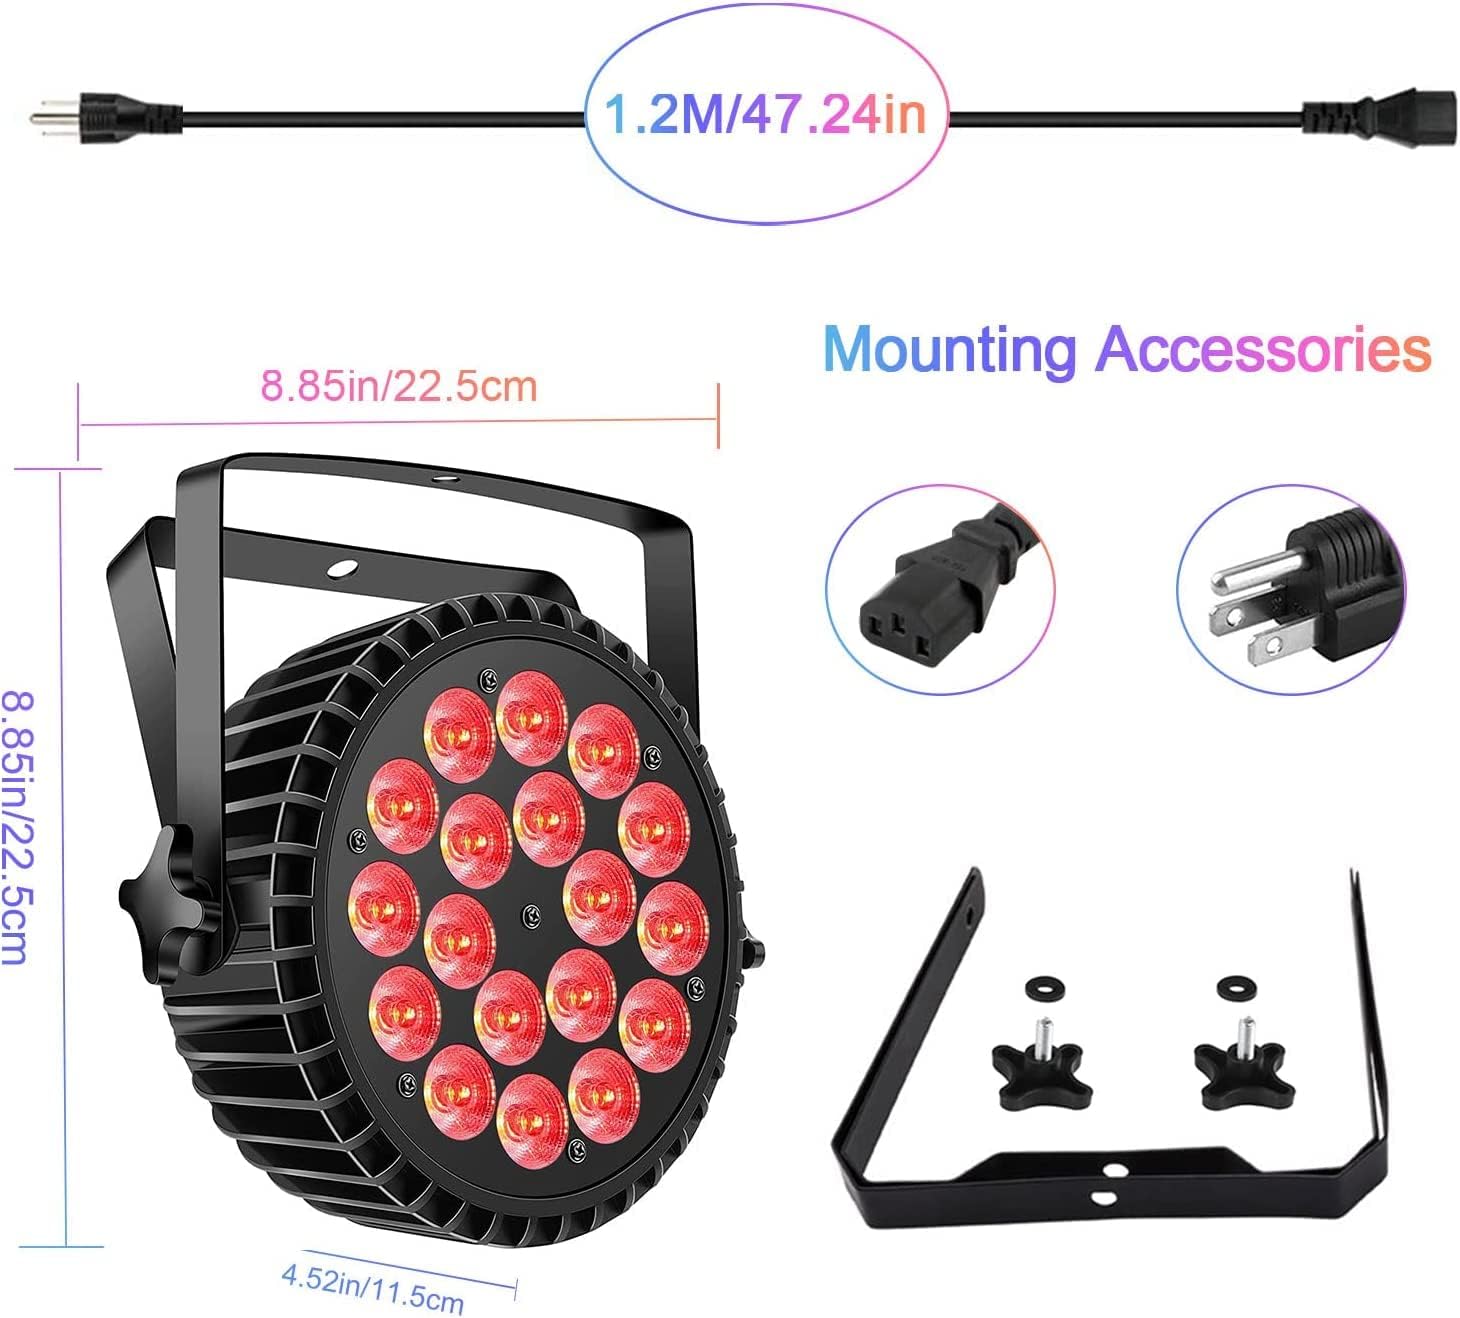
Image: The U`King LED Par Light shown with its dimensions (8.85in x 8.85in x 4.52in) and included accessories: a 1.2m power cord, a power input connector, a US plug, and a mounting bracket with knob screws.
4. Product Overview
The U`King 18X12W RGBW 4-in-1 LED DJ Par Can Light features 18 high-power 12W RGBW LEDs, offering a wide range of color mixing capabilities. Its robust cast aluminum shell ensures durability and efficient heat dissipation. The unit includes an intelligent digital display for easy operation and an adjustable bracket for versatile mounting.
4.1 Components and Controls

Image: Rear panel of the U`King LED Par Light, detailing the control interface. From left to right: POWER IN, DMX IN, DMX OUT, MENU button, UP button, DOWN button, ENTER button, and a digital DISPLAY. A heat dissipation fan is centrally located, and an adjustable bracket is visible on the sides.
- POWER IN: Connects to the main power supply.
- DMX IN: 3-pin XLR input for DMX signal.
- DMX OUT: 3-pin XLR output for linking to other DMX fixtures.
- DISPLAY: Digital screen showing current mode and settings.
- MENU: Navigates through the main menu options.
- UP/DOWN: Adjusts values or scrolls through menu options.
- ENTER: Confirms selections.
- Heat Dissipation Design: Built-in fan and aluminum casing for optimal cooling.
- Adjustable Bracket: Allows for flexible positioning and mounting.
5. Setup
5.1 Mounting
The U`King LED Par Light can be mounted in various positions:
- Floor Mount: Place the light directly on a flat surface.
- Truss Mount: Secure the light to a lighting truss using appropriate clamps (not included) and the integrated bracket.
- Wall/Ceiling Mount: Attach the bracket to a wall or ceiling using suitable screws and anchors (not included).
Ensure the mounting surface or structure can support the weight of the fixture. The adjustable bracket allows for precise angle adjustment after mounting.

Image: A close-up view of the U`King LED Par Light's adjustable stand, illustrating its 360-degree rotation capability for flexible positioning.

Image: An illustration demonstrating the easy installation of the U`King LED Par Light using its two sturdy brackets, which can be fixed with screws onto a lamp stand or wall for stable support.
5.2 Power Connection
Connect the provided power cord to the POWER IN port on the rear of the fixture and then to a suitable power outlet (110V AC).
5.3 DMX Connection (Optional)
If using DMX control, connect a DMX controller to the DMX IN port of the first fixture. For multiple fixtures, link them in a daisy chain using DMX OUT to DMX IN connections.
6. Operating Modes
The U`King LED Par Light supports multiple operating modes, selectable via the digital display and control buttons on the rear panel.
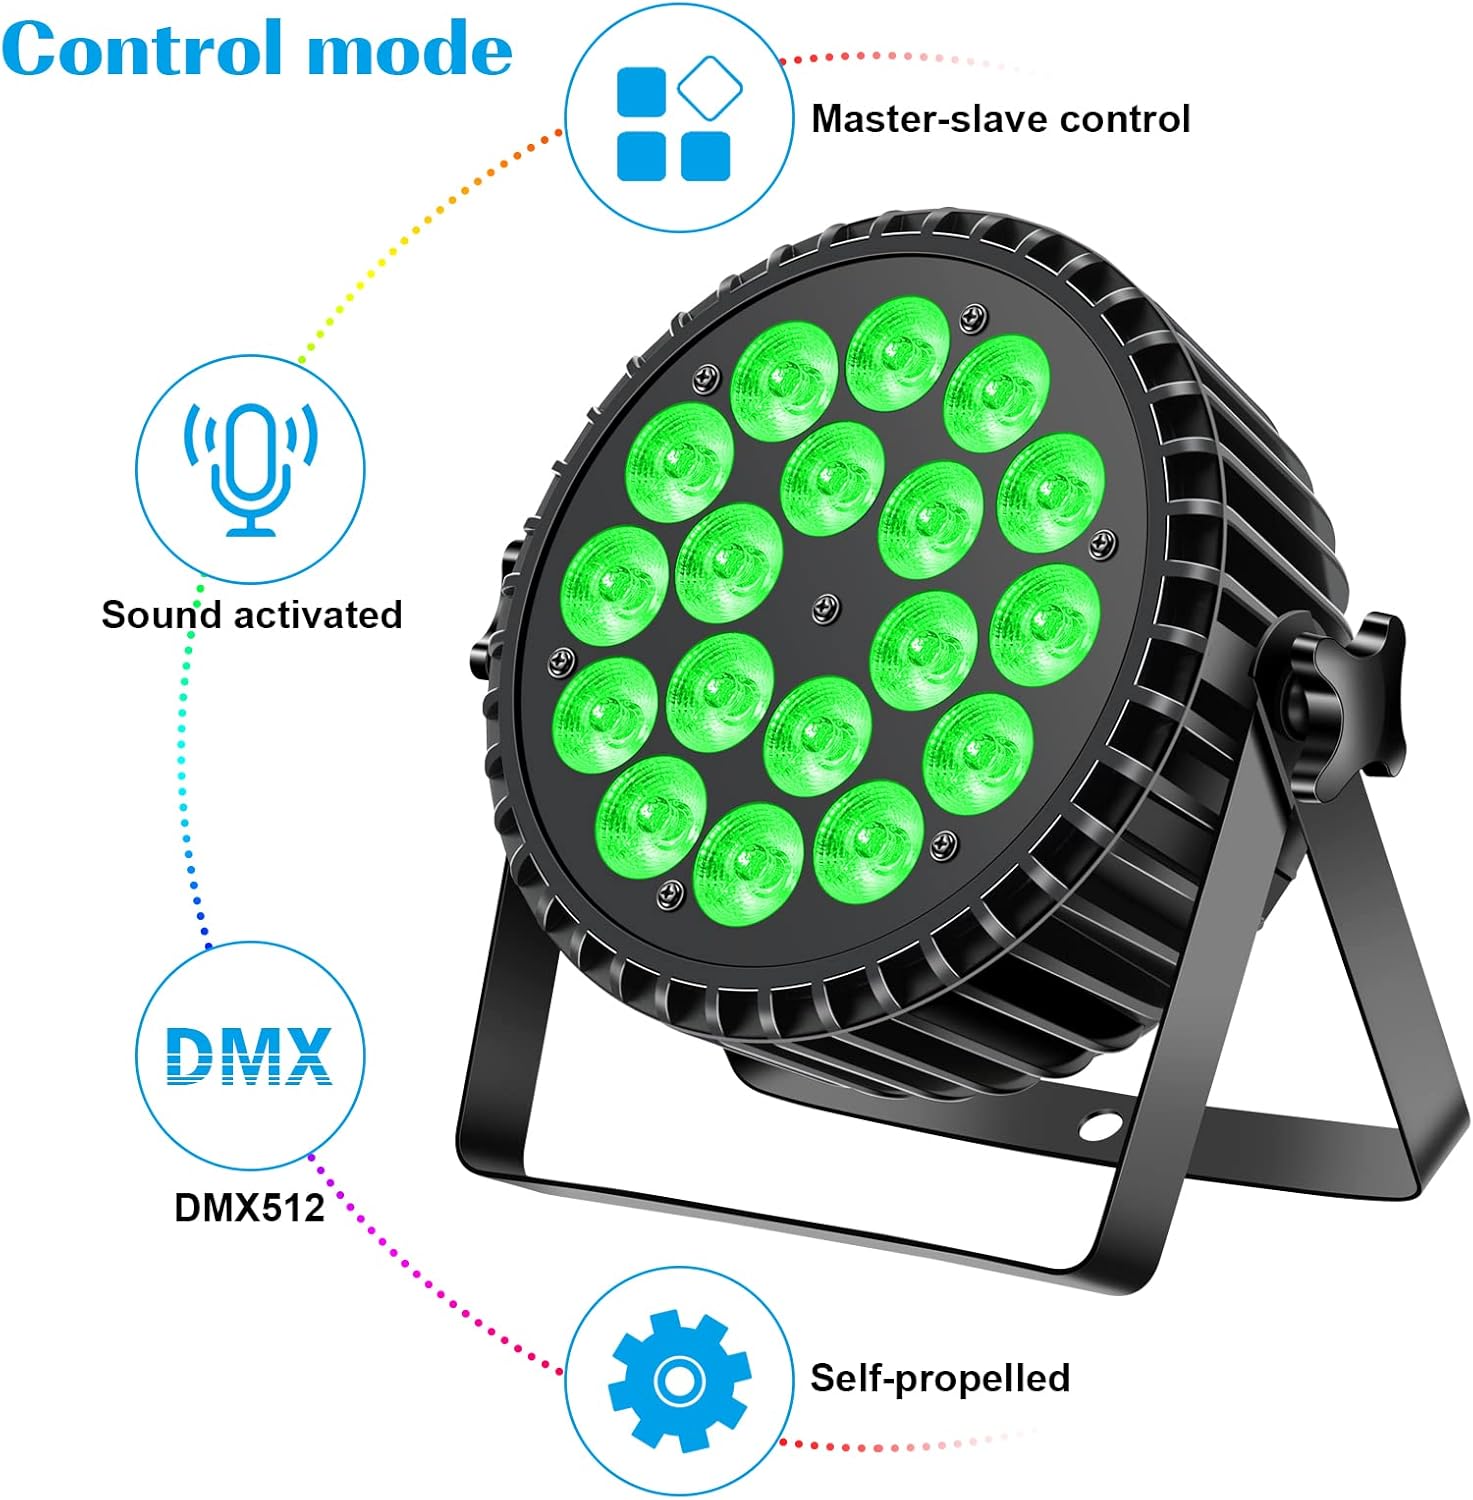
Image: A circular diagram showing the four primary control modes of the U`King LED Par Light: Master-slave control, Sound activated, DMX512, and Self-propelled (Auto Run).
- Auto Run Mode (Self-propelled): The light cycles through pre-programmed patterns and color changes automatically. Speed is adjustable.
- Sound Activated Mode: The light reacts to ambient sound or music, changing colors and patterns in sync with the beat. Sensitivity is adjustable.
- DMX512 Mode: Allows external control of the light's functions (color, dimming, strobe, etc.) via a DMX controller. Supports 4 or 8 DMX channels.
- Master-Slave Mode: One light acts as the 'master' and controls other 'slave' lights, synchronizing their effects without a DMX controller.
6.1 Selecting Modes
Use the MENU button to navigate through the main operating modes displayed on the digital screen. Use the UP and DOWN buttons to adjust parameters or select specific programs within a mode. Press ENTER to confirm your selection.

Image: A grid displaying various vibrant color lighting effects produced by the U`King LED Par Lights, including solid colors like purple, green, red, white, and mixed color washes.

Image: Another grid showcasing diverse lighting effects from the U`King LED Par Lights, featuring various color combinations and beam patterns.
7. DMX Operation
The U`King LED Par Light can be controlled via DMX512 protocol, offering precise control over its functions. The fixture supports both 4-channel and 8-channel DMX modes.
7.1 DMX Address Setting
To set the DMX address, navigate to the DMX address setting option using the MENU button. Use the UP/DOWN buttons to select the desired DMX start address (1-512) and press ENTER to confirm.
7.2 DMX Channel Functions (Example for 8-Channel Mode)
Below is a typical DMX channel assignment. Specific functions may vary slightly; refer to the on-screen display for exact channel mapping.
| Channel | Function | Value Range | Description |
|---|---|---|---|
| 1 | Master Dimmer | 0-255 | 0 = Off, 255 = Full Brightness |
| 2 | Red Intensity | 0-255 | 0 = Off, 255 = Full Red |
| 3 | Green Intensity | 0-255 | 0 = Off, 255 = Full Green |
| 4 | Blue Intensity | 0-255 | 0 = Off, 255 = Full Blue |
| 5 | White Intensity | 0-255 | 0 = Off, 255 = Full White |
| 6 | Strobe | 0-255 | 0 = No Strobe, 1-255 = Strobe Speed (slow to fast) |
| 7 | Color Macro / Auto Programs | 0-255 | Selects pre-set colors or auto-running programs |
| 8 | Program Speed / Sound Sensitivity | 0-255 | Adjusts speed of auto programs or sensitivity in sound mode |
8. Maintenance
8.1 Cleaning
To maintain optimal light output and extend the lifespan of the fixture, regularly clean the lens and housing. Use a soft, lint-free cloth and a mild cleaning solution. Do not use abrasive cleaners or solvents.
8.2 Storage
When not in use, store the fixture in a dry, dust-free environment, preferably in its original packaging or a protective case.

Image: A close-up of the silent cooling fan integrated into the rear panel of the U`King LED Par Light, highlighting its role in efficient heat dispersion.

Image: A cutaway diagram illustrating the multi-layered construction of the U`King LED Par Light's casing, featuring an advanced heat-resistant layer, an alloy oxidation layer, and a cast aluminum exterior for durability and heat management.
9. Troubleshooting
- No Power:
- Check if the power cord is securely connected to both the fixture and the power outlet.
- Verify that the power outlet is functional.
- No Light Output:
- Ensure the dimmer channel (if in DMX mode) is set to a value above zero.
- Check if the fixture is in a paused or black-out mode.
- Verify the selected operating mode is active.
- DMX Control Issues:
- Check DMX cable connections and ensure they are secure.
- Verify the DMX address on the fixture matches the address set on your controller.
- Ensure the DMX controller is sending a signal.
- Try using a DMX terminator on the last fixture in the chain.
- Sound Activated Mode Not Responding:
- Increase the sound sensitivity setting.
- Ensure there is sufficient audio input for the microphone to detect.
10. Specifications
| Specification | Detail |
|---|---|
| Brand | U`King |
| Model Number | B117-US |
| Light Source Type | LED |
| Number of Light Sources | 18 |
| LED Wattage | 12W per LED (RGBW 4-in-1) |
| Total Wattage | 216 watts |
| Voltage | 110 Volts |
| Control Modes | DMX512 (4/8 channels), Sound Activated, Master-Slave, Auto Run |
| Material | Aluminum (Cast Aluminum Shell) |
| Finish Type | Acrylic, Aluminum |
| Product Dimensions | 9.6"L x 4.3"W x 9.6"H |
| Item Weight | 6 Pounds |
| Mounting Type | Floor Mount (also suitable for truss/wall) |
| Bulb Features | Dimmable |
| Certifications | CE, RoHS |
11. Warranty and Support
U`King products are designed for reliability and performance. For warranty information or technical support, please refer to the contact details provided with your purchase or visit the official U`King website. Please have your model number (B117-US) and purchase date available when contacting support.