
1. Setup
1.1 Included Components
Before beginning installation, ensure all components are present:
- 1 x Portable Air Conditioner Unit
- 1 x User Manual
- 1 x Remote Control
- 1 x Exhaust Hose (4.92 ft)
- 2 x Exhaust Hose Connectors
- 1 x Adjustable Window Kit (Panels A & B)
- 1 x Drain Hose (4.9 ft)
- Screws and Window Kit Screw (Butterfly Nut)
1.2 Window Kit Installation
The window kit is designed for both hanging (vertical slide) and sliding (horizontal slide) windows. Ensure your window type is compatible and measures between 36-50 inches.
- Disassemble the screw kit counterclockwise.
- Install the screw into Panel A of the window kit.
- Connect Panel A with Panel B, ensuring the screw aligns with the slot.
- Fasten the butterfly nut to fix the window kit at the desired length.
- Insert the exhaust hose adapter into the window kit opening.
- Place the assembled window kit into your window frame and adjust its length to fit snugly. Tighten the butterfly nut to secure.

Image: Diagram illustrating the adjustable window kit and how it fits into both vertical and horizontal sliding windows, with the exhaust hose connected.
Video: Detailed installation guide for the Air Choice Portable Air Conditioner's window kit and exhaust hose. This video demonstrates how to assemble the window panels, connect the exhaust hose, and secure the setup in a window.
1.3 Exhaust Hose Connection
Connect the exhaust hose to the rear of the air conditioner unit by installing the connector clockwise. Ensure a secure fit to prevent hot air from re-entering the room.
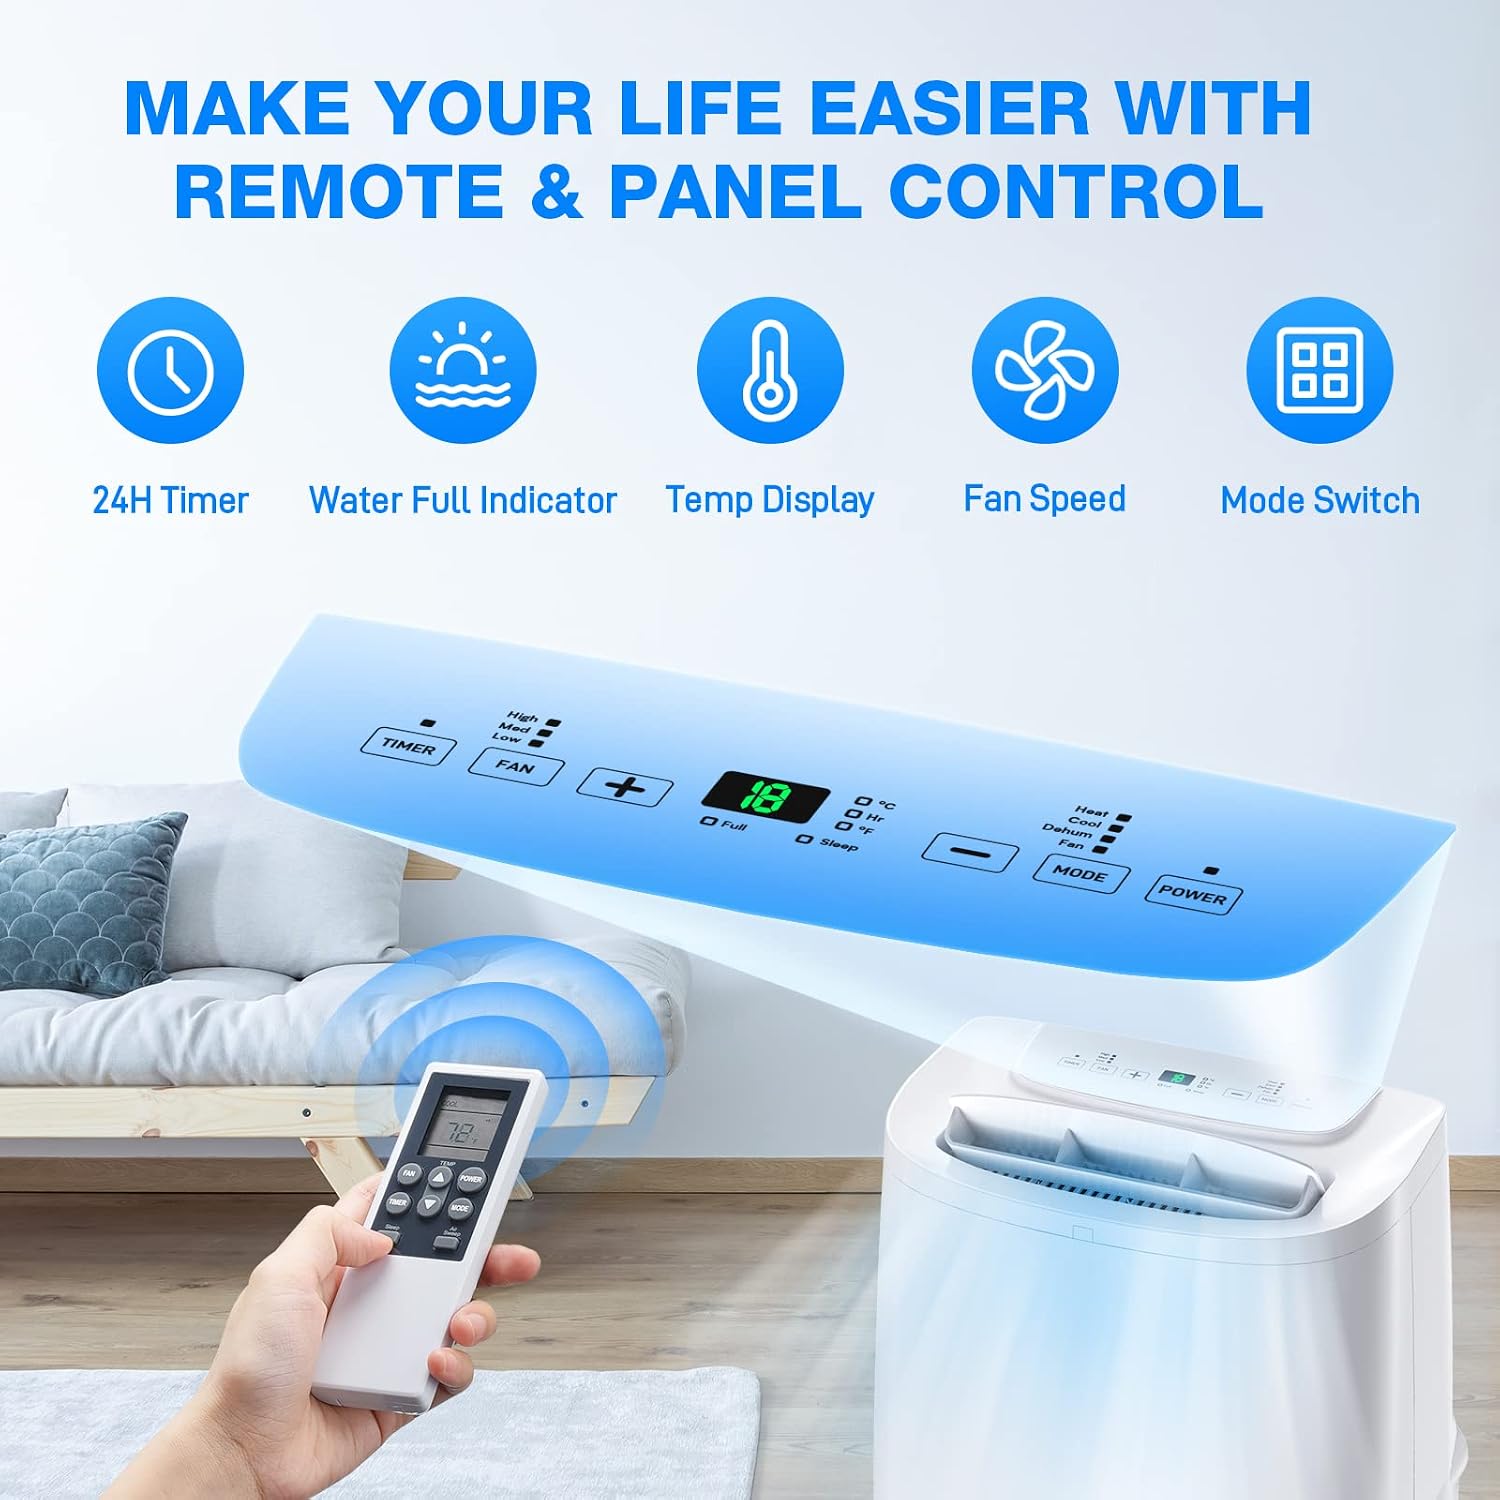
Image: The portable air conditioner unit positioned in a room, with its exhaust hose extending to and installed in a window, demonstrating proper setup for venting hot air.
1.4 Unit Placement and Clearance
Place the unit on a level surface. For optimal performance, maintain a clearance of at least 19.7 inches (50 cm) from walls and other objects to ensure proper airflow for the intake and exhaust vents.

Image: The portable air conditioner unit highlighting its ultra-portable design with 360° universal wheels, built-in handles, and a remote control holder, along with its dimensions.
2. Operation
2.1 Control Panel Overview
The unit features a user-friendly digital control panel on top. It displays the current temperature, fan speed, and active mode. Touch-sensitive buttons allow for easy adjustments.

Image: Close-up of the portable air conditioner's digital control panel, showing buttons for Timer, Fan, Temperature adjustment, Mode, and Power, along with an LED display and indicators for various settings.
2.2 Remote Control Overview
A compact remote control is included for convenient operation from a distance. It duplicates most functions available on the control panel.
- Power Button: Turns the unit on or off.
- Mode Button: Cycles through Cool, Fan, Dry, and Sleep modes.
- Temperature Adjustment: Up/Down arrows to set desired temperature (62°F-86°F / 17°C-30°C).
- Fan Speed: Adjusts fan speed (High, Medium, Low, Auto).
- Timer Button: Sets the 24-hour on/off timer.
- Auto Swing: Activates or deactivates the auto-swing function for even air distribution.
- Sleep Mode: Activates a quieter, energy-saving mode for nighttime.
- °C/°F Switch: Toggles between Celsius and Fahrenheit temperature display.
2.3 Operating Modes
- Cool Mode: Provides powerful cooling for rooms up to 700 sq. ft. Set your desired temperature between 62°F (17°C) and 86°F (30°C).
- Fan Mode: Operates as a fan without cooling, circulating air.
- Dry Mode (Dehumidifier): Removes excess moisture from the air, ideal for humid environments.
- Sleep Mode: Optimizes settings for quiet operation and comfortable sleep, gradually adjusting temperature.

Image: The Air Choice portable air conditioner effectively cooling a living room, demonstrating its 14000 BTU cooling capacity, 400m³/h air flow, 700 sq.ft cooling area, and 40°-90° auto swing function.

Image: The portable air conditioner's digital control panel and remote control, illustrating features like 24H Timer, Water Full Indicator, Temp Display, Fan Speed, and Mode Switch for convenient operation.
2.4 Timer Function
Utilize the 24-hour on/off timer to program the unit to start or stop at specific times, enhancing convenience and energy efficiency.

Image: The portable air conditioner operating in a bedroom, highlighting its 24-hour timed on/off feature for scheduled cooling.
2.5 Auto Swing Function
The auto-swing function helps distribute cool air evenly throughout the room, preventing hot spots and ensuring consistent comfort.

Image: Close-up of the portable air conditioner's top vent, illustrating the 90° auto swing function that efficiently distributes airflow for better cooling.
3. Maintenance
3.1 Filter Cleaning
The unit features washable filters for easy maintenance. Regularly clean the filters to ensure optimal air quality and cooling efficiency. Simply remove the filter panels from the back of the unit, wash gently with water, and allow to dry completely before re-installing.
Image: The portable air conditioner with its washable filters removed, demonstrating how to access and clean them for cleaner and fresher air.
Video: This video provides a comprehensive overview of the portable air conditioner, including its features, components, and a demonstration of how to clean the washable filters.
3.2 Drainage (Manual/Continuous)
The unit collects moisture during operation, especially in Dry mode. It has a "Water Full Indicator" that illuminates when the internal reservoir is full, requiring manual drainage. Alternatively, you can set up continuous drainage by connecting the included drain hose to the lower drain plug and directing it to a suitable drain.

Image: The rear of the portable air conditioner, showing the "Water Full Indicator" and the drainage outlet for removing collected moisture.
4. Troubleshooting
If you encounter issues with your Air Choice Portable Air Conditioner, please refer to the following common solutions:
- Unit not turning on: Ensure the power cord is securely plugged into a grounded outlet. Check if the reset button on the plug needs to be pressed.
- No cool air: Verify that the unit is in Cool mode and the temperature setting is lower than the ambient room temperature. Check if the exhaust hose is properly installed and sealed to prevent hot air recirculation. Clean the air filters if they are dirty.
- "FL" (Full) indicator is on: The internal water reservoir is full. Drain the water manually or set up continuous drainage.
- Unit is noisy: Ensure the unit is placed on a flat, stable surface. Check for any obstructions in the air intake or exhaust vents.
- Insufficient cooling: Ensure the room size is within the recommended 700 sq. ft. for the 14000 BTU model. Close all windows and doors to the room being cooled. Check for proper clearance around the unit.
For further assistance, please contact customer support.
5. Specifications
| Feature | Detail |
|---|---|
| Brand | Air Choice |
| Model Name | NPH-10H/X1E |
| Cooling Power | 14000 British Thermal Units (BTU) |
| Coverage Area | Up to 700 sq. ft. |
| Product Dimensions | 19.13"D x 34.57"W x 18.31"H |
| Weight | 80.6 Pounds |
| Voltage | 115 Volts |
| Wattage | 1300 watts |
| Noise Level | 53 Decibels |
| Refrigerant | R 410A |
| Special Features | Dehumidifier, Portable, Auto Swing, 24H Timer, Remote Control |
| Control Method | Remote, Touch Panel |
| Installation Type | Free Standing |
6. Warranty & Support
6.1 Warranty Information
This Air Choice Portable Air Conditioner comes with a 12-month limited warranty, with an additional 12-month extended warranty available upon registration. Please retain your proof of purchase for warranty claims.
6.2 Customer Support
For any questions, troubleshooting, or warranty inquiries, please contact Air Choice customer support. You can typically find contact information in the included User Manual or on the official Air Choice website.
- Quick reply within 24 hours.
- Replacement available within 12 months.
- Lifetime after-sales service and technical support.


